


wordpress响应慢
This is a special post that I made just to help out those who are struggling to get your graphs working properly.
这是我写的一篇特别文章,旨在帮助那些正在努力使您的图表正常工作的人。
I start off with a discussion of PHP and MySQL. If you really struggled through those parts of this series, take some time to review this section. Some of it’s repeating older sections, but now that you’ve actually done this, you will likely have some epiphanies about how and why this process works.
我首先讨论PHP和MySQL。 如果您真的在本系列的这些部分中苦苦挣扎,请花一些时间来复习本节。 其中有些重复了较早的部分,但实际上您已经完成了此操作,因此您可能会对这个过程的方式和原因有所了解。
Next, I cover some basic troubleshooting. Many of you will find yourself staring at a blank screen. This is usually due to one of several very specific issues that we can work through.
接下来,我将介绍一些基本的故障排除方法。 你们中许多人会发现自己盯着黑屏。 这通常是由于我们可以解决的几个非常具体的问题之一。
In the final part of this series, you can really drill into how to style the graphs with our own brand colors, shadows, and other tweaks.
在本系列的最后一部分中,您可以真正了解如何使用我们自己的品牌颜色,阴影和其他调整来设置图形样式。
PHP / MySQL初学者提示: (PHP/MySQL Tips for Beginners:)
If you’re new to PHP and MySQL, you may wonder what those words with a dollar sign mean. If you paste this code into an editor that supports code checking, you’ll see that it changes those words to a different color.
如果您不熟悉PHP和MySQL,您可能会想知道那些带有美元符号的单词是什么意思。 如果将此代码粘贴到支持代码检查的编辑器中,则会看到它将这些单词更改为其他颜色。
Those are variables and a critical piece of the PHP/MySQL puzzle. Let’s look at the $wpuser variable. At the top of the file, we go through a little song and dance to find who is the currently logged in user. In short, the variable on the left of the equals sign “gets” whatever is on the right side of the equal sign.
这些是变量,是PHP / MySQL难题的关键部分。 让我们看一下$ wpuser变量。 在文件的顶部,我们进行一些小小的歌舞,以查找谁是当前登录的用户。 简而言之,等号左侧的变量“获取”等号右侧的变量。
So the $current_user variable “gets” whatever the current user logged in using some code that’s built into WordPress – wp_get_current_user();. This code returns lots of information in an array, which would look like a table of information. One of the rows in this array is the user’s login ID.
因此,$ current_user变量“获取”当前用户使用WordPress中内置的某些代码登录的任何内容– wp_get_current_user();。 此代码以数组的形式返回大量信息,该信息看起来像一个信息表。 该数组中的行之一是用户的登录ID。
So, we are able to assign $wpuser the login ID using the code $current_user->user_login. You can assign it several other things, but we just want the user_login for now.
因此,我们可以使用代码$ current_user-> user_login为$ wpuser分配登录ID。 您可以为其分配其他几项,但是现在我们只需要user_login。
Variables are the safest way to pass information within PHP around. You can pass variables outside of a function so that other code can use it – even JavaScript!
变量是在PHP中传递信息的最安全方法。 您可以在函数外部传递变量,以便其他代码可以使用它,甚至JavaScript!
将功能添加到插件文件 (Adding the Function to the Plugin File)
If you were following along in the previous parts of this series, you may already have done this part. In WordPress, go over to your “Plugins” > “Editor,” and select Flot for WordPress as the plugin you want to edit.
如果您按照本系列前面的部分进行操作,则可能已经完成了这一部分。 在WordPress中,转到“插件”>“编辑器”,然后选择“ Flot for WordPress”作为要编辑的插件。
Also in previous posts, we created a simple form for adding content to a custom table using phpMyAdmin. I including that PHP file in this. Add the include call at the bottom of the file:
同样在以前的文章中,我们创建了一个简单的表单,用于使用phpMyAdmin向自定义表添加内容。 我在其中包括该PHP文件。 在文件底部添加include调用:
[sourcecode language=”php”]
[源代码语言=“ php”]
/* Here’s where you add your custom files for pulling and adding data Remember that you can NOT use a URL to point to any files you want to include. You have to use a PATH. So you can stick these files anywhere you want in your WP install, just use a PATH to point to them. The plugin_dir_path call will use a PATH from the WP wp-content/plugins folder: http://codex.wordpress.org/Function_Reference/plugin_dir_path */ include ( plugin_dir_path( __FILE__ ) . ‘flot/custom_workout.php’); include ( plugin_dir_path( __FILE__ ) . ‘flot/pushups_results.php’);
/ *在这里添加自定义文件以提取和添加数据。请记住,您不能使用URL指向要包含的任何文件。 您必须使用PATH。 因此,您可以将这些文件粘贴到WP安装中所需的任何位置,只需使用PATH指向它们即可。 plugin_dir_path调用将使用WP wp-content / plugins文件夹中的PATH:http://codex.wordpress.org/Function_Reference/plugin_dir_path * / include(plugin_dir_path(__FILE__)。'flot / custom_workout.php'); 包括(plugin_dir_path(__FILE__)。'flot / pushups_results.php');
[/sourcecode]
[/源代码]
We already had the custom_workout.php file in there, so just add the include for the pushups_results.php file. Now, all you have to do is drop the shortcode [pushups_results_sc] anywhere you want it, and you’re done!
我们已经有了custom_workout.php文件,因此只需为pushups_results.php文件添加include。 现在,您所要做的就是将短代码[pushups_results_sc]放到您想要的任何位置,然后就完成了!
故障排除 (Troubleshooting)
The first thing you’re all going to run into is a big, blank screen. The first thing to check is that your placeholder div is wrapped in a div with both height and width defined. Customize this to fit your WordPress post width. But, if you see a blank screen, this is usually the culprit.
你们都会遇到的第一件事是一个大的空白屏幕。 首先要检查的是,占位符div包裹在div中,同时定义了高度和宽度。 自定义此项以适合您的WordPress帖子宽度。 但是,如果看到空白屏幕,通常是罪魁祸首。
I didn’t take a lot of time here to discuss the details of the pushups_results.php file — the code used to display graph results. I’m expecting you to go through the comments. Even for novice developers, you should be able to have enough information that you can Google answers beyond what I’ve included here and in the comments of the code.
我在这里没有花很多时间来讨论pushups_results.php文件的详细信息—用于显示图形结果的代码。 希望您能评论一下。 即使对于新手开发人员,您也应该能够获得足够的信息,Google可以提供除我在此处以及在代码注释中提供的信息之外的答案。
To start graphing data from a different data set isn’t too tough:
要开始绘制来自不同数据集的数据的图形并不难:
- Plug in your own database connection info 插入您自己的数据库连接信息
- Change the queries to match your database 更改查询以匹配您的数据库
- Change the variables in the JavaScript to match your database calls 更改JavaScript中的变量以匹配您的数据库调用
That’s it! Rinse and repeat for all the graphs you can imagine.
而已! 冲洗并重复您可以想象的所有图形。
完善功能 (Rounding Out the Functionality)
I went ahead and made a tool for users to be able to delete records and I wanted to combine the “Add Pushups” functionality with the graph. So do the following to quickly add a complete pushup tracker tool:
我继续前进,为用户提供了一个删除记录的工具,我想将“添加俯卧撑”功能与图表结合起来。 因此,请执行以下操作以快速添加完整的俯卧撑跟踪器工具:
- Create a new post and call it Pushups Tracker 创建一个新帖子,并将其称为Pushups Tracker
Add the following shortcodes to the post:
将以下简码添加到帖子中:
Add the following shortcodes to the post:
将以下简码添加到帖子中:
- [pushups_sc] [pushups_sc]
- [pushups_results_sc] [pushups_results_sc]
- [pushups_records_sc] [pushups_records_sc]
- Publish it 发布它
- From the resources files I provided, upload the pushups_records.php and delete_pushups.php to wp-content/plugins/flot-for-wp/flot folder 从我提供的资源文件中,将pushups_records.php和delete_pushups.php上传到wp-content / plugins / flot-for-wp / flot文件夹
Go to “Plugins” > “Editor” within WordPress and add the following include statement at the bottom with the other two already there:
转到WordPress中的“插件”>“编辑器”,并在底部添加以下包含语句,另外两个已经存在:
- include ( plugin_dir_path( __FILE__ ) . ‘flot/pushups_records.php’); 包括(plugin_dir_path(__FILE__)。'flot / pushups_records.php');
- Navigate to the Pushups Tracker post and behold the goodness! 导航至Pushups Tracker帖子,看看其优点!
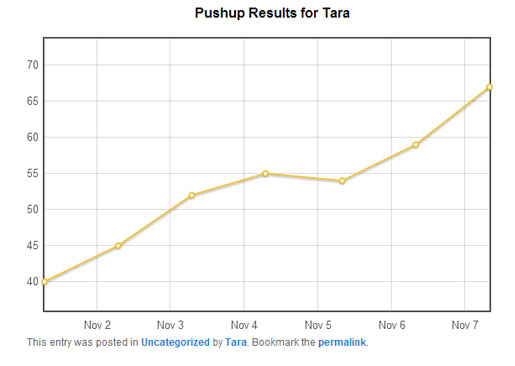
I’m really thrilled to see what you all are going to come up with! Don’t forget that you can call data from anywhere to make your graphs work. It’s really just limited by your imagination. Check out the pushups_results.php file for one way to get data into your page and to call the Flot graphs.
看到你们所有人将要想出的一切,我真的很高兴! 不要忘记,您可以从任何地方调用数据来使图形工作。 它实际上只是受您的想象力限制。 请查看pushups_results.php文件,以获取一种将数据导入页面并调用Flot图形的方法。
Now go forth and make data interesting. You have the power!
现在,使数据有趣。 你有力量!
In the final section of this series, I’ll go into the details of how to customize the graphs so you can match colors and other design elements to your brand. Flot has a load of features for customizing charts and graphs, but they’re not very intuitive. That’s where I come in to help!
在本系列的最后一部分,我将详细介绍如何自定义图表,以便您可以将颜色和其他设计元素匹配到您的品牌。 Flot具有大量用于自定义图表的功能,但是它们不是很直观。 那就是我来帮助的地方!
翻译自: https://www.sitepoint.com/responsive-real-time-graphs-in-wordpress-dealing-with-data/
wordpress响应慢


 230
230


 被折叠的 条评论
为什么被折叠?
被折叠的 条评论
为什么被折叠?
 到【灌水乐园】发言


