


vue.js django
Wouldn’t it be cool if you could prototype a custom web application that’s responsive (mobile-ready), reactive (light-speed fast), with a full-featured admin interface to manage the content — all in no time? Actually, using Django and Vue.js, you can! 😁
如果您可以原型化一个响应式 (移动就绪), 响应式 (光速快速),功能齐全的管理界面来立即管理内容的自定义Web应用程序,这不是很酷吗? 实际上,使用Django和Vue.js,您可以! 😁
0.简介:全栈开发101 (0. Introduction: Full Stack Development 101)
I’ll cover how to prototype a custom web app, and to keep it as short and sweet as possible, the context information here will be rather brief. However, I will provide — hopefully — enough resources so that you know where to go should you need more information.
我将介绍如何对自定义Web应用程序进行原型设计,并使其尽可能短而甜美,此处的上下文信息将非常简短。 但是,我希望会提供足够的资源,以便您知道需要更多信息时应该去哪里。
To this end I’ll fully mash up data management, presentation, and routing between Django and Vue.js — so get ready!
为此,我将完全融合Django和Vue.js之间的数据管理,表示和路由-因此,请做好准备!
关于Django (About Django)
You may know of Django, the Python-based web framework for perfectionists with deadlines that’s ridiculously fast, reassuringly secure, and exceedingly scalable. But if you don’t know much about it, this article will serve as an extremely fast hands-on introduction.
您可能知道Django ,这是针对完美主义者的基于Python的Web框架,其截止日期是如此之快,令人放心的安全性和极大的可扩展性 。 但是,如果您对此不太了解,那么本文将作为非常快速的动手入门。
关于Vue.js (About Vue.js)
Same deal with Vue.js, the progressive JavaScript framework that’s approachable, versatile, and performant. If you aren’t familiar with it, here you’ll get a quick-and-dirty introduction.
Vue.js也是如此 ,它是渐进的,通用的和高性能的 JavaScript渐进式框架 。 如果您不熟悉它,这里将为您提供快速而又肮脏的介绍。
I’ll also cover two official Vue.js libraries:
我还将介绍两个官方的Vue.js库:
Vue Router for route/view mapping
Vue路由器用于路线/视图映射
Vuex for state management
Vuex用于状态管理
Python + JavaScript =获胜! (Python + JavaScript = WIN!)
For this article, we’ll set a publishing project with a basic database schema to save authors and articles, and a minimal user interface (UI) to interact with them.
对于本文,我们将设置一个发布项目,该项目具有一个基本的数据库架构来保存authors和articles ,并具有一个与之交互的最小用户界面 (UI)。
Hopefully, this will serve as a toy program to understand how to integrate Django using Python code on the back end with a JavaScript framework on the front end, that you can adapt later to your own needs.
希望这将成为一个玩具程序,以了解如何使用后端的Python代码和前端JavaScript框架集成Django ,以便您以后可以适应自己的需求。
1.设置Django项目 (1. Setting Up a Django Project)
Very quickly, we’ll set up a project from scratch. If you already know how to handle Django projects, you can skip this section. We’ll assume you already have Python installed.
很快,我们将从头开始建立一个项目。 如果您已经知道如何处理Django项目,则可以跳过本节。 我们假设您已经安装了Python 。
For a more in-depth guide, see How to install Django on the Django documentation site.
有关更深入的指南,请参阅Django文档站点上的如何安装Django 。
Python虚拟环境 (Python Virtual Environment)
Let’s open a console and create a virtual environment (see Virtual Environments and Packages for more info):
让我们打开一个控制台并创建一个虚拟环境(有关更多信息,请参见虚拟环境和软件包 ):
$ virtualenv myenvironmentUsing base prefix 'c:\\users\\luzdealba\\appdata\\local\\programs\\python\\python37'
New python executable in C:\Users\luzdealba\Development\myenvironment\Scripts\python.exe
Installing setuptools, pip, wheel …
doneDon’t mind the paths, as these will change from system to system.
不要介意路径,因为这些路径会因系统而异。
Let’s access and activate the virtual environment.
让我们访问并激活虚拟环境。
On Windows:
在Windows上:
$ cd myenvironment
$ Scripts\activate
On macOS and Linux:
在macOS和Linux上:
$ cd myenvironment
$ source bin/activate
Django套件 (Django Package)
Let’s install Django:
让我们安装Django:
(myenvironment) $ pip install djangoCollecting django
Downloading Django-3.0.3-py3-none-any.whl (7.5 MB)
Collecting sqlparse>=0.2.2
Downloading sqlparse-0.3.1-py2.py3-none-any.whl (40 kB)
Collecting pytz
Using cached pytz-2019.3-py2.py3-none-any.whl (509 kB)
Collecting asgiref~=3.2
Downloading asgiref-3.2.3-py2.py3-none-any.whl (18 kB)
Installing collected packages: sqlparse, pytz, asgiref, django
Successfully installed asgiref-3.2.3 django-3.0.3 pytz-2019.3 sqlparse-0.3.1One more time, don’t mind about program versions and file sizes as these will vary.
再过一次,不要介意程序版本和文件大小,因为它们会有所不同。
该项目 (The Project)
Let’s start a project called myproject:
让我们开始一个名为myproject的项目:
(myenvironment) $ django-admin startproject myprojectLet’s access the project:
让我们访问该项目:
(myenvironment) $ cd myproject应用程式 (The App)
Start an app called myapp:
启动一个名为myapp的应用程序:
(myenvironment) $ django-admin startapp myappAnd add myapp.apps.MyappConfig to the INSTALLED_APPS constant list in myproject/settings.py to enable the app.
并将myapp.apps.MyappConfig添加到myproject/settings.py的INSTALLED_APPS常量列表中以启用该应用程序。
2.使用Django设置数据库 (2. Setting Up the Database with Django)
Here we’ll define the back-end database with Django, which we’ll later integrate with a front-end storage with Vuex.
在这里,我们将使用Django定义后端数据库,稍后再将其与Vuex的前端存储集成。
Django模型 (Django Models)
Models are Django’s way to implement an object-relational database management system (ORDBMS). In other words, plain text files where you can define database tables and fields, and from where these will propagate to the application layer and the DB engine.
模型是Django实现对象关系数据库管理系统 (ORDBMS)的方式。 换句话说,纯文本文件可以在其中定义数据库表和字段,并从这些表和字段传播到应用程序层和数据库引擎。
Let’s code the following models for our app in myapp/models.py:
让我们在myapp/models.py为我们的应用程序编码以下模型:
from django.db import models

class Article(models.Model):
    """Table schema to store articles."""
    name = models.CharField(max_length=64)
    author = models.ForeignKey('myapp.Author', on_delete=models.CASCADE)
    content = models.TextField()
    slug = models.CharField(default='', max_length=64)

    def __str__(self):
        return '%s' % self.name

class Author(models.Model):
    """Table schema to store auhtors."""
    name = models.CharField(max_length=64)
    slug = models.CharField(default='', max_length=64)

    def __str__(self):
        return '%s' % self.name
Notice that we implemented a URL slug for both articles and authors.
注意,我们为文章和作者都实现了一个URL slug 。
For more information, see Model API reference on the Django documentation site.
有关更多信息,请参阅Django文档站点上的Model API参考 。
Django管理员 (Django Admin)
Before we can manage these models through the admin site, we’ll first need to register them so that Django makes them available to us.
在我们可以通过管理站点管理这些模型之前,首先需要register它们,以便Django将其提供给我们。
Let’s simply edit myapp/admin.py so that it looks like this:
让我们简单地编辑myapp/admin.py ,使其看起来像这样:
from django.contrib import admin

from .models import Article
from .models import Author

# register models to use in admin site
admin.site.register(Article)
admin.site.register(Author)
Read more about the Django admin site on the Django documentation site.
在Django文档站点上了解有关Django管理站点的更多信息。
Django迁移 (Django Migrations)
From the Django’s Migrations documentation:
从Django的Migrations文档中 :
Migrations are Django’s way of propagating changes you make to your models (adding a field, deleting a model, etc.) into your database schema.
迁移是Django将您对模型所做的更改(添加字段,删除模型等)传播到数据库模式的一种方式。
In short: migrations do everything; no SQL commands required.
简而言之:迁移无所不能 ; 无需SQL命令。
First, let’s create the migration files:
首先,让我们创建迁移文件:
(myenvironment) $ python manage.py makemigrationsMigrations for 'myapp':
myapp\migrations\0001_initial.py
- Create model Author
- Create model ArticleNow let’s use that information to update the database:
现在,让我们使用该信息来更新数据库:
(myenvironment) $ python manage.py migrateOperations to perform:
Apply all migrations: admin, auth, contenttypes, myapp, sessions
Running migrations:
Applying contenttypes.0001_initial... OK
Applying auth.0001_initial... OK
Applying admin.0001_initial... OK
Applying admin.0002_logentry_remove_auto_add... OK
Applying admin.0003_logentry_add_action_flag_choices... OK
Applying contenttypes.0002_remove_content_type_name... OK
Applying auth.0002_alter_permission_name_max_length... OK
Applying auth.0003_alter_user_email_max_length... OK
Applying auth.0004_alter_user_username_opts... OK
Applying auth.0005_alter_user_last_login_null... OK
Applying auth.0006_require_contenttypes_0002... OK
Applying auth.0007_alter_validators_add_error_messages... OK
Applying auth.0008_alter_user_username_max_length... OK
Applying auth.0009_alter_user_last_name_max_length... OK
Applying auth.0010_alter_group_name_max_length... OK
Applying auth.0011_update_proxy_permissions... OK
Applying myapp.0001_initial... OK
Applying sessions.0001_initial... OKDon’t mind the long list. That’s because that was our first migration, so not only our Author and Article tables were created, but also all of Django’s default schemas.
不要介意冗长的清单。 这是因为这是我们的第一次迁移,因此不仅创建了Author和Article表,而且还创建了Django的所有默认模式。
For more info, see Migration operations in the Django documentation site.
有关更多信息,请参阅Django文档站点中的迁移操作 。
3. Django模板中具有Vue组件的基本接口 (3. A Basic Interface with Vue Components in a Django Template)
Here’s one of the most interesting parts of the mashup, as we’ll mix closely related tools from different technologies.
这是混搭中最有趣的部分之一,因为我们将混合使用来自不同技术的紧密相关的工具。
Django视图 (Django View)
Django goes by the model–view–controller (MVC) software design pattern, which divides the related program logic into three interconnected elements.
Django采用模型-视图-控制器 (MVC)软件设计模式,该模式将相关的程序逻辑分为三个相互关联的元素。
We’ll code the following view in myapp/views.py:
我们将在myapp/views.py编写以下视图:
from django.shortcuts import render

from .models import Article
from .models import Author

def frontend(request):
    """Vue.js will take care of everything else."""
    articles = Article.objects.all()
    authors = Author.objects.all()

    data = {
        'articles': articles,
        'authors': authors,
    }

    return render(request, 'myapp/template.html', data)
Notice that we queried all of the articles and authors form the database. That will come in handy later.
注意,我们查询了所有文章,并且作者组成了数据库。 稍后会派上用场。
See more about writing views and class-based views (API) in the Django documentation site.
在Django文档站点中了解有关编写视图和基于类的视图 ( API )的更多信息。
Django模板 (Django Template)
Django has a rich template language with built-in template tags and filters, and an API for Python programmers; but yes, you guessed it — we won’t cover much of that here. 😅
Django具有丰富的模板语言,带有内置的模板标签和过滤器 ,以及适用于Python程序员的API ; 但是,是的,您猜对了-我们在这里不会做很多介绍。 😅
What we will do, however, is use Bootstrap’s Starter template to set a very basic navigation layout for the app:
但是,我们将使用Bootstrap的Starter模板为该应用设置非常基本的导航布局:
- light gray background 浅灰色背景
- white foreground 白色前景
- centered content 中心内容
So we’ll code the following template in myapp/templates/myapp/template.html (you’ll need to create the sub-directories templates/myapp/ within myapp/):
因此,我们将在myapp/templates/myapp/template.html编写以下模板的代码(您需要在myapp/templates/myapp/template.html中创建子目录templates/myapp/ myapp/ ):
<!doctype html>
<html lang="en">
  <head>
    <!-- Required meta tags -->
    <meta charset="utf-8">
    <meta name="viewport" content="width=device-width, initial-scale=1, shrink-to-fit=no">

    <!-- Bootstrap CSS -->
    <link rel="stylesheet" href="https://stackpath.bootstrapcdn.com/bootstrap/4.4.1/css/bootstrap.min.css" integrity="sha384-Vkoo8x4CGsO3+Hhxv8T/Q5PaXtkKtu6ug5TOeNV6gBiFeWPGFN9MuhOf23Q9Ifjh" crossorigin="anonymous">

    <title>Django and Vue.js</title>
  </head>
  <body class="bg-light">
    <div class="bg-white container">
      <h1>Prototyping a Web App with Django and Vue.js</h1>

      <!-- Content -->
    </div>

    <!-- Vue.js -->
    <script src="https://unpkg.com/vue"></script>
    <script src="https://unpkg.com/vue-router"></script>

    <!-- jQuery first, then Popper.js, then Bootstrap JS -->
    <script src="https://code.jquery.com/jquery-3.4.1.slim.min.js" integrity="sha384-J6qa4849blE2+poT4WnyKhv5vZF5SrPo0iEjwBvKU7imGFAV0wwj1yYfoRSJoZ+n" crossorigin="anonymous"></script>
    <script src="https://cdn.jsdelivr.net/npm/popper.js@1.16.0/dist/umd/popper.min.js" integrity="sha384-Q6E9RHvbIyZFJoft+2mJbHaEWldlvI9IOYy5n3zV9zzTtmI3UksdQRVvoxMfooAo" crossorigin="anonymous"></script>
    <script src="https://stackpath.bootstrapcdn.com/bootstrap/4.4.1/js/bootstrap.min.js" integrity="sha384-wfSDF2E50Y2D1uUdj0O3uMBJnjuUD4Ih7YwaYd1iqfktj0Uod8GCExl3Og8ifwB6" crossorigin="anonymous"></script>
  </body>
</html>
Read more about Django templates.
阅读有关Django模板的更多信息。
Vue.js模板 (Vue.js Templates)
Vue.js also has a template syntax available, and it furthermore allows us to create our own HTML tags.
Vue.js 还具有可用的模板语法 ,并且它还使我们能够创建自己HTML标签。
We’ll create four templates: article-list, author-list, article-item and author-item:
我们将创建四个模板: article-list , author-list , article-item和author-item :
<template id="article-list-template">
  <div class="article-list">
    <h2>Articles</h2>
    <article-item
      v-for="article in articles"
      v-bind:key="article.slug"
      v-bind:name="article.name"
      v-bind:slug="article.slug"
      v-bind:content="article.content"
    ></article-item>
  </div>
</template>

<template id="author-list-template">
  <div class="author-list">
    <h2>Authors</h2>
    <author-item
      v-for="author in authors"
      v-bind:key="author.slug"
      v-bind:name="author.name"
      v-bind:slug="author.slug"
    ></author-item>
  </div>
</template>

<template id="article-item-template">
  <div class="article-item">
    <span v-if="$route.params.slug">
      <h3>
        <router-link
          v-bind:to="'/article/' + $route.params.slug + '/'"
          v-html="$store.getters.getArticleBySlug($route.params.slug)['name']"
        ></router-link>
      </h3>
      <div v-html="$store.getters.getArticleBySlug($route.params.slug)['content']"></div>
    </span>
    <span v-else>
      <h3>
        <router-link
          v-bind:to="'/article/' + slug + '/'"
          v-html="name"
       ></router-link>
     </h3>
      <div v-html="content"></div>
      <hr />
    </span>
  </div>
</template>

<template id="author-item-template">
  <div class="author-item">
    <span v-if="$route.params.slug">
      <b>
        <router-link v-bind:to="'/author/' + $route.params.slug + '/'">
          [[ $store.getters.getAuthorBySlug($route.params.slug)['name'] ]]
        </router-link>
      </b>
      ([[ $route.params.slug ]])
    </span>
    <span v-else>
      <b>
        <router-link v-bind:to="'/author/' + slug + '/'">
          [[ name ]]
        </router-link>
      </b> ([[ slug ]])
    </span>
  </div>
</template>
分解 (Breakdown)
What we did here, in a nutshell:
简而言之,我们在这里所做的工作:
List rendering with
v-for.使用
v-for列表渲染。Data binding in HTML attributes with
v-bind.Raw HTML rendering with
v-html.使用
v-html原始HTML呈现。
$store and $route will make more sense in a moment when we introduce storage and routing.
在介绍存储和路由时, $store和$route会更有意义。
Django和Vue.js模板之间的文本插值 (Text Interpolation between Django and Vue.js Templates)
Just like with Django, the most basic form of text interpolation in Vue.js is with the “Mustache” syntax (double curly brackets).
与Django一样,Vue.js中最基本的文本插值形式是使用“ Mustache”语法(双大括号)。
Like this:
像这样:
<span>Message: {{ msg }}</span>In order to avoid conflicts between the two, when instantiating Vue.js we’ll set it to use double square brackets instead:
为了避免两者之间的冲突,在实例化Vue.js时,我们将其设置为使用双方括号代替:
delimiters: ['[[', ']]']Vue.js主题 (Vue.js Themes)
Did you know you can “theme” Vue.js?
您知道可以“主题化” Vue.js吗?
Drop-in themes for Vue.js
Vue.js的嵌入式主题
Vuetify.js, Material Design component framework
Vuetify.js , 材料设计组件框架
BootstrapVue, Bootstrap components and grid system for Vue.js
BootstrapVue ,用于Vue.js的Bootstrap组件和网格系统
Element UI, a component library for developers, designers and product managers
Element UI ,一个针对开发人员,设计人员和产品经理的组件库
Vue Material, Material Design and Vue.js
Vue材质 ,材质设计和Vue.js
Quasar Framework, high-performance Vue.js UI
Quasar Framework ,高性能Vue.js UI
Vue.js组件 (Vue.js Components)
Components are reusable Vue instances. What that means is that we can define a component, code an HTML template for it, and then use it as many times as we need it with Vue.js handling the DOM for us.
组件是可重用的Vue实例。 这意味着我们可以定义一个组件,为该组件编写HTML模板,然后通过Vue.js为我们处理DOM来使用所需的次数。
We’ll show the entire single-page application (SPA) code in the end. For now, let’s introduce a few snippets.
最后,我们将显示整个单页应用程序 (SPA)代码。 现在,让我们介绍一些片段。
Just as with templates, we’ll define four components — ArticleList, AuthorList,, ArticleItem, and AuthorItem:
与模板一样,我们将定义四个组件ArticleList , AuthorList, ,, ArticleItem和AuthorItem :
ArticleList = Vue.component('article-list', {
  data: function () { return { articles: store.state.articles } },
  template: '#article-list-template',
});

AuthorList = Vue.component('author-list', {
  data: function () { return { authors: store.state.authors } },
  template: '#author-list-template',
});

ArticleItem = Vue.component('article-item', {
  delimiters: ['[[', ']]'],
  props: ['name', 'slug', 'content'],
  template: '#article-item-template',
});

AuthorItem = Vue.component('author-item', {
  delimiters: ['[[', ']]'],
  props: ['name', 'slug'],
  template: '#author-item-template',
});
分解 (Breakdown)
When in a component,
datamust be a function ($storewill be explained in a moment).在组件中时,
data必须是一个函数 (稍后将解释$store)。We use the templates previously defined.
我们使用先前定义的模板 。
To disambiguate text interpolation, make sure you set
delimitersthat are different from Django’s ({{/}}).要消除文本插值的歧义,请确保设置与Django(
{{/}})不同的delimiters。We use
propslisted as an array to pass data to our components.我们使用列为数组的
props将数据传递到我们的组件。
4.使用Vuex连接Vue.js商店以收集Django数据库 (4. Connecting Vue.js Store to Collect Django’s Database Using Vuex)
A rich front end might have many loosely coupled components, each with its own set of parameters, which can make it complicated to share data or to manage the state of variables.
丰富的前端可能具有许多松散耦合的组件,每个组件都有自己的一组参数,这会使共享数据或管理变量状态变得很复杂。
Here’s where Vuex comes in handy:
这是Vuex派上用场的地方:
It serves as a centralized store for all the components in an application, with rules ensuring that the state can only be mutated in a predictable fashion.
它充当应用程序中所有组件的集中存储,其规则确保状态只能以可预测的方式进行更改。
创建Vuex商店 (Creating a Vuex Store)
Let’s create and define a store in our Django template, and let’s use the data shared in the Django View:
让我们在Django模板中创建和定义商店,并使用Django视图中共享的数据:
const store = new Vuex.Store({
  state: {
      authors: [
      {% for author in authors %}
          {
            name: '{{ author.name }}',
            slug: '{{ author.slug }}',
          },
      {% endfor %}
      ],
      articles: [
      {% for article in articles %}
          {
            content: '{{ article.content | linebreaksbr }}',
            name: '{{ article.name }}',
            slug: '{{ article.slug }}',
          },
      {% endfor %}
      ],
  },
  getters: {
    getArticleBySlug: (state) => (slug) => {
      return state.articles.find(articles => articles.slug === slug)
    },
    getAuthorBySlug: (state) => (slug) => {
      return state.authors.find(authors => authors.slug === slug)
    },
  }
})
分解 (Breakdown)
Let’s review what just happened:
让我们回顾一下刚刚发生的事情:
We’ve created a store using
Vuex.Store().我们使用
Vuex.Store()创建了一个商店。We defined a Vuex state where all of the
articlesandauthorsare collected.我们定义了一个Vuex状态 ,其中收集了所有
articles和authors。We used the
forloop that’s built into the Django templates to iterate through all of thearticlesandauthors.我们使用Django模板中内置的
for循环来遍历所有articles和authors。We’ve created two Vuex getters to get an article or an author by their slug,
getArticleBySlugandgetAuthorBySlug, respectively.我们已经创建了两个Vuex获取器,分别通过它们的插件
getArticleBySlug和getAuthorBySlug来获取文章或作者。
There’s a lot more to Vuex, so make sure to check the Getting Started guide and the API reference.
Vuex还有很多其他内容,因此请确保查看《 入门指南》和API参考 。
5. Django和Vue Router之间的路由URL (5. Routing URLs between Django and Vue Router)
Django has a powerful URL dispatcher, which we’ll use in combination with Vue.js routing.
Django有一个强大的URL调度器 ,我们将它与Vue.js路由结合使用。
We’ll create an application that:
我们将创建一个应用程序,该应用程序:
uses dynamic route matching to seamlessly switch between pages without refreshes (see example)
works with nested routes (see example)
使用Django (With Django)
Reactive URLs usually need a special configuration on the server to work properly, but Django lets us design URLs however we want, so no need to set rewrite rules for Apache or NGINX.
React性 URL通常需要在服务器上进行特殊配置才能正常工作,但是Django允许我们根据需要设计URL,因此无需为Apache或NGINX设置重写规则。
We’ll edit myproject/urls.py so that it uses the base directory / as the route for our app:
我们将编辑myproject/urls.py ,使其使用基本目录/作为应用程序的路由:
from django.contrib import admin
from django.urls import path

# don't forget to import the app's view!
from myapp import views as myapp_views

urlpatterns = [
    path('admin/', admin.site.urls),

    # paths for our app
    path('', myapp_views.frontend),
    path('article/<slug:slug>/', myapp_views.frontend),
    path('author/<slug:slug>/', myapp_views.frontend),
]
使用Vue路由器 (With Vue Router)
By default, Vue Router uses “hash mode” (i.e: http://site/#/path) as a JavaScript trick to load parts of the page using anchors. However, we’ll leverage Vue Router’s HTML5 History Mode, which means that all of our URLs will change seamlessly without reloading the page and without using hashes.
默认情况下,Vue Router使用“哈希模式”(即:http:// site /#/ path)作为JavaScript技巧,以使用定位符加载页面的某些部分。 但是,我们将利用Vue Router的HTML5历史记录模式 ,这意味着我们所有的URL都将无缝更改,而无需重新加载页面和不使用哈希。
We’ll set the router to match each path to their respective component previously defined:
我们将设置路由器,以将每个路径与它们先前定义的相应组件进行匹配:
const routes = [
  { component: ArticleList, path: '/article/', },
  { component: AuthorList,  path: '/author/',  },
  { component: ArticleItem, path: '/article/:slug/', },
  { component: AuthorItem,  path: '/author/:slug/',  },
]

const router = new VueRouter({
  mode: 'history',
  routes: routes,
})
As we can see, the syntax to define paths is slightly different from Django’s, but it’s essentially the same thing.
我们可以看到,定义路径的语法与Django的语法略有不同,但是本质上是相同的。
Read more about the Vue Router.
了解有关Vue路由器的更多信息。
6.测试一切 (6. Testing Everything)
Now that we’ve got all of the pieces together, it’s time to do some gray box testing and see how things work!
既然我们已经把所有的部分都放在一起了,是时候进行一些灰盒测试了 ,看看它是如何工作的!
创建Django超级用户 (Create a Django Superuser)
Before we can log in to the admin, we’ll need to create a superuser.
在登录到管理员之前,我们需要创建一个超级用户。
Let’s create an administrator:
让我们创建一个管理员:
(myenvironment) $ python manage.py createsuperuserNext, you’ll enter the username, email address, and password (twice).
接下来,您将输入用户名,电子邮件地址和密码(两次)。
运行本地服务器 (Run a Local Server)
We’ll run Django’s built-in server with runserver to launch the website on our local system.
我们将使用runserver运行Django的内置服务器,以在本地系统上启动网站。
On a console:
在控制台上:
(myenvironment) $ python manage.py runserverWatching for file changes with StatReloader
Performing system checks...
System check identified no issues (0 silenced).
March 09, 2020 - 19:41:22
Django version 3.0.3, using settings 'myproject.settings'
Starting development server at http://127.0.0.1:8000/
Quit the server with CTRL-BREAK.创建数据库条目 (Create Database Entries)
We’ll now populate the database so that we can browse something on the front end.
现在,我们将填充数据库,以便我们可以浏览前端的内容。
Let’s head to http://127.0.0.1:8000/admin/ and enter the admin credentials you’ve just created so that we can create two authors and four articles:
让我们转到http://127.0.0.1:8000/admin/并输入您刚刚创建的管理员凭据,以便我们可以创建两个作者和四篇文章:
-

On the MYAPP pane, next to Authors, click on the Add link and create at least two authors.
在“ MYAPP”窗格上,在“作者”旁边,单击“ 添加”链接并创建至少两个作者。
-
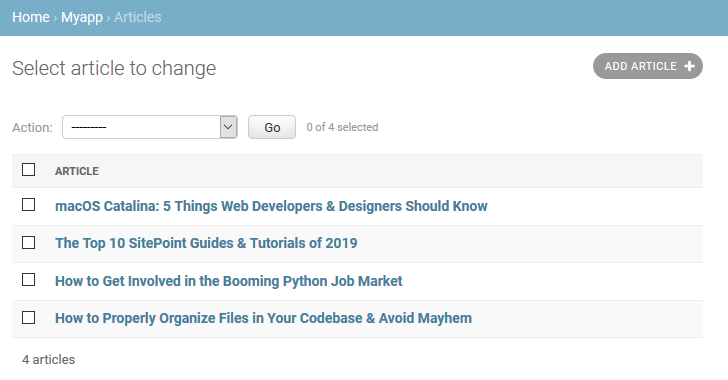
On the MYAPP pane, next to Articles, click on the Add link and create at least two different articles for each author.
在“ MYAPP”窗格上“文章”旁边,单击“ 添加”链接,并为每个作者至少创建两个不同的文章。
Notice that you must add articles after having created a few authors so that you can link them.
请注意,您必须在创建一些作者之后添加文章,以便您可以链接它们。
浏览网站! (Browse the Site!)
Now’s the time to see how it all plays together!
现在是时候看看它们如何共同发挥作用了!
完整的SPA代码 (Full SPA Code)
You can navigate all of the project code in my GitHub repository, luzdealba / djangovuejs.
您可以在我的GitHub存储库luzdealba / djangovuejs中浏览所有项目代码。
Anyway, this is probably what you’re most interested in:
无论如何,这可能是您最感兴趣的内容:
<!doctype html>
<html lang="en">
  <head>
    <!-- Required meta tags -->
    <meta charset="utf-8">
    <meta name="viewport" content="width=device-width, initial-scale=1, shrink-to-fit=no">

    <!-- Bootstrap CSS -->
    <link rel="stylesheet" href="https://stackpath.bootstrapcdn.com/bootstrap/4.4.1/css/bootstrap.min.css" integrity="sha384-Vkoo8x4CGsO3+Hhxv8T/Q5PaXtkKtu6ug5TOeNV6gBiFeWPGFN9MuhOf23Q9Ifjh" crossorigin="anonymous">

    <title>Django and Vue.js</title>
    <style>
      .router-link-active {
        color: black;
        text-decoration: none;
      }
    </style>
  </head>
  <body class="bg-light">
    <div class="bg-white container">

      <div class="jumbotron">
        <h1 class="display-4">Django and Vue.js</h1>
        <p class="lead">
          Wouldn’t it be cool if you could prototype a custom web application that’s responsive (mobile ready), reactive (light-speed fast), with a full–featured back office site to manage the content; all of that in no time? Actually, with a mashup between Django’s and Vue.js, you can! 😁
        </p>
      </div>

      <!-- Content -->
      <div id="myapp">
        <nav class="navbar navbar-expand-lg navbar-light bg-light">
          <ul class="navbar-nav mr-auto">
            <li class="nav-item">
              <router-link
                class="nav-link text-primary"
                to="/author/"
              >
                Go to Authors
              </router-link>
            </li>
            <li class="nav-item">
              <router-link
                class="nav-link text-primary"
                to="/article/"
              >
                Go to Articles
              </router-link>
            </li>
          </ul>
        </nav>
        <br />
        <router-view></router-view>
      </div>
    </div>

    <!-- Vue.js -->
    <script src="https://unpkg.com/vue"></script>
    <script src="https://unpkg.com/vue-router"></script>
    <script src="https://unpkg.com/vuex"></script>

    <!-- Vue templates -->
    <template id="article-list-template">
      <div class="article-list">
        <h2>Articles</h2>
        <article-item
          v-for="article in articles"
          v-bind:key="article.slug"
          v-bind:name="article.name"
          v-bind:slug="article.slug"
          v-bind:content="article.content"
        ></article-item>
      </div>
    </template>

    <template id="author-list-template">
      <div class="author-list">
        <h2>Authors</h2>
        <author-item
          v-for="author in authors"
          v-bind:key="author.slug"
          v-bind:name="author.name"
          v-bind:slug="author.slug"
        ></author-item>
      </div>
    </template>

    <template id="article-item-template">
      <div class="article-item">
        <span v-if="$route.params.slug">
          <h3>
            <router-link
              v-bind:to="'/article/' + $route.params.slug + '/'"
              v-html="$store.getters.getArticleBySlug($route.params.slug)['name']"
            ></router-link>
          </h3>
          <div v-html="$store.getters.getArticleBySlug($route.params.slug)['content']"></div>
        </span>
        <span v-else>
          <h3>
            <router-link
              v-bind:to="'/article/' + slug + '/'"
              v-html="name"
           ></router-link>
         </h3>
          <div v-html="content"></div>
          <hr />
        </span>
      </div>
    </template>

    <template id="author-item-template">
      <div class="author-item">
        <span v-if="$route.params.slug">
          <b>
            <router-link v-bind:to="'/author/' + $route.params.slug + '/'">
              [[ $store.getters.getAuthorBySlug($route.params.slug)['name'] ]]
            </router-link>
          </b>
          ([[ $route.params.slug ]])
        </span>
        <span v-else>
          <b>
            <router-link v-bind:to="'/author/' + slug + '/'">
              [[ name ]]
            </router-link>
          </b> ([[ slug ]])
        </span>
      </div>
    </template>

    <!-- Vue app -->
    <script>
      // store
      const store = new Vuex.Store({
        state: {
            authors: [
            {% for author in authors %}
                {
                  name: '{{ author.name }}',
                  slug: '{{ author.slug }}',
                },
            {% endfor %}
            ],
            articles: [
            {% for article in articles %}
                {
                  content: '{{ article.content | linebreaksbr }}',
                  name: '{{ article.name }}',
                  slug: '{{ article.slug }}',
                },
            {% endfor %}
            ],
        },
        getters: {
          getArticleBySlug: (state) => (slug) => {
            return state.articles.find(articles => articles.slug === slug)
          },
          getAuthorBySlug: (state) => (slug) => {
            return state.authors.find(authors => authors.slug === slug)
          },
        }
      })

      // components
      ArticleList = Vue.component('article-list', {
        data: function () { return { articles: store.state.articles } },
        template: '#article-list-template',
      });

      AuthorList = Vue.component('author-list', {
        data: function () { return { authors: store.state.authors } },
        template: '#author-list-template',
      });

      ArticleItem = Vue.component('article-item', {
        delimiters: ['[[', ']]'],
        props: ['name', 'slug', 'content'],
        template: '#article-item-template',
      });

      AuthorItem = Vue.component('author-item', {
        delimiters: ['[[', ']]'],
        props: ['name', 'slug'],
        template: '#author-item-template',
      });

      // router
      const routes = [
        { component: ArticleList, path: '/article/', },
        { component: AuthorList,  path: '/author/',  },
        { component: ArticleItem, path: '/article/:slug/', },
        { component: AuthorItem,  path: '/author/:slug/',  },
      ]

      const router = new VueRouter({
        mode: 'history',
        routes: routes,
      })

      // app
      const myapp = new Vue({
          router,
          store,
      }).$mount('#myapp');
    </script>

    <!-- jQuery first, then Popper.js, then Bootstrap JS -->
    <script src="https://code.jquery.com/jquery-3.4.1.slim.min.js" integrity="sha384-J6qa4849blE2+poT4WnyKhv5vZF5SrPo0iEjwBvKU7imGFAV0wwj1yYfoRSJoZ+n" crossorigin="anonymous"></script>
    <script src="https://cdn.jsdelivr.net/npm/popper.js@1.16.0/dist/umd/popper.min.js" integrity="sha384-Q6E9RHvbIyZFJoft+2mJbHaEWldlvI9IOYy5n3zV9zzTtmI3UksdQRVvoxMfooAo" crossorigin="anonymous"></script>
    <script src="https://stackpath.bootstrapcdn.com/bootstrap/4.4.1/js/bootstrap.min.js" integrity="sha384-wfSDF2E50Y2D1uUdj0O3uMBJnjuUD4Ih7YwaYd1iqfktj0Uod8GCExl3Og8ifwB6" crossorigin="anonymous"></script>
  </body>
</html>
展望:微服务! (Looking Forward: Microservices!)
At this point, you already have a solid prototype that can work as a proof of concept to present an idea to your prospect clients or colleagues, or as a foundation for your own project.
至此,您已经有了一个可靠的原型,可以用作概念验证来向潜在客户或同事提出想法,或者作为您自己项目的基础。
While the interface we created can present database registries, you can’t really interact with them in any other way through the front end, such as making new additions, editions, or deleting such entries. For that, you’ll need an API.
尽管我们创建的界面可以显示数据库注册表,但是您实际上无法通过前端以任何其他方式与它们进行交互,例如进行新的添加,版本或删除此类条目。 为此,您需要一个API。
Believe it or not, implementing a microservice through a REST API is fairly straightforward with Django. All you need is the Django REST framework add-on, which is extremely well documented and, as all things Django, powerful, flexible, and secure.
信不信由你, 使用REST API通过REST API实现微服务非常简单 。 您需要的是Django REST框架附加组件,该附加组件的文档非常详尽,并且与Django一样,它们都是强大,灵活和安全的。
With an exposed API, the next thing you can do is manage data right there on your front end with Vue.js. I can’t cover the details here, but you can check the “Using Axios to Consume APIs” article in the Vue.js Cookbook.
使用公开的API,您接下来要做的就是使用Vue.js在前端管理数据。 我无法在此处详细介绍,但是您可以查看Vue.js Cookbook中的“ 使用Axios来使用API ”一文。
结语 (Wrapping Up)
How’s that for a primer on full-stack development? We’ve prototyped a project that can be the foundation for a web application.
那是如何进行全栈开发入门的? 我们已经设计了一个项目的原型,该项目可以作为Web应用程序的基础 。
And I didn’t water down anything! In fact, because we’re using Vuex storage for state management and Vue Router for dynamic route matching from the get-go, there aren’t substantial changes that we’ll need to do as the application scales. So you can essentially take it from there and expand in whichever direction you need to — customizing the database, improving the interface, and even creating a microservice!
而且我没有浇水! 实际上,由于我们正在使用Vuex存储进行状态管理,并使用Vue Router从一开始就进行动态路由匹配,因此随着应用程序的扩展,我们不需要做任何实质性的更改。 因此,您基本上可以从那里开始使用它,并朝着您需要的任何方向扩展-自定义数据库,改进界面,甚至创建微服务!
Don’t be shy if your Python or JavaScript knowledge is somewhat limited. We all need to start somewhere. Read further, code further, and stay curious!
如果您的Python或JavaScript知识有限,请不要害羞。 我们都需要从某个地方开始。 进一步阅读,进一步编码,并保持好奇心 !
翻译自: https://www.sitepoint.com/web-app-prototype-django-vue/
vue.js django


 448
448

 被折叠的 条评论
为什么被折叠?
被折叠的 条评论
为什么被折叠?
 到【灌水乐园】发言


