


Microsoft Visual Studio is one of the most powerful integrated development environments available, with one downside: it's only available for Windows. In order to attract Linux and Mac users to the Visual Studio family of development tools, Microsoft recently launched Visual Studio Code (or VSCode for short)—a truly cross-platform code editor that is both fast and light-weight.
Microsoft Visual Studio是可用的最强大的集成开发环境之一,但有一个缺点:它仅适用于Windows。 为了吸引Linux和Mac用户使用Visual Studio系列开发工具,Microsoft最近发布了Visual Studio Code(简称VSCode),这是一种真正的跨平台代码编辑器,既快速又轻巧。
VSCode works equally well on Linux, Mac, and Windows. However, because Microsoft Visual Studio 2013 itself is available on Windows, VSCode is most likely to see more adoption among Linux and Mac users who, until now, had to make do with simpler alternatives such as Sublime Text, Atom or Komodo Edit for web development.
VSCode在Linux,Mac和Windows上同样出色地工作。 但是,由于Microsoft Visual Studio 2013本身可在Windows上使用,所以VSCode最有可能在Linux和Mac用户中得到更多采用,直到现在,他们必须使用Sublime Text,Atom或Komodo Edit等更简单的替代方法进行Web开发。 。
Here are some features that might make VSCode a compelling alternative to your present code editor:
以下功能可能使VSCode成为当前代码编辑器的引人注目的替代品:
- intelligent code completion 智能代码完成
- linting 林亭
- interactive debugging 交互式调试
- version control 版本控制
In most of the other popular code editors, these features are only available after you install the appropriate plugins manually—if they are available at all.
在大多数其他流行的代码编辑器中,只有在手动安装了适当的插件之后,才能使用这些功能(如果它们完全可用)。
In this tutorial, I'm going to show you how to install and use VSCode on Ubuntu, one of the most popular Linux distros.
在本教程中,我将向您展示如何在Ubuntu(一种最受欢迎的Linux发行版)上安装和使用VSCode。
Note: if you're a Windows user, you can still follow this tutorial by skipping all the command-line installations. You just have to use the Windows installer instead, which sets everything up for you.
注意 : 如果您是Windows用户,则仍然可以跳过所有命令行安装来遵循本教程。 您只需要改用Windows安装程序即可为您进行所有设置。
先决条件 (Prerequisites)
In order to follow this tutorial, you're going to need:
为了遵循本教程,您将需要:
- A 64-bit computer running Ubuntu 14.04 or higher 运行Ubuntu 14.04或更高版本的64位计算机
- A sudo user sudo用户
安装 (Installation)
Create a directory for VSCode.
为VSCode创建目录。
mkdir ~/VSCodeEnter that directory, and use wget to download VSCode.
输入该目录,然后使用wget下载VSCode。
cd ~/VSCode
  wget 'http://download.microsoft.com/download/9/5/4/9549F9CC-2663-40D7-8CB6-244D7C4C3CDA/VSCode-linux-x64.zip'
Extract the archive using unzip.
使用unzip提取档案。
unzip VSCode-linux-x64.zipCreate a link to the executable named Code inside /usr/local/bin/ so that it can be run from any directory.
在/usr/local/bin/创建指向名为Code的可执行文件的链接,以便可以从任何目录运行它。
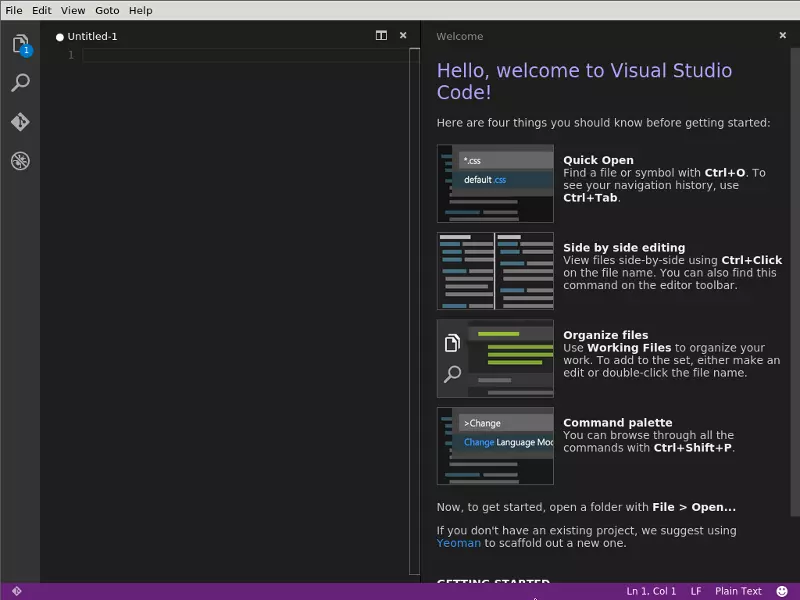
sudo ln -s $PWD/Code /usr/local/bin/codeStart VSCode by typing in code. You should be able to see the welcome screen now:
通过输入code来启动VSCode。 您现在应该可以看到欢迎屏幕:
创建一个项目 (Creating a Project)
In the present release of VSCode, there isn't an option to create a new project. However, it can treat existing directories as projects. For it to do so, all you have to do is pass the directory as a command line argument to code. For example, for it treat the directory ~/JustAnotherApp as a project, you could type in:
在当前版本的VSCode中,没有创建新项目的选项。 但是,它可以将现有目录视为项目。 为此,您要做的就是将目录作为命令行参数传递给code 。 例如,由于将目录~/JustAnotherApp视为一个项目,您可以输入:
cd ~/JustAnotherApp
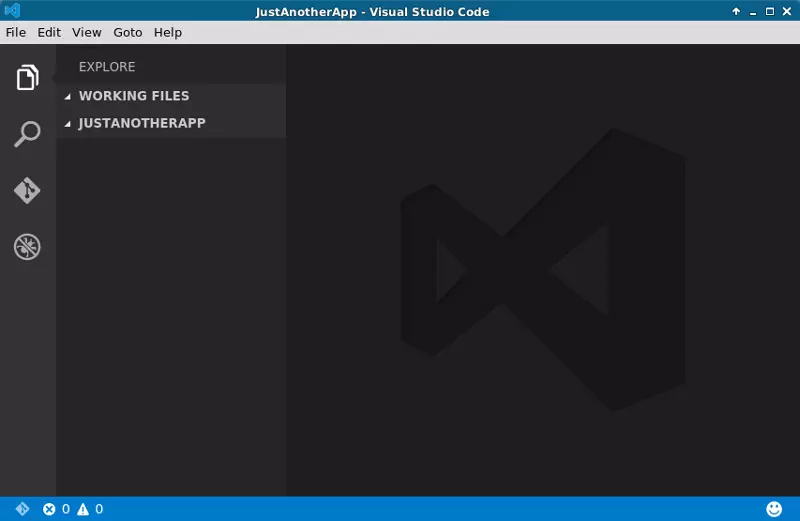
code .If your project doesn't have any files yet, here's what you will see:
如果您的项目尚无任何文件,则将看到以下内容:
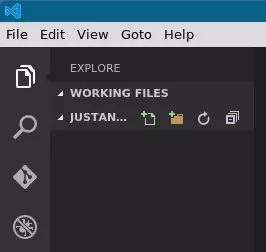
You can now click on the name of your project to see buttons that let you create new files and folders:
现在,您可以单击项目的名称以查看用于创建新文件和文件夹的按钮:
使用智能感知 (Using IntelliSense)
IntelliSense is an umbrella term used by Microsoft that covers features such as automatic code completion and context-aware code suggestions. These are really helpful for increasing productivity, especially when you are using a new API or library. In the present preview release of VSCode, IntelliSense is available on all platforms for JavaScript, CSS, HTML and a few other languages. In this tutorial, I'll show you how to use it in your Node.js projects.
IntelliSense是Microsoft使用的总称,涵盖自动代码完成和上下文感知代码建议等功能。 这些对于提高生产率确实很有帮助,尤其是在使用新的API或库时。 在VSCode的当前预览版本中,IntelliSense在所有平台上都可用,适用于JavaScript,CSS,HTML和其他一些语言。 在本教程中,我将向您展示如何在Node.js项目中使用它。
To view IntelliSense's suggestions, all you have to do is press Control+Space. For example, in your project's package.json, invoking IntelliSense will list all the available fields:
要查看IntelliSense的建议,只需按Control + Space 。 例如,在项目的package.json ,调用IntelliSense将列出所有可用字段:

Similarly, pressing Control+Space in your Javascript files, you can see the fields and methods available in certain common classes and objects.
同样,在Javascript文件中按Control + Space ,可以看到某些常见类和对象中可用的字段和方法。
However, these suggestions are not available for all classes. For instance, if you try to look at the fields and methods available in an instance of express, you'll find nothing by default:
但是,这些建议并非适用于所有课程。 例如,如果您尝试查看express实例中可用的字段和方法,则默认情况下您将一无所获:

To solve this problem, you need the relevant TypeScript type definitions. To get these definitions, you can use TSD (TypeScript Definition manager for DefinitelyTyped), an npm module.
要解决此问题,您需要相关的TypeScript类型定义。 要获取这些定义,可以使用npm模块TSD(用于DefinitelyTyped的TypeScript定义管理器)。
If you don't have it already, install it from the terminal using:
如果尚未安装,请使用以下命令从终端安装:
npm install tsd@next -gNow, inside your project directory, you can use tsd to install the type definitions you want. For example, to install the type definitions for the Express framework, you have to type in the following:
现在,在项目目录中,您可以使用tsd安装所需的类型定义。 例如,要安装Express框架的类型定义,您必须输入以下内容:
tsd install express --saveThis will create a file named tsd.d.ts inside your project, in a directory called typings. Reference this file inside VSCode by adding the following code to your JavaScript file:
这将创建一个文件名为tsd.d.ts你的项目中,在目录中称为typings 。 通过将以下代码添加到您JavaScript文件中,在VSCode中引用此文件:
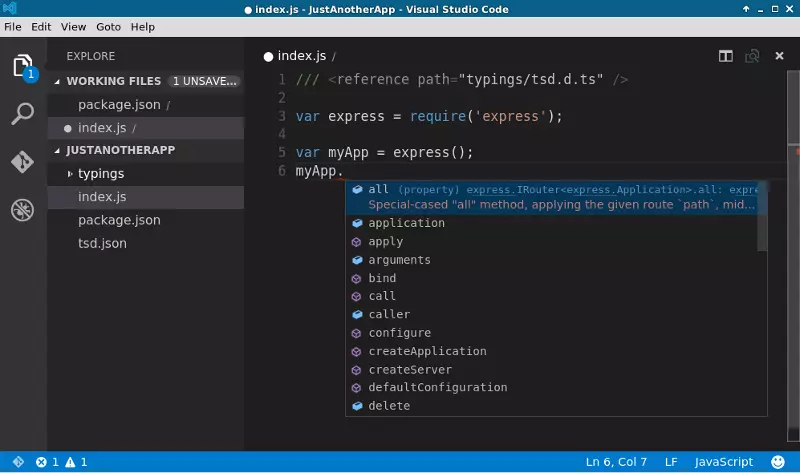
/// <reference path="typings/tsd.d.ts" />You can now press Control+Space to see that suggestions are available for objects that belong to the Express framework:
现在,您可以按Control + Space键以查看建议是否适用于属于Express框架的对象:
调试 (Debugging)
In most light-weight code editors, debugging support is either absent, or is supported only with the help of plugins. VSCode, on the other hand, sports a built-in interactive debugger that can vastly improve your coding experience. The first time you try to use the debugger in your Node.js project, VSCode generates a file named launch.json that contains various configuration details. This file might need a few changes depending on your project. The most important fields in this configuration are name and program. By default, name has the value Launch app.js and program has the value app.js. You need to change these to match the files in your project. For example, if the name of your project's main file is index.js instead of app.js, your launch.json should contain:
在大多数轻量级代码编辑器中,缺少调试支持,或者仅在插件的帮助下才支持调试。 另一方面,VSCode具有内置的交互式调试器,可以极大地改善您的编码体验。 首次尝试在Node.js项目中使用调试器时,VSCode会生成一个名为launch.json的文件,其中包含各种配置详细信息。 根据您的项目,此文件可能需要进行一些更改。 此配置中最重要的字段是name和program 。 默认情况下, name的值是Launch app.js , program的值是app.js 您需要更改它们以匹配项目中的文件。 例如,如果项目主文件的名称是index.js而不是app.js ,则launch.json应包含:
"name" : "Launch index.js",
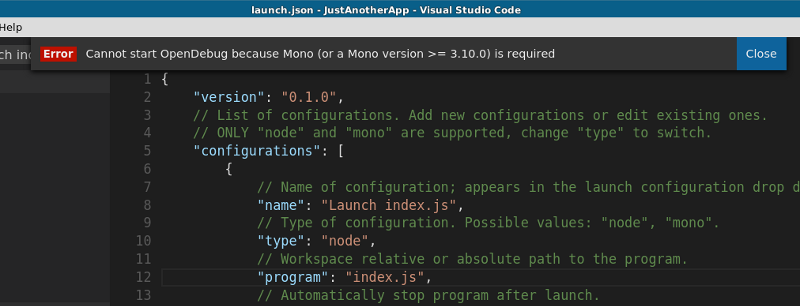
"program" : "index.js"Though it works out of the box on Windows, on Ubuntu (and most other Linux distros and Mac OS X), you need to install Mono 3.10.0 or higher for the debugger to work. Without it, trying to start the debugger will fail:
尽管它在Windows,Ubuntu(以及大多数其他Linux发行版和Mac OS X)上都是开箱即用的,但是您需要安装Mono 3.10.0或更高版本才能使调试器正常工作。 没有它,尝试启动调试器将失败:
To install the latest version of Mono, you need to add a new PPA to Ubuntu's software sources. Do so by opening a terminal and typing in:
要安装最新版本的Mono,您需要在Ubuntu的软件源中添加新的PPA 。 为此,请打开终端并输入:
sudo add-apt-repository ppa:ermshiperete/monodevelopYou can now install Mono using apt-get.
您现在可以使用apt-get安装Mono。
sudo apt-get update
  sudo apt-get install monodevelop-current
Finally, create a link to the mono executable inside /usr/bin:
最后,在/usr/bin创建一个指向mono可执行文件的链接:
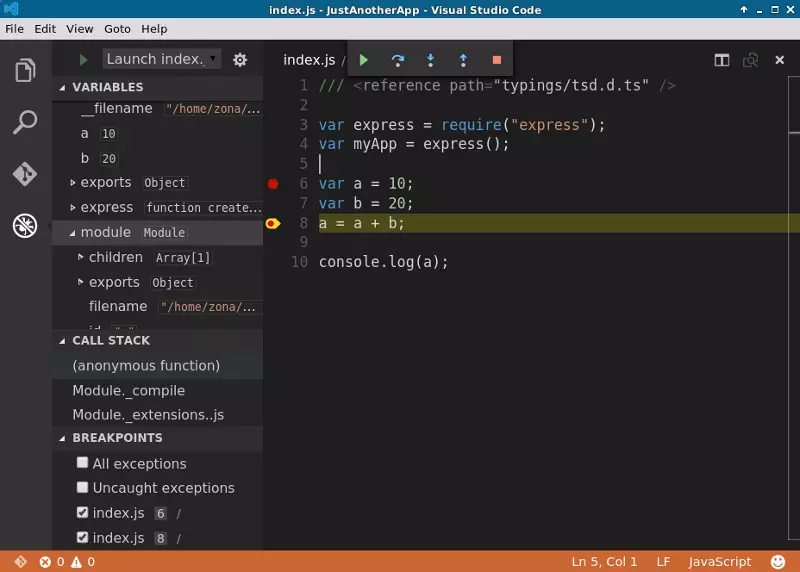
sudo ln -s /opt/monodevelop/bin/mono /usr/bin/monoReturn to VSCode and start the debug again. You should see it working:
返回VSCode并再次开始调试。 您应该看到它正在工作:
使用版本控制 (Using Version Control)
On all platforms, VSCode supports version control with Git. To use this feature, you need to have Git installed on your computer. On Ubuntu, you can install Git by opening a terminal again and typing in the following:
在所有平台上,VSCode支持Git的版本控制。 要使用此功能,您需要在计算机上安装Git。 在Ubuntu上,您可以通过再次打开终端并输入以下内容来安装Git:
sudo apt-get install gitGo back to VSCode, and click on the Git button in the toolbar. You'll be prompted to initialize a new repository:
返回VSCode,然后单击工具栏中的Git按钮。 系统将提示您初始化新的存储库:
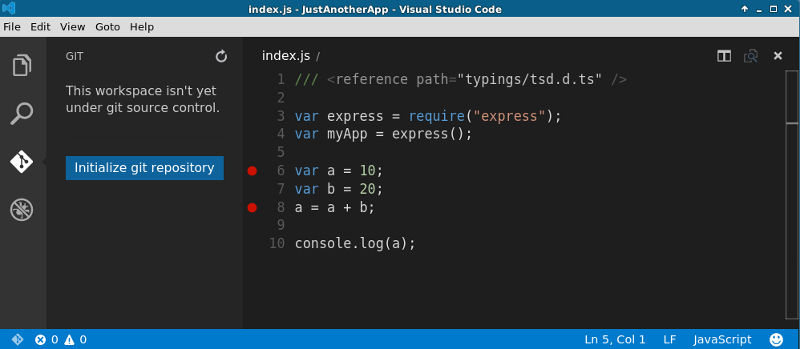
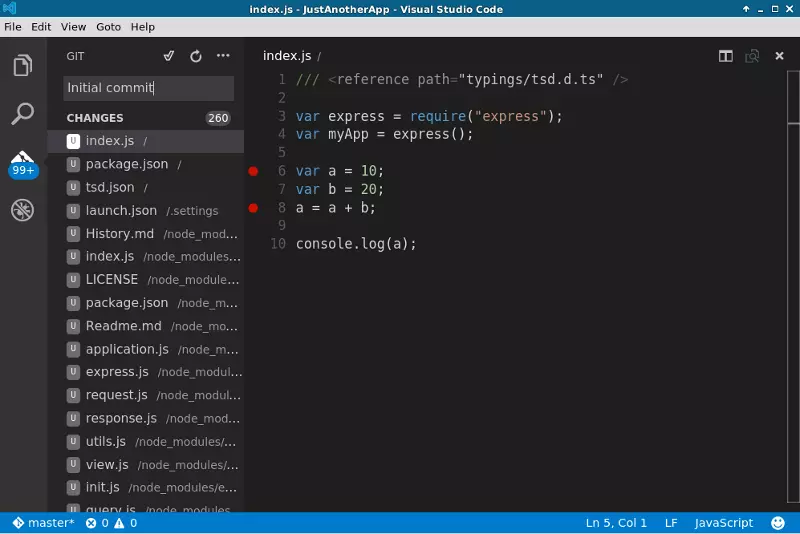
Once initialized, VSCode shows you all the files that need to be committed or updated. Committing is as simple as typing in a commit message and clicking on the check mark:
初始化后,VSCode将显示需要提交或更新的所有文件。 提交就像输入提交消息并单击复选标记一样简单:
使用Markdown预览 (Using Markdown Preview)
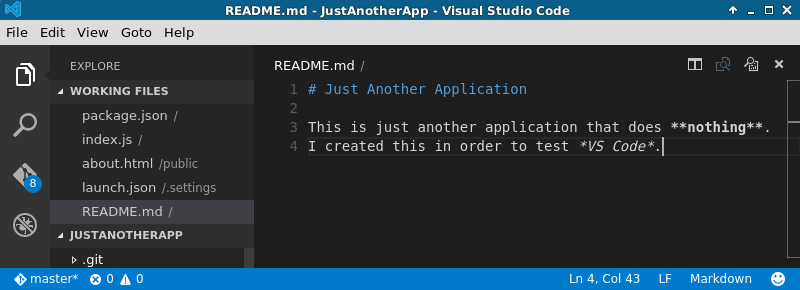
On all platforms, VSCode supports Markdown preview, and it works without any additional installations. When you are editing a markdown file, pressing Control+Shift+V at any time will display a preview of the file.
在所有平台上,VSCode支持Markdown预览,并且无需任何其他安装即可工作。 编辑降价文件时,随时按Control + Shift + V将显示文件预览。
For example, if your Markdown file looks like this:
例如,如果您的Markdown文件如下所示:
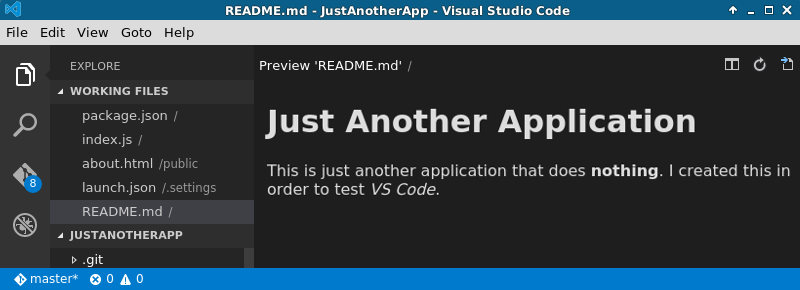
… the preview will show this:
…预览将显示以下内容:
结论 (Conclusion)
You now know how to install and run Visual Studio Code—the first development tool from Microsoft's Visual Studio family that supports Linux—on your Ubuntu system. Though the set up process is slightly involved, you should give it a try in order to experience its slick and streamlined interface that's optimized for web development.
现在,您知道如何在Ubuntu系统上安装和运行Visual Studio Code(这是Microsoft Visual Studio家族中第一个支持Linux的开发工具)。 尽管设置过程略有涉及,但您应该尝试一下,以体验其针对Web开发进行了优化的流畅,精简的界面。
As of May 2015, VSCode was still in preview, with improvements and new features likely to appear in following months. Updates are easy to install, and are available for all platforms at the same time.
截至2015年5月,VSCode仍处于预览阶段,其改进和新功能可能会在接下来的几个月中出现。 更新易于安装,并且可同时用于所有平台。
If you have any questions or comments about this guide, please let me know. Have you tried VSCode already? If so, what did you think?
如果您对此指南有任何疑问或意见,请告诉我。 您是否已经尝试过VSCode? 如果是这样,您是怎么想的?


 2万+
2万+

 被折叠的 条评论
为什么被折叠?
被折叠的 条评论
为什么被折叠?
 到【灌水乐园】发言


