


css:before伪类
The following is an extract from our book, CSS Master, written by Tiffany B. Brown. Copies are sold in stores worldwide, or you can buy it in ebook form here.
以下是Tiffany B. Brown所著《 CSS Master》一书的摘录。 副本在世界各地的商店中都有出售,或者您可以在此处以电子书形式购买 。
As mentioned earlier in this chapter, pseudo-classes help us define styles for documents based on information that is unable to be gleaned from the document tree or can’t be targeted using simple selectors. These include logical and linguistic pseudo-classes such as :not() and :lang(). It also includes user-triggered pseudo-classes such as :hover and :focus.
如本章前面所述,伪类可帮助我们根据无法从文档树中收集或无法使用简单选择器确定目标的信息来定义文档样式。 这些包括逻辑和语言伪类,例如:not()和:lang() 。 它还包括用户触发的伪类,例如:hover和:focus 。
In this section, we’ll cover some esoteric and lesser-known pseudo-classes with a focus on what is available in browsers: child-indexed and typed child-indexed pseudo-classes, and input pseudo-classes. Child-indexed and typed child-indexed pseudo-classes let us select elements by their position in the document subtree. Input pseudo-classes target form fields based on their input values and states.
在本节中,我们将介绍一些深奥的和鲜为人知的伪类,重点是浏览器中可用的伪类:子索引的和类型化的子索引的伪类,以及输入伪类。 子索引的和类型化的子索引的伪类使我们可以根据元素在文档子树中的位置来选择元素。 输入伪类基于表单字段的输入值和状态来为其指定目标。
用:target突出显示页面片段 (Highlighting Page Fragments with :target)
A fragment identifier is the part of a URL that follows the #; for example, #top or #footnote1. You’ve probably used them to create in-page navigation: a so-called “jump link.” With the :target pseudo-class, we can highlight the portion of the document that corresponds to that fragment, and we can do it without JavaScript.
片段标识符是URL中#后面的部分; 例如#top或#footnote1 。 您可能已经使用它们来创建页内导航:所谓的“跳转链接”。 使用:target伪类,我们可以突出显示文档中与该片段相对应的部分,并且无需JavaScript就可以做到这一点。
Say, for example, that you have series of comments or a discussion board thread:
例如,假设您有一系列评论或讨论区线程:
<section id="comments">
<h2>Comments on this post</h2>
<article class="comment" id="comment-1146937891">...</article>
<article class="comment" id="comment-1146937892">...</article>
<article class="comment" id="comment-1146937893">...</article>
</section>
With some CSS and other fancy bits, it looks a little like what you see in the figure below.
使用一些CSS和其他漂亮的外观,它看起来有点像您在下图中看到的。
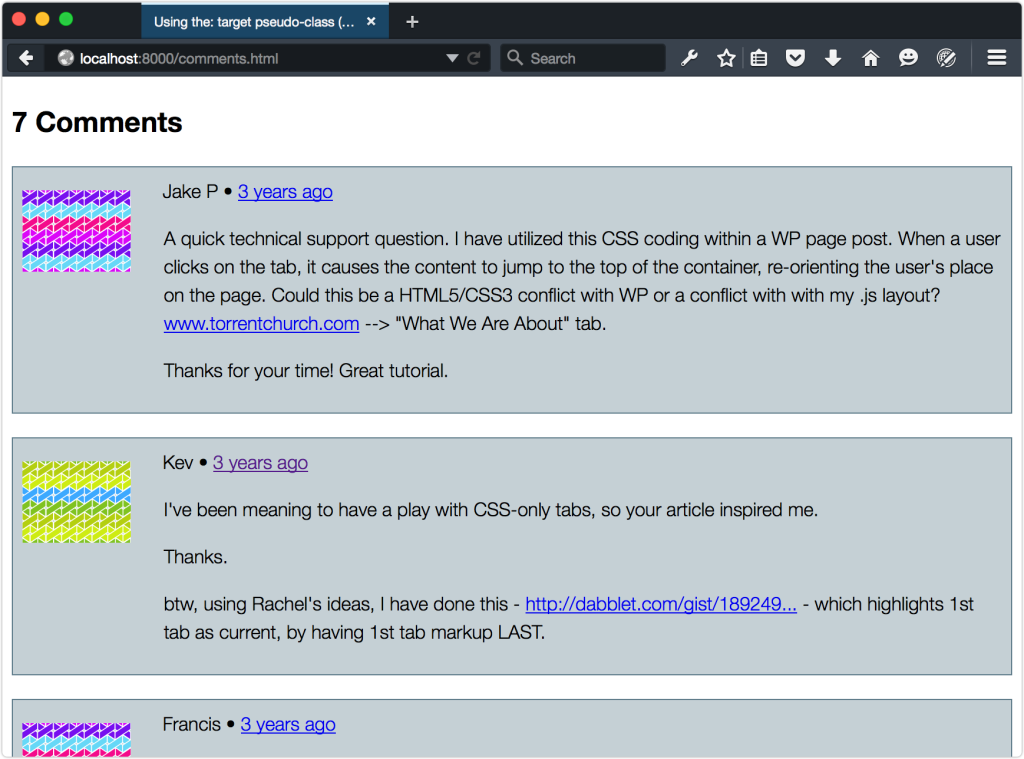
Each comment in the aforementioned code has a fragment identifier, which means we can link directly to it. For example, <a href="#comment-1146937891">. Then all we need to do is specify a style for this comment using the :target pseudo-class:
上述代码中的每个注释都有一个片段标识符,这意味着我们可以直接链接到它。 例如, <a href="#comment-1146937891"> 。 然后,我们需要做的就是使用:target伪类为此注释指定样式:
.comment:target {
background: #ffeb3b;
border-color: #ffc107
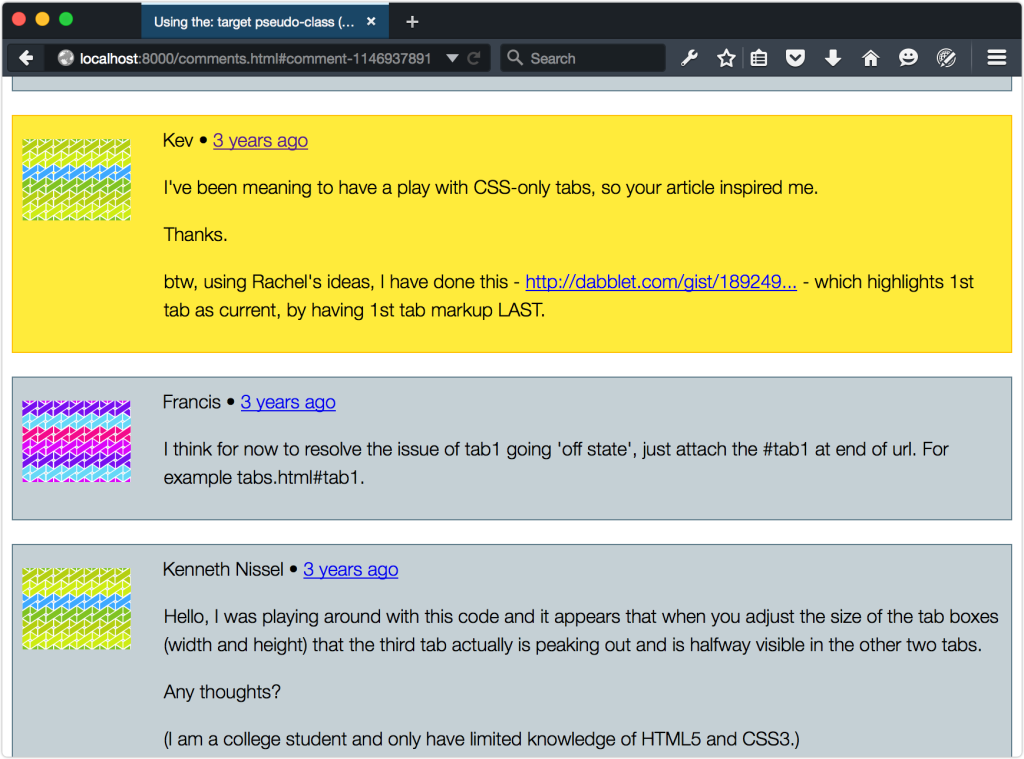
}When the fragment identifier part of the URL matches that of a comment (for example, http://example.com/post/#comment-1146937891), that comment will have a yellow background, seen below.
当URL的片段标识符部分与注释的标识符部分匹配时(例如, http://example.com/post/#comment-1146937891 ),该注释将具有黄色背景,如下所示。
You can use any combination of CSS with :target, which opens up some fun possibilities such as JavaScript-less tabs. Craig Buckler details this technique in his tutorial “How to Create a CSS3-only Tab Control Using the :target Selector.” We’ll update it a bit to use more CSS3 features. First, let’s look at our HTML:
您可以将CSS与:target结合使用,这将带来一些有趣的可能性,例如无JavaScript标签。 Craig Buckler在他的教程“如何使用:target选择器创建仅CSS3的Tab控件”中详细介绍了此技术。 我们将对其稍作更新以使用更多CSS3功能。 首先,让我们看一下HTML:
<div class="tabbed-widget">
<div class="tab-wrap">
	<a href="#tab1">Tab 1</a>
	<a href="#tab2">Tab 2</a>
	<a href="#tab3">Tab 3</a>
</div>

<ul class="tab-body">
	<li id="tab1">
		<p>This is tab 1.</p>
	</li>
	<li id="tab2">
		<p>This is tab 2</p>
	</li>
	<li id="tab3">
		<p>This is tab 3.</p>
	</li>
</ul>
</div>
It’s fairly straightforward, consisting of tabs and associated tab content. Let’s add some CSS:
它非常简单,由标签和相关的标签内容组成。 让我们添加一些CSS:
[id^=tab] {
position: absolute;
}
[id^=tab]:first-child {
z-index: 1;
}
[id^=tab]:target {
z-index: 2;
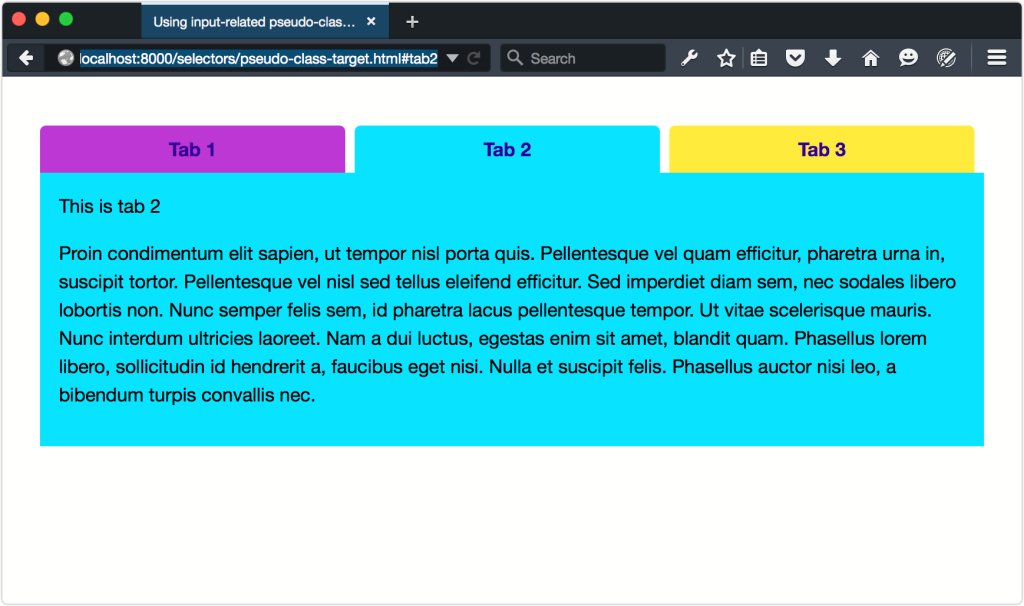
}Here’s where the magic happens. First, we’ve absolutely positioned all of our tabs. Next, we’ve made our first tab the topmost layer by adding z-index: 1. This is only important if you want the first tab in the source order to be the first tab users see. Lastly, we’ve added z-index: 1 to our target tab. This ensures that the targeted layer will always be the topmost one. You can see the result below.
这就是魔术发生的地方。 首先,我们已将所有选项卡绝对定位。 接下来,我们通过添加z-index: 1使我们的第一个标签成为最顶层。 仅当您希望源顺序中的第一个选项卡成为用户看到的第一个选项卡时,这才很重要。 最后,我们在目标标签中添加了z-index: 1 。 这样可以确保目标图层始终是最顶层。 您可以在下面看到结果。
提示:改善可访问性 (Tip: Improving Accessibility)
A more accessible version might also use JavaScript to toggle the hidden or aria-hidden=true attributes based on the visibility of each tab body.
更具可访问性的版本可能还会使用JavaScript基于每个选项卡主体的可见性来切换hidden属性或aria-hidden=true属性。
Clicking a tab updates the URL with the new document fragment identifier. This in turn, triggers the :target state.
单击选项卡将使用新的文档片段标识符更新URL。 反过来,它触发:target状态。
用:not()否定选择器 (Negating Selectors with :not())
Perhaps the most powerful of this new crop of pseudo-classes is :not(). It returns all elements except for those that match the selector argument. For example, p:not(.message) selects every p element that lacks a message class.
在这种新的伪类中,最强大的也许是:not() 。 它返回除与选择器参数匹配的元素以外的所有元素。 例如, p:not(.message)选择缺少message类的每个p元素。
The :not() pseudo-class is what’s known as a functional pseudo–class. It accepts a single argument, much like functions in other programming languages do. Any argument passed to :not() must be a simple selector such as an element type, a class name, an ID, or another pseudo-class. Pseudo-elements will fail, as will compound selectors such as label.checkbox or complex selectors such as p img.
:not()伪类是功能伪类 。 它接受一个参数,就像其他编程语言中的函数一样。 传递给:not()任何参数都必须是简单的选择器,例如元素类型,类名,ID或另一个伪类。 伪元素将失败,复合选择器(如label.checkbox或复杂选择器(如p img也会失败。
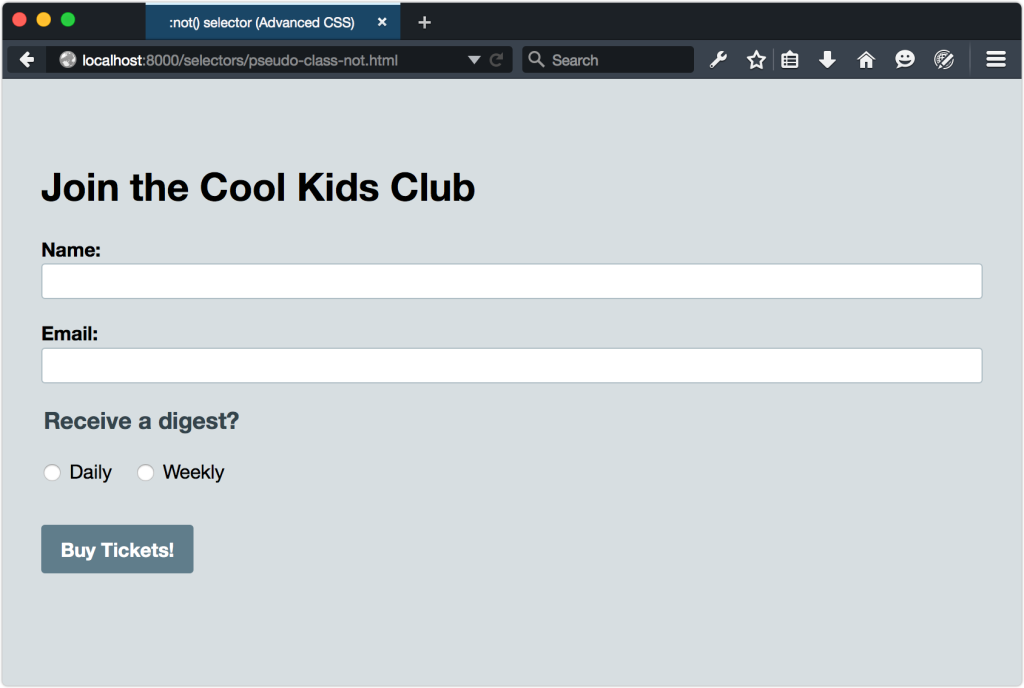
Here’s an example of a form that uses textual input types and radio buttons:
这是使用文本输入类型和单选按钮的表单的示例:
<form method="post" action="#">
  <h1>Join the Cool Kids Club</h1>
  <p>
	   <label for="name">Name:</label>
	   <input type="text" id="name" name="name" required>
  </p>

  <p>
	  <label for="email">Email:</label>
	  <input type="email" id="email" name="email" required>
  </p>
  <fieldset>
	<legend>Receive a digest?</legend>
	<p>
		<input type="radio" id="daily" name="digest">
		<label for="daily" class="label-radio">Daily</label>
		<input type="radio" id="weekly" name="digest">
		<label for="weekly" class="label-radio">Weekly</label>
	</p>
  </fieldset>
  <button type="submit">Buy Tickets!</button>
</form>
In the HTML, labels associated with a radio type have a .label-radio class. We can use the :not() pseudo-class: to target those elements without a label-radio class, as shown in in the figure below:
在HTML中,与radio类型关联的标签具有.label-radio类。 我们可以使用:not()伪类:来定位那些没有label-radio类的元素,如下图所示:
label:not(.label-radio) {
  font-weight: bold;
  display:block;
}
Here’s a trickier example. Let’s create styles for textual inputs. These include input types such as number, email, and text along with password and url. But let’s do this by excluding radio button, check box, and range inputs. Your first instinct might be to use the following selector list:
这是一个比较棘手的例子。 让我们为文本输入创建样式。 这些包括输入类型,例如number , email和text以及password和url 。 但是,让我们通过排除单选按钮,复选框和范围输入来做到这一点。 您的第一个直觉可能是使用以下选择器列表:
([type=radio]),
input:not([type=checkbox]),
input:not([type=range]) {
  ...
}
Unfortunately, this won’t work, as each selector overrides the previous one. It’s the equivalent of typing:
不幸的是,这将不起作用,因为每个选择器都会覆盖前一个选择器。 相当于键入:
input:not([type=radio]){ ... }
input:not([type=checkbox]) { ... }
input:not([type=range]) {... }
Instead, we need to chain our :not() pseudo-classes, so that they all filter the input element:[4]
相反,我们需要链接我们的:not()伪类,以便它们都过滤input元素: [4]
input:not([type=radio]):not([type=checkbox]):not([type=range]) {
...
}
Using pseudo-classes (and pseudo-elements) without a simple selector is the equivalent of using it with the universal selector. In other words, :not([type=radio]) is the same as *:not([type=radio]). In this case, every element that lacks a type attribute and value of radio will match―including html and body. To prevent this, use :not() with a selector such as a class name, ID, or attribute selector. By the way, this also holds true true for class name, ID, and attribute selectors: .warning and [type=radio] are the same as *.warning and *[type=radio].
在没有简单选择器的情况下使用伪类(和伪元素)等效于在通用选择器中使用它。 换句话说, :not([type=radio])与*:not([type=radio]) 。 在这种情况下,每个缺少type属性和radio值的元素都将匹配-包括html和body 。 为防止这种情况,请在选择器中使用:not() ,例如类名,ID或属性选择器。 顺便说一句,这也适用于类名,ID和属性选择器: .warning和[type=radio]与*.warning和*[type=radio] 。
CSS Selectors Level 4 refines the way :not() works, so that it can accept a list as an argument, and not just simple selectors. Rather than chaining pseudo-classes as previously, we’ll be able to use a comma-separated argument:
CSS选择器第4级改进了:not()工作方式,以便它可以接受列表作为参数,而不仅仅是简单的选择器。 无需像以前那样链接伪类,我们将能够使用逗号分隔的参数:
input:not([type=radio], [type=checkbox], [type=range]) {
...
}
Unfortunately, no major browser supports this yet, so use chaining in the meantime.
不幸的是,尚无主流浏览器支持此功能,因此请同时使用链接。
css:before伪类


 280
280

 被折叠的 条评论
为什么被折叠?
被折叠的 条评论
为什么被折叠?
 到【灌水乐园】发言


