 ( )
( )

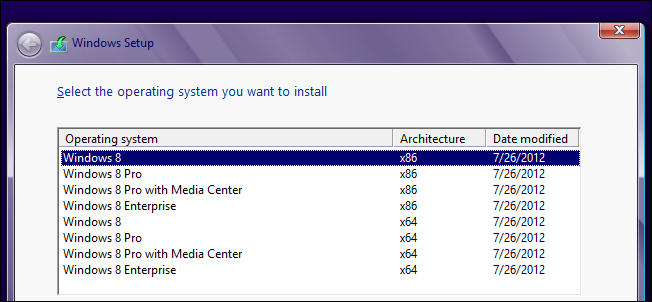
There are a lot of different versions of Windows, but you probably didn’t know that short of the Enterprise edition, the disc or image that you own contains all versions for that architecture. Read on to see how we can use them to make a universal Windows 8 install disc.
Windows有很多不同的版本,但是您可能不知道除了Enterprise版本以外,您拥有的光盘或映像包含该体系结构的所有版本。 请继续阅读以了解如何使用它们制作通用的Windows 8安装光盘。
您需要的东西 (Things You Will Need)
- A x86 Version of Windows 8 Windows 8的x86版本
- A x64 Version of Windows 8 Windows 8的x64版本
- A x86 Version of Windows 8 Enterprise Windows 8 Enterprise的x86版本
- A x64 Version of Windows 8 Enterprise Windows 8 Enterprise的x64版本
- A Windows 8 PC Windows 8 PC
Note: While we will use all the images above you don’t really need the Enterprise Edition. You could always leave out parts of the tutorial if you know what you are doing, if you are not comfortable with that and still want to follow through you could always grab the Enterprise evaluation images that are available for free to the public, on MSDN.
注意:虽然我们将使用上面的所有图像,但您实际上并不需要企业版。 如果您知道自己在做什么,则可以始终忽略本教程的各个部分;如果您对此感到不满意,并且仍然想继续进行下去,则可以始终在MSDN上获取可供公众免费使用的企业评估图像。
入门 (Getting Started)
To get started you will need to Download the Windows 8 ADK from Microsoft.
首先,您需要从Microsoft下载Windows 8 ADK 。
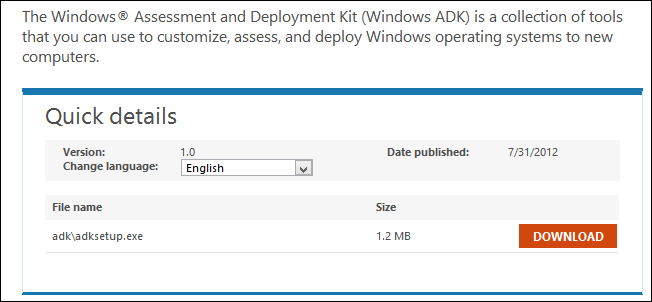
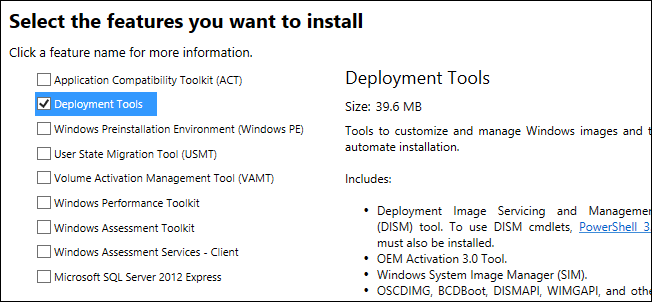
Once downloaded go ahead and install it, you will only need the Deployment tools so be sure to uncheck the rest of the options.
一旦下载并继续安装,您将只需要部署工具,因此请确保取消选中其余选项。
Lastly you will also need to create the following folder structure on the root of your C:\ drive to make things a bit easier.
最后,您还需要在C:\驱动器的根目录上创建以下文件夹结构,以使事情变得容易一些。
- C:\Windows8Root C:\ Windows8Root
- C:\Windows8Root\x86 C:\ Windows8Root \ x86
- C:\Windows8Root\x64 C:\ Windows8Root \ x64
- C:\Windows8Root\Enterprisex86 C:\ Windows8Root \ Enterprisex86
- C:\Windows8Root\Enterprisex64 C:\ Windows8Root \ Enterprisex64
- C:\Windows8Root\Temp C:\ Windows8Root \ Temp
- C:\Windows8Root\Final C:\ Windows8Root \ Final
OK lets get started.
好的,让我们开始吧。
制作图像 (Making The Image)
The first thing we need to do is create a base image, so mount the x86 version of Windows 8 and copy its files to:
我们需要做的第一件事是创建基本映像,因此挂载Windows 8的x86版本并将其文件复制到:
C:\Windows8Root\Final
C:\ Windows8Root \ Final
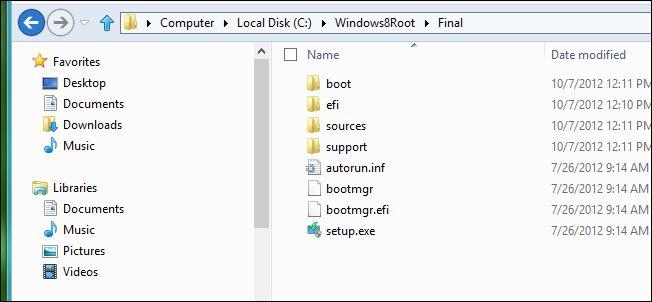
Now move the install.wim file from:
现在从以下位置移动install.wim文件:
C:\Windows8Root\Final\sources
C:\ Windows8Root \ Final \ sources
To:
至:
C:\Windows8Root\x86
C:\ Windows8Root \ x86
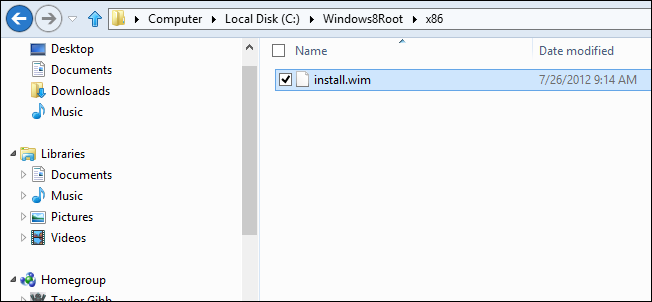
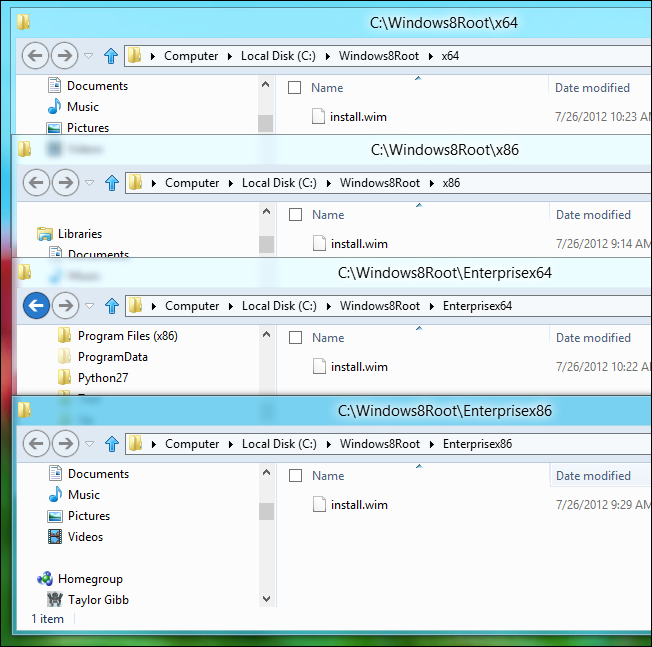
Next go ahead and copy the install.wim file from the other 3 images, Windows 8 x64, Windows 8 Enterprise x86 and Windows 8 Enterprise x64 to the respective folders in Windows8Root, the install.wim file can be located at:
接下来,将其他3个映像Windows 8 x64,Windows 8 Enterprise x86和Windows 8 Enterprise x64的install.wim文件复制到Windows8Root中的相应文件夹中,install.wim文件可以位于:
D:\sources\install.wim
D:\ sources \ install.wim
Note: The above assumes that the images are always mounted at drive D.
注意:以上假设图像始终安装在驱动器D上。
Remember that each install.wim is different so don’t copy them to the wrong directories or the rest of the tutorial wont work.
请记住,每个install.wim是不同的,因此请勿将它们复制到错误的目录中,否则本教程的其余部分将无法正常工作。
Next switch to the Metro Start Screen and open the Deployment and Imaging Tools Environment.
接下来,切换到Metro Start屏幕并打开Deployment and Imaging Tools Environment。
Note: If you are not a local administrator on your PC, you will need to right-click on it and choose to run it as an administrator.
注意:如果您不是PC上的本地管理员,则需要右键单击它,然后选择以管理员身份运行它。

Now run the following commands:
现在运行以下命令:
Dism /Export-Image /SourceImageFile:c:\Windows8Root\x86\install.wim /SourceIndex:2 /DestinationImageFile:c:\Windows8Root\Final\sources\install.wim /DestinationName:”Windows 8″ /compress:maximum
Dism / Export-Image /SourceImageFile:c:\Windows8Root\x86\install.wim / SourceIndex:2 /DestinationImageFile:c:\Windows8Root\Final\sources\install.wim / DestinationName:“ Windows 8” / compress:maximum
Dism /Export-Image /SourceImageFile:c:\Windows8Root\x86\install.wim /SourceIndex:1 /DestinationImageFile:c:\Windows8Root\Final\sources\install.wim /DestinationName:”Windows 8 Pro” /compress:maximum
Dism / Export-Image /SourceImageFile:c:\Windows8Root\x86\install.wim / SourceIndex:1 /DestinationImageFile:c:\Windows8Root\Final\sources\install.wim / DestinationName:“ Windows 8 Pro” / compress:maximum
Dism /Export-Image /SourceImageFile:c:\Windows8Root\x86\install.wim /SourceIndex:1 /DestinationImageFile:c:\Windows8Root\Final\sources\install.wim /DestinationName:”Windows 8 Pro with Media Center” /compress:maximum
Dism / Export-Image /SourceImageFile:c:\Windows8Root\x86\install.wim / SourceIndex:1 /DestinationImageFile:c:\Windows8Root\Final\sources\install.wim / DestinationName:“带有Media Center的Windows 8 Pro” / compress :最大值
Dism /Export-Image /SourceImageFile:c:\Windows8Root\Enterprisex86\install.wim /SourceIndex:1 /DestinationImageFile:c:\Windows8Root\Final\sources\install.wim /DestinationName:”Windows 8 Enterprise” /compress:maximum
Dism / Export-Image /SourceImageFile:c:\Windows8Root\Enterprisex86\install.wim / SourceIndex:1 /DestinationImageFile:c:\Windows8Root\Final\sources\install.wim / DestinationName:“ Windows 8 Enterprise” / compress:maximum
Dism /Export-Image /SourceImageFile:c:\Windows8Root\x64\install.wim /SourceIndex:2 /DestinationImageFile:c:\Windows8Root\Final\sources\install.wim /DestinationName:”Windows 8″ /compress:maximum
Dism / Export-Image /SourceImageFile:c:\Windows8Root\x64\install.wim / SourceIndex:2 /DestinationImageFile:c:\Windows8Root\Final\sources\install.wim / DestinationName:“ Windows 8” / compress:maximum
Dism /Export-Image /SourceImageFile:c:\Windows8Root\x64\install.wim /SourceIndex:1 /DestinationImageFile:c:\Windows8Root\Final\sources\install.wim /DestinationName:”Windows 8 Pro” /compress:maximum
Dism / Export-Image /SourceImageFile:c:\Windows8Root\x64\install.wim / SourceIndex:1 /DestinationImageFile:c:\Windows8Root\Final\sources\install.wim / DestinationName:“ Windows 8 Pro” / compress:maximum
Dism /Export-Image /SourceImageFile:c:\Windows8Root\x64\install.wim /SourceIndex:1 /DestinationImageFile:c:\Windows8Root\Final\sources\install.wim /DestinationName:”Windows 8 Pro with Media Center” /compress:maximum
Dism / Export-Image /SourceImageFile:c:\Windows8Root\x64\install.wim / SourceIndex:1 /DestinationImageFile:c:\Windows8Root\Final\sources\install.wim / DestinationName:“带有Media Center的Windows 8 Pro” / compress :最大值
Dism /Export-Image /SourceImageFile:c:\Windows8Root\Enterprisex64\install.wim /SourceIndex:1 /DestinationImageFile:c:\Windows8Root\Final\sources\install.wim /DestinationName:”Windows 8 Enterprise” /compress:maximum
Dism / Export-Image /SourceImageFile:c:\Windows8Root\Enterprisex64\install.wim / SourceIndex:1 /DestinationImageFile:c:\Windows8Root\Final\sources\install.wim / DestinationName:“ Windows 8 Enterprise” / compress:maximum
Next navigate to:
接下来导航到:
C:\Windows8Root\sources\
C:\ Windows8Root \ sources \
And create a new text file.
并创建一个新的文本文件。
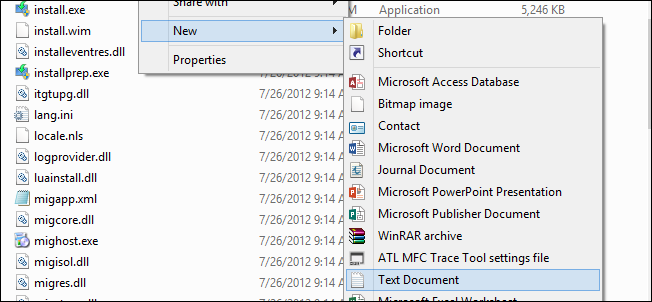
You will need to call it:
您需要调用它:
EI.cfg
文件
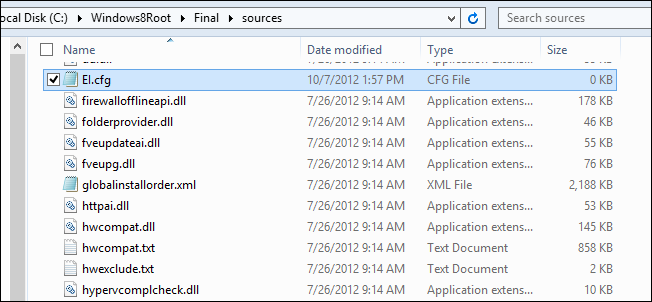
Then edit it to look like the following:
然后对其进行编辑,如下所示:
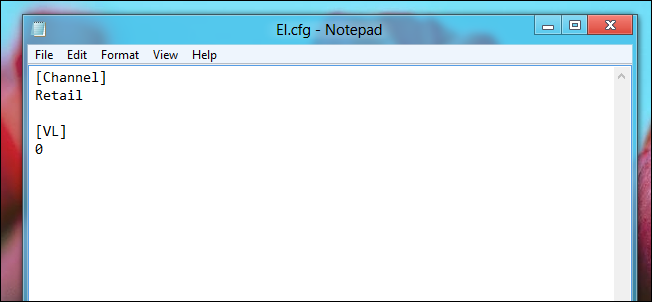
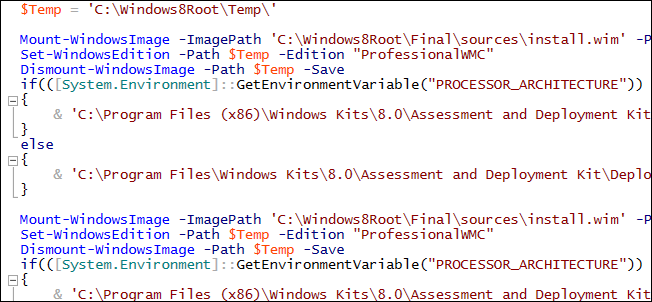
The last thing we need to do is work some magic to get Windows Media Center added to the WMC editions of Windows 8. For that I have written a little script to make it easier for everybody, you can grab it here. Once you have downloaded it extract it.
我们要做的最后一件事是做一些魔术,以将Windows Media Center添加到Windows 8的WMC版本中。为此,我编写了一个小脚本以使每个人都更容易使用,您可以在这里获取它。 下载后,将其解压缩。
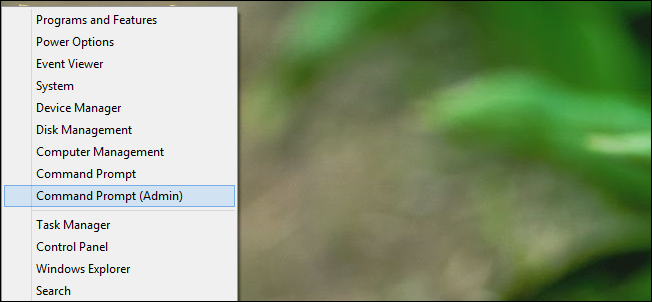
In order to use it right-click in the bottom left hand corner of the screen, and open an elevated command prompt.
为了使用它,右键单击屏幕的左下角,然后打开提升的命令提示符。
Then go ahead and paste the following into the command prompt window.
然后继续并将以下内容粘贴到命令提示符窗口中。
powershell.exe -ExecutionPolicy Unrestricted -File C:\Users\Taylor\Documents\HTGWindows8Converter.ps1
powershell.exe -ExecutionPolicy不受限制-文件C:\ Users \ Taylor \ Documents \ HTGWindows8Converter.ps1
Note: You will need to replace the path to the script, another thing to note is that if the path you replace it with has spaces you will need to enclose the path in quotes.
注意:您将需要替换脚本的路径,另外要注意的是,如果替换为脚本的路径具有空格,则需要将路径用引号引起来。
The script should kick off straight away and has some progress bars you can watch while it does its thing.
该脚本应立即开始运行,并具有一些进度条,您可以在执行过程中观看。
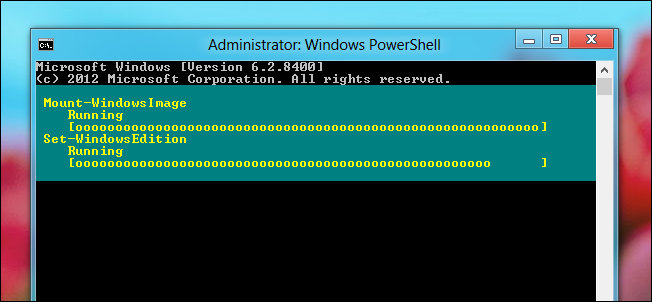
Half way through another Window will pop open, which will start creating your final ISO image.
在另一个窗口中途弹出一个窗口,它将开始创建最终的ISO映像。
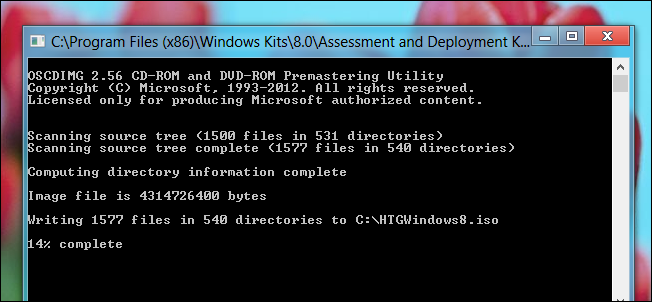
When its complete, close the command prompt and you should have an ISO image on the root of your C drive called:
完成后,关闭命令提示符,您应该在C驱动器的根目录上有一个ISO映像,名为:
HTGWindows8.iso
HTGWindows8.iso
That’s all there is to it.
这里的所有都是它的。

翻译自: https://www.howtogeek.com/126093/how-to-get-all-the-windows-8-editions-on-one-install-disk/


 被折叠的 条评论
为什么被折叠?


