


The window snapping feature in Windows 7 and the ability to organize monitor(s) into specific gridded sections have both become popular lately. If you love the idea of having both combined in a single software then join us as we look at Acer GridVista.
Windows 7中的窗口捕捉功能和将监视器组织到特定网格部分的功能最近都变得很流行。 如果您喜欢将两者结合在一个软件中的想法,请加入我们,我们来看看Acer GridVista。
Note: Acer GridVista works with Windows XP, Vista, & 7. It will also work with dual monitors.
注意:Acer GridVista可与Windows XP,Vista和7一起使用。它也可与双显示器一起使用。
Setup
建立
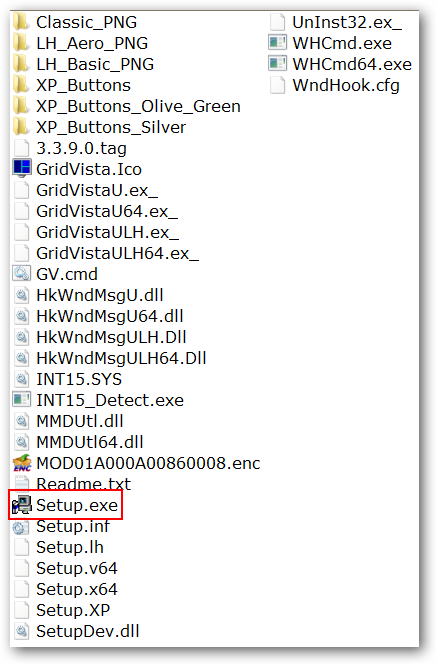
Acer GridVista comes in a zip file format and at first you might assume that it is portable in nature but it is not. Once you unzip the enclosed folder you will need to double click on “Setup.exe” to install the program.
Acer GridVista以zip文件格式提供,起初您可能会认为它本质上是可移植的,但事实并非如此。 解压缩随附的文件夹后,您将需要双击“ Setup.exe”以安装程序。
Acer GridVista in Action
宏cer GridVista实战
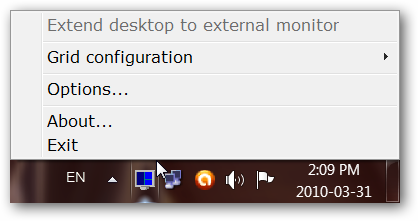
Once you have installed the program and started it up all that you will notice at first is the new “System Tray Icon”. Here you can see the “Context Menu”…
一旦安装了程序并启动它,您首先会注意到的是新的“系统托盘图标”。 在这里您可以看到“上下文菜单”…
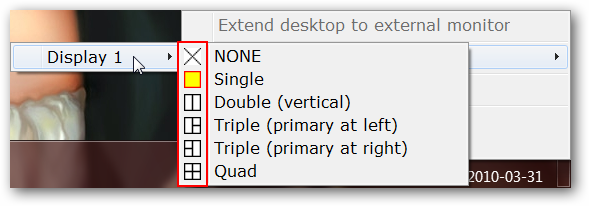
The only menu command that you will likely use most of the time is the “Grid Configuration Command”. Notice that for our single monitor setup that it lists “Display 1”. The “Single Setting” is enabled by default and you can easily choose the layout that best suits your needs. The enabled layout style will always be highlighted in yellow for easy reference.
您大多数时间可能会使用的唯一菜单命令是“ Grid Configuration Command”。 请注意,对于我们的单个监视器设置,它列出了“ Display 1”。 默认情况下,“单一设置”处于启用状态,您可以轻松选择最适合您的布局。 启用的布局样式将始终以黄色突出显示,以方便参考。
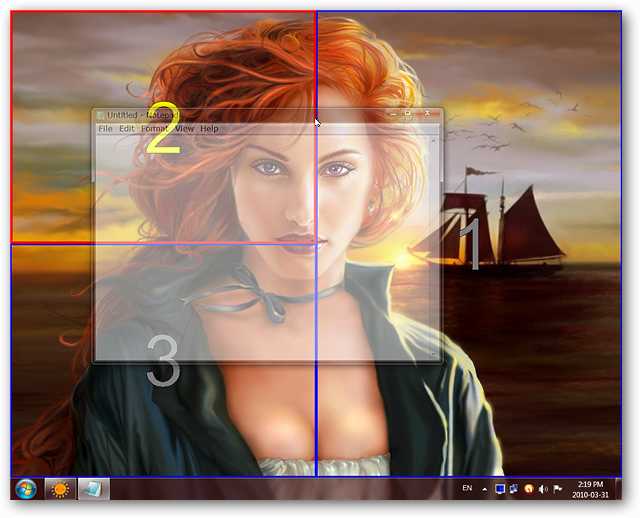
For our example we chose the “Triple (primary at right)” layout style. Each section will be specifically numbered as shown here. Do not worry…the grid and numbers only appear for a moment and then become invisible again until you move an app window into that section/area of your screen.
在我们的示例中,我们选择了“三元组(右侧为主要)”布局样式。 每个部分都将按照此处所示的方式进行编号。 不用担心……网格和数字只会出现片刻,然后再次变得不可见,直到将应用程序窗口移至屏幕的该部分/区域。

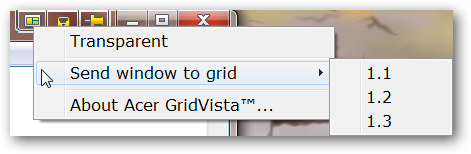
On every regular app window that you open you will notice three new buttons in the upper right corner. Here is what each of these new buttons do:
在您打开的每个常规应用程序窗口中,您都会在右上角看到三个新按钮。 这些新按钮的作用如下:
- Acer GridVista Extensions (Transparent, Send To Window Grid, About Acer GridVista): Viewable in a drop-down menu Acer GridVista扩展(透明,发送到窗口网格,关于Acer GridVista):在下拉菜单中可见
Lock To Grid (Enable/Disable): Enabled by default –> Note: Set to disable on a particular window to keep it free of the “grid locking function”
锁定到网格(启用/禁用):默认情况下启用–> 注意:设置为在特定窗口上禁用以使其不受“网格锁定功能”的影响
- Always On Top (Enable/Disable): Disabled by default 始终在最前面(启用/禁用):默认情况下禁用

A good look at the “Extensions Drop-Down Menu” where you can set an app window to be transparent or send it to a specific screen section on your monitor(s).
仔细查看“扩展名下拉菜单”,您可以在其中将应用程序窗口设置为透明或将其发送到显示器上的特定屏幕区域。
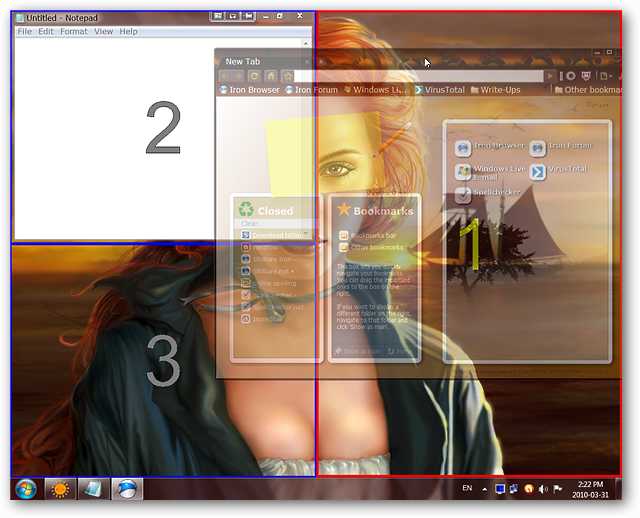
If you open an app it will not automatically lock into a specific section. To lock the window into a specific section drag-and-drop the app window into the desired section. Notice the red outline and highlighted number on “Section 2” below. The red outline and highlighted number serves as an indicator that if you release the app window at that moment it will lock into the outlined/highlighted section.
如果您打开一个应用程序,它将不会自动锁定到特定部分。 要将窗口锁定到特定部分,请将应用程序窗口拖放到所需部分。 请注意下面“第2节”中的红色轮廓和突出显示的数字。 红色的轮廓和突出显示的数字表示如果您此时释放应用程序窗口,它将锁定在轮廓突出显示的部分。
Now that Notepad is locked into “Section 2” you can see that it is maximized within that section.
现在,记事本已锁定在“第2部分”中,您可以看到该部分已最大化。

Continue to drag-and-drop your app windows into the appropriate sections as desired…apps can still be reduced to the “Taskbar” the same as before.
继续根据需要将应用程序窗口拖放到适当的部分……应用程序仍可以像以前一样缩小为“任务栏”。
Options
选件
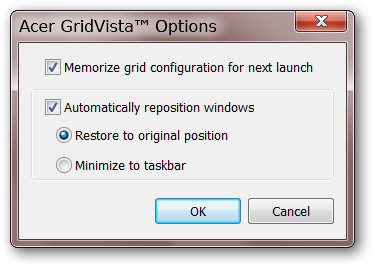
These are the options available for Acer GridVista…
这些是Acer GridVista可用的选项。
Conclusion
结论
If you have been wanting the ability to “snap” windows and organize them into specific screen areas then Acer GridVista is definitely a program that you should try out.
如果您一直希望能够“捕捉”窗口并将它们组织到特定的屏幕区域中,那么Acer GridVista绝对是您应该尝试的程序。
Links
链接
Download Acer GridVista at Softpedia


 627
627

 被折叠的 条评论
为什么被折叠?
被折叠的 条评论
为什么被折叠?
 到【灌水乐园】发言


