


word 引文 角标

Properly formatting bibliographies has always driven students crazy. With modern versions of Microsoft Word, though, the process is streamlined to the point of almost being automatic, and today we’re going to show you how to add citations and bibliographies to your Word documents.
正确格式化书目总是使学生发疯。 但是,对于现代版本的Microsoft Word,该过程已简化到几乎是自动的程度,今天,我们将向您展示如何在Word文档中添加引文和书目。
Note: the techniques we’re going to cover here should work for Microsoft Word 2007 and later. The screenshots are all taken in the latest version of Word 2016, so your version might look slightly different, but it works the same way.
注意:我们将在此处介绍的技术适用于Microsoft Word 2007和更高版本。 屏幕快照全部以最新版本的Word 2016拍摄,因此您的版本可能看起来略有不同,但工作方式相同。
创建来源并在文本中添加引文 (Creating Sources and Adding Citations To Your Text)
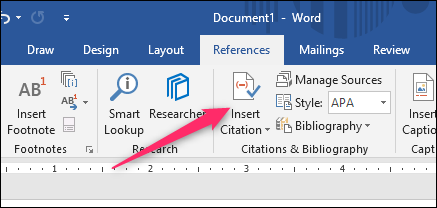
When you’re working on any Word document, place your cursor where you want the citation to be placed. Switch to the “References” tab on the Ribbon, and then click the “Insert Citation” button.
当您处理任何Word文档时,请将光标放在要放置引文的位置。 切换到功能区上的“参考”选项卡,然后单击“插入引文”按钮。
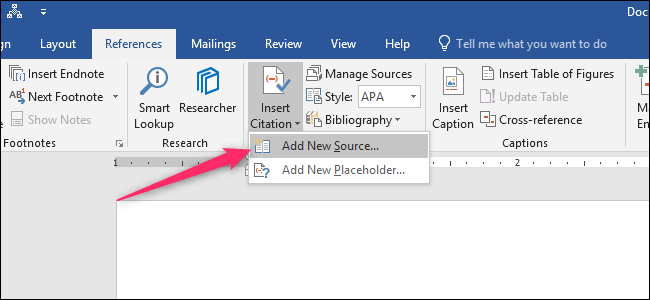
The popup menu that appears shows any sources you have already added (we’ll get to that in a moment), but to add a new source, just click the “Add New Source” command.
出现的弹出菜单显示您已经添加的所有源(稍后将介绍),但是要添加新源,只需单击“添加新源”命令。
In the Create Source window that appears, you can enter all of the relevant information for just about any source. The default setting for the “Type of Source” dropdown is Book, but just open that dropdown to choose other types of sources like journal articles, web sites, interviews, and so on. So, pick the type of source, fill out the fields, give your source a tag name (typically a shortened version of the title), and then click “OK” to finish the source.
在出现的“创建源”窗口中,您可以输入几乎任何源的所有相关信息。 “来源类型”下拉列表的默认设置为“书籍”,但只需打开该下拉列表即可选择其他类型的来源,例如期刊文章,网站,访谈等。 因此,选择源的类型,填写字段,为源提供标签名称(通常是标题的缩写),然后单击“确定”完成源。
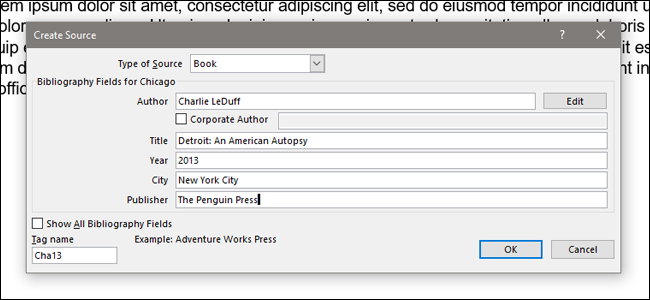
Note: By default, Word uses APA citation style, but it’s not limited to that. If you’re using another citation method for your document, click the “Show All Bibliography fields” option to fill out extra information.
注意 :默认情况下,Word使用APA引用样式,但不仅限于此。 如果您对文档使用其他引用方法,请单击“显示所有书目字段”选项以填写其他信息。
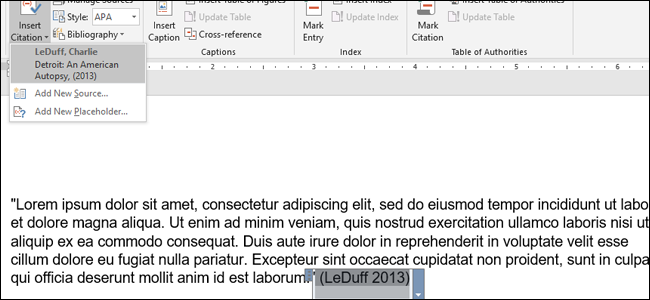
Word adds a citation for your new source to your document. And, the next time you need to cite that particular source, simply click that “Insert Citation” button again. Your source appears on the list (along with any other sources you’ve added). Select the source you want, and Word correctly inserts the citation into the document.
Word将对您的新来源的引用添加到文档中。 而且,下次您需要引用该特定来源时,只需再次单击该“插入引文”按钮即可。 您的来源会显示在列表中(以及您添加的所有其他来源)。 选择所需的来源,然后Word将引用正确插入文档中。
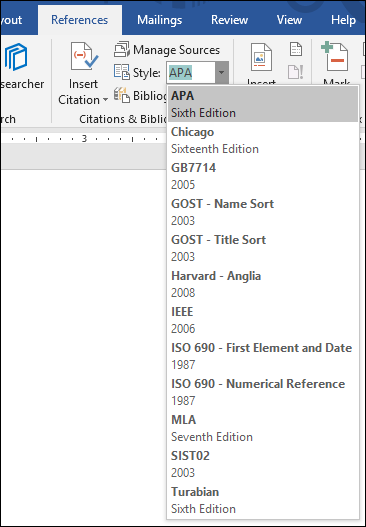
By default, Word uses the APA style for citations, but you can change that by picking another option from the “Style” dropdown right next to the “Insert Citation” button.
默认情况下,Word使用APA样式进行引用,但是您可以通过从“插入引用”按钮旁边的“样式”下拉菜单中选择另一个选项来进行更改。
Just repeat those steps to add any other sources you need, and to place citations where you want.
只需重复这些步骤即可添加您需要的任何其他来源,并将引用放置在所需的位置。
创建书目 (Creating Your Bibliography)
When your document is finished, you’ll want to add a bibliography that lists all your sources. Head to the end of your document and create a new page using Layout > Breaks > Page Break. Switch over the “References” tab, and click the “Bibliography” button. You can select from a few pre-formatted bibliography styles with headers, or you can click the “Insert Bibliography” option to add one without any header or extra formatting.
完成文档后,您需要添加一个列出所有来源的参考书目。 转到文档末尾,然后使用“布局”>“中断”>“分页符”创建一个新页面。 切换“参考”选项卡,然后单击“书目”按钮。 您可以从几种带有标题的预格式化书目样式中进行选择,也可以单击“插入书目”选项以添加一个没有任何标题或其他格式的书目。

Bam! Word adds all the works you cited in your document to the bibliography, in the correct order and format for the writing style you’ve set up.
am! Word将您在文档中引用的所有作品以正确的顺序和格式添加到参考书目中,以您设置的写作风格为准。

备份并检索您的源 (Back Up and Retrieve Your Sources)
What if you frequently write papers on similar topics, and you don’t want to have to re-enter the source information to Word each time? Word has you covered here too. Every time you enter a new source, it’s saved in what Word calls the “master source list.” For each new document, you can retrieve old sources from the master list and apply them to your current project.
如果您经常撰写有关类似主题的论文,而又不想每次都将源信息重新输入到Word中怎么办? 你在这里也有报道。 每次输入新源时,它都会保存在Word称为“主源列表”中。 对于每个新文档,您可以从主列表中检索旧资源并将其应用于当前项目。
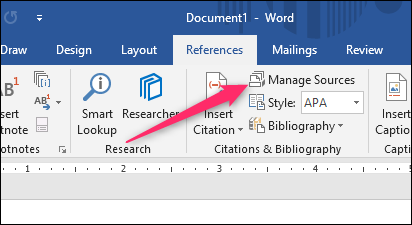
On the “References” tab, click the “Manage Sources” button.
在“参考”选项卡上,单击“管理源”按钮。
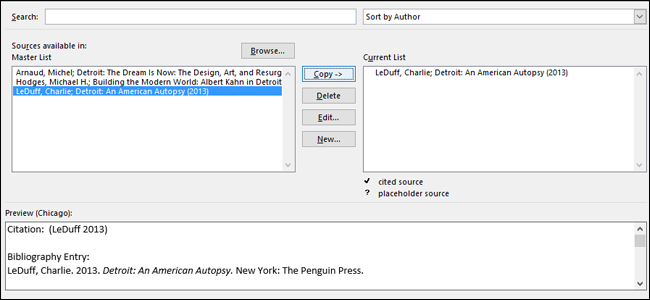
The window that appears shows all the sources you’ve used before. Click a source on the left side of the window, and then click “Copy” to apply it to the current document. Repeat this for each source you need, and then click “OK” to finish.
出现的窗口显示了您之前使用过的所有资源。 单击窗口左侧的源,然后单击“复制”以将其应用于当前文档。 对所需的每个来源重复此操作,然后单击“确定”完成。
If you’ve entered dozens or hundreds of sources, you can use the search tool at the top of this window to quickly narrow down the list by author, title, year, or the tag you’ve personally applied to the individual source.
如果您输入了数十个或数百个来源,则可以使用此窗口顶部的搜索工具来按作者,标题,年份或您个人应用于单个来源的标签快速缩小列表范围。
If you need to move your source list to another computer and another copy of Word, you’ll find your sources stored in an XML file at the following location (where username is your user name):
如果您需要将源列表移动到另一台计算机和Word的另一副本中,则会在以下位置(其中用户名是您的用户名)中找到存储在XML文件中的源:
C:\Users\username\AppData\Roaming\Microsoft\Bibliography
C:\ Users \ 用户名 \ AppData \ Roaming \ Microsoft \ Bibliography
After copying that file to another computer, click the “Manage Sources” button in Word on the new computer, and you can browse for the file.
将文件复制到另一台计算机后,单击新计算机上Word中的“管理源”按钮,即可浏览该文件。
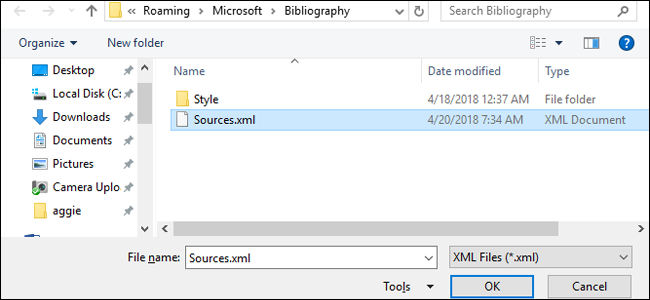
Image source: Shutterstock/Mikael Damkier
图片来源: Shutterstock / Mikael Damkier
word 引文 角标


 2万+
2万+


 被折叠的 条评论
为什么被折叠?
被折叠的 条评论
为什么被折叠?
 到【灌水乐园】发言


