


Back in Android 4.2, Google hid Developer Options. Since most “normal” users don’t need to access the feature, it leads to less confusion to keep it out of sight. If you need to enable a developer setting, like USB Debugging, you can access the Developer Options menu with a quick trip into the About Phone section of the Settings menu.
回到Android 4.2,Google隐藏了开发人员选项。 由于大多数“普通”用户不需要访问该功能,因此可以减少混淆,以免使其看不见。 如果需要启用开发人员设置(如USB调试),则可以快速进入“设置”菜单的“关于电话”部分,访问“开发人员选项”菜单。
如何访问开发人员选项菜单 (How to Access the Developer Options Menu)
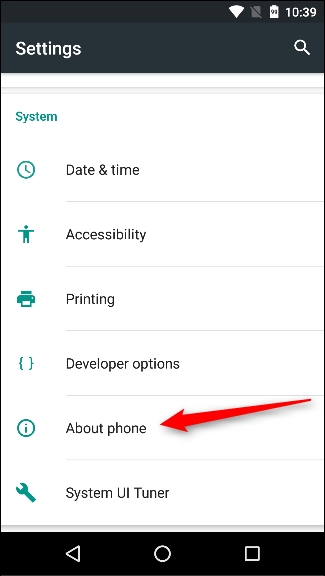
To enable Developer Options, open the Settings screen, scroll down to the bottom, and tap About phone or About tablet.
要启用“开发人员选项”,请打开“设置”屏幕,向下滚动至底部,然后点击关于手机或关于平板电脑。
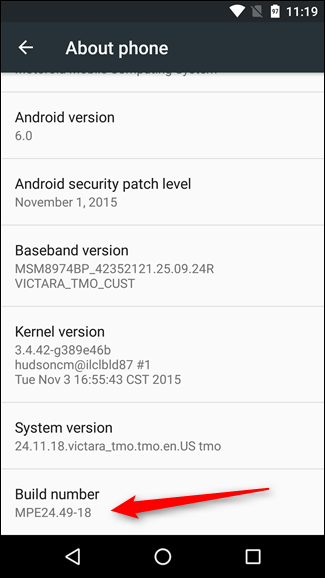
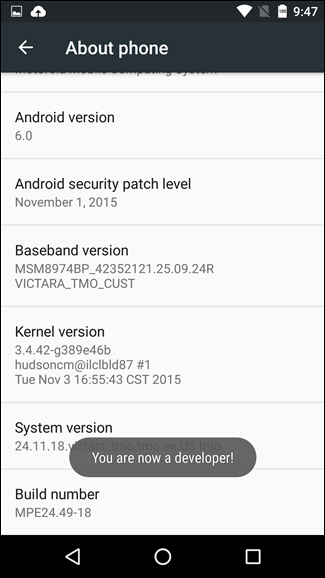
Scroll down to the bottom of the About screen and find the Build number.
向下滚动到“关于”屏幕的底部,找到内部版本号。
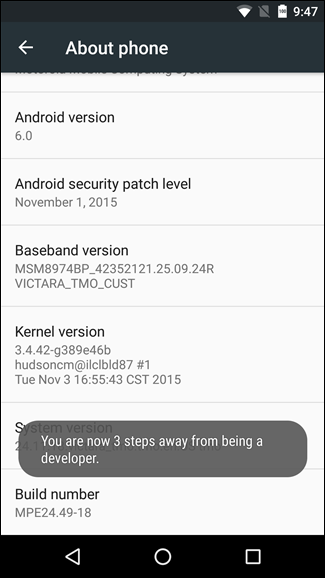
Tap the Build number field seven times to enable Developer Options. Tap a few times and you’ll see a toast notification with a countdown that reads “You are now X steps way from being a developer.”
点击内部版本号七次以启用“开发人员选项”。 轻按几次,您将看到一个吐司通知,显示的倒计时为“您现在距离成为开发人员X步之遥”。
When you’re done, you’ll see the message “You are now a developer!”. Congratulations. Don’t let this newfound power go to your head.
完成后,您将看到消息“您现在是开发人员!”。 恭喜你 不要让这种新发现的力量落到你的头上。
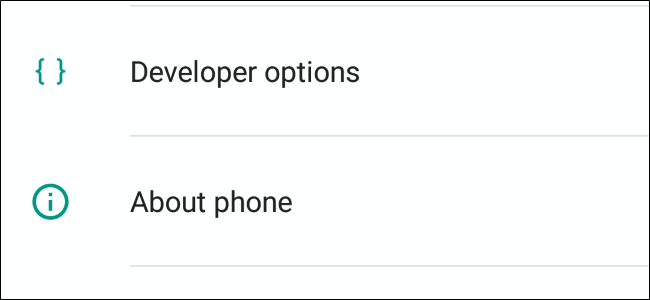
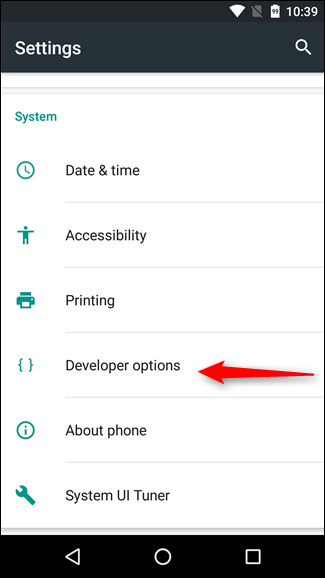
Tap the Back button and you’ll see the Developer options menu just above the “About Phone” section in Settings. This menu is now enabled on your device—you won’t have to repeat this process again unless you perform a factory reset.
点按“后退”按钮,您将在“设置”中“关于电话”部分的上方看到开发人员选项菜单。 现在,设备上已启用此菜单-除非执行出厂重置,否则您无需再次重复此过程。
如何启用USB调试 (How to Enable USB Debugging)
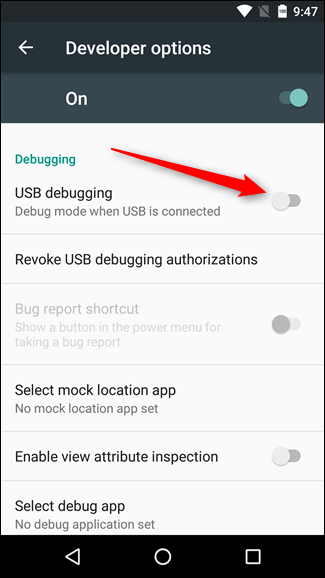
To enable USB Debugging, you’ll need to jump into the Developer options menu, scroll down to the Debugging section, and toggle the “USB Debugging” slider.
要启用USB调试,您需要跳到“开发人员”选项菜单,向下滚动到“调试”部分,然后切换“ USB调试”滑块。
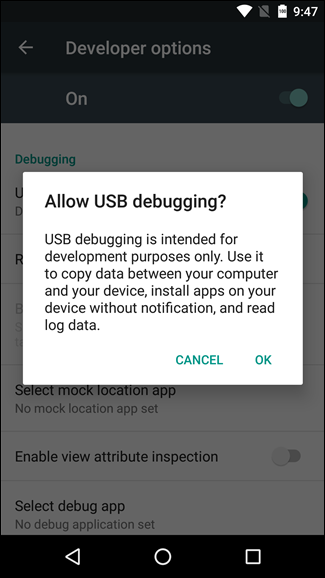
Once upon a time, USB Debugging was thought to be a security risk if left on all the time. Google has done a few things that make that less of an issue now, because debugging requests have to be granted on the phone—when you plug the device into an unfamiliar PC, it will prompt you to allow USB debugging (as seen in the screenshot below).
从前,如果一直将USB调试视为安全隐患。 Google已经做了一些使事情变得不那么重要的事情,因为必须在电话上发出调试请求-当您将设备插入陌生的PC时,它将提示您允许USB调试(如屏幕截图所示)下面)。

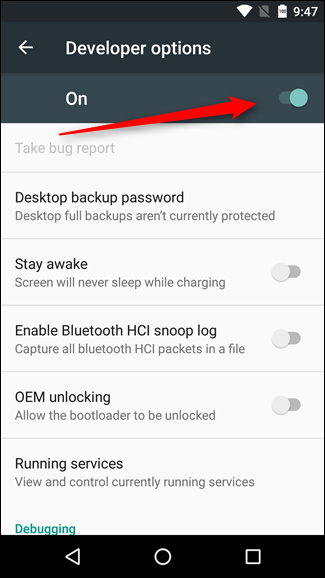
If you still want to disable USB debugging and other developer options when you don’t need them, slide the switch at the top of the screen. Easy peasy.
如果在不需要时仍要禁用USB调试和其他开发人员选项,请滑动屏幕顶部的开关。 十分简单。
Developer Options are power settings for developers, but that doesn’t mean non-developer users can’t benefit from them as well. USB debugging is required for things like adb, which in turn is used for rooting devices. Once your device is rooted, the possibilities are endless.
开发人员选项是开发人员的强大设置,但这并不意味着非开发人员用户也无法从中受益。 诸如adb之类的东西需要USB调试,而后者又用于生根设备 。 设备扎根后, 可能性将无穷无尽 。


 7503
7503

 被折叠的 条评论
为什么被折叠?
被折叠的 条评论
为什么被折叠?
 到【灌水乐园】发言


