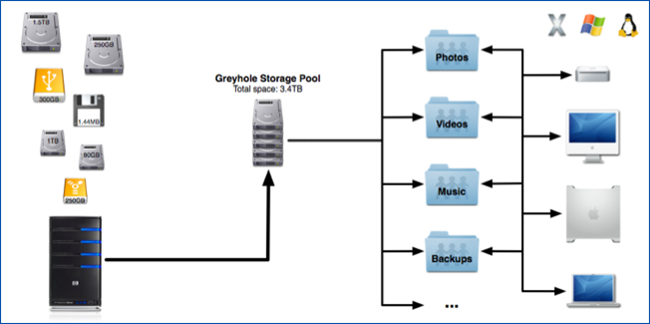
We have just shown you that you can upgrade your Windows Home Server for free by choosing the open source Amahi server. Now that it’s installed, here’s how to manage your drives, shares, and storage pool.
我们刚刚向您展示了您可以通过选择开源Amahi服务器免费升级Windows Home Server 。 现在已经安装了,这里是管理驱动器,共享和存储池的方法。
添加硬盘 (Add Hard Drive)
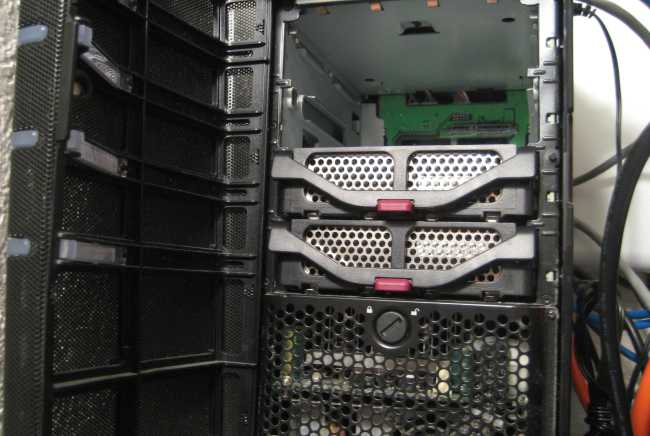
The first step to adding storage is to add more drives. To do that, shutdown the server and plug in the additional hard drives you would like to add.
添加存储的第一步是添加更多驱动器。 为此,请关闭服务器并插入要添加的其他硬盘驱动器。
We will need to format the new drive so make sure you have a backup of anything you may need.
我们将需要格式化新驱动器,因此请确保您有所需备份。
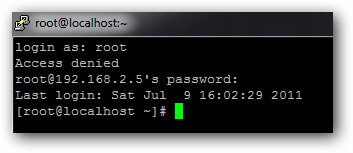
Power on the Amahi machine and use another computer to SSH to the server.
打开Amahi机器的电源,然后使用另一台计算机SSH到服务器。
If you don’t have an SSH client on another computer you can also use anyterm from the Amahi repository.
如果您在另一台计算机上没有SSH客户端,则也可以使用Amahi存储库中的anyterm 。
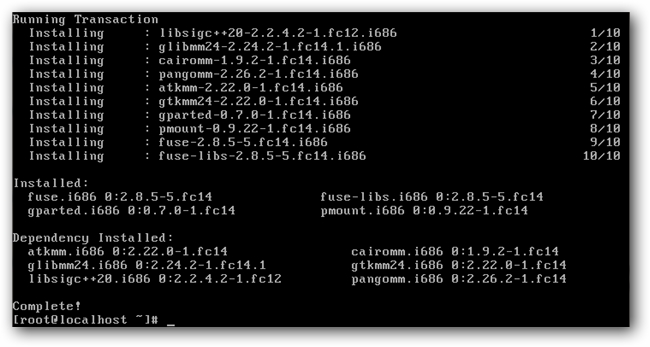
First, install a few tools so we can mount and format the drive(s). Run this command as root:
首先,安装一些工具,以便我们可以安装和格式化驱动器。 以超级用户身份运行此命令:
yum -y install pmount fuse fuse-libs ntfs-3g gparted util-linux-ng
yum -y install pmount fuse fuse-libs ntfs-3g gparted util-linux-ng
Next, check to make sure your hard drive was detected with the command
接下来,检查以确保使用以下命令检测到您的硬盘驱动器
ls -l /dev/disk/by-id/ | egrep -v "part|scsi"
ls -l /dev/disk/by-id/ | egrep -v "part|scsi"
You will want to look for something that starts with “ata-” because these are your IDE and SATA drives while something that starts with “usb-” will be a USB hard drive. Make note of the part after the “-> ../../sd” because that corresponds to your hard drive letter in /dev/sdX
您将要查找以“ ata-”开头的内容,因为它们是您的IDE和SATA驱动器,而以“ usb-”开头的内容将是USB硬盘。 记下“-> ../../sd”之后的部分,因为这与/ dev / sdX中的硬盘驱动器号相对应

Using the drive letter you just got, launch cfdisk from the terminal as root with your new drive as it’s only option.
使用您刚得到的驱动器号,从终端以root身份启动cfdisk,这是新驱动器的唯一选择。
Make sure this is your new drive and not an existing drive with data. All of the information will be formatted from the drive in this next step. Typically if you only have two hard drives the first will be /dev/sda while the second will be /dev/sdb
确保这是您的新驱动器,而不是具有数据的现有驱动器。 下一步将从驱动器格式化所有信息。 通常,如果您只有两个硬盘驱动器,则第一个将是/ dev / sda,而第二个将是/ dev / sdb
In the example above I will launch cfdisk with:
在上面的示例中,我将使用以下命令启动cfdisk:
cfdisk /dev/sdb
cfdisk /dev/sdb
If you have partitions already on the drive use up/down to select the partition(s) and left/right to select the delete action at the bottom.
如果驱动器上已经有分区,请使用向上/向下选择分区,并使用向左/向右选择底部的删除操作。
Once all the partitions have been deleted you can then select new, to create a new partition, and then write the new partition table to the drive.
删除所有分区后,您可以选择“新建”以创建新分区,然后将新分区表写入驱动器。
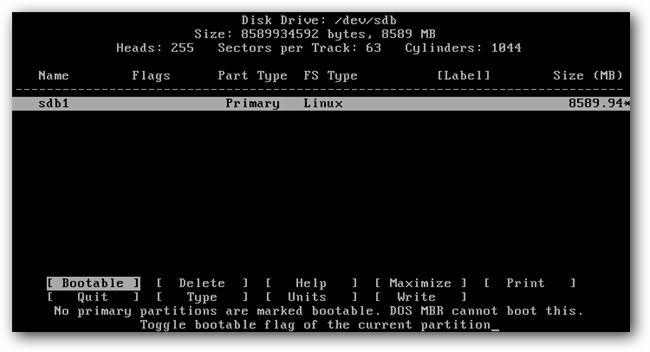
Quite cfdisk when the actions have been completed and then run the command below replacing sdX with your drive letter.
完成操作后请使用cfdisk,然后运行下面的命令,将sdX替换为驱动器号。
mkfs.ext4 -j /dev/sdX1
mkfs.ext4 -j /dev/sdX1
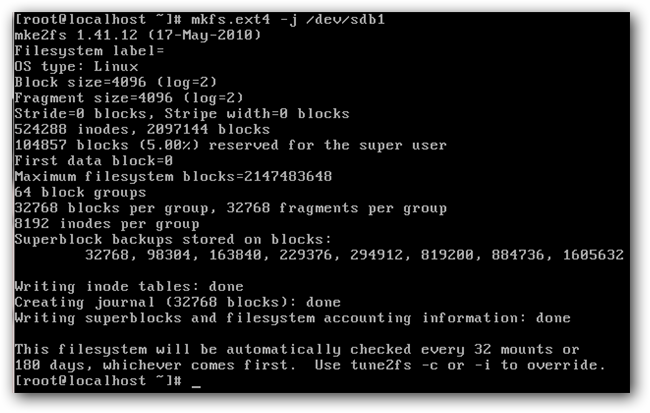
Now the drive has a fresh partition formatted and ready to go. Run the command
现在,驱动器已格式化并可以使用了新分区。 运行命令
hda-diskmount
hda-diskmount
as root to automatically mount your new partition.
以root用户身份自动挂载新分区。

The hda-diskmount command will also give you the line you need to add to /etc/fstab to automatically have the drive mounted every time the server is turned on. Use nano to edit your fstab file as root
hda-diskmount命令还将为您提供您需要添加到/ etc / fstab的行,以便在每次打开服务器时自动安装驱动器。 使用nano以root身份编辑fstab文件
nano /etc/fstab
nano /etc/fstab
and add the suggested line from the hda-diskmount command to the bottom of the file.
并将建议的行从hda-diskmount命令添加到文件底部。

Reboot the system and when the server is back up go to to the webpanel to verify the hard drive is mounted.
重新启动系统,并在服务器备份时转到Webpanel以确认已安装硬盘驱动器。
管理存储池 (Manage Storage Pool)
Now that the hard drive is formatted and mounted, go to your HDA’s setup page, click on the settings page and then check the box for advanced settings.
现在,硬盘驱动器已格式化并安装好了,请转到HDA的设置页面,单击设置页面,然后选中高级设置复选框。
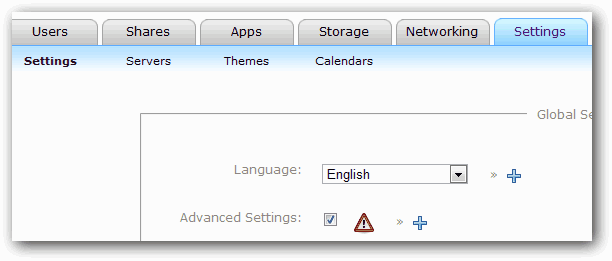
Now go to the shares -> storage pool tab and check the box next to your new hard drive to use the drive in the greyhole pool.
现在转到共享->存储池选项卡,然后选中新硬盘旁边的框以使用灰Kong池中的驱动器。

If you want to use the benefits of pooled storage you will need to add more than one hard drive to the pool. Repeat the steps above to add more drives to your HDA and then pool the drives here.
如果要利用池化存储的优势,则需要向池中添加多个硬盘驱动器。 重复上述步骤,将更多驱动器添加到您的HDA中,然后在此处合并驱动器。
建立分享 (Create Share)
Now that you have more space and the storage is being pooled, click on the shares -> shares tab and click new share.
既然您有更多空间并且正在对存储进行池化,请单击共享->共享选项卡,然后单击新共享。
Give the share a name and select if you want it to be read only and visible.
给共享命名,然后选择是否使其只读和可见。

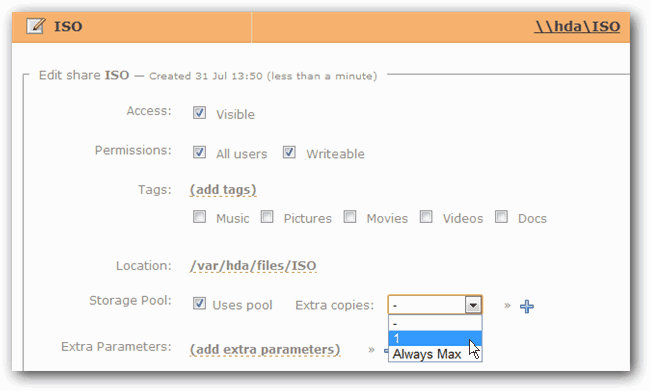
Once the share is created, click on the edit icon next to the share name and check the box to use the storage pool.
创建共享后,单击共享名称旁边的编辑图标,然后选中该框以使用存储池。
If you have more than one hard drive added to the pool you can also select how many copies of the files you would like to store in case hard drives fail.
如果池中添加了多个硬盘驱动器,则您还可以选择要在硬盘驱动器发生故障时要存储的文件副本数。
For more information or advanced setup of your storage, check out the Amahi wiki
有关存储的更多信息或高级设置,请查看Amahi Wiki
Amahi wiki: Adding a Second Hard Drive
翻译自: https://www.howtogeek.com/69192/learn-how-to-upgrade-and-manage-your-amahi-server-storage/


 779
779


 被折叠的 条评论
为什么被折叠?


