


synology nfs
MacOS’s Time Machine backup utility lets you back up your entire computer to an external hard drive, but you can also back up to a NAS that’s on your local network. Here’s how to do it.
MacOS的Time Machine备份实用程序使您可以将整个计算机备份到外部硬盘驱动器,但也可以备份到本地网络上的NAS。 这是操作方法。
We’ve shown you how to set up Time Machine on your Mac. It’s pretty easy to do when you’re just backing up to an external hard drive that’s connected directly to your computer. However, if you’d rather use your Synology NAS that’s connected to your local network, there’s a bit more work to do (but it’s still pretty easy).
我们已经向您展示了如何在Mac上设置Time Machine 。 当您仅备份到直接连接到计算机的外部硬盘驱动器时,这很容易做到。 但是,如果您希望使用连接到本地网络的Synology NAS,则还有很多工作要做(但仍然很容易)。
第一步:专门为Time Machine创建共享 (Step One: Create a Share Specifically for Time Machine)
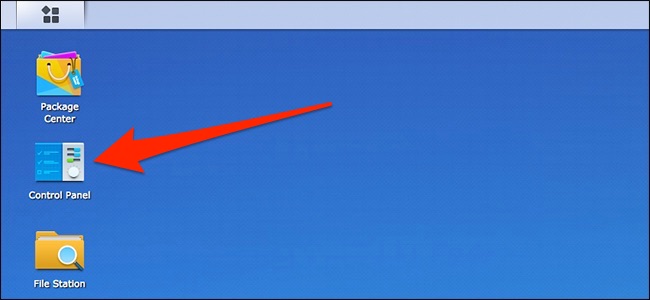
The first thing you’ll need to do is create a separate shared folder on your NAS that’s specifically for Time Machine backups. To do this, fire up DiskStation Manager and open up the Control Panel.
您需要做的第一件事是在NAS上创建一个单独的共享文件夹,专门用于Time Machine备份。 为此,请启动DiskStation Manager并打开“控制面板”。
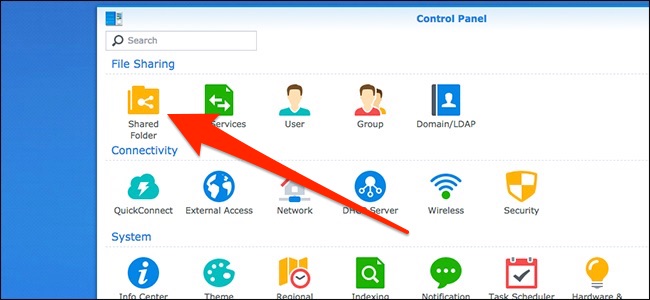
Click the “Shared Folder” item.
单击“共享文件夹”项。
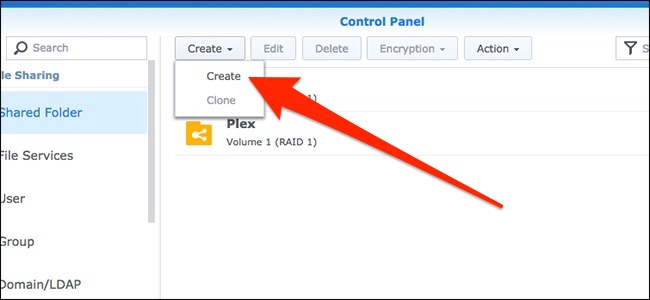
Open the “Create” dropdown menu, and then click the “Create” command.
打开“创建”下拉菜单,然后单击“创建”命令。
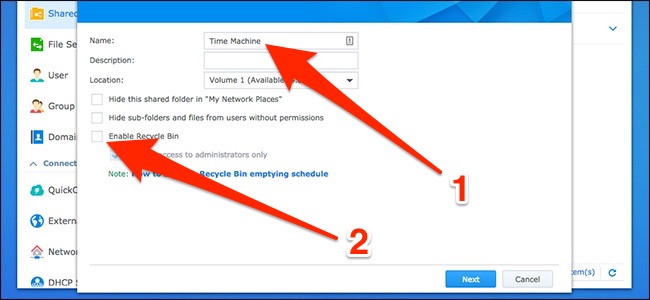
Give the shared folder a name (like “Time Machine”) and then disable the Recycle Bin (you won’t need this for Time Machine backups). Hit “Next” to continue.
为共享文件夹命名(例如“ Time Machine”),然后禁用回收站(Time Machine备份不需要此名称)。 点击“下一步”继续。
On the next screen, you can enable encryption for your Time Machine backups if you want. If you choose to do this, it’s better for your Synology NAS to handle it, rather than macOS, as that will free up resources on your computer.
如果需要,可以在下一个屏幕上为Time Machine备份启用加密。 如果您选择这样做,则Synology NAS最好处理它而不是macOS,因为这样可以释放计算机上的资源。

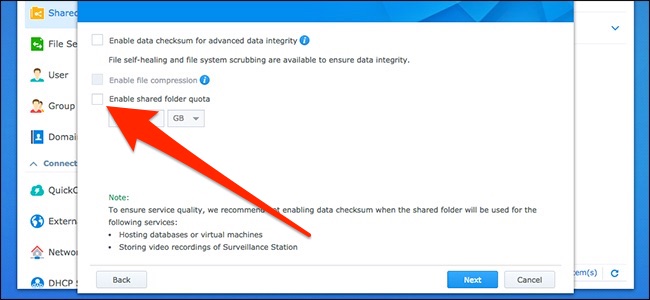
Turn on the “Enable Shared Folder Quota” option. This places a maximum capacity on the shared folder so that Time Machine doesn’t continue to create more and more backups until it fills up the entire NAS.
打开“启用共享文件夹配额”选项。 这样可以在共享文件夹上放置最大容量,以便Time Machine在填满整个NAS之前不会继续创建越来越多的备份。
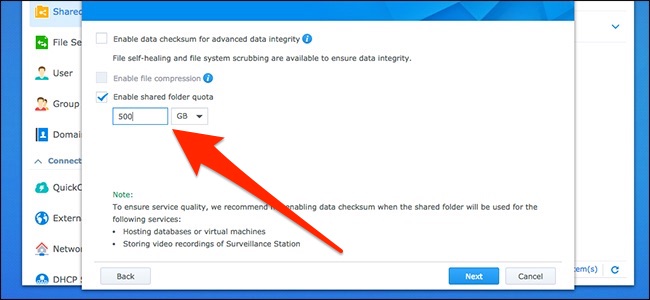
Below that, enter a storage size that’s about three times the size of your Mac’s storage capacity (e.g. if your Mac has 250 GB of storage space, make the storage size 750 GB). You can enter whatever you want, but I find this to be the sweet spot that includes a longer history of backups without getting too crazy on storage space.
在此之下,输入的存储大小约为Mac的存储容量的三倍(例如,如果您的Mac有250 GB的存储空间,则将存储大小设为750 GB)。 您可以输入所需的任何内容,但是我发现这是最佳的选择,其中包括更长的备份历史记录,而又不会对存储空间太过疯狂。
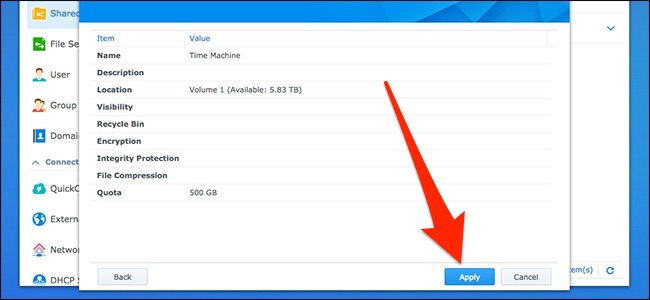
On the next screen, hit the “Apply” button to confirm the settings.
在下一个屏幕上,点击“应用”按钮以确认设置。
Next, you’ll set user permissions for the shared folder. The defaults are pretty good, so you’re safe just going ahead and hitting the “OK” button. You can create a new user specifically for the Time Machine backup with a different password and everything, but it’s not required.
接下来,您将为共享文件夹设置用户权限。 默认值非常好,因此您可以放心,然后单击“确定”按钮。 您可以使用不同的密码和其他所有方式专门为Time Machine备份创建一个新用户,但这不是必需的。

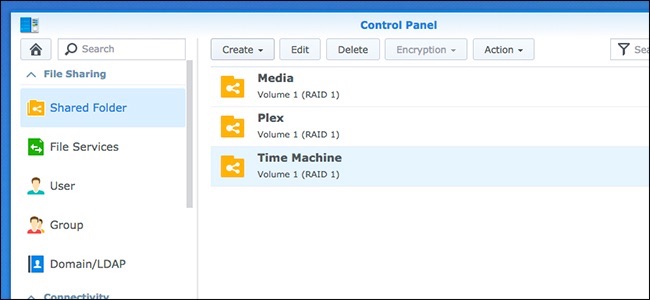
You’ll now see your new Time Machine shared folder in the list.
现在,您将在列表中看到新的Time Machine共享文件夹。
第二步:为共享启用Time Machine访问 (Step Two: Enable Time Machine Access for the Share)
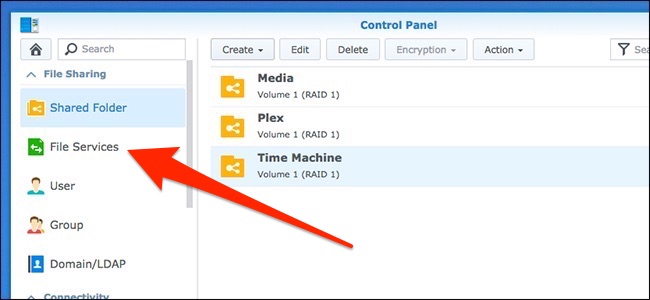
Now that you’ve created the shared folder, you need to enable a couple of features so that Time Machine can successfully back up to it. To get started with this, click “File Services” in the left-hand sidebar of the NAS control panel.
现在,您已经创建了共享文件夹,您需要启用几个功能,以便Time Machine可以成功备份到该文件夹。 要开始使用此功能,请单击NAS控制面板左侧栏中的“文件服务”。
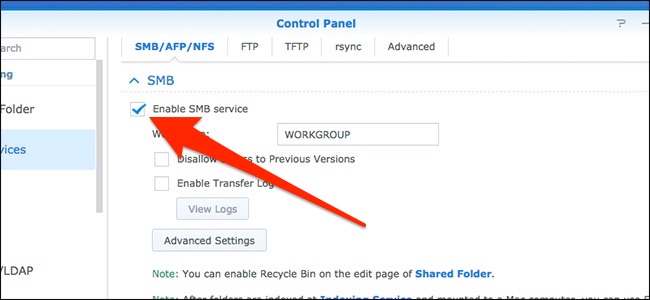
On the “SMB/AFP/NFS” tab, enable the “Enable SMB Service” option. If you have macOS El Capitan or older, you’ll want to use AFP instead by scrolling down a bit and ticking the “Enable AFP Service” check box.
在“ SMB / AFP / NFS”选项卡上,启用“启用SMB服务”选项。 如果您使用的是macOS El Capitan或更早的版本,则需要向下滚动一点并勾选“启用AFP服务”复选框,以使用AFP。
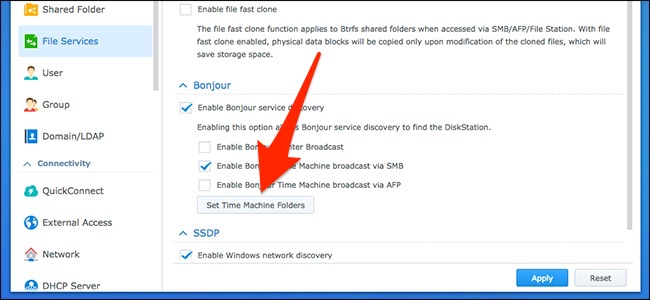
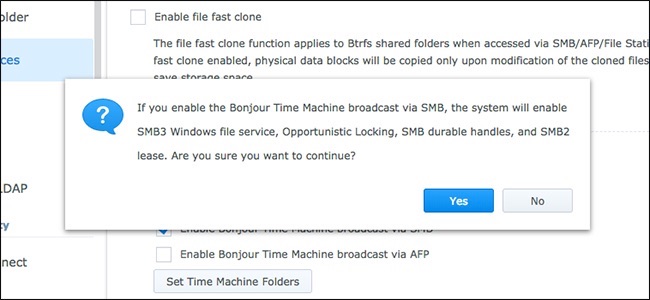
Next, witch over to the “Advanced” tab, and then tick the “Enable Bonjour Time Machine broadcast via SMB” option (or AFP if you’re on an older version of macOS).
接下来,转到“高级”选项卡,然后勾选“启用通过SMB广播Bonjour Time Machine”选项(如果您使用的是旧版macOS,则选择AFP)。

After that, click the “Set Time Machine Folders” button.
之后,单击“设置Time Machine文件夹”按钮。
Place a check next to the Time Machine shared folder that you created earlier, and then hit the “Apply” button.
选中您之前创建的Time Machine共享文件夹旁边的复选框,然后单击“应用”按钮。
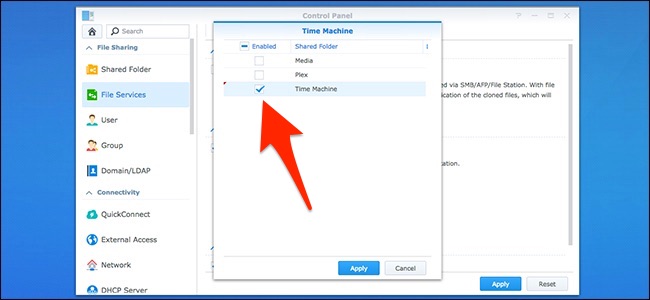
Click “Yes” when the pop-up appears.
出现弹出窗口时,单击“是”。
第三步:将Mac连接到NAS (Step Three: Connect Your Mac to Your NAS)
If you’ve already been using your NAS for other things, it’s likely that your Mac is already connected to it. If it is, skip to the next section. If it’s not already connected, follow the steps below.
如果您已经将NAS用于其他用途,则可能您的Mac已连接到它。 如果是,请跳至下一部分。 如果尚未连接,请执行以下步骤。
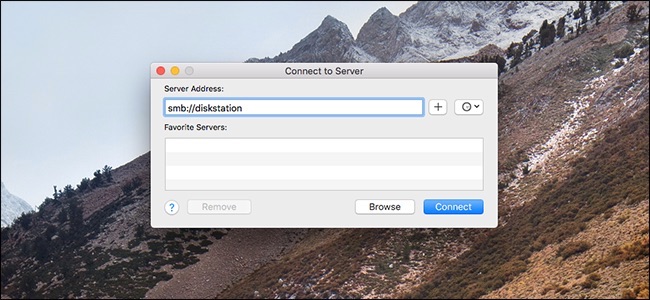
On your Mac desktop, open the “Go” menu, and then select the “Connect to Server” command.
在Mac桌面上,打开“转到”菜单,然后选择“连接到服务器”命令。

In the text box, type smb:// followed by the name of your NAS or its local IP address. Hit “Connect” to continue. You may be prompted to enter the log in credentials for the NAS.
在文本框中,输入smb://然后输入NAS的名称或其本地IP地址。 点击“连接”继续。 可能会提示您输入NAS的登录凭据。
第四步:将Time Machine设置为备份到NAS (Step Four: Set Time Machine to Back Up to Your NAS)
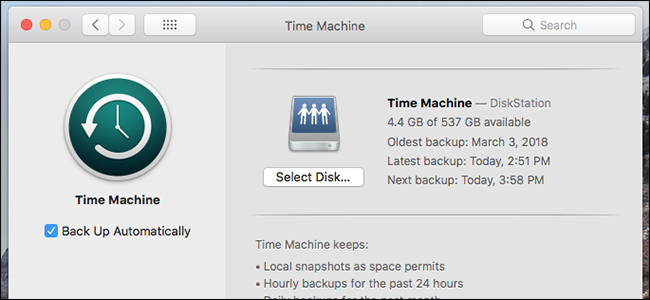
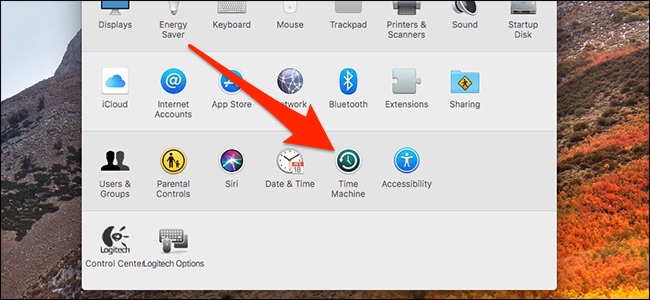
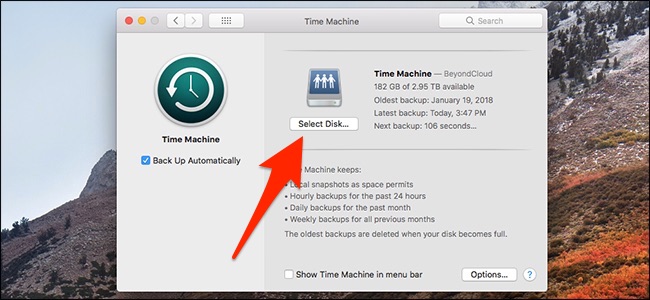
When your Mac is connected to your NAS, open up System Preferences and select the “Time Machine” option.
当Mac连接到NAS时,打开“系统偏好设置”,然后选择“ Time Machine”选项。
Click the “Select Disk” button.
点击“选择磁盘”按钮。
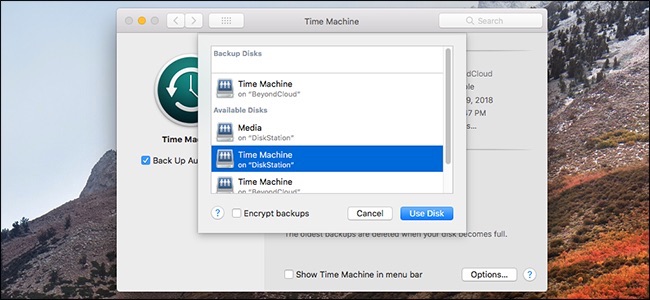
Select the shared folder that you created for your Time Machine backups, and then click the “Use Disk” button.
选择您为Time Machine备份创建的共享文件夹,然后单击“使用磁盘”按钮。
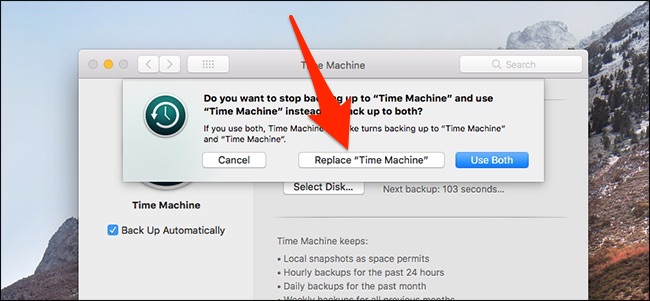
If you had a previous storage drive linked to Time Machine, you’ll get a pop-up asking you if you want to use both disks or replace the old one with your new disk. Choose the “Replace” option.
如果您以前有一个与Time Machine链接的存储驱动器,则会弹出一个对话框,询问您是否要使用两个磁盘或将旧磁盘替换为新磁盘。 选择“替换”选项。
You may be prompted to enter your NAS’s log in credentials again before you can continue, but when that’s done, you’ll be all set.
在继续操作之前,系统可能会提示您再次输入NAS的登录凭据,但是,一切准备就绪。
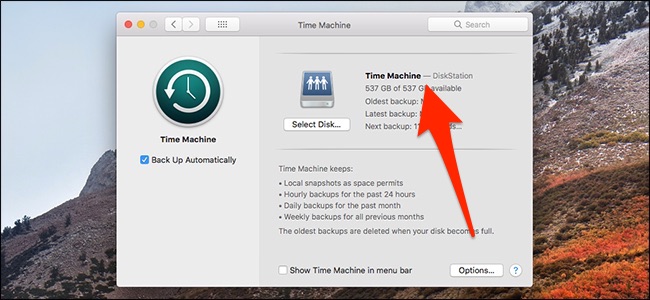
Your Mac will now automatically back up to your Synology NAS.
您的Mac现在将自动备份到Synology NAS。
翻译自: https://www.howtogeek.com/347166/how-to-back-up-your-mac-to-your-synology-nas/
synology nfs


 1194
1194

 被折叠的 条评论
为什么被折叠?
被折叠的 条评论
为什么被折叠?
 到【灌水乐园】发言


