


finder刷新文件夹
Any location in OS X has options to change its view. The best part is you can set each location to its own particular view based on a location’s contents or your personal preferences.
OS X中的任何位置都可以选择更改其视图。 最好的部分是您可以根据位置的内容或您的个人喜好将每个位置设置为其自己的特定视图。
Wherever you are in Finder, you can right-click and choose “Show View Options.” It doesn’t matter if you click on a blank spot in a folder, or on its contents, you will still be able to access the View Options.
无论您在Finder中的何处,都可以右键单击并选择“显示视图选项”。 单击文件夹中的空白处或其内容都没有关系,您仍然可以访问“查看选项”。

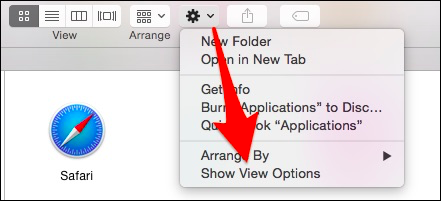
Alternatively, you can click on the “Action” menu in the Finder and choose “Show View Options” from the list.
或者,您可以单击Finder中的“操作”菜单,然后从列表中选择“显示视图选项”。
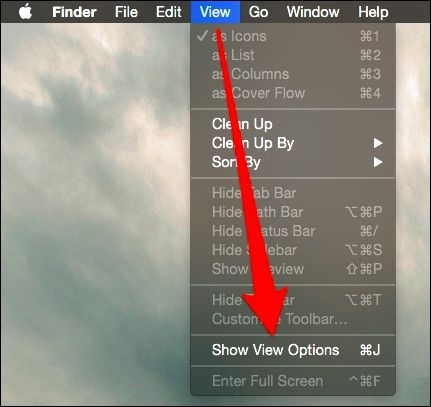
Finally, there’s the “View” menu on the menu bar, note also, you can access the view options from anywhere using the keyboard shortcut “Command + J” (OS X’s keyboard shortcuts really take a lot of extra clicks and time out of doing routine tasks).
最后,菜单栏上有“查看”菜单,还请注意,您可以使用键盘快捷键“ Command + J”从任何位置访问查看选项( OS X的键盘快捷键确实需要很多额外的点击和操作时间)例行任务)。
Regardless of how you access the view options, what you see is going to be fairly uniform from location to location, though they will vary depending on your folder’s view (icon, list, column, and cover flow).
无论您如何访问视图选项,所看到的内容在不同位置都会相当统一,尽管它们会根据文件夹的视图(图标,列表,列和封面流)而有所不同。
Let’s clarify what we mean by that.
让我们澄清一下这是什么意思。
查看所有内容的选项 (View Options for Everything)
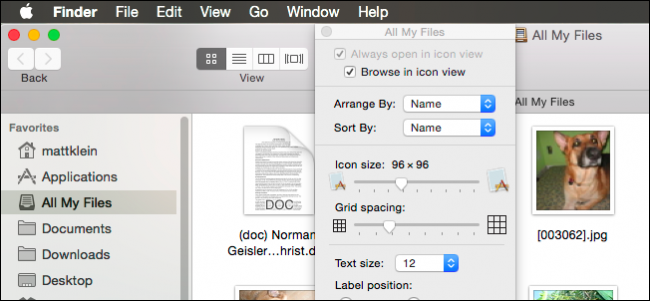
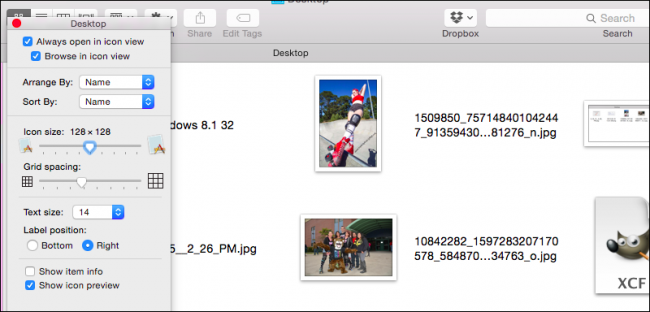
Here we have our Desktop open and you can see our options for the “icon view,” which means contents are displayed as icons.
在这里,我们打开了桌面,您可以看到“图标视图”的选项,这意味着内容显示为图标。
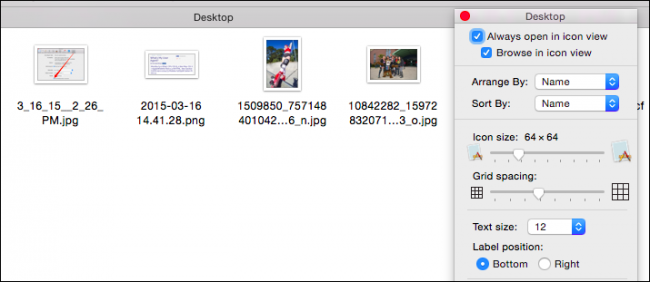
You can do all sorts of stuff here, change the icon size, grid spacing, arrangement, text size, placement, and more. In the following screenshot, we’re still in icon view, but we’ve bumped up the icon size a great deal, increased the text size, and positioned the label to the right.
您可以在此处进行各种操作,更改图标大小,网格间距,排列,文本大小,位置等。 在下面的屏幕截图中,我们仍然处于图标视图中,但是我们大大提高了图标大小,增加了文本大小,并将标签放置在右侧。
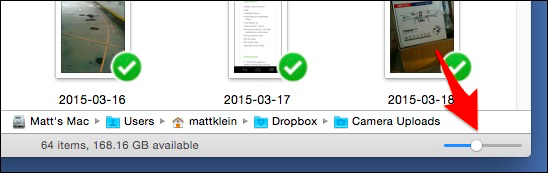
Notice that when you’re in icon view, there’s a little slider in the bottom-right corner, which lets you quickly change icon size. You can also quickly navigate back in the folder’s path by double-clicking on a previous location.
请注意,在图标视图中时,右下角有一个小滑块,可让您快速更改图标大小。 您还可以通过双击上一个位置来快速导航到文件夹的路径。
If you don’t see the path (or any other Finder elements in these screenshots), you can show/hide them by clicking the “View” menu.
如果看不到路径(或这些屏幕快照中的任何其他Finder元素),则可以通过单击“查看”菜单来显示/隐藏它们。
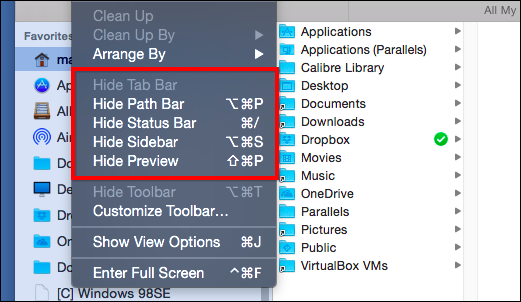
You’ll find you can also “Hide Toolbar” in some Finder locations. When you do this, the Toolbar and Sidebar are hidden. The icon size slider (discussed above) is also moved to the top-right corner.
您会发现您也可以在某些Finder位置“隐藏工具栏”。 当您执行此操作时,工具栏和边栏将被隐藏。 图标大小滑块(如上所述)也移到了右上角。
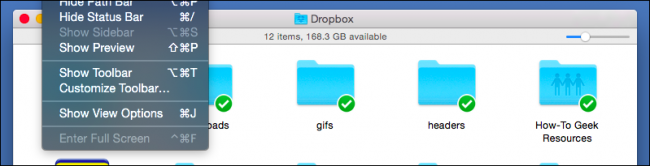
Even if you never want to hide the Toolbar, make sure you remember this option in case you encounter a Finder location with the Toolbar hidden.
即使您永远不想隐藏工具栏,也要确保记住该选项,以防遇到隐藏了工具栏的Finder位置。
整理,整理,清理 (Arrange, Sort, Clean Up)
Before we move on, let’s pause to explain arrange, sort, and clean up. Basically, how it works is like this, you can “arrange” a Finder view, and then you can “sort” each arrangement.
在继续之前,让我们暂停一下以说明排列,排序和清理。 基本上,它的工作方式是这样的,您可以“排列” Finder视图,然后可以“排列”每种排列。
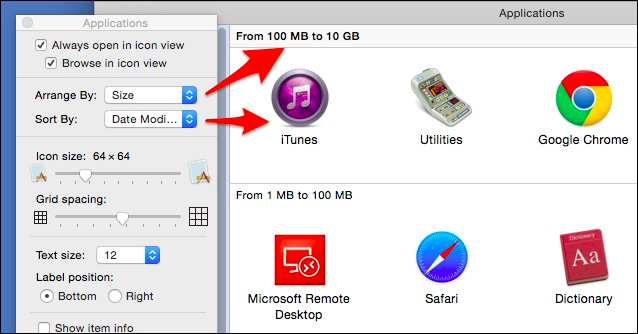
We’ve arranged our Applications folder by size, which is divided into different ranges (100MB to 10GB, 1MB to 100MB, etc.). We’ve further sorted the folder by date modified. We recently changed our iTunes app icon, and Microsoft Remote Desktop and Safari were just updated, so they’re sorted first.
我们已按大小排列了“应用程序”文件夹,该文件夹分为不同的范围(100MB至10GB,1MB至100MB等)。 我们进一步按修改日期对文件夹进行了排序。 我们最近更改了iTunes应用程序图标 ,并且Microsoft远程桌面和Safari刚刚进行了更新,因此它们排在第一位。
You can see what we mean by this in the following screenshot.
您可以在以下屏幕截图中看到我们的意思。
You might also notice that in some Finder views, icons don’t seem to adhere to any order, that you can move them all about and sort them any old way, even stacking icons on top of each other. This is the result you get if your arrange and sort options are set to “None”.
您可能还会注意到,在某些Finder视图中,图标似乎并没有遵循任何顺序,您可以随意移动它们并以任何旧的方式对其进行排序,甚至可以将图标堆叠在一起。 如果将您的安排和排序选项设置为“无”,这就是您得到的结果。

You’re going to encounter view like this. It can get messy, so just know that this is why. Just understand then, that you can either affect an arrange/sort scheme, or you can use the Clean Up option.
您将遇到这样的视图。 它可能会变得凌乱,所以只需知道这就是原因。 然后,请理解,您可以影响排列/排序方案,也可以使用“清理”选项。
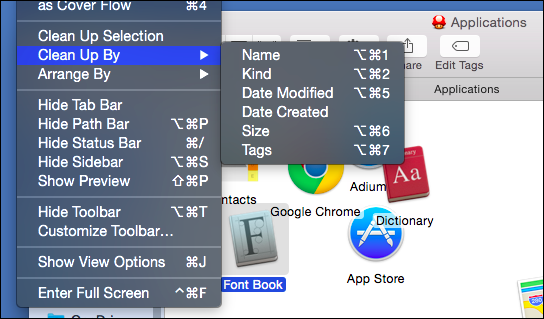
Clean Up exists solely for those views that don’t have any sort or arrange filters applied. Also, if you select an icon or group of icons, you can clean up them up by selection.
清理仅适用于未应用任何排序或排列过滤器的视图。 另外,如果选择一个图标或一组图标,则可以通过选择来清理它们。
If you decide to “Arrange By”, then your icons will not only be arranged but also sorted, which means if you want to go back to the messy look, you’ll have to turn arrange and sort off in View Options.
如果您决定“排列方式”,则不仅会排列图标,还会对图标进行排序,这意味着如果要返回到凌乱的外观,则必须在“视图选项”中关闭排列和排序。
不同的位置,不同的选择 (Different Location, Different Options)
If we switch locations, so too do the view options. There’s no need to right-click or use the action menu again, because the view options stay open, so you can quickly go from location to location making changes.
如果我们切换位置,则视图选项也将切换。 无需右键单击或再次使用操作菜单,因为视图选项保持打开状态,因此您可以快速地在不同位置进行更改。
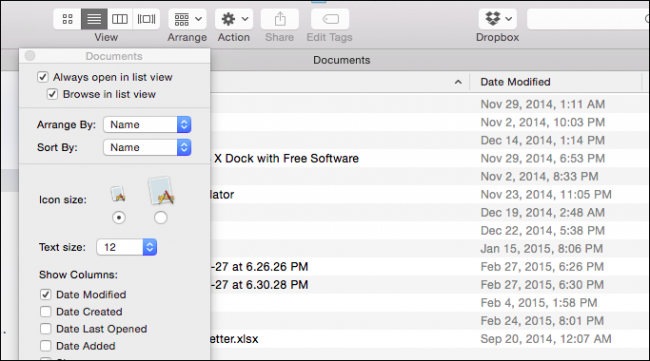
Here’s our Documents folder, which is in List view (versus icon view). List view’s options allow us to choose the columns we want to show, the size of the text, icons (you only get two choices), and more. Additionally, you can now sort stuff by columns so if you want to view by name, date modified, etc.
这是我们的Documents文件夹,它位于“列表”视图(相对于图标视图)中。 列表视图的选项使我们可以选择要显示的列,文本的大小,图标(您只有两个选择)等等。 此外,您现在可以按列对内容进行排序,因此,如果要按名称,修改日期等进行查看。
Note, not only do the View Options change according to the location you’re in, but they also change to reflect the view, which means if you change the view, you can then adjust the options accordingly.
请注意,“视图选项”不仅会根据您所处的位置进行更改,而且还会更改以反映视图,这意味着,如果更改视图,则可以相应地调整选项。
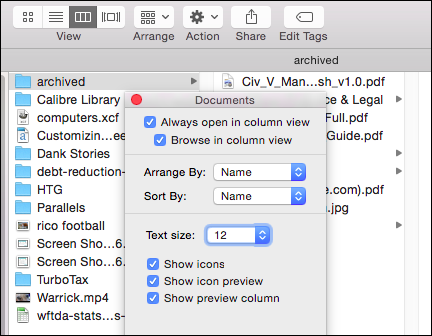
In the following screenshot, we’ve changed our Documents view from list to column view by clicking on the appropriate button in the “View” toolbar. As a result, the options have changed to column view.
在以下屏幕截图中,我们通过单击“视图”工具栏中的相应按钮,将“文档”视图从列表视图更改为列视图。 结果,选项已更改为列视图。
Keep in mind, any changes you make to a folder, will only apply to that folder, which means when you change to another location, it will have its own unique view.
请记住,对文件夹所做的任何更改将仅应用于该文件夹,这意味着当您更改到另一个位置时,它将具有自己的唯一视图。
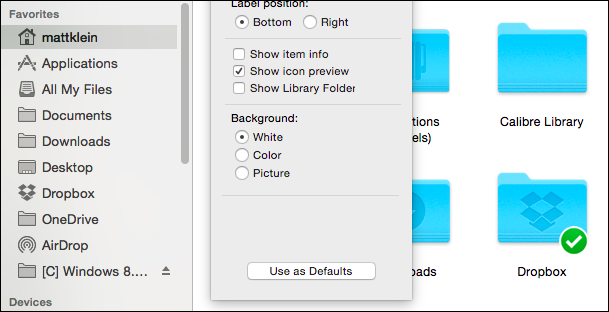
What if you want to create a view for a folder such as your Documents that you want to apply to its subfolders? Easy enough, look at the bottom of the View Options and you’ll see a button that will let you set that view as the default.
如果要为文件夹(例如要应用于其子文件夹的文档)创建视图怎么办? 很简单,查看“视图选项”的底部,您将看到一个按钮,可用于将该视图设置为默认视图。
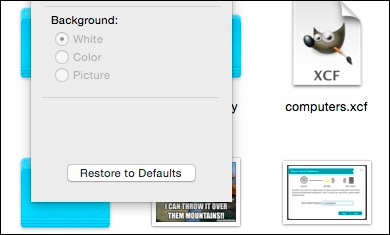
If you hold the “Option” key, the button will change to “Restore to Defaults,” that way you can revert if you change your mind.
如果按住“ Option”键,该按钮将变为“ Restore to Defaults”,这样您可以改变主意恢复原状。
You might have noticed in an earlier screenshot, that some folders have more options available than others. For example, in your Home folder, you can add the Library folder, which is normally hidden but can be accessed by holding “Option” from the Go menu.
您可能已经在早期的屏幕截图中注意到,某些文件夹具有比其他文件夹更多的可用选项。 例如,在您的Home文件夹中,您可以添加Library文件夹,该文件夹通常是隐藏的,但是可以通过从Go菜单中按住“ Option”来访问 。
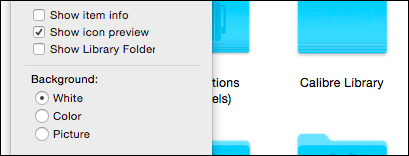
There’s also the background option. If you choose “Color,” will give you a wheel and slider to select a new background color.
还有背景选项。 如果选择“颜色”,将为您提供滚轮和滑块以选择新的背景色。

If you want a picture background in your folder, then that is an option as well. Select the “Picture” option and then drag a photo onto the box next to it.
如果您希望文件夹中有图片背景,那么这也是一个选择。 选择“图片”选项,然后将照片拖到旁边的框中。

You probably want to use high resolution images so they fill out your folder’s background. Luckily OS X already comes with a good collection to get you started, which can be found by navigating to “/Library/Desktop Pictures.”
您可能要使用高分辨率图像,以便它们填充文件夹的背景。 幸运的是,OS X已经附带了一个不错的入门指南,可以通过导航到“ / Library / Desktop Pictures”来找到它。
We think that just about covers almost everything you need to know about OS X’s folder view options. They’re quite versatile and allow a great deal of customization per your habits and needs.
我们认为,这几乎涵盖了您需要了解的有关OS X文件夹视图选项的所有内容。 它们用途广泛,可以根据您的习惯和需求进行大量自定义。
Do you have a comment or question you’d like to share? Please sound off in our discussion forum. We encourage and welcome any feedback you would like to contribute.
您有什么要分享的评论或问题吗? 请在我们的论坛上发声。 我们鼓励并欢迎您想提供的任何反馈。
翻译自: https://www.howtogeek.com/211778/how-to-customize-folder-views-in-os-x/
finder刷新文件夹


 2090
2090


 被折叠的 条评论
为什么被折叠?
被折叠的 条评论
为什么被折叠?
 到【灌水乐园】发言


