


ssisdb
In this article, I am going to explain how to start using the SSISDB database, also known as the SSIS Catalog database. In my previous article, I have provided an overview of this SSIS catalog database in detail. I would recommend you read that article, before moving on further with this if you want to understand how the SSIS catalog database works. The SSIS catalog database is one single database in which you can deploy all your SSIS packages and then organize and manage those packages centrally.
在本文中,我将解释如何开始使用SSISDB数据库,也称为SSIS目录数据库。 在上一篇文章中,我详细介绍了此SSIS目录数据库。 如果您想了解SSIS目录数据库的工作方式,我建议您先阅读该文章,然后再继续进行。 SSIS目录数据库是一个单一数据库,您可以在其中部署所有SSIS软件包,然后集中组织和管理这些软件包。
创建SSIS包 (Creating the SSIS Package)
To begin with, let us start by creating the SSIS package that we will be using to demonstrate how to use the SSISDB database. Head over to Visual Studio and start by creating a new Integration Services project. This will be a very simple package that has a Data Flow Task in it. We will simply read data from a source table in SQL Server and then write it back to a destination table in a different SQL Server database. For demonstrating the use of Environment variables, we will also have two databases for each DEV and PROD as follows.
首先,让我们开始创建SSIS包,我们将使用它来演示如何使用SSISDB数据库。 转至Visual Studio并从创建一个新的Integration Services项目开始 。 这将是一个非常简单的程序包,其中包含一个数据流任务。 我们将简单地从SQL Server中的源表中读取数据,然后将其写回到其他SQL Server数据库中的目标表中。 为了演示环境变量的使用,我们还将为每个DEV和PROD提供两个数据库,如下所示。
-
- SourceTable 源表
- DestinationTable DestinationTable
-
- SourceTable 源表
- DestinationTable DestinationTable
You can run the following script to create these four tables and insert some dummy data into it.
您可以运行以下脚本来创建这四个表,并将一些虚拟数据插入其中。
CREATE DATABASE SQLShackDemo_DEV
GO
CREATE DATABASE SQLShackDemo_PROD
GO

USE SQLShackDemo_DEV
GO

CREATE TABLE SourceTable(
    Subject		VARCHAR(10)
)
GO
CREATE TABLE DestinationTable(
    Subject		VARCHAR(10)
)
GO
INSERT INTO SourceTable (Subject) VALUES ('Maths')
GO


USE SQLShackDemo_PROD
GO

CREATE TABLE SourceTable(
    Subject		VARCHAR(10)
)
GO
CREATE TABLE DestinationTable(
    Subject		VARCHAR(10)
)
GO
INSERT INTO SourceTable (Subject) VALUES ('Physics')
INSERT INTO SourceTable (Subject) VALUES ('Chemistry')
INSERT INTO SourceTable (Subject) VALUES ('Biology')
INSERT INTO SourceTable (Subject) VALUES ('English')
GO

GO
Once you run the above script, you can see the following information being already available in the tables.
运行上述脚本后,您可以在表中看到以下信息。
Figure 1 – DEV and PROD tables
图1 – DEV和PROD表
Let us begin by adding the connection manager to the SSIS project. Right-click on the panel to create both the connection managers as follows.
让我们首先将连接管理器添加到SSIS项目中。 右键单击面板以创建两个连接管理器,如下所示。
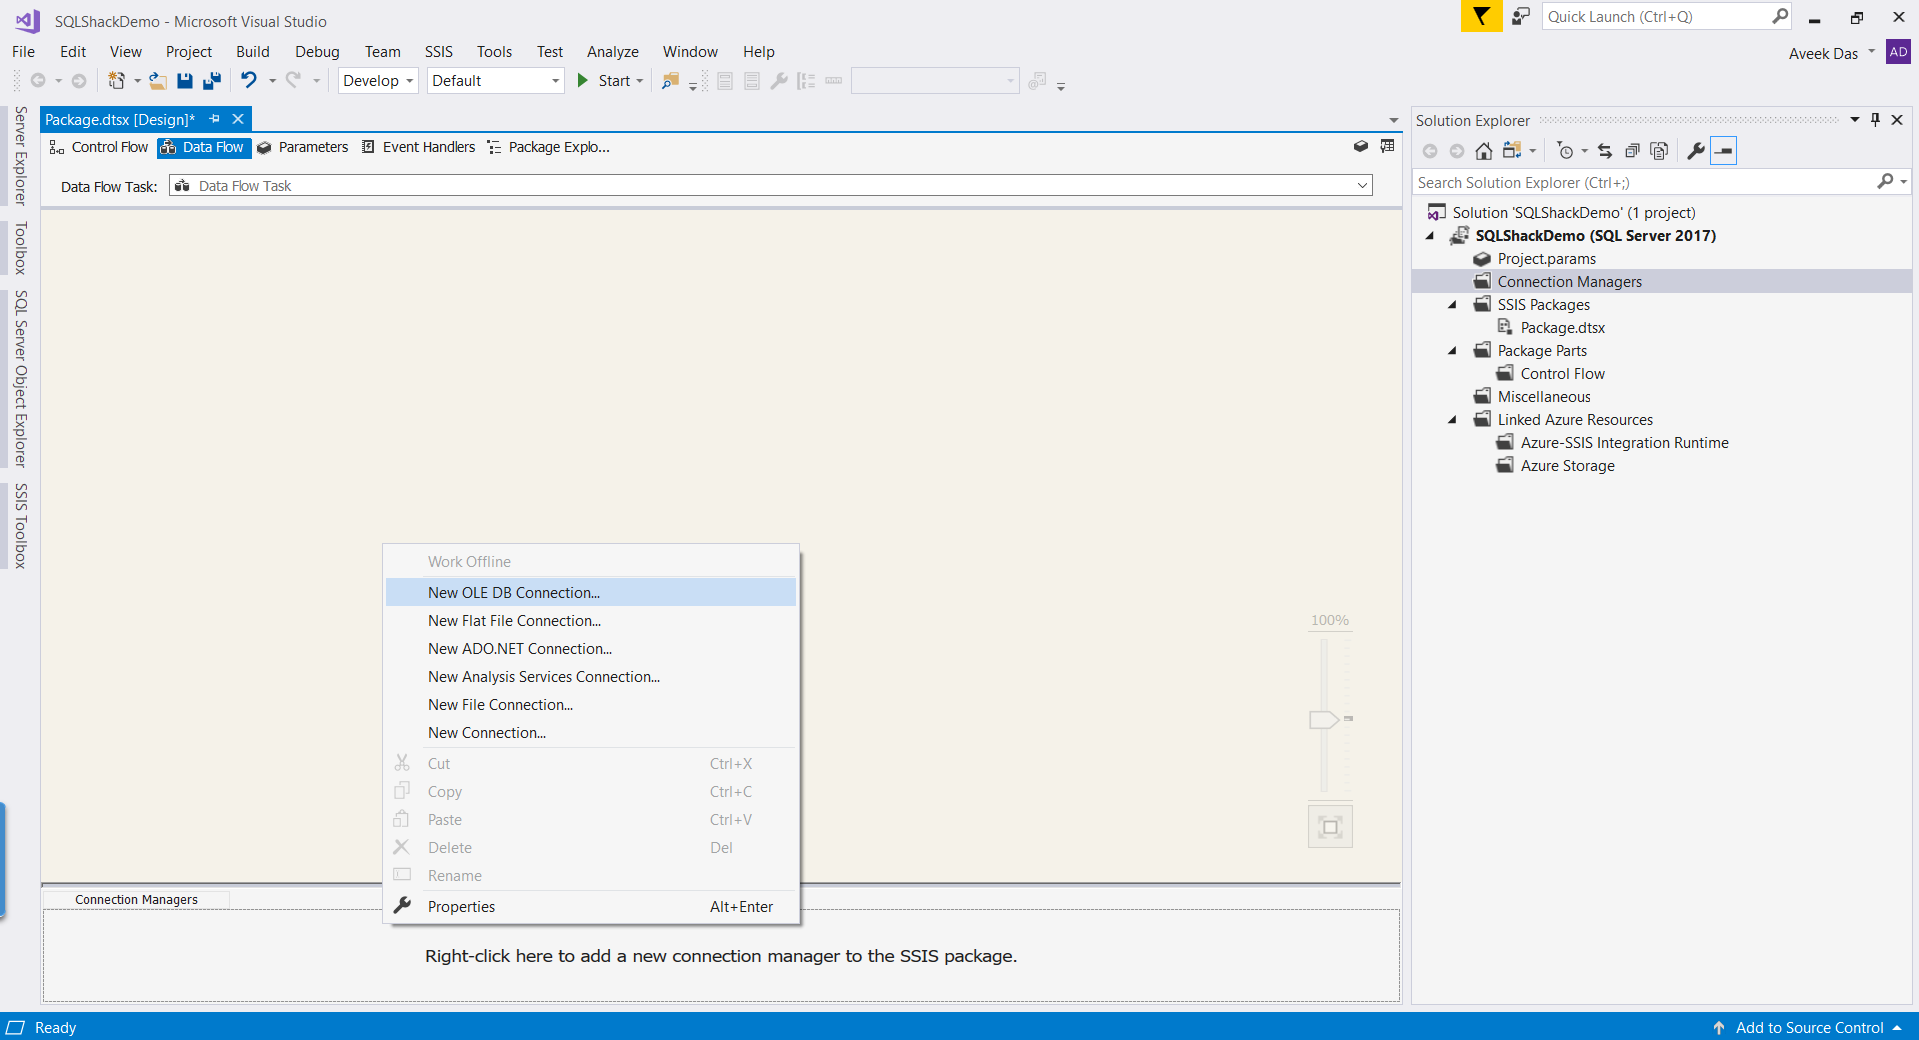
Figure 2 – Creating the OLEDB Connection Manager for Source
图2 –为源创建OLEDB连接管理器
Click New to create a new connection manager.
单击“ 新建”创建一个新的连接管理器。
Figure 3 – Creating the new connection manager
图3 –创建新的连接管理器
Specify the Server name and the database name and click on Test Connection. If the connection is successful, you can click OK and move forward. For now, we will go ahead by selecting the SQLShackDemo_DEV database.
指定服务器名称和数据库名称 ,然后单击“ 测试连接” 。 如果连接成功,则可以单击“ 确定”并继续。 现在,我们将选择SQLShackDemo_DEV数据库。
Figure 4 – Connecting to the DEV database
图4 –连接到DEV数据库
Once the connection manager is created successfully, you can see it on the Connection Managers pane below. Let us now go ahead and create the Data Flow Task.
成功创建连接管理器后,您可以在下面的“连接管理器”窗格中看到它。 现在让我们继续创建数据流任务。
创建数据流任务 (Creating the Data Flow Task)
Drag and drop a Data Flow Task to the Control Flow pane of the SSIS Window. Inside the Data Flow Task, add the following two objects.
将数据流任务拖放到SSIS窗口的“ 控制流”窗格中。 在“数据流任务”中,添加以下两个对象。
- OLEDB Source OLEDB来源
- OLEDB Destination OLEDB目的地
For OLEDB Source, we will select the SourceTable and for OLEDB Destination, we will select the DestinationTable.
对于OLEDB Source ,我们将选择SourceTable ,对于OLEDB Destination ,我们将选择DestinationTable 。
Figure 5 – Selecting the datasource for OLEDB Source
图5 –为OLEDB Source选择数据源
Figure 6 – OLEDB Destination Editor
图6 – OLEDB目标编辑器
Once both the objects are set up correctly, you can map the columns accordingly. Finally, you can see the following.
一旦正确设置了两个对象,就可以相应地映射列。 最后,您可以看到以下内容。
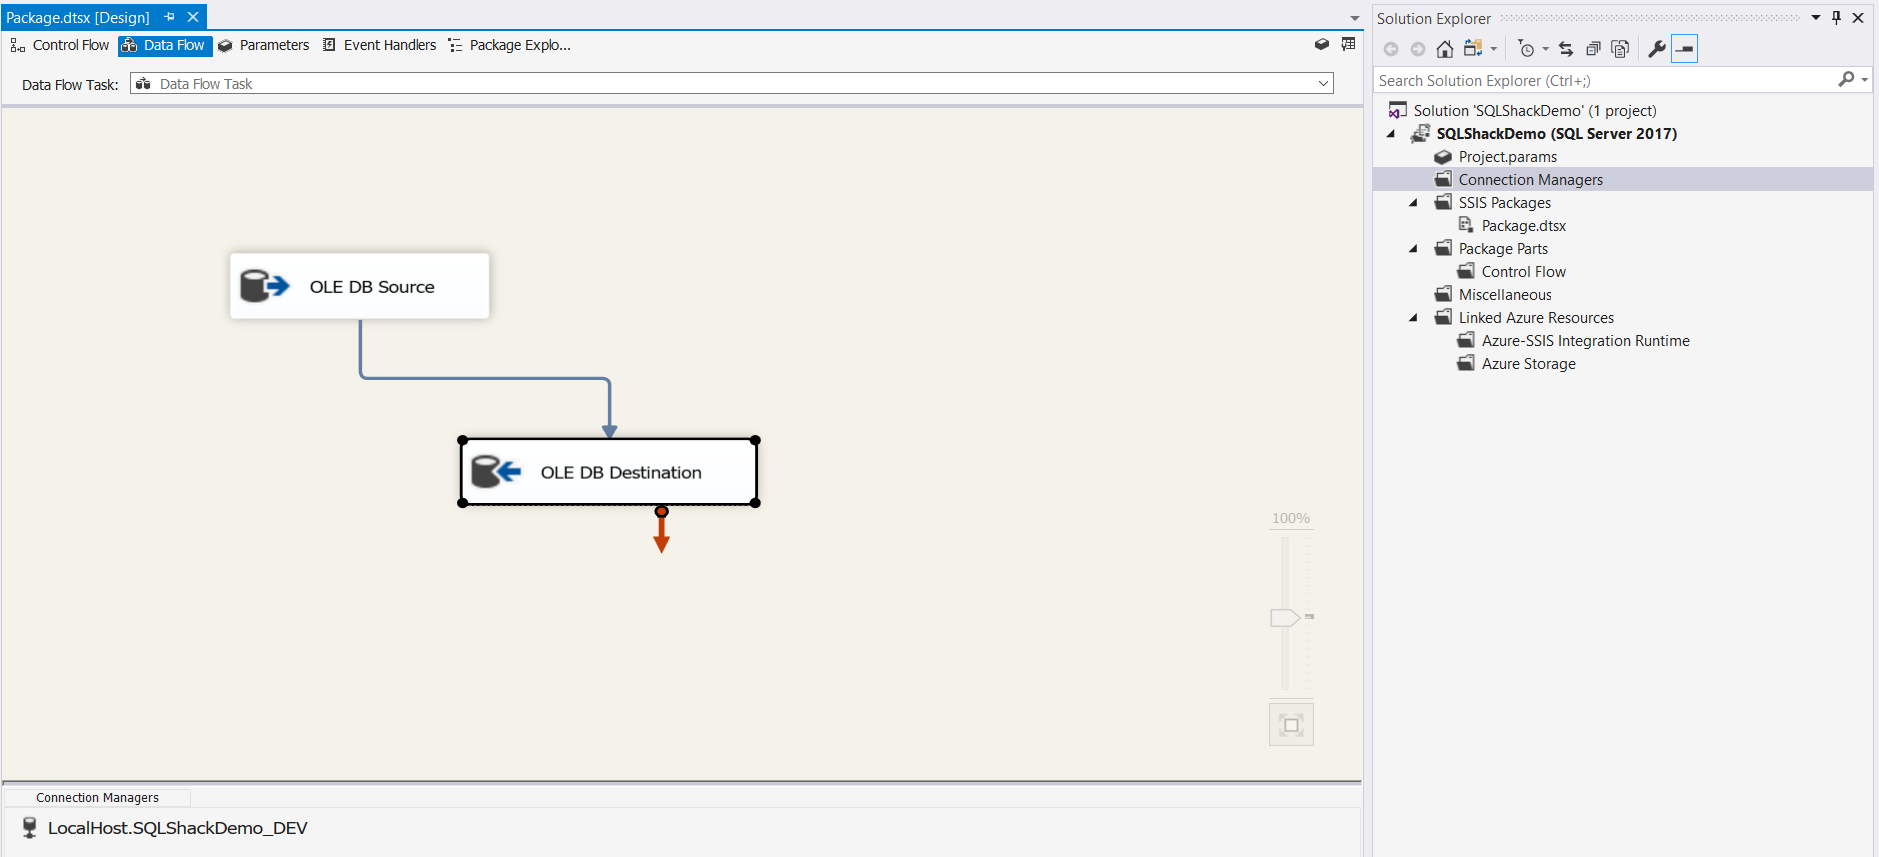
Figure 7 – Data Flow Task Created
图7 –创建的数据流任务
构建和执行SSIS程序包 (Building and Executing the SSIS Package)
Now that we are done with building our SSIS Package, let’s go ahead and build it. Select Build from the menu bar and click on Build Solution.
现在我们已经完成了构建SSIS包的工作,让我们继续进行构建。 从菜单栏中选择Build ,然后单击Build Solution 。
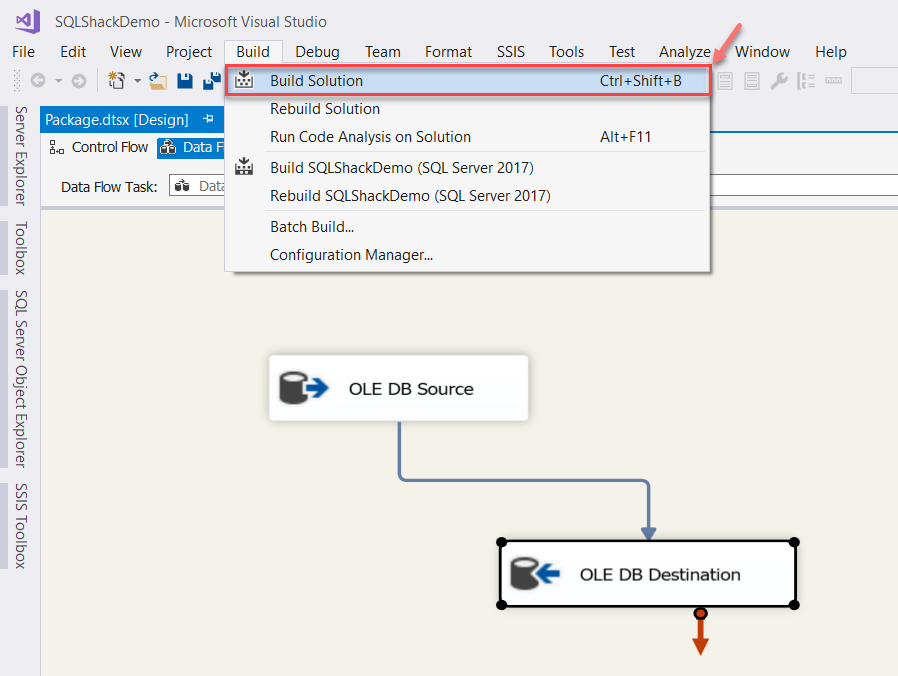
Figure 8 – Build Solution
图8 –构建解决方案
As soon as you build your project, you can see the build window at the bottom. You can read the messages until it reads Build complete.
一旦您构建项目,就可以在底部看到构建窗口。 您可以阅读消息,直到其显示Build complete为止。
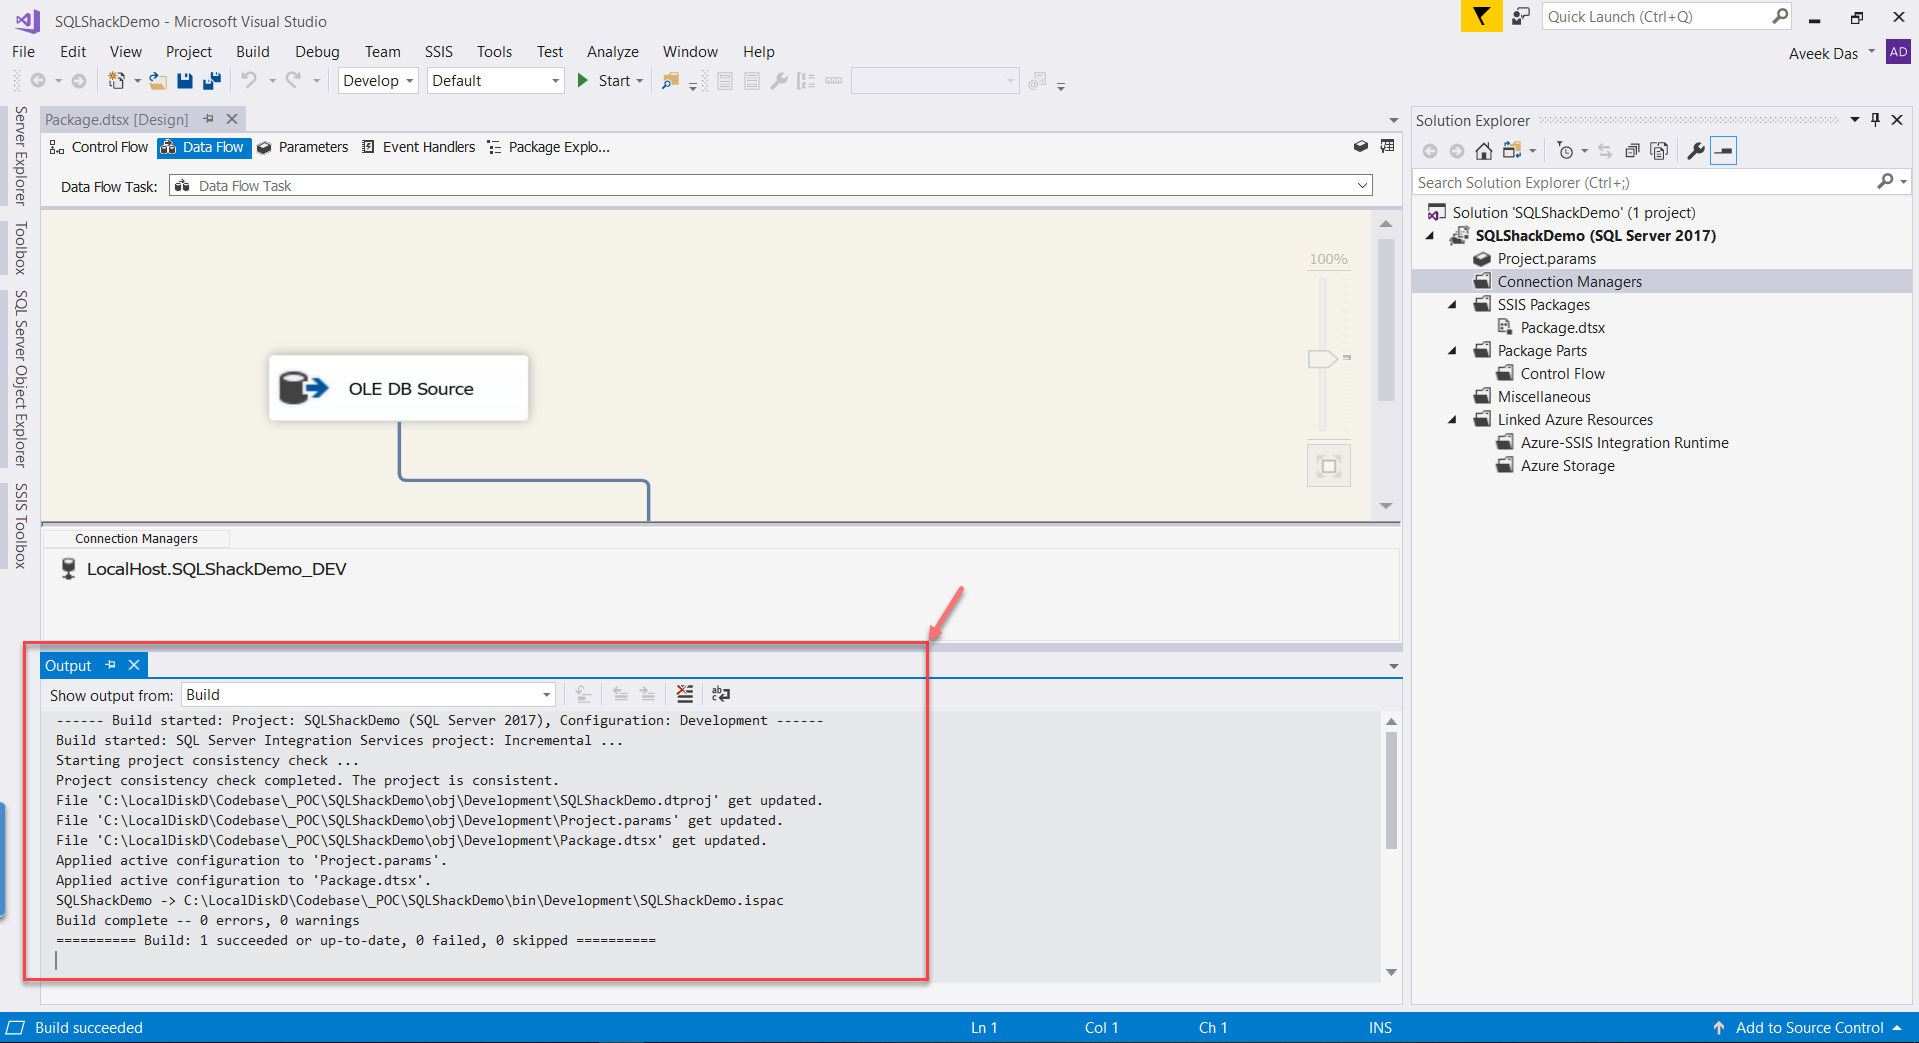
Figure 9 – Build complete
图9 –构建完成
Now that our SSIS package is built, we can go ahead and run this package. Hit F5 on your keyboard or click on Start on the menu bar. As the project executes, it will transfer all the records from your source table to the destination table.
现在,我们的SSIS包已构建,我们可以继续运行该包。 在键盘上按F5或单击菜单栏上的开始 。 在项目执行时,它将把所有记录从源表转移到目标表。
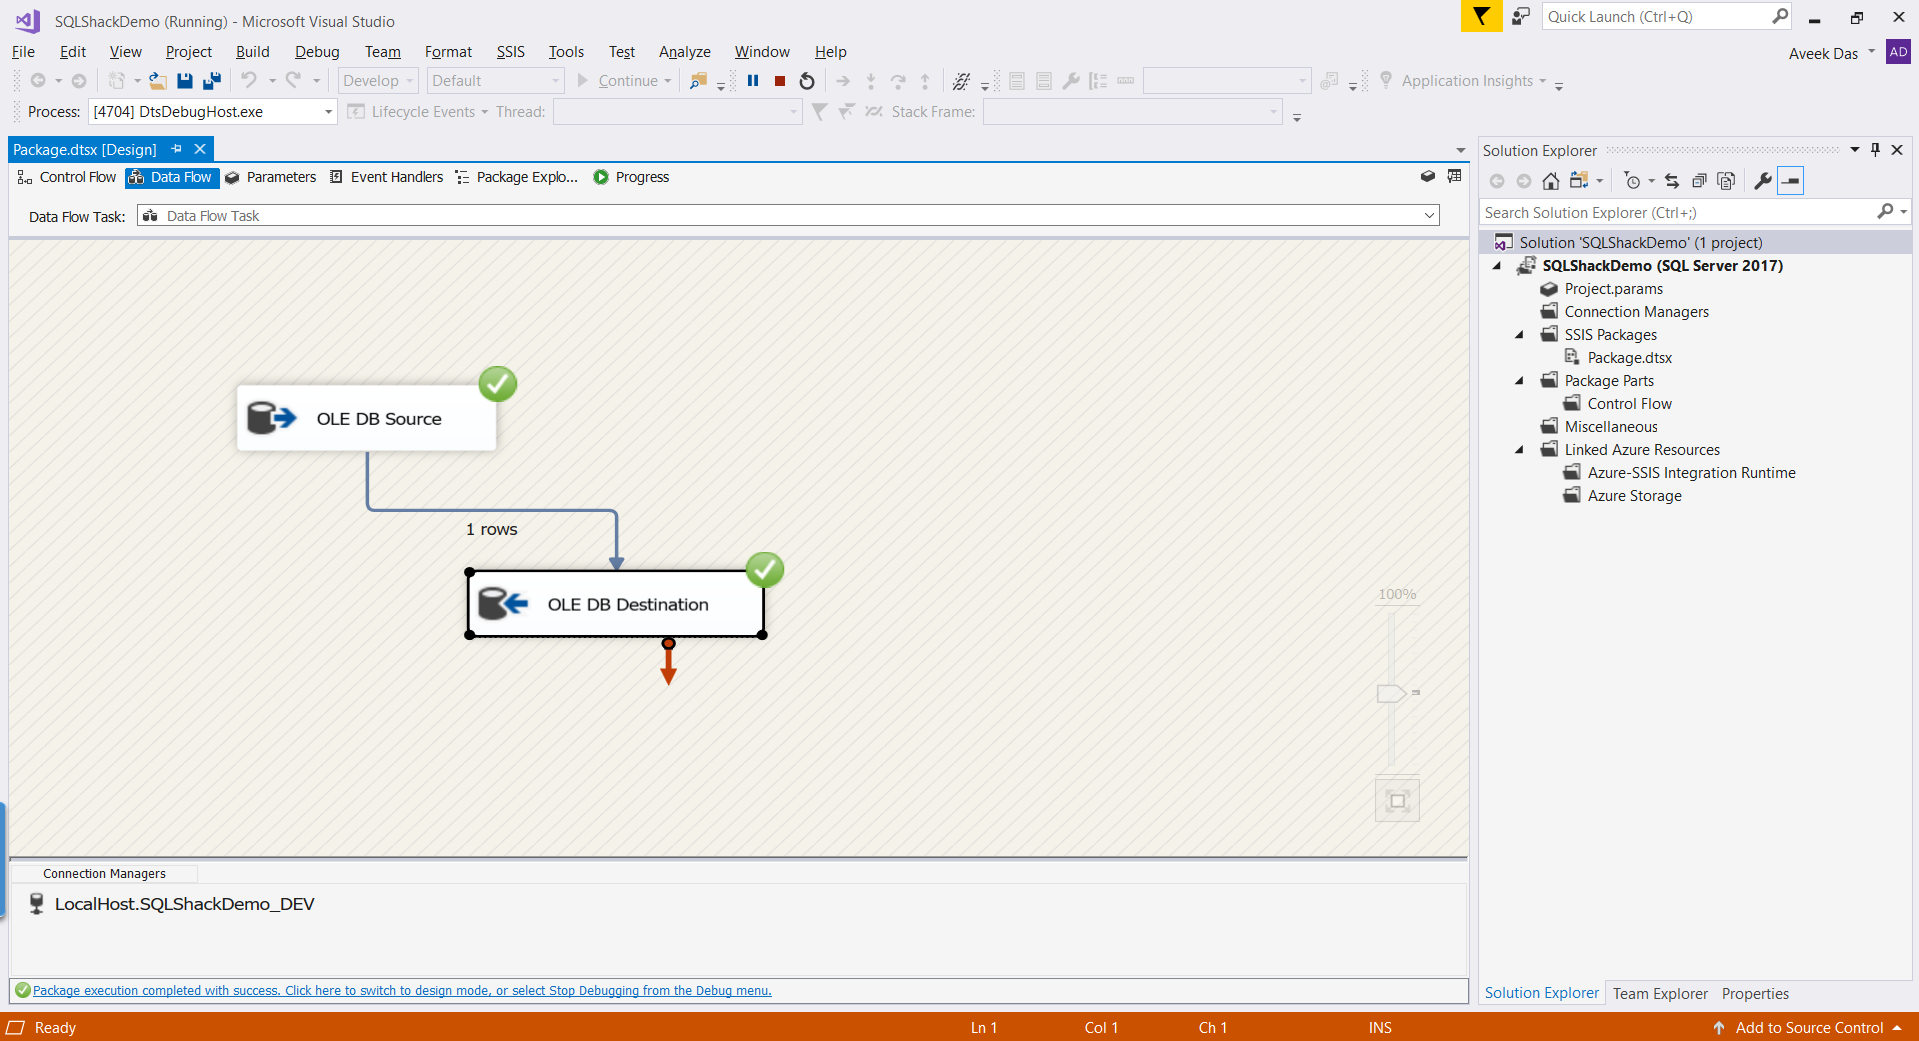
Figure 10 – SSIS Project executed
图10 – SSIS项目执行
将ISPAC文件部署到SSISDB (Deploying the ISPAC File to SSISDB)
So far, we have created our SSIS package and executed it in debug mode. Now let us go ahead and try to deploy it. We can then execute the package from the SSISDB database directly. Whenever we build an SSIS project, the output of the build is an ISPAC file, also known as the Integration Services Package file. You can easily find this file by browsing the bin directory of the SSIS solution. If there is a DBA in your organization, you can hand over this ISPAC file to them and then can carry out the deployment in the production environment.
到目前为止,我们已经创建了SSIS包并在调试模式下执行了它。 现在,让我们继续尝试并部署它。 然后,我们可以直接从SSISDB数据库执行该程序包。 每当我们建立一个SSIS项目,构建的输出是一个ISPAC文件,也被称为我 ntegration 小号 ervices 封装时的文件。 您可以通过浏览SSIS解决方案的bin目录轻松找到此文件。 如果您的组织中有DBA,则可以将此ISPAC文件移交给他们,然后可以在生产环境中进行部署。
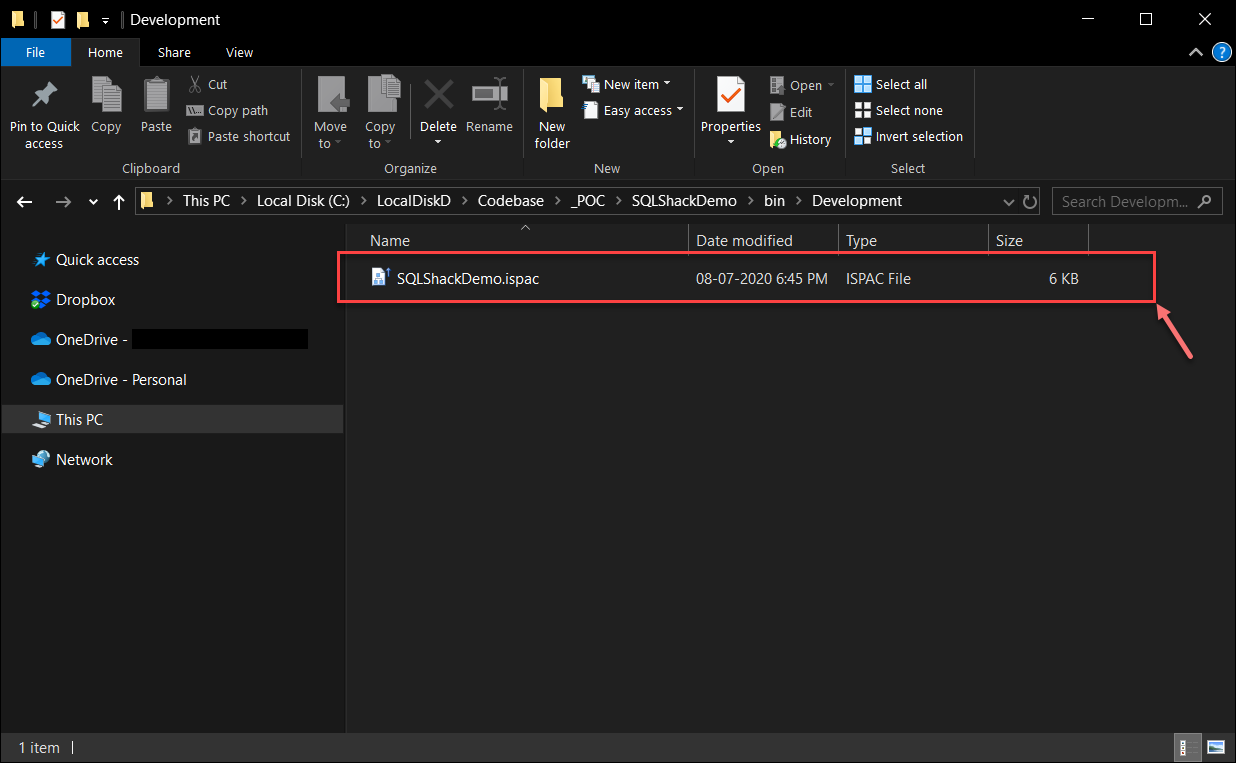
Figure 11 – Browsing the ISPAC file
图11 –浏览ISPAC文件
Now, as mentioned in my previous article, there are multiple steps you can choose to deploy your ISPAC file as follows:
现在,如前一篇文章所述,您可以按照以下步骤选择多个步骤来部署ISPAC文件:
- Using SQL Server Management Studio 使用SQL Server Management Studio
- Using the SQL Server Data Tools / Visual Studio 使用SQL Server数据工具/ Visual Studio
- Using TSQL scripts 使用TSQL脚本
For the sake of this tutorial, we will go ahead with the SQL Server Management Studio (SSMS) option. Head over to SSMS and expand the SSISDB database. Right-click and select Create Folder. A folder is a logical group that you may consider which is available in the SSISDB database. You can organize your multiple SSIS projects in these folders. Usually, I try to create a folder for each of the customers I work with. Using this way helps me to isolate all the projects for a customer under one single folder in the SSISDB database. Give this folder some valid name and that’s it.
为了本教程的缘故,我们将继续使用SQL Server Management Studio (SSMS)选项。 转至SSMS并扩展SSISDB数据库。 右键单击并选择创建文件夹 。 文件夹是一个逻辑组,您可以考虑在SSISDB数据库中使用哪个逻辑组。 您可以在这些文件夹中组织多个SSIS项目。 通常,我尝试为与我合作的每个客户创建一个文件夹。 使用这种方法可以帮助我在SSISDB数据库的单个文件夹下为客户隔离所有项目。 为该文件夹提供一个有效的名称,仅此而已。
Figure 12 – Creating a folder in SSISDB
图12 –在SSISDB中创建一个文件夹
You will be prompted to provide a name and a description for this new folder. Please proceed accordingly. Click on OK once done.
系统将提示您提供此新文件夹的名称和说明。 请相应地进行。 完成后单击“ 确定” 。
Figure 13 – Creating the SQLShackDemoFolder
图13 –创建SQLShackDemoFolder
You can see that this folder is now present under the SSISDB database. You are now good to deploy the SSIS project. Expand the folder name and there you can see the two objects – Projects and Environments. Right-click on the project and select Deploy Project to deploy our ISPAC file to the SSIS catalog database. This will open up the Integration Services Deployment Wizard where you can specify the location of the package.
您可以看到该文件夹现在位于SSISDB数据库下。 现在,您可以很好地部署SSIS项目。 展开文件夹名称,在那里您可以看到两个对象– Projects和Environments 。 右键单击该项目,然后选择“ 部署项目”以将我们的ISPAC文件部署到SSIS目录数据库。 这将打开Integration Services部署向导,您可以在其中指定包的位置。
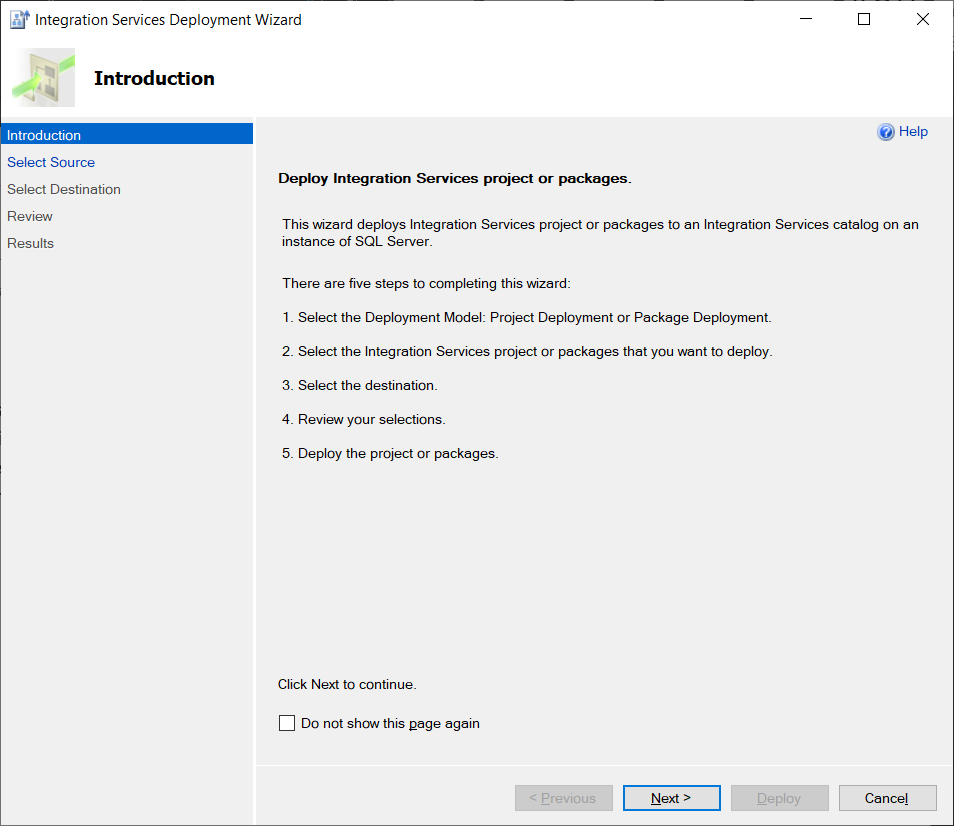
Figure 14 – Integration Services Deployment Wizard
图14 – Integration Services部署向导
Click on Next to move forward. In the next window that appears, select the deployment model as Project Deployment and enter the path of the ISAPC file from the directory.
单击下一步前进。 在出现的下一个窗口中,将部署模型选择为Project Deployment,然后从目录中输入ISAPC文件的路径。
Figure 15 – Project Deployment Model
图15 –项目部署模型
On the next page, you need to provide the destination where the package is going to be deployed. Enter the Server Name with the correct authentication type and click Connect. You can see that the path of the folder is already available where the ISPAC file is going to be deployed.
在下一页上,您需要提供要在其中部署程序包的目的地。 输入具有正确身份验证类型的服务器名称 ,然后单击“ 连接” 。 您可以看到该文件夹的路径在将要部署ISPAC文件的位置已经可用。
Figure 16 – Deploying the SSIS Project
图16 –部署SSIS项目
Click on Deploy once done. The wizard will take some time and deploy the project to the selected folder.
完成后单击“部署”。 该向导将花费一些时间,并将项目部署到选定的文件夹。
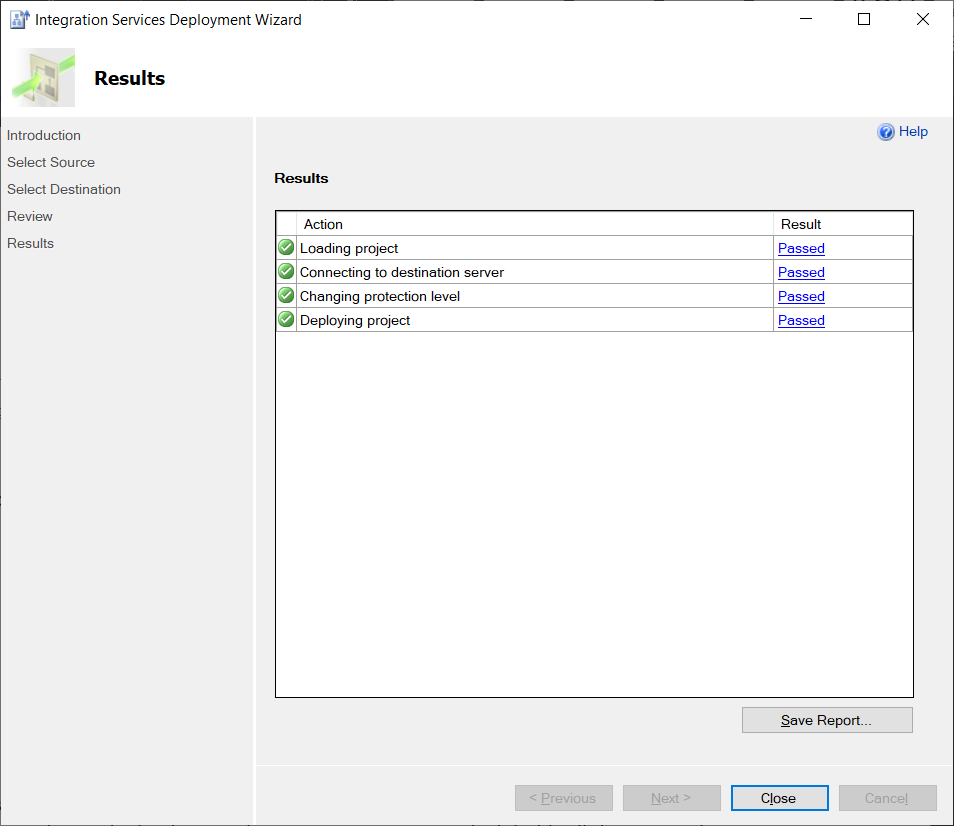
Figure 17 – SSIS Project Deployed
图17 –部署的SSIS项目
Also, you can refresh the folder and see the project being deployed here successfully. Now let us go ahead and configure this package to execute with the production data. Right-click on the project name and select Configure.
另外,您可以刷新文件夹并查看正在此处成功部署的项目。 现在,让我们继续并配置该程序包以与生产数据一起执行。 右键单击项目名称,然后选择配置 。
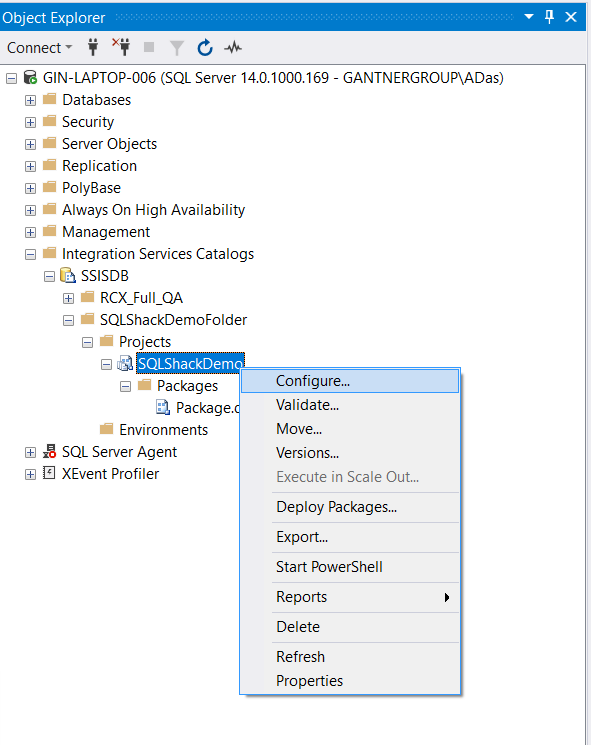
Figure 18 – Configure Project
图18 –配置项目
In the Configure window, select the tab for Connection Managers and update the InitialCatalog value as shown in the figure below and click OK.
在“ 配置”窗口中,选择“ 连接管理器 ”选项卡并更新InitialCatalog值,如下图所示,然后单击“ 确定” 。
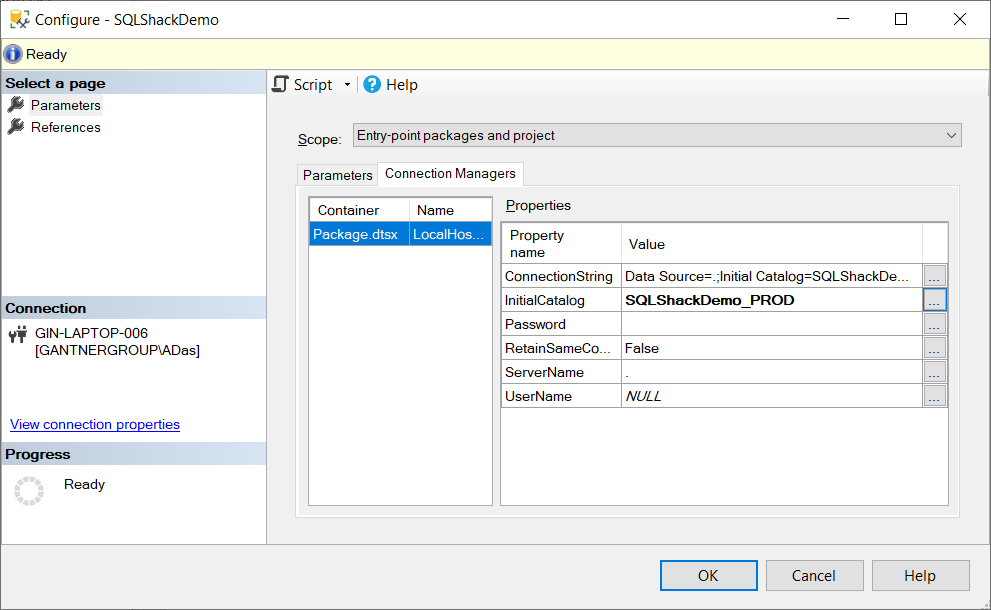
Figure 19 – Configuring the project
图19 –配置项目
Now if you execute the project, you can see the data is being populated into the SQLShackDemo_PROD database.
现在,如果执行项目,则可以看到数据正在填充到SQLShackDemo_PROD数据库中。
Figure 20 – Destination Table
图20 –目标表
结论 (Conclusion)
In this article, I have explained how to start using the SSISDB on SQL Server. This database, also known as the SSIS catalog is the single database in the SQL Server instance which holds all the SSIS packages. With this catalog database, you can easily deploy all your SSIS packages in one central location and administer it easily. You can organize those packages in multiple folders and create projects under each of those folders. I have already talked about the structure of the SSIS catalog database in one of my previous articles. Please feel free to read it once in case you have any doubts understanding the structure and overview of the SSIS catalog database.
在本文中,我已经解释了如何在SQL Server上开始使用SSISDB。 该数据库,也称为SSIS目录,是SQL Server实例中包含所有SSIS包的单个数据库。 使用此目录数据库,您可以轻松地将所有SSIS软件包部署在一个中央位置并轻松进行管理。 您可以将这些包组织在多个文件夹中,并在每个文件夹下创建项目。 在之前的一篇文章中,我已经讨论过SSIS目录数据库的结构。 如果您对SSIS目录数据库的结构和概述有任何疑问,请随时阅读。
ssisdb


 1670
1670

 被折叠的 条评论
为什么被折叠?
被折叠的 条评论
为什么被折叠?
 到【灌水乐园】发言


