


 本文详细介绍了如何使用SQL Server Integration Services (SSIS) 从SharePoint服务器上的Excel电子表格加载数据到SQL Server。在处理过程中,重点讨论了安全问题,包括设置UNC格式的数据源链接和处理SharePoint的身份验证。通过使用SSIS创建数据流任务,配置Excel源和OLE DB目标,实现了数据迁移。最后,文章提到了通过Windows任务计划程序而非SQL Server Agent来规避安全挑战的方法,以实现每晚的数据自动加载。
介绍 (Introduction)
In the process of doing the round of PASS SQL Saturday’s, I have often been asked how to load data into SQL Server from SharePoint. Naturally and at first glance it should be a ‘no brainer’ however the gotcha is normally related to a security issue. Over the past few days, I have been working on just such an issue. But wait, I am getting ahead of myself!
在进行周六的PASS SQL的过程中,经常有人问我如何从SharePoint将数据加载到SQL Server中。 自然地,乍一看,它应该是“不费吹灰之力”,但是,陷阱通常与安全问题有关。 在过去的几天中,我一直在研究此类问题。 但是,等等,我要超越自己!
入门 (Getting started)
The scenario is fairly simple. The client has a myriad of Excel spreadsheets on a SharePoint instance. The data within one (or more) of these spreadsheets is updated on a daily basis and the client wanted the data within a particular spreadsheet, to be loaded by a nightly process. A view of the SharePoint server may be seen below:
该场景非常简单。 客户端在SharePoint实例上有无数个Excel电子表格。 这些电子表格中一个(或多个)中的数据每天进行更新,并且客户希望将特定电子表格中的数据通过每晚的流程进行加载。 SharePoint服务器的视图如下所示:

SQL Server集成服务和我们的“ SharePoint”数据 (SQL Server Integration Services and our ‘SharePoint’ data)
The most efficient and effective manner of getting our data into SQL Server is via SQL Server Integration Services (hence forward referred to as SSIS). As the client is still working with SQL Server 2008 R2, the screen dumps that I shall be showing are created with SQL Server Integration Services 2008 HOWEVER the steps that we shall be using are applicable in SQL Server 2014, which is the version that I use for all code and presentations.
将数据导入SQL Server的最有效方式是通过SQL Server Integration Services(以下简称为SSIS)。 由于客户端仍在使用SQL Server 2008 R2,因此我将显示的屏幕转储是使用SQL Server Integration Services 2008创建的。但是,我们将使用的步骤适用于SQL Server 2014,这是我使用的版本所有代码和演示文稿。
We begin by creating a new Integration Services Project (see below)
我们首先创建一个新的Integration Services项目(请参见下文)

Integration Services opens and presents your working surface.
Integration Services将打开并显示您的工作界面。

I add a ‘Data Flow’ task to the surface (see below). This will permit me to define the source of my data, in addition to defining the target for my raw data.
我向表面添加了“数据流”任务(请参见下文)。 除了定义原始数据的目标外,这还允许我定义数据源。

Clicking on the ‘Data Flow’ tab (see below), we are taken to the Data Flow design sheet. Here we shall define our source data and define the end repository for our data.
单击“数据流”选项卡(见下文),我们进入“数据流”设计表。 在这里,我们将定义源数据,并定义数据的最终存储库。

As our data source is an excel spreadsheet, we need to create and configure an ‘Excel data source’.
由于我们的数据源是一个Excel电子表格,因此我们需要创建和配置一个“ Excel数据源”。

From the toolbox on the left side of the screen dump above, we drag an Excel data source onto our working surface.
从上方屏幕转储左侧的工具箱中,将Excel数据源拖到工作表面上。
The plot now thickens! As our data source is web based we must configure our data source in a different manner from a normal disk based excel file.
现在情节变厚了! 由于我们的数据源是基于Web的,因此我们必须以不同于普通基于磁盘的excel文件的方式配置数据源。
Further, the data source link MUST be in UNC format.
此外,数据源链接必须为UNC格式。
In our case \\sharepoint.xxx.internal\Community\4dx\SteveSQL\WigLoadTemplate.xlsx
在我们的例子中\\ sharepoint.xxx.internal \ Community \ 4dx \ SteveSQL \ WigLoadTemplate.xlsx

We first click the Browse button (see above). Window explorer opens and we paste our UNC format SharePoint link in the File name box (See below)
我们首先单击浏览按钮(参见上文)。 窗口浏览器打开,我们将UNC格式的SharePoint链接粘贴到“文件名”框中(请参见下文)

We now click ‘Open’ and are immediately challenged by our SharePoint sight for our security credentials.
现在,我们单击“打开”,并且SharePoint视域立即向我们挑战了我们的安全凭据。

We let SharePoint know who we are (see above) and click OK. We are returned to our Excel Connection Managed Screen (see below).
我们让SharePoint知道我们是谁(请参阅上文),然后单击“确定”。 我们返回到“ Excel连接管理”屏幕(如下所示)。

Double clicking the Excel Source control (shown below) permits us to choose the source sheet containing our data to be imported.
双击Excel Source控件(如下所示)使我们能够选择包含要导入的数据的源表。

Once open, we shall select our ‘Actual’ sheet (see below)
打开后,我们将选择“实际”表(请参见下文)

Once selected we can click on the columns tab shown on the left hand side of the screen above. The source columns are now displayed (See below)
选择后,我们可以单击上方屏幕左侧显示的“列”标签。 现在显示源列(请参见下文)

We now click OK to complete this step. We are now returned to our design sheet.
现在,我们单击确定以完成此步骤。 现在,我们返回到设计表。

设置数据目的地 (Setting the data Destination)
Setting our data destination is a simple matter. I have taken the liberty of creating a staging table in our SQL Shack Database.
设置数据目标很简单。 我已经自由地在我们SQL Shack数据库中创建临时表。

Meanwhile back in our project, we add an OLEBD destination to our work screen and create an OLEDB data connection. The data connection is shown below.
同时,在我们的项目中,我们将OLEBD目标添加到工作屏幕并创建OLEDB数据连接。 数据连接如下所示。

The connection to the SQLShack database having been created, we now drop an OLEDB destination control onto our work surface and configure it.
已经创建了与SQLShack数据库的连接,现在我们将OLEDB目标控件放到工作面上并进行配置。

We now set the field mappings between the source spreadsheet and the destination table fields.
现在,我们在源电子表格和目标表字段之间设置字段映射。

We click OK to accept our configuration.
我们单击确定以接受我们的配置。
This completes the set up for the first sheet. There were three sheets to be loaded from the clients ‘Excel spreadsheet file’. The process to load the remaining spreadsheets is similar to what has just been covered.
这样就完成了第一张纸的设置。 从客户端的“ Excel电子表格文件”中加载了三张纸。 加载剩余电子表格的过程与刚才介绍的过程类似。
I have taken the liberty of completing our flow and this can be seen below.
我已经自由地完成了流程,可以在下面看到。

测试我们的项目 (Testing our project)
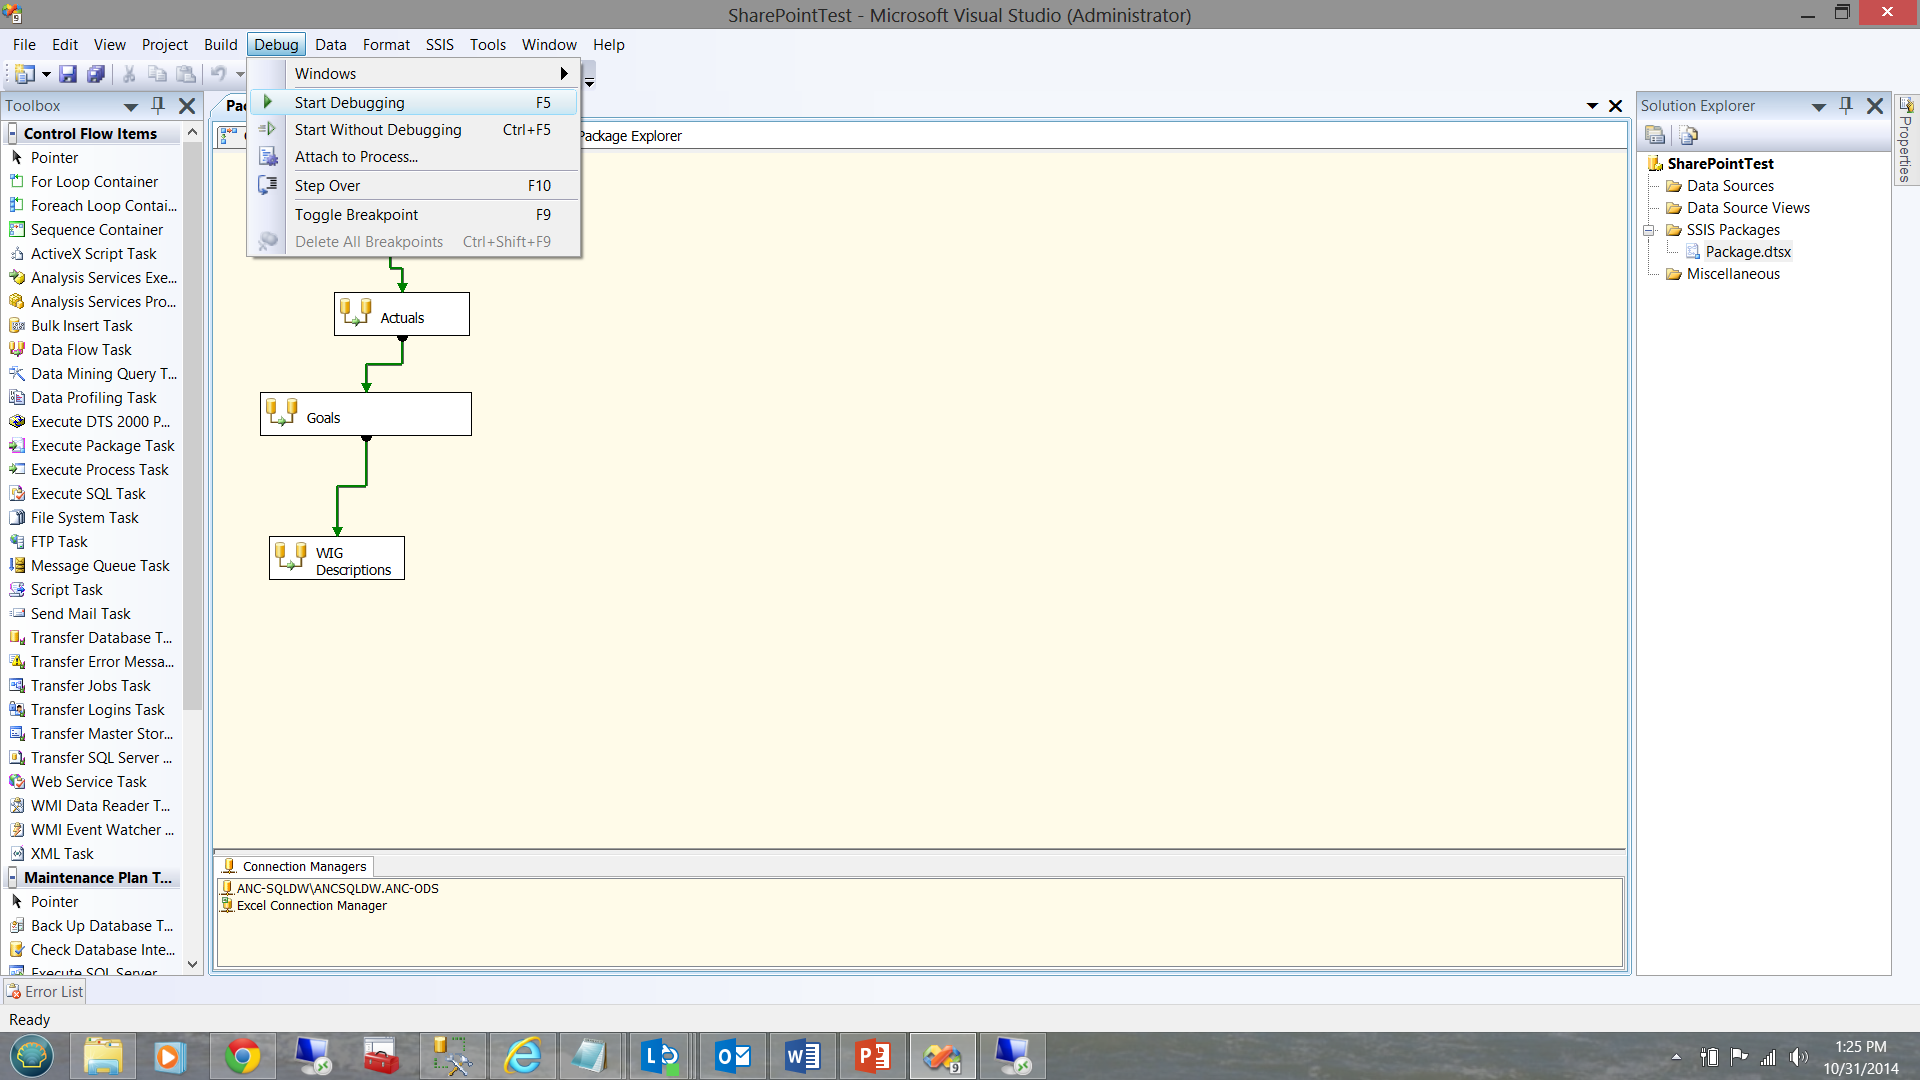
To test our project I choose the debug tab and click ‘Start Debugging’.
要测试我们的项目,我选择“调试”选项卡,然后单击“开始调试”。

As the eagle-eyed reader will note, our load was successful.
鹰眼的读者会注意到,我们的加载成功了。
检查我们的数据 (Examining our data)
Our loaded table is shown below:
我们的加载表如下所示:

现在真正的工作开始了!! (Now the ‘Real’ work begins!!)
Working with SharePoint is often challenging due to security issues. As we wish to pull data from the SharePoint site each evening via our package, it is important to prevent SharePoint from challenging the scheduled job each time it is run.
由于安全问题,与SharePoint协作通常具有挑战性。 由于我们希望每天晚上通过软件包从SharePoint网站提取数据,因此重要的是要防止SharePoint每次运行都对计划的作业提出挑战。
To clarify, while the nightly runs are processed with a process ID and with a non-expiring password, there is also the SharePoint authentication to be taken into consideration. Few client sites will remove the security any SharePoint directory.
要澄清的是,尽管夜间运行是使用进程ID和未过期的密码进行处理的,但也需要考虑SharePoint身份验证。 很少有客户端网站会删除任何SharePoint目录的安全性。
In real life this created a challenge. Once the process ID logged on and the package started, it was challenged for a user ID and password. Despite trying numerous ways to encrypt the user ID and password into the package, we came up empty handed.
在现实生活中,这构成了挑战。 一旦登录到进程ID并启动了程序包,便会要求用户输入ID和密码。 尽管尝试了多种方法将用户ID和密码加密到程序包中,但我们还是空手而归。
周围的工作 (The work around)
One thing that we did notice after having correctly authenticated was that we could run the package manually numerous times without being challenged. FURTHER, when loading the package into SQL Server via the Integration Services option from Management Studio, we were able to run the package without issue so long as we did not log out.
经过正确验证后,我们确实注意到的一件事是,我们可以手动运行该软件包多次而不会受到挑战。 此外,当通过Management Studio中的Integration Services选项将程序包加载到SQL Server时,只要我们不注销就可以运行程序包而不会出现问题。
Great!!! The million dollar question was: “Will the same thing happen if we ‘DISCONNECT’ (as opposed to logging out) the process ID and leave it running in the background?” We found that in this manner the security token remained intact.
大!!! 一百万美元的问题是:“如果我们'断开'(而不是注销)进程ID并让它在后台运行,会发生同样的事情吗?” 我们发现,以这种方式,安全令牌保持完整。
While manual package execution (from the file system) worked without issues and the package stored in the Integration Services portion of Management Studio worked without issues (both as a file system package and as a package within MSDB), the same could NOT be said for trying to schedule and execute the package from the SQL Server Agent. The reader should note that the SQL Server Agent is run via the SAME process ID discussed above. The reader should also note that:
尽管手动执行程序包(从文件系统执行)没有问题,并且存储在Management Studio的Integration Services部分中的程序包也没有问题(无论是作为文件系统程序包还是作为MSDB中的程序包),但都不能这样说。尝试从SQL Server代理计划和执行程序包。 读者应注意,SQL Server代理是通过上面讨论的SAME进程ID运行的 。 读者还应注意:
- The package was ‘developed’ by the process ID 程序包由进程ID“开发”
- Testing was done with the same process ID 使用相同的进程ID进行测试
- SharePoint was ‘told’ that the process ID could have all the necessary rights on the spreadsheet. SharePoint被“告知”进程ID可以拥有电子表格上的所有必要权限。
This said, one would expect to encounter few access violations or gotcha’s.
这就是说,人们期望很少遇到访问冲突或陷阱。
Carla Sabotta from Microsoft has super checklist to sort these issues out. Do have a look at the following link
Microsoft的Carla Sabotta拥有超级清单,可以解决这些问题。 看看下面的链接
使用DTEXECUI (Using DTEXECUI)
Having spent days reading and researching the issue we decided to work-around the scheduling issue by not using the SQL Server Agent BUT rather to utilize the Windows Task Scheduler on the Server. When the Process ID was left in disconnected mode, this worked brilliantly.
经过数天的阅读和研究,我们决定通过不使用SQL Server代理BUT来解决调度问题,而是利用服务器上的Windows Task Scheduler。 当进程ID处于断开连接模式时,这很好用。
To do this required an execution string to call the package and execute it. One of the great tools in the SQL Server arsenal is DTEXECUI
为此,需要一个执行字符串来调用程序包并执行它。 DTEXECUI是SQL Server武库中最出色的工具之一
We call DTEXECUI from the command line.
我们从命令行调用DTEXECUI。

The first data capture screen then pops up.
然后弹出第一个数据捕获屏幕。

We first set the ‘General’ tab. I have taken the liberty of once again completing this tab. Note that the two properties that are critical are the Package Source and the location of the package (See above).
我们首先设置“常规”标签。 我已经自由了,再次完成此选项卡。 请注意,两个至关重要的属性是“包来源”和包的位置(请参见上文)。
We now jump to the “Connection Mangers’ tab just to have a look at our connections. We select the Excel connection by ‘checking’ it (see below).
现在,我们跳到“连接管理器”选项卡只是为了看看我们的连接。 我们通过“选中”来选择Excel连接(见下文) 。

Finally, we jump to the ‘Command Line’ tab. NOTE that a command line string has been created!
最后,我们跳到“命令行”选项卡。 注意,已经创建了命令行字符串!

All that we need to do is to cut and paste this into a flat file with a .bat extension, with the words ‘DTEXEC.exe’ before our string.
我们要做的就是将其剪切并粘贴到扩展名为.bat的平面文件中,并在字符串之前加上“ DTEXEC.exe”字样。
Thus our final string is placed into that .bat file and the string should resemble the string shown below.
因此,我们的最终字符串将放置在该.bat文件中,并且该字符串应类似于以下所示的字符串。
DTEXEC.exe /FILE “\”C:\SharePointTest\SharePointTest\GoalLoad.dtsx\”” /CONNECTION “\”Excel Connection Manager\””;”\”Provider=Microsoft.ACE.OLEDB.12.0;Data Source=\\sharepoint.xxx.internal\Community\4dx\SteveSQL\WigLoadTemplate.xlsx;Extended Properties=\”\”EXCEL 12.0 XML;HDR=YES\”\”;\”” /CHECKPOINTING OFF /REPORTING EW
DTEXEC.exe / FILE“ \” C:\ SharePointTest \ SharePointTest \ GoalLoad.dtsx \“” / CONNECTION“ \” Excel Connection Manager \“”;“ \” Provider = Microsoft.ACE.OLEDB.12.0; Data Source = \ \ sharepoint.xxx.internal \ Community \ 4dx \ SteveSQL \ WigLoadTemplate.xlsx;扩展属性= \“ \” EXCEL 12.0 XML; HDR = YES \“ \”; \“” / CHECKPOINTING OFF / REPORTING EW
在任务计划程序中安排我们的每晚工作!!! (Scheduling our nightly job in the Task Scheduler!!!)

To start the Task Scheduler, one must merely start typing the word ‘Task’ in the search screen (See bottom left in the screen dump above).
要启动“任务计划程序”,只需在搜索屏幕中开始输入单词“任务”(请参见上方屏幕转储的左下方)。
The task scheduler opens.
任务计划程序将打开。

We choose ‘Create Task’ from the menu in the upper right hand corner of the screen dump above. The ‘General’ tab of the ‘Create Task’ is brought up. Once again, I have taken the liberty of completing this screen.
我们从上方屏幕转储右上角的菜单中选择“创建任务”。 弹出“创建任务”的“常规”标签。 我再次自由地完成了此屏幕。

We now click on the ‘Trigger’ tab which is the second tab on the ‘Create Task’ input window. This is where we shall schedule the run time for our job. The name of the job to be run is covered in the next tab section ‘Action’ and for the life of me, it seems like it is putting the ‘cart before the horse’.
现在,我们单击“触发器”选项卡,这是“创建任务”输入窗口中的第二个选项卡。 在这里,我们将安排工作的运行时间。 下一个选项卡部分的“操作”中涵盖了要运行的作业的名称,对于我的生命来说,似乎是在将“手推车放在马头上”。

设置要运行的批处理文件 (Setting the batch file to be run)
We now must tell the system which file to run. As we are doing this via the Windows Server Task Scheduler, we choose SQLShack.bat file (which contains the command line string).
现在我们必须告诉系统要运行哪个文件 。 通过Windows Server Task Scheduler执行此操作时,我们选择SQLShack.bat文件 (其中包含命令行字符串)。
We first select the ‘Action’ tab from the ‘Create task’ screen and select a ‘New Action’. The ‘New Action’ menu now appears. By default ‘Start a program’ will appear.
我们首先从“创建任务”屏幕中选择“操作”标签,然后选择“新操作”。 现在出现“新动作”菜单。 默认情况下,将显示“启动程序”。

We simply enter the name of our batch file (see above) and we are all done after clicking OK and OK again. Your scheduled job will appear in the list of jobs in the top middle portion of the screen shown above. By ‘right clicking’ on your job, you may run it to confirm that all is correct.
我们只需输入批处理文件的名称(请参见上文),然后单击“确定”并再次单击“确定”即可完成所有操作。 您计划的作业将显示在上方屏幕上方中间部分的作业列表中。 通过“右键单击”您的工作,您可以运行它以确认一切正确。
We have now completed what we started out to do!
现在,我们已经完成了开始要做的工作!
结论 (Conclusions)
Moving data from one location to another always presents its own challenges. When the data is located on a SharePoint Server additional complexity comes into play. This is mainly in the form of security-related issues.
将数据从一个位置移动到另一位置始终会带来自身的挑战。 当数据位于SharePoint Server上时,其他复杂性也会发挥作用。 这主要是与安全相关的问题。
We have seen how to create a SSIS package to pull data from an Excel spreadsheet located on a SharePoint server and have it placed in a SQL Server table.
我们已经看到了如何创建SSIS包以从位于SharePoint服务器上的Excel电子表格中提取数据并将其放置在SQL Server表中。
We have looked at some of the security issues involved in creating the process.
我们已经研究了创建流程所涉及的一些安全问题。
We have seen potential workarounds to the myriad of “Gotcha’s”
我们已经看到了各种“ Gotcha”的潜在解决方法
Finally we saw an alternate way of scheduling our ETL.
最后,我们看到了另一种调度ETL的方法。
Happy programming!
编程愉快!
翻译自: https://www.sqlshack.com/share-data-loading-sql-data-sharepoint/


 2437
2437

 被折叠的 条评论
为什么被折叠?
被折叠的 条评论
为什么被折叠?
 到【灌水乐园】发言


