


mongodb建表sql
In this 5th part of the ongoing series of SQL Server 2019 Enhanced PolyBase, we will learn how to install and configure MongoDB and create an external table.
在正在进行SQL Server 2019增强型PolyBase系列的第5部分中,我们将学习如何安装和配置MongoDB以及创建外部表。
SQL Server 2019 supports MongoDB Teradata and ODBC based data sources. We will install MongoDB on both the windows environment as well as on Ubuntu OS.
SQL Server 2019支持基于MongoDB Teradata和ODBC的数据源。 我们将在Windows环境以及Ubuntu OS上安装MongoDB。
Windows系统上的MongoDB安装 (MongoDB installation on Windows system)
MongoDB is a non-relational and open-source document-based database. It offers important features such as high performance and automatic scaling. MongoDB comes into two editions Enterprise and the Community edition. In this article, we will install the MongoDB community edition on windows environment.
MongoDB是一个非关系式且基于开源文档的数据库。 它提供了重要的功能,例如高性能和自动缩放。 MongoDB分为企业版和社区版两个版本。 在本文中,我们将在Windows环境上安装MongoDB社区版。
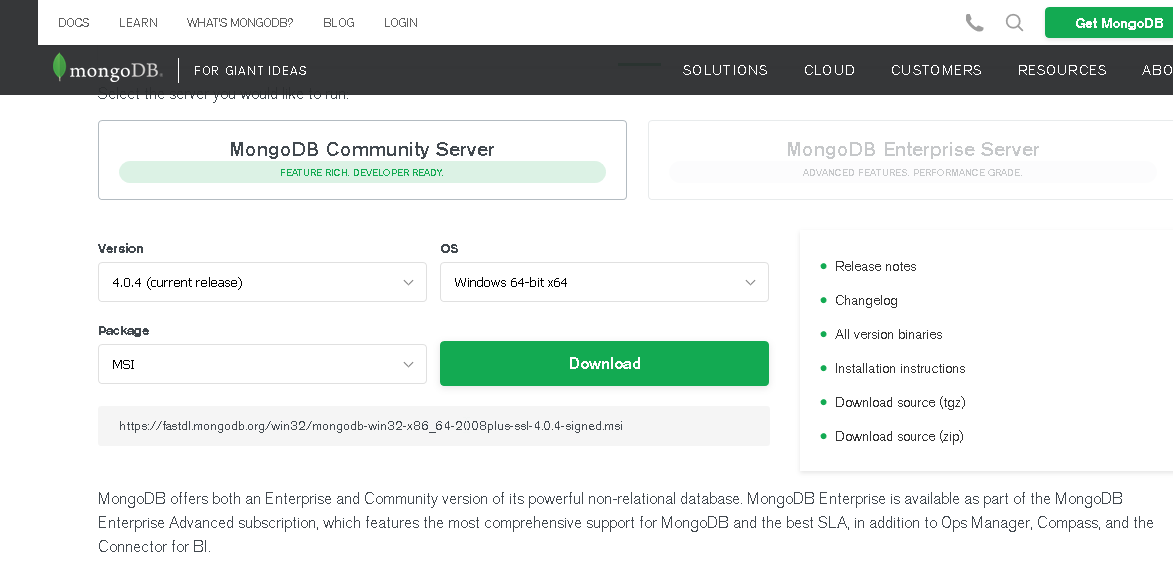
Once MongoDB package file download completes double-click on the file to launch it.
MongoDB软件包文件下载完成后,双击该文件以启动它。
It launches the MongoDB 4.0.4 set up wizard. Click on next to continue the setup wizard.
它启动MongoDB 4.0.4设置向导。 单击下一步继续安装向导。
Accept the end user license agreement and click Next.
接受最终用户许可协议,然后单击“下一步”。
We need to choose the setup type:
我们需要选择设置类型:
- Complete: installs all program features. It will require additional disk space as compared to the custom set up. This is recommended to use if we do not have much knowledge about MongoDB 完成:安装所有程序功能。 与自定义设置相比,将需要更多的磁盘空间。 如果我们对MongoDB的了解不多,建议使用此方法
- Custom: In this setup mode, we need to choose the program features. It requires an advanced level of knowledge to install custom level set up 自定义:在此设置模式下,我们需要选择程序功能。 需要具备高级知识才能安装自定义级别设置
In this article, we will perform a complete installation.
在本文中,我们将执行完整的安装。
The next page is the service configuration. We will go with the default configuration here.
下一页是服务配置。 我们将在此处使用默认配置。
If required, change the below directory locations:
如果需要,请更改以下目录位置:
- Data Directory: C:\program Files\MongoDB\Server\4.0\data\ 数据目录:C:\ program Files \ MongoDB \ Server \ 4.0 \ data \
- Log Directory: C:\program Files\MongoDB\Server\4.0\log\ 日志目录:C:\ program Files \ MongoDB \ Server \ 4.0 \ log \
In next page, we can choose to install MongoDB Compass official graphical user interface tool. We can skip this as well.
在下一页中,我们可以选择安装MongoDB Compass官方图形用户界面工具。 我们也可以跳过此步骤。
In the next screen, click on ‘Install’ to begin the installation.
在下一个屏幕中,单击“安装”以开始安装。
You can monitor the installation status in the progress window.
您可以在进度窗口中监视安装状态。
We have installed MongoDB 4.0.4 in the windows environment.
我们已经在Windows环境中安装了MongoDB 4.0.4。
During the installation, we have specified the MongoDB directory. Below is the content for MongoDB directory.
在安装过程中,我们指定了MongoDB目录。 以下是MongoDB目录的内容。
In the ‘C:\program files\MongoDB\Server\4.0\bin’ directory, we can find the highlighted .exe files
在“ C:\ program files \ MongoDB \ Server \ 4.0 \ bin”目录中,我们可以找到突出显示的.exe文件。
- Server process: mongod.exe 服务器进程:mongod.exe
- Client process: mongo.exe 客户端进程:mongo.exe
- MongoDB shard process: mongos.exe MongoDB分片过程:mongos.exe
We need to add the path of the MongoDB directory into the environment variable under the ‘PATH’ variable.
我们需要将MongoDB目录的路径添加到“ PATH”变量下的环境变量中。
Open the command prompt with administrative permission and launch the mongod.exe server process with below command.
使用管理员权限打开命令提示符,并使用以下命令启动mongod.exe服务器进程。
>mongod –dbpath “C:\Program Files\MongoDB\Server\4.0\data”
> mongod –dbpath“ C:\ Program Files \ MongoDB \ Server \ 4.0 \ data”
Here –dbpath points to the database directory.
这里–dbpath指向数据库目录。
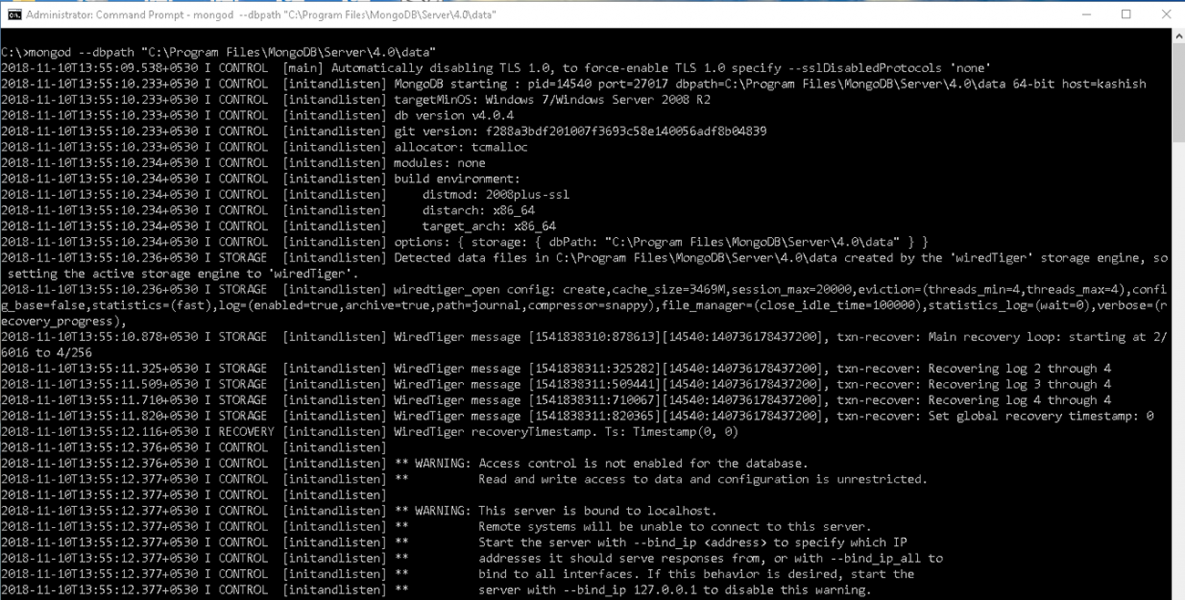
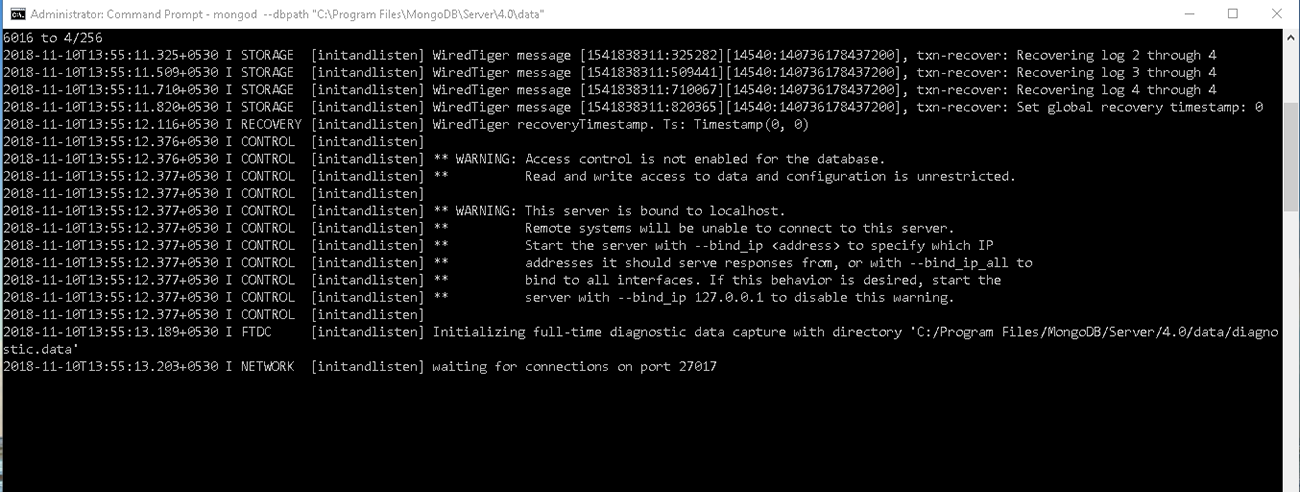
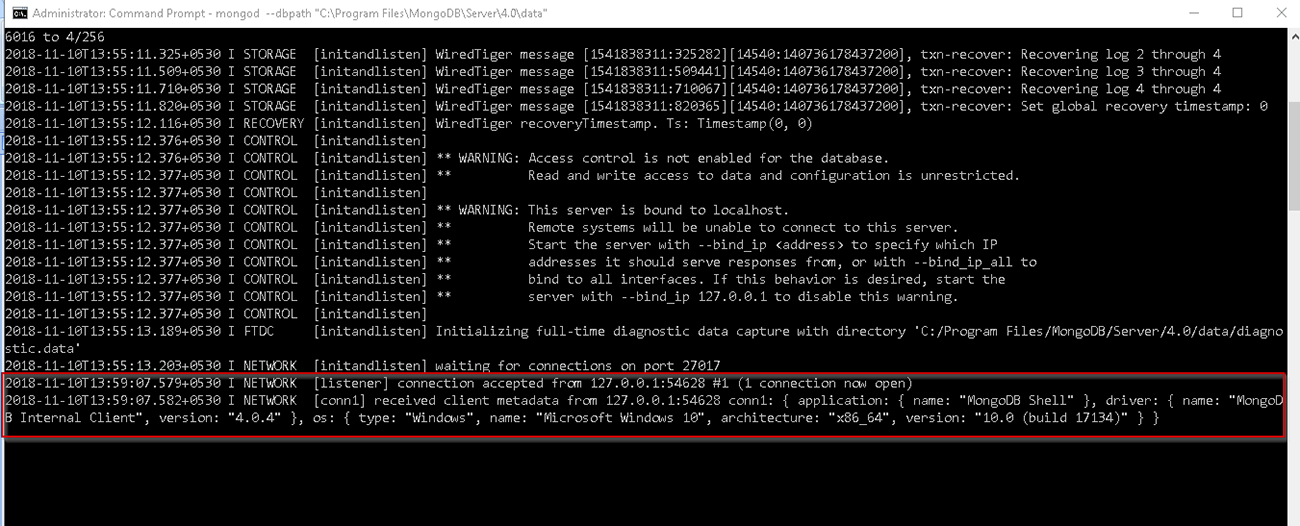
This command starts the mondod.exe server service and you can see the status ‘waiting for connections on port 27017’
此命令启动mondod.exe服务器服务,您可以看到状态“等待端口27017上的连接”
Launch another command prompt and run the ‘mongo’ to start the client tool. It connects to the mongo server service and we can see the prompt ‘>’. We can run the queries in MongoDB now.
启动另一个命令提示符,然后运行“ mongo”以启动客户端工具。 它连接到mongo服务器服务,我们可以看到提示'>' 。 我们现在可以在MongoDB中运行查询。
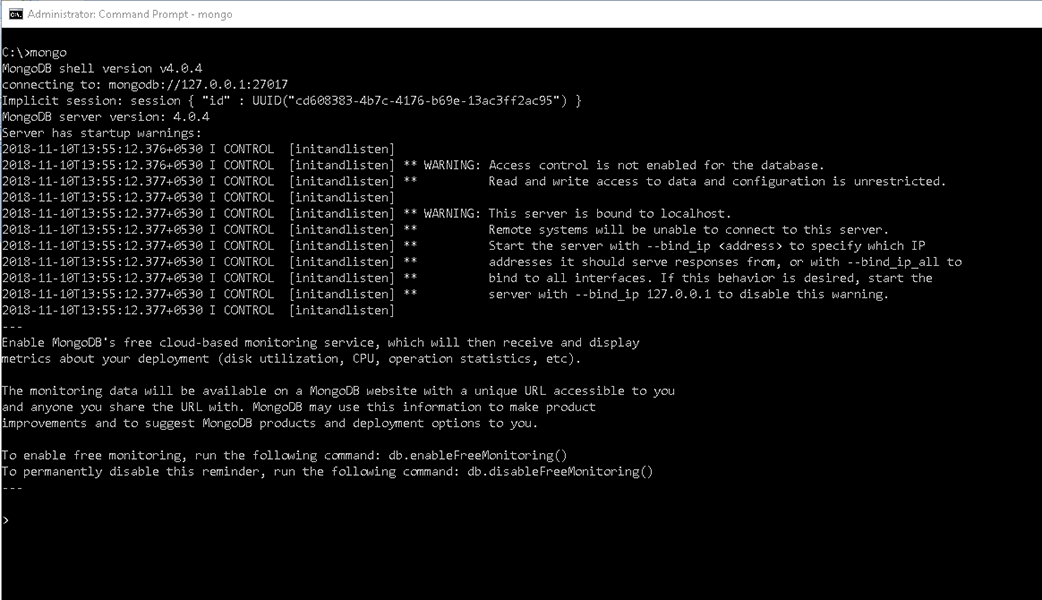
While the client processes connect to the host MongoDB server instance, we can view the status as highlighted. We can see the connection information in the server instance command prompt. You get the information about the client OS type, name, version, architecture as well.
当客户端进程连接到主机MongoDB服务器实例时,我们可以查看突出显示的状态。 我们可以在服务器实例命令提示符下看到连接信息。 您还将获得有关客户端操作系统类型,名称,版本,体系结构的信息。
In MongoDB, we can connect to any database name. If just switch to that database. It is not required to create the database first.
在MongoDB中,我们可以连接到任何数据库名称。 如果只是切换到该数据库。 不需要首先创建数据库。
In below screen, we connected to the database:
在下面的屏幕中,我们连接到数据库:
>use SQLShackDemoPolyBase
>使用SQLShackDemoPolyBase
We can see the message ‘switched to DB SQLShackDemoPolyBase’
我们可以看到消息“已切换到DB SQLShackDemoPolyBase”
We can list down the database using the command ‘show dbs’
我们可以使用“ show dbs”命令列出数据库
You can notice here that it does not show the database ‘SQLShackDemoPolyBase’. We have not created any document in this database; therefore, it is not listed under the database names.
您会在这里注意到它没有显示数据库'SQLShackDemoPolyBase' 。 我们没有在该数据库中创建任何文档; 因此,它不在数据库名称下列出。
We can insert the document in below format.
我们可以按以下格式插入文档。
>db.product.insert({“name”:”SQLServer2019″})
> db.product.insert ({“名称” :“ SQLServer2019”})
Once the document is inserted, you get a message ‘writeResult ({“nInserted”:1})’
插入文档后,您会收到一条消息“ writeResult({ “ nInserted”:1})”
Now, if you run the query ‘show dbs’ to view the databases, we can see the DB ‘SQLShackDemoPolyBase’
现在,如果您运行查询“ show dbs”以查看数据库,我们可以看到数据库“ SQLShackDemoPolyBase”
We can create multiple documents using the below format.
我们可以使用以下格式创建多个文档。
db.products.insert(
   [
     { _id: 10, item: "Mpuse", qty: 50, type: "Computer" },
     { _id: 11, item: "Keyboard", qty: 20, type: "accessories" },
     { _id: 12, item: "Monitor", qty: 100 }
   ],
   { ordered: false }
)
Ubuntu Linux上的MongoDB (MongoDB on Ubuntu Linux)
We have learned how to install MongoDB in a windows environment in the above steps. Now, we will install MongoDB on the Ubuntu Linux. In this article, I am using a virtual machine configured with the Ubuntu OS. You can follow the article Linux with Ubuntu to configure the virtual machine.
通过以上步骤,我们学习了如何在Windows环境中安装MongoDB。 现在,我们将在Ubuntu Linux上安装MongoDB。 在本文中,我将使用配置了Ubuntu OS的虚拟机。 您可以按照文章Linux与Ubuntu一起配置虚拟机。
Open a terminal connection in Putty and run the below steps.
在Putty中打开终端连接,然后运行以下步骤。
sudo apt-key adv –keyserver hkp://keyserver.ubuntu.com:80 –recv EA312927
sudo apt-key adv –keyserver hkp://keyserver.ubuntu.com:80 –recv EA312927
echo “deb http://repo.mongodb.org/apt/ubuntu “$(lsb_release -sc)”/mongodb-org/3.2 multiverse” | sudo tee /etc/apt/sources.list.d/mongodb-org-3.2.list

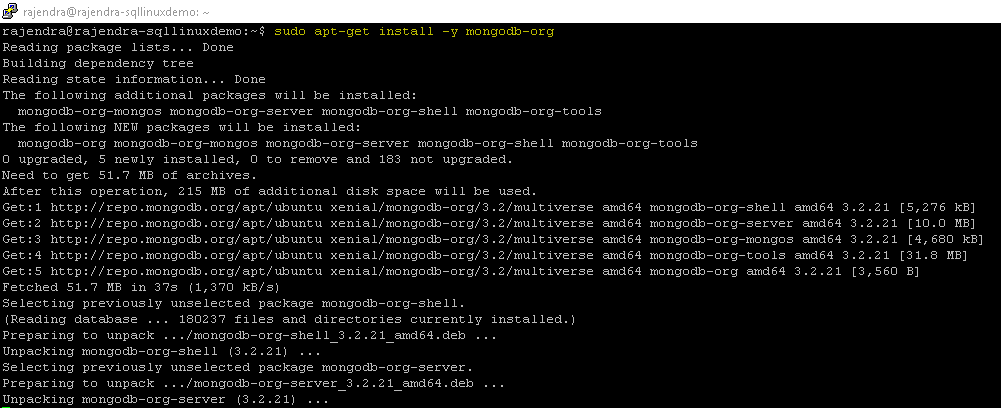
sudo apt-get install -y MongoDB-org
须藤apt-get install -y MongoDB-org
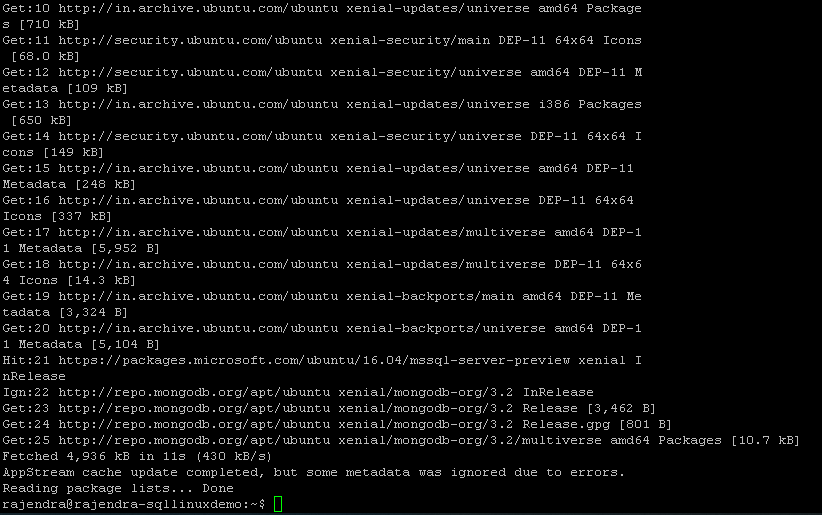
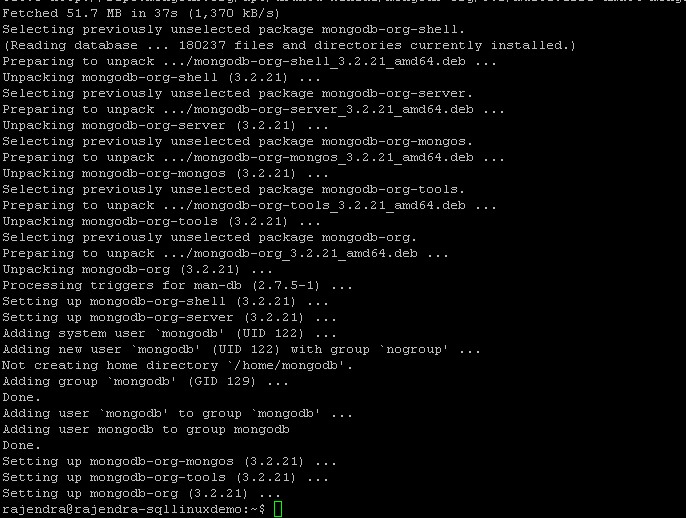
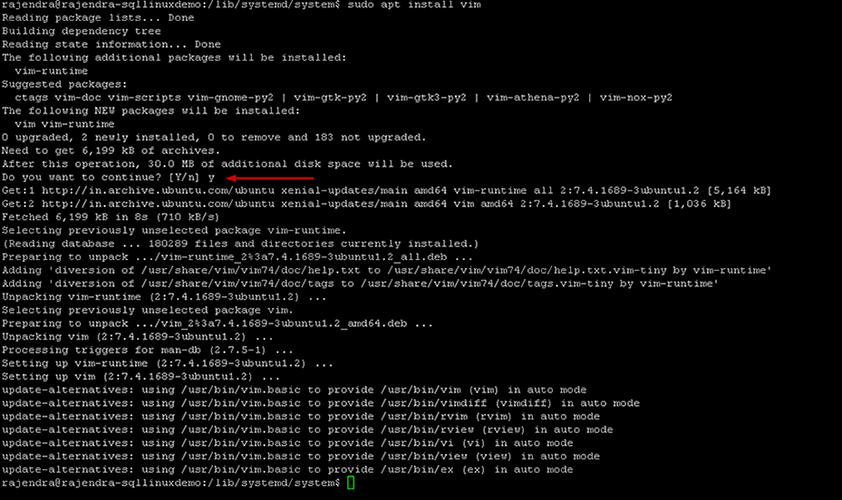
It downloads and installs the MongoDB in the Ubuntu Linux. You can view the setup messages in the following screen.
它会在Ubuntu Linux中下载并安装MongoDB。 您可以在以下屏幕中查看设置消息。
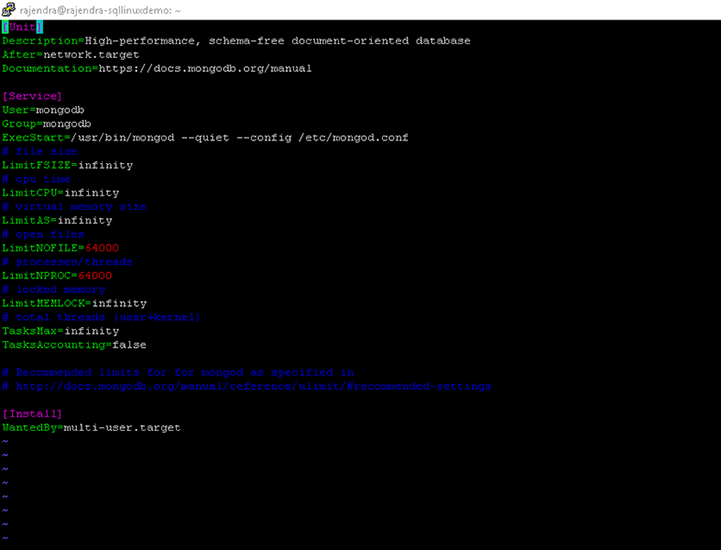
We can view the content of mongod.service file using the below commands
我们可以使用以下命令查看mongod.service文件的内容
$cd /lib/systemd/system/
$ cd / lib / systemd / system /
$ sudo cat mongod.service
$ sudo cat mongod.service
Update the system service with the command:
使用以下命令更新系统服务:
$ sudo cat mongod.service
$ sudo cat mongod.service
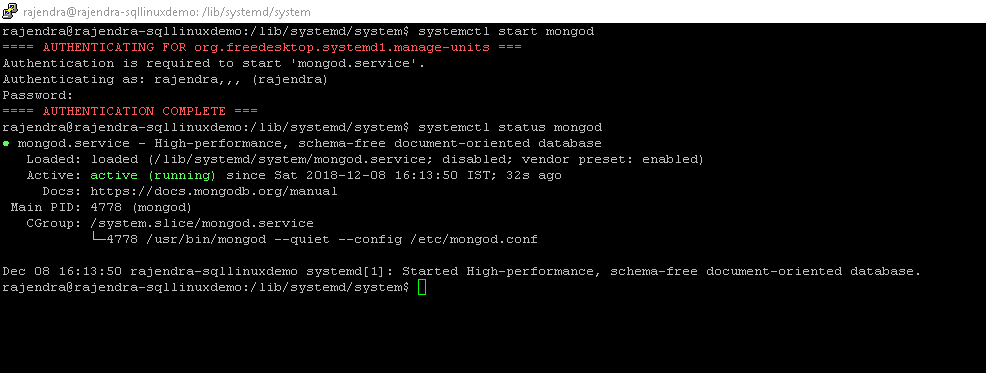
Start the mondo service:
启动mondo服务:
$ systemctl start mongod
$ systemctl启动mongod
Check the status of mongod service. Service status should be active (running):
检查mongod服务的状态。 服务状态应处于活动状态(正在运行):
$ systemctl status mongod
$ systemctl飞行状态
Start another putty session and run the command ‘mongo’ to start the client process.
启动另一个腻子会话并运行命令“ mongo”以启动客户端进程。
Similar to windows environment, we can run the query in the client tool.
与Windows环境类似,我们可以在客户端工具中运行查询。
We can create the admin user with the highlighted command.
我们可以使用突出显示的命令创建admin用户。
We can enable authentication in MongoDB with the -auth parameter. Edit the mongod.service with the vim command.
我们可以使用-auth参数在MongoDB中启用身份验证。 使用vim命令编辑mongod.service。
$ vim /lib/systemd/system/mongod.service
$ vim /lib/systemd/system/mongod.service
Press ‘i’ to enable insert in the configuration file.
按“ i”启用在配置文件中插入。
Go to the line and add -auth parameter in the ‘execstart’
转到该行, 然后在“ execstart”中添加-auth参数
Save and close the configuration file, we can view the content with the cat command.
保存并关闭配置文件,我们可以使用cat命令查看内容。
$ cat /lib/systemd/system/mongod.service
$ cat /lib/systemd/system/mongod.service
You can see the -auth parameter is added into the configuration file successfully.
您可以看到-auth参数已成功添加到配置文件中。
Restart the mongod service and check the status.
重新启动mongod服务并检查状态。
$ sudo service mongod restart
$ sudo服务mongod重新启动
$sudo systemctl status mongod
$ sudo systemctl status蒙古

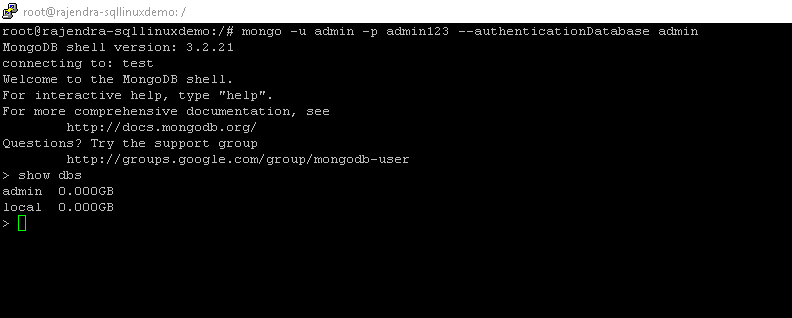
Connect the client process with the credentials in below format.
使用以下格式的凭据连接客户端进程。
# mongo -u ‘user’ -p ‘password’ –authenticationdatabase admin
#mongo -u'用户'-p'密码'–authenticationdatabase admin
配置PolyBase访问MongoDB (Configure PolyBase to access MongoDB )
In a previous article, Enhanced PolyBase SQL 2019 – Installation and basic overview, we configured PolyBase to access data from the SQL Server and the Oracle data source. We can create an external table using the external table wizard in Azure data studio. For other data sources, we can only do this buy running the create an external table using a query.
在上一篇文章``增强型PolyBase SQL 2019-安装和基本概述''中 ,我们将PolyBase配置为访问SQL Server和Oracle数据源中的数据。 我们可以使用Azure数据工作室中的外部表向导来创建外部表。 对于其他数据源,我们只能通过使用查询运行创建外部表来完成。
Below services should be running in the source SQL Server 2019 instance.
以下服务应在源SQL Server 2019实例中运行。

Steps are almost similar to create an external table for MongoDB as it is for SQL and Oracle. Let us view the steps.
为MongoDB创建外部表的步骤几乎与为SQL和Oracle创建外部表的步骤相似。 让我们查看步骤。
CREATE MASTER KEY ENCRYPTION BY PASSWORD = 'password@123';
CREATE DATABASE SCOPED CREDENTIAL MongoDB
WITH IDENTITY = admin, Secret = admin123;
LOCATION format '<type>://<server>[:<port>]'. CREATE EXTERNAL DATA SOURCE MongoDBSource WITH ( LOCATION = 'mongodb://192.168.43.160:27017', CREDENTIAL = MongoDB --specify credential created in step 2 );
CREATE EXTERNAL TABLE Employee(
[Name] varchar(50) NOT NULL,
[location] varchar(50) NOT NULL,
[website] varchar(100) NOT NULL
)
WITH (
LOCATION='Employee.Employee',
DATA_SOURCE= MongoDBSource
);
结论 (Conclusion)
In this article, we explore the MongoDB installation on both the windows and the Ubuntu environment. We learned the basics of MongoDB that will help you to prepare for enhanced PolyBase using a MongoDB data source.
在本文中,我们将探讨在Windows和Ubuntu环境中的MongoDB安装。 我们了解了MongoDB的基础知识,可帮助您使用MongoDB数据源准备增强的PolyBase。
目录 (Table of contents)
| 增强的PolyBase SQL 2019-安装和基本概述 |
| 增强的PolyBase SQL 2019-Oracle DB的外部表 |
| 增强的PolyBase SQL 2019-使用t-SQL的外部表 |
| 增强的PolyBase SQL 2019-外部表SQL Server,目录视图和下推式 |
| 增强的PolyBase SQL 2019 – MongoDB和外部表 |
翻译自: https://www.sqlshack.com/enhanced-polybase-sql-2019-mongodb-and-external-table/
mongodb建表sql


 263
263

 被折叠的 条评论
为什么被折叠?
被折叠的 条评论
为什么被折叠?
 到【灌水乐园】发言


