


 本文深入介绍了Photoshop中文字处理和排版的基础知识,包括字符面板的使用,如字体、字号、字距、跟踪等设置,以及如何调整文本方向、对齐方式和变形文本。通过实例展示了如何设计简单的书封面,强调了选择合适字体和调整元素布局的重要性。同时,提到了设计不仅关乎元素排列,还涉及到Photoshop中的一些高级技巧和滤镜应用。

photoshop脚本指南
Programs like Photoshop have allowed new generations of would-be designers jump in and create with greater ease than ever before. See just how easy it is by learning the Type Character Panel, and applying it to some basic design work.
诸如Photoshop之类的程序使新一代的准设计师可以进入并比以往任何时候都更轻松地创建。 通过学习“文字字符面板”,并将其应用于一些基本的设计工作,了解它有多么容易。
Having covered the text tool briefly in Part 1, The Toolbox, and creation of text objects in Part 3, Layers, let’s take a closer look at how to set typography in Photoshop. Of course, if you’ve missed any part of the How-To Geek Guide to Learning Photoshop, each are still available in this bundled link.
在第1部分“工具箱”中简要介绍了文本工具之后,在第3部分“图层”中介绍了文本对象的创建,让我们仔细看看如何在Photoshop中设置排版。 当然,如果您错过了学习Photoshop的How-To Geek指南的任何部分,则仍然可以在此捆绑链接中找到它们。
字体和字符面板 (Fonts and the Character Panel)
While vector programs like Adobe Illustrator are superior choices for handling abstract shapes like fonts, Photoshop is no slouch in the Typography department. It is capable of nearly any typographic treatment Illustrator is capable of, and some that it isn’t.
尽管诸如Adobe Illustrator之类的矢量程序是处理诸如字体之类的抽象形状的上乘之选,但Photoshop在印刷部门并不乏味。 它几乎可以提供Illustrator所能进行的任何印刷处理,而某些印刷机却没有。
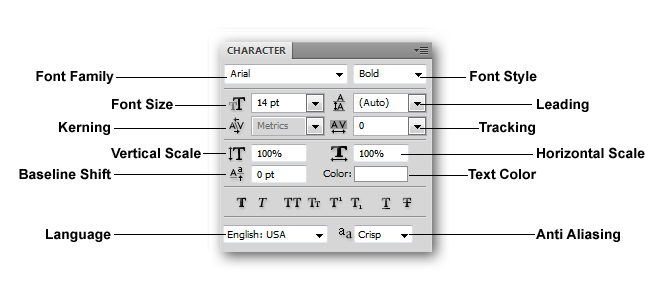
The character panel can be found by going to Window > Character, if it is not already in your right side panel. It is rich with options for your text, which we’ll go over now. Be warned, that this section contains complicated typographic terms that you may or may not know. Brush up on your typography terms with the How-To Geek article, “Understand Typography Like a Professional Designer,” or simply keep reading.
如果尚未在右侧面板中,请转到“窗口”>“字符”,找到该字符面板。 它具有丰富的文本选项,我们现在将进行介绍。 请注意,此部分包含您可能不知道的复杂印刷术语。 使用How-To Geek文章“像专业设计师一样了解印刷术”来复习印刷术术语,或者继续阅读。
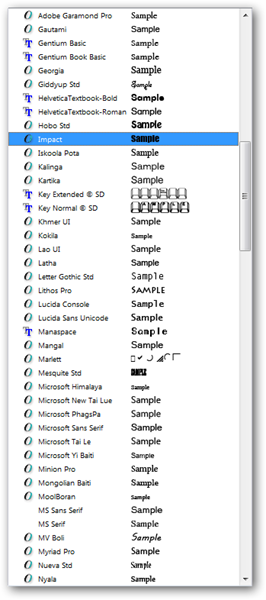
Font Family: Where you chose the font your text object is set in, for example, Helvetica, Arial, Times New Roman, etc.
字体系列:在选择字体的位置设置了文本对象,例如Helvetica,Arial,Times New Roman等。
Font Style: If you have font families installed, your “font style” may be active, this is where you can choose alternate versions of the same face. For instance, Arial Bold, Arial Narrow, Arial Condensed, Arial Rounded MT, Arial Black, etc.
字体样式:如果安装了字体系列,则“字体样式”可能处于活动状态,在这里您可以选择同一张脸的替代版本。 例如,Arial Bold,Arial Narrow,Arial Condensed,Arial Rounded MT,Arial Black等。
Font Size: Where you can numerically alter the size of your font. Type in numbers here or use the pulldown menu for suggested common point sizes.
字体大小:您可以在数字上更改字体大小的位置。 在此处输入数字或使用下拉菜单获取建议的公共点大小。
Leading: Typographic term for the space between lines of paragraph text, set in points.
前导:段落文字各行之间的空格的印刷术语,以磅为单位。
Kerning: Horizontal spacing between pairs of letters. Negative numerical values here will close spaces between characters while positive values will add space between letters.
字距:成对的字母之间的水平间距。 此处的负数值将封闭字符之间的空格,而正数值将在字母之间添加空格。
Tracking: Similar to the concept of Kerning, Tracking adjusts the general kerning over an entire text object or over several selected letters. You can adjust tracking on a text object, and then kern between individual letters, if you wish.
跟踪:类似于字距调整的概念,“跟踪”调整整个文本对象或几个选定字母的常规字距调整。 您可以根据需要调整对文本对象的跟踪,然后调整各个字母之间的距离。
Vertical Scale: A controlled way to stretch and squash typography up and down. Input numerical values here in percent of the original character height.
垂直比例尺:一种可控制的方式来向上和向下拉伸和挤压字体。 在此输入数值,以原始字符高度的百分比表示。
Horizontal Scale: A controlled way to stretch and squash typography to the left and right. Input numerical values here in percent of the original character width.
水平比例尺:一种可控制的方式,可以将印刷术左右拉伸和挤压。 在此输入数值,以原始字符宽度的百分比表示。
Baseline Shift: The baseline is the line the text “rests” on. Move certain selected characters off the baseline to make them appear higher or lower than the rest of the set text.
基线偏移:基线是文本“停留”的行。 将某些选定的字符移出基线,以使其看起来高于或低于其余的设置文本。
Text Color: An area where text object color can be adjusted.
文字颜色:可以调整文字对象颜色的区域。
Language: Adjusts the language the text is set in, in case non-English characters are needed.
语言:如果需要非英文字符,则调整设置文本的语言。
Anti-Aliasing: Options for rendering text in pixels by adjusting the amount of pixel blurring used to describe the edges of type. “None” renders letters in hard-edged pixels, while all others use various forms of anti-aliasing.
消除锯齿:通过调整用于描述文字边缘的像素模糊量,以像素为单位呈现文本的选项。 “无”以硬边像素渲染字母,而所有其他字母则使用各种形式的抗锯齿。
人造粗体和其他字符面板选项 (Faux Bold and Other Character Panel Options)
|
| Faux Bold: The size of your current font is artificially thickened to create an artificial bold font. Using an actual bold font in the “Font Family” or “Font Style” is generally preferable. |
| Faux Italic: Your current font is artificially slanted to the right, creating a false italic look. Again, using an actual italic font in the “Font Family” or “Font Style” is preferable. | |
|
| Uppercase: Transforms your type into all uppercase. Very useful in those cases where it is time consuming to retype large sections of upper and lower case text. |
| Small Caps: Creates a false small caps by shrinking the point size of your uppercase letters. All lowercase letters will be replaced with these smaller capitals in your text object. | |
|
| Superscript: Changes selected text or text object to superscript, as in the case of 28. |
| Subscript: Changes selected text or text object to subscript, as in the case of C6H12O6. | |
|
| Underline: Adds a simple underscore underneath your selected text or text object. |
| Strikethrough: Adds a simple strike through all of your selected text or text object. |
|
| 假粗体:人为地增加当前字体的大小,以创建人造粗体。 通常最好在“字体家族”或“字体样式”中使用实际的粗体字体。 |
| Faux Italic:您的当前字体被人为地向右倾斜,从而产生假的斜体外观。 同样,最好在“字体家族”或“字体样式”中使用实际的斜体字体。 | |
|
| 大写:将您的类型转换为全部大写。 在重新输入大写和小写字母的文本非常耗时的情况下非常有用。 |
| 小写大写:通过缩小大写字母的磅值来创建错误的小写大写。 所有小写字母都将替换为文本对象中的这些较小的大写字母。 | |
|
| 上标:将选定的文本或文本对象更改为上标,例如2 8 。 |
| 下标:与C 6 H 12 O 6一样,将选定的文本或文本对象更改为下标。 | |
|
| 下划线:在您选择的文本或文本对象下添加一个简单的下划线。 |
| 删除线:通过所有选定的文本或文本对象添加简单的删除线。 |
 ()
()
选项面板和文字工具 (The Options Panel and the Type Tool)
Some options not available in the Character Panel are waiting at the top of your screen, in the Options Panel, when you use the Type tool. These three are:
使用“文字”工具时,“字符面板”中某些不可用的选项正在屏幕顶部的“选项面板”中等待。 这三个是:

| Text Orientation: Toggles the direction the text in your text object runs, either horizontally or vertically. |
| Alignment: Sets the alignment of your text object either to Left-Aligned, Center-Aligned, or Right Aligned. | |

| Warp Text: Warps text objects into one of several pre-defined, adjustable shapes, like banners or other objects. |
| 文本方向:切换文本对象中文本的水平或垂直方向。 | |

| 对齐方式:将文本对象的对齐方式设置为“左对齐”,“居中对齐”或“右对齐”。 |
| 变形文本:将文本对象变形为几种预定义的可调整形状之一,例如横幅或其他对象。 |
()
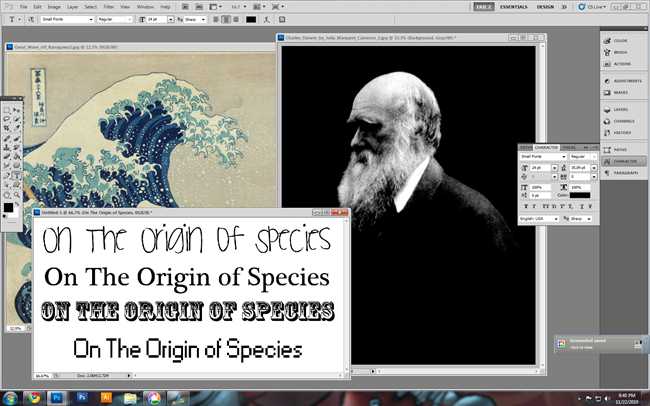
设计一个简单的书的封面 (Designing a Simple Book Cover)
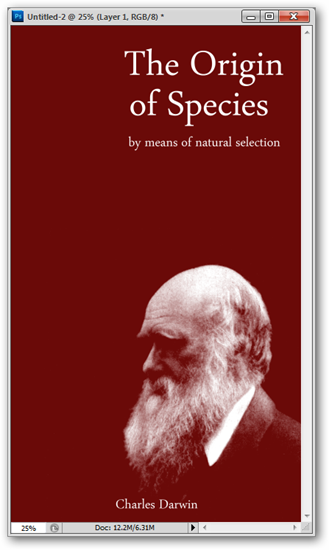
Because design is about real world application, we will look through the creation of a basic book cover design for one of the most important (not to say controversial) scientific books of all time, On The Origin of Species By Means of Natural Selection, by Charles Darwin.
因为设计是关于现实世界的应用,所以我们将研究为有史以来最重要的一本(不用说有争议的)科学书籍的基础书封面设计的创建,作者为:《自然选择的物种起源》 ,作者:查尔斯·达尔文。
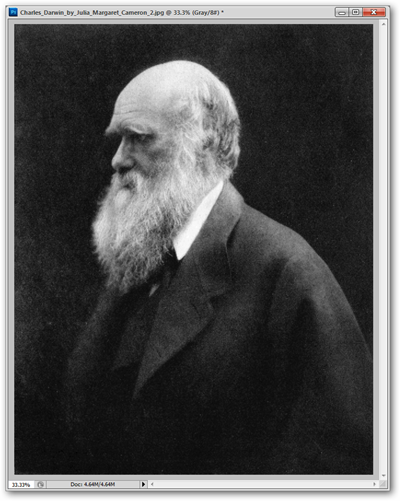
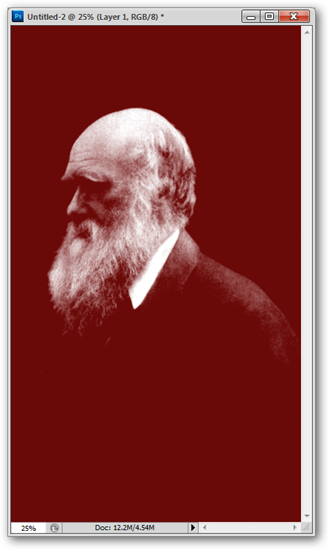
brings up the levels tool to adjust the image of Darwin. While design is not necessarily simply about arrangement of elements, this simplistic approach will suffice for demonstration purposes.
调出关卡工具以调整达尔文的形象。 尽管设计并不一定只是关于元素的排列,但这种简单的方法足以满足演示目的。
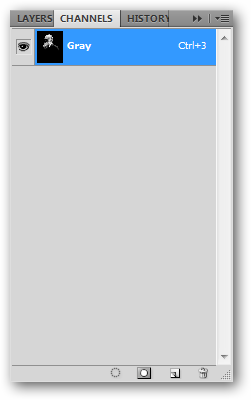
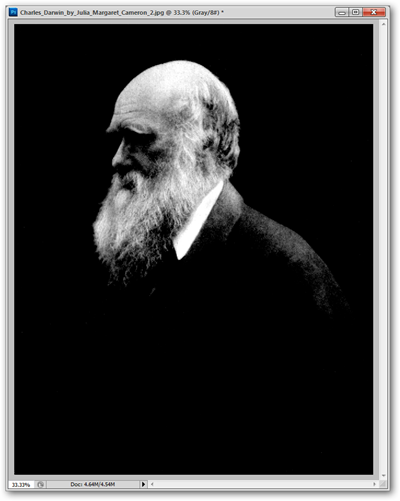
As the image is blacked, Ctrl click on the Gray channel in your channels panel. This creates a selection of all the white in the image.
当图像变黑时,按住Ctrl键单击通道面板中的“灰色”通道。 这将创建图像中所有白色的选择。
Edit: If your file is not already in Grayscale, but RGB or CMYK, you should go to Image > Mode > Grayscale before Ctrl + Clicking on your grayscale channel. Thanks to HTG reader l3utterfish for bringing this to my attention.
编辑:如果您的文件不是灰度,而是RGB或CMYK,则应在Ctrl +单击您的灰度通道之前进入“图像”>“模式”>“灰度”。 感谢HTG读者l3utterfish引起我的注意。
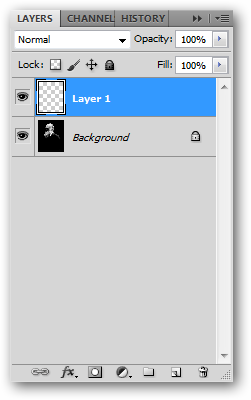
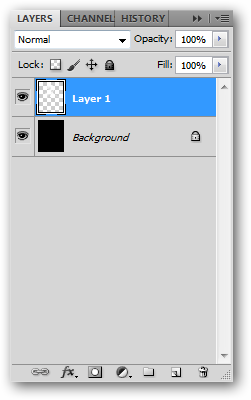
Press to create new layer.
按创建新层。
Edit > Fill to fill the selection in your new layer with white.
编辑>填充以白色填充新图层中的选择。

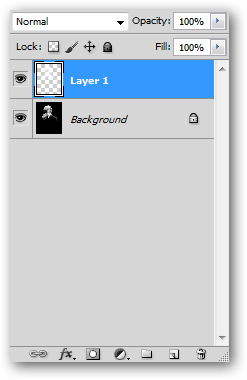
The icon photograph of Darwin is now removed from the black background and ready to be used as an element.
达尔文(Darwin)的偶像照片现在已从黑色背景中删除,可以用作元素。
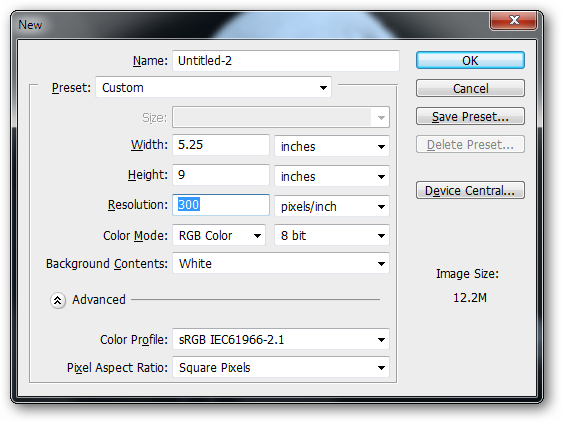
Press to create a new document at your preferred size. The size illustrated is the same size of another important book, Robert Bringhurst’s The Elements of Typographic Style.
按创建您喜欢的尺寸的新文档。 插图的大小与另一本重要书籍罗伯特·布林赫斯特(Robert Bringhurst)的《印刷风格的元素》的大小相同。
And here is our very tall workspace for the book cover.
这是我们非常高的书套工作空间。
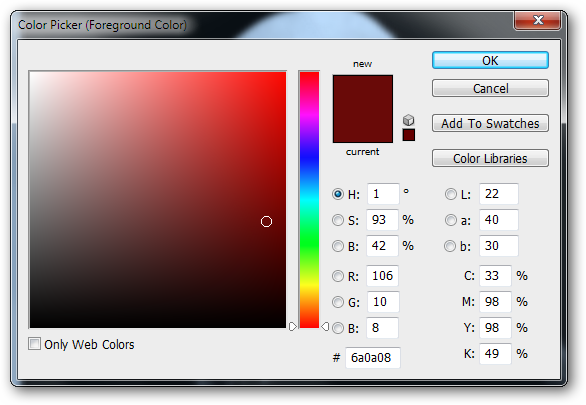
Pick a foreground color in the in your toolbox. Any color will suffice, although in this demonstration, a dark color is preferable.
在工具箱中选择前景色。 任何颜色都足够,尽管在此演示中,深色是可取的。
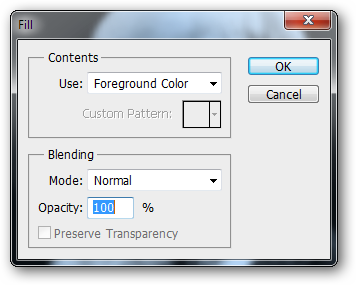
Edit > Fill and be certain to set “Use” to “Foreground Color.”
编辑>填充,并确保将“使用”设置为“前景色”。

The background is filled with the wine color chosen earlier.
背景充满了先前选择的酒色。
Press shortcut key . Navigate to your original file, and drag your layer into your new file using the selected Move Tool.
按快捷键。 导航到原始文件,然后使用选定的“移动工具”将图层拖动到新文件中。
The layer should appear something like this inside the new file.
在新文件中,该图层应显示为以下内容。
Press or select the type tool, Illustrated above to start setting type.
按或选择文字工具(如上图所示)开始设置文字。
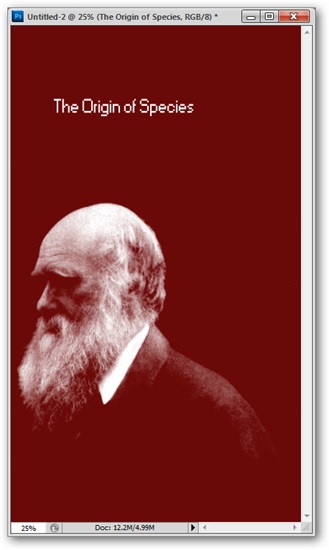
Not all fonts are appropriate to the content. This pixelated font is very bad for this concept.
并非所有字体都适合于内容。 这种像素化字体对于此概念非常不利。
A more conservative font may honor the content and create a more appropriate look.
较保守的字体可能会尊重内容并创建更合适的外观。
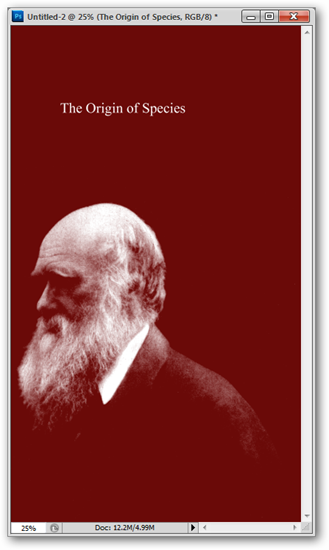
With even a few limited font options installed, it can seem overwhelming. However, picking the right font is difficult and time consuming, but altogether very important to a piece of design.
即使安装了几个有限的字体选项,它似乎也势不可挡。 但是,选择正确的字体既困难又费时,但对于一个设计而言却非常重要。

When the right font is found, adjusting it with the Character Panel is a simple matter.
找到正确的字体后,使用“字符面板”进行调整很简单。
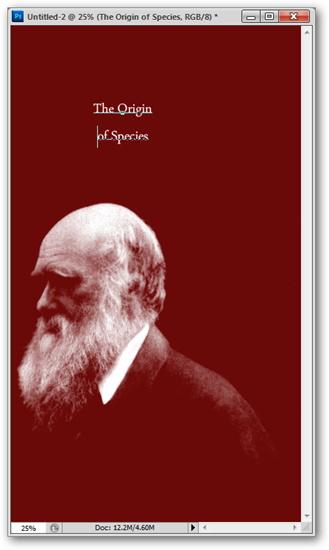
The font size is changed,and the type broken into two lines.
更改字体大小,并将字体分成两行。
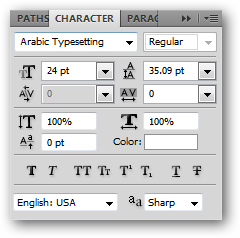
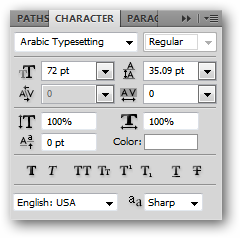
When the point size is adjusted, we may run into issues with leading.
调整点数时,我们可能会遇到领先问题。
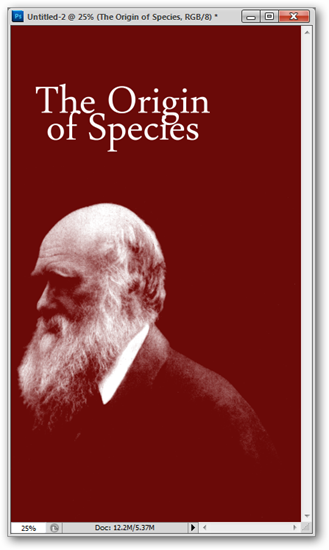
When letters collide, readers will be left with legibility and readability issues. Adjusting leading is the only response.
当字母碰撞时,读者将面临可读性和可读性问题。 调整领先地位是唯一的回应。
Increasing the point size of the leading improves the readability of the title.
增加引线的磅值大小可以提高标题的可读性。
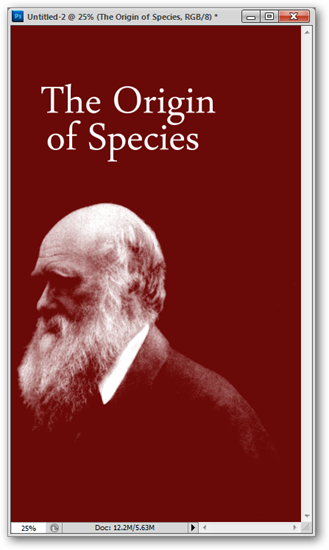
Additional information will have to be added, and oftentimes, Photoshop assumes you want to use the same font as point size as your last used text object. This may or may not be the case.
必须添加其他信息,并且,Photoshop通常会假定您要使用与上次使用的文本对象相同的字体作为磅值。 可能会或可能不会。
New text objects added and adjusted, we can start to access our design as a whole.
添加并调整了新的文本对象,我们可以开始整体访问设计。
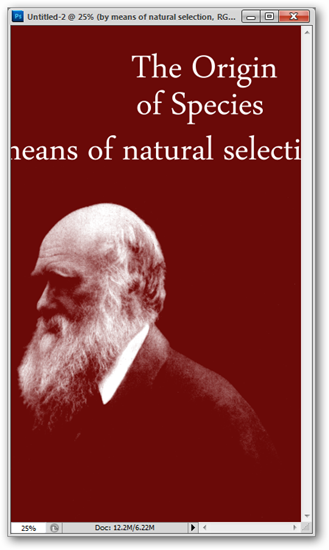
We may find we wish to move elements around.
我们可能会发现我们希望移动元素。

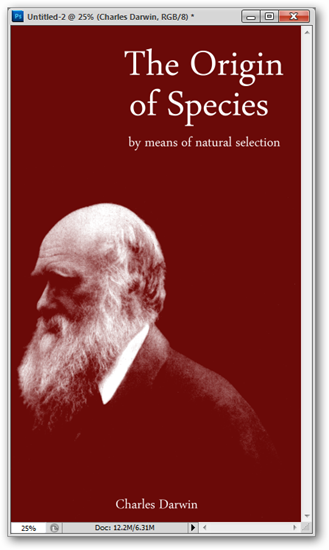
We may also add more elements or subtlety shift text, to keep a consistent line on the page. The Text tool will also allow you to adjust typos, like the letters “Means” “Natural” and “Selection” that need capitalizing in a title.
我们还可能添加更多元素或微妙的移位文本,以使页面上的行保持一致。 文本工具还允许您调整输入错误,例如需要大写标题的字母“ Means”,“ Natural”和“ Selection”。
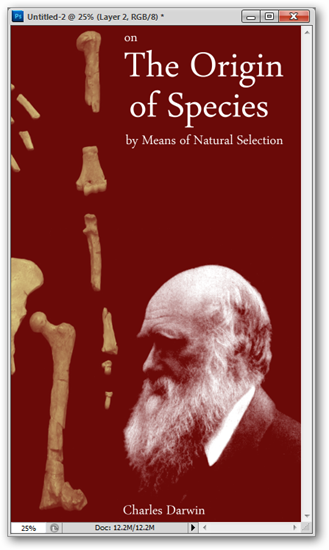
Additional elements can also help a design, like this skeleton of Lucy, the famous Australopithecus afarensis. Again, design is not necessarily a simple combination of elements, as it can involve process Photoshop is completely incapable of. However, it is often an excellent tool for this sort of graphics work.
其他元素也可以帮助设计,例如露西的骨骼,即著名的南方古猿afarensis。 同样,设计不一定是元素的简单组合,因为它可能涉及Photoshop完全无法实现的过程。 但是,它通常是用于此类图形工作的出色工具。
Photoshop tips left you confused? Start at the Beginning! Check out the previous installments of the How-To Geek Guide to Learning Photoshop.
Photoshop提示让您感到困惑? 从头开始! 请查阅“如何学习Photoshop极客指南”的前几期。
Come back to How-To Geek for the Final installments of the Guide to Learning Photoshop, where we’ll wrap up our guide with a look at the Filters of Photoshop. 回到How-To Geek的“学习Photoshop指南”的最后部分中,我们将在Photoshop滤镜中总结一下该指南。
Image Credit: Darwin by Julia Margaret Cameron, in public domain. Lucy by Wikipedia user 120, made available under Creative Commons.
图片来源:Julia·玛格丽特·卡梅隆(Julia Margaret Cameron)的达尔文(Darwin),在公共领域。 维基百科用户120的露西(可在创用CC下使用) 。
photoshop脚本指南


 被折叠的 条评论
为什么被折叠?
被折叠的 条评论
为什么被折叠?
 到【灌水乐园】发言


