


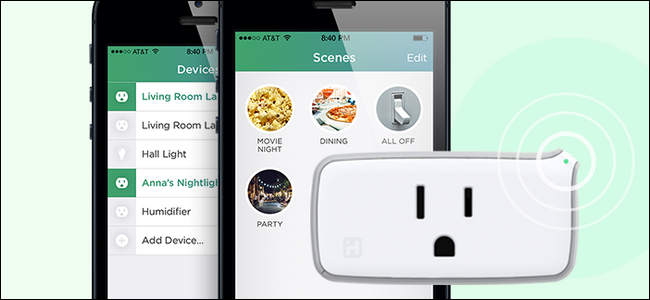
What do you do if you want to add a device to your HomeKit smart home, but the device doesn’t support HomeKit? You set up a middleman with the iHome iSP5, an inexpensive HomeKit-enabled smart outlet.
如果要向HomeKit智能家居中添加设备,但该设备不支持HomeKit,该怎么办? 您可以使用iHome iSP5(价格低廉,支持HomeKit的智能插座)设置中间商。
HomeKit is Apple’s smarthome platform, and if you want to control all your appliances and devices with the majesty of your voice through Siri, you need to add them all to your HomeKit home. If you have newer HomeKit friendly stuff, like the second generation Philips Hue hub, then you’re all set.
HomeKit是Apple的智能家居平台,如果您想通过Siri用声音的威力控制所有设备和装置,则需要将它们全部添加到HomeKit家庭中。 如果您拥有较新的HomeKit友好产品,例如第二代Philips Hue hub ,那么一切就绪。
But what about items that aren’t HomeKit compatible? What if you want to control a simple box fan in the window, a table lamp, an old coffee pot, or any number of the many, many, electrical devices we all own that aren’t smart anything, let alone HomeKit compatible? What if you have an older smarthome device that isn’t HomeKit compatible but you want to use it with your HomeKit system?
但是与HomeKit不兼容的商品呢? 如果要控制窗口中的简单箱式风扇,台灯,旧咖啡壶,或者我们拥有的许多很多电子设备中的任何一种,它们都不是智能产品,更不用说HomeKit兼容了吗? 如果您有一个不兼容HomeKit的较旧的智能家居设备,但想与HomeKit系统一起使用该怎么办?
There’s an easy fix for that situation: a HomeKit compatible smart outlet. Rather than replace the electrical device with a HomeKit compatible one, you can simply insert a smart plug in between the wall outlet and the power cord of the device to act as a HomeKit middleman. In other words: it lets you control nearly any appliance in your house using Siri.
有一种简单的解决方法:兼容HomeKit的智能插座。 您无需将电子设备替换为兼容HomeKit的电器,而只需将智能插头插入设备的壁装电源插座和电源线之间即可充当HomeKit的中间人。 换句话说:它使您可以使用Siri控制房屋中的几乎所有设备。
This solution does have one immediately obvious shortcoming: it’s binary. While a device designed to be a smarthome product, like a networked music player, might have a plethora of settings and configuration options available to it, the only thing a smart outlet can do is control the flow of electricity to the device. In that regard it could turn a radio on and off, but it certainly can’t change the station or switch between the radio and the CD inputs.
该解决方案确实有一个显而易见的缺点:它是二进制的。 虽然设计为智能家居产品的设备(如网络音乐播放器)可能具有许多可用的设置和配置选项,但智能插座唯一能做的就是控制设备的电流。 在这方面,它可以打开和关闭收音机,但肯定不能更改电台或在收音机和CD输入之间切换。
That doesn’t mean we should call the smart outlet dumb, however, as despite the limitation of simply turning devices on and off, smart outlets offer tons of additional functionality. You can control the device with your voice, set triggers based on time of day, and integrate the device into home control scenes.
这并不意味着我们应该称其为智能插座哑巴,但是,尽管简单地打开和关闭设备存在局限性,但智能插座仍提供了许多附加功能。 您可以用声音控制设备,根据一天中的时间设置触发器,并将设备集成到家庭控制场景中。
Sound like the solution to your smarthome quandary? Let’s look at what you need and how to set it up.
听起来像是解决智能家居难题的解决方案? 让我们看看您需要什么以及如何设置它。
你需要什么 (What You Need)

HomeKit is still relatively new, and there are only a handful of HomeKit-enabled outlets on the market. Rather than send you out to sift through the emerging market and attempt to avoid early adoption pitfalls, we’ll just steer you right to the single model we recommend above all the others: the iHome iSP5.
HomeKit还是相对较新的产品,市场上只有少数支持HomeKit的商店。 我们不会引导您进入新兴市场并试图避免早期采用的陷阱,而是让您直接使用我们建议的单一模型,即iHome iSP5 。
It’s the most economical HomeKit smart plug on the market–other outlets cost $40-80, but the iHome model is $34, and often on sale for less. Not only does it support HomeKit, but it can also communicate via the iHome system, which has two big benefits.
它是市场上最经济的HomeKit智能插头-其他插座的价格为40-80美元,而iHome模型的价格为34美元,并且通常以更低的价格出售。 它不仅支持HomeKit,而且还可以通过iHome系统进行通信,这有两个好处。
First, it means Android users in your home can also control the iHome plug via the iHome Android app. Second, it means you don’t need an Apple TV (for remote HomeKit access) to control the plug when you’re away from home (as you can send a signal to it via the iHome app). In addition to all that, it’s also rated for up to an 1800W electrical load so you can use it to control everything from a low-watt lamp to high-watt device like a space heater or window AC unit.
首先,这意味着您家中的Android用户还可以通过iHome Android应用程序控制iHome插件。 其次,这意味着您出门在外时不需要Apple TV(用于远程HomeKit访问)来控制插头(因为您可以通过iHome应用向其发送信号)。 除此之外,它还具有高达1800W的额定电气负载,因此您可以使用它来控制从低功率灯到高功率设备(如空间加热器或窗户交流装置)的所有东西。
Finally, the iHome iSP5 also supports integration with the Amazon Echo, the Wink hub, and the Nest thermostat. Unlike many smarthome products that only work with one platform, even if you completely abandon HomeKit and set up a totally different smarthome system, you can bring the iHome plug along with you.
最后,iHome iSP5还支持与Amazon Echo,Wink集线器和Nest恒温器集成。 与许多只在一个平台上运行的智能家居产品不同,即使您完全放弃HomeKit并设置了完全不同的智能家居系统,也可以将iHome插头随身携带。
设置iHome iSP5 (Setting Up The iHome iSP5)
Setting up the iHome iSP5 is really straightforward, as long as you keep in mind that you’re essentially setting it up twice (once for the iHome system and once for the HomeKit system). If you don’t keep that in mind, the setup process can be a bit confusing because it feels like you’re repeating everything.
设置iHome iSP5确实非常简单,只要记住要设置两次即可(对于iHome系统一次,对于HomeKit系统一次)。 如果您不注意这一点,则设置过程可能会有些混乱,因为感觉就像您在重复所有操作。
Simply plug the iSP5 into an outlet and then press and hold the button (located on the little wing-like-nub that sticks up from the upper right of the device) for 12 seconds until the indicator light blinks green and red. This resets the device to the factory settings and ensures there isn’t a lingering configuration from the quality testing at the factory. After plugging it in and resetting it, download the free iHome Control app from the App Store and launch it.
只需将iSP5插入电源插座,然后按住按钮(位于设备右上方的小翼状小突起上)并保持12秒钟,直到指示灯闪烁绿色和红色。 这会将设备重置为出厂设置,并确保出厂时的质量测试中没有挥之不去的配置。 插入并重置后,从App Store下载免费的iHome Control应用并启动它。
You’ll be prompted to create an iHome account.
系统将提示您创建一个iHome帐户。
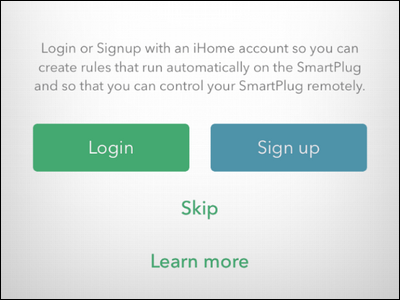
If you only want to access your iHome outlet from within your home, or you have the new Apple TV with HomeKit support that allows for remote access, you can skip this step. We’d still recommend signing up for an account, however, as it provides backup access to the plug independently of HomeKit and allows for non-iOS users in your home to control the plug.
如果您只想在家中访问iHome插座,或者拥有支持HomeKit的新Apple TV支持远程访问,则可以跳过此步骤。 我们仍然建议您注册一个帐户,因为它提供了独立于HomeKit的插件备份访问权限,并允许您家中的非iOS用户控制插件。
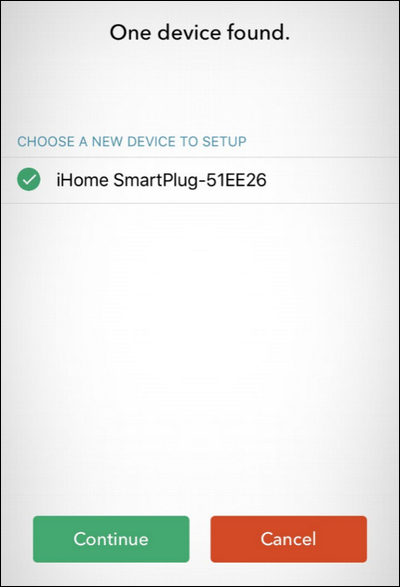
Whether you sign up or skip the step, the application will prompt you to reset your plug. Joke’s on them, we’re one step ahead! Click “Next” and ignore the prompt to reset the device. The app will begin searching for devices. Don’t worry if it seems to be doing nothing–during the search process there’s no indicator and it says that no devices are found but then, suddenly, your device will appear. Give it at least 30-60 seconds.
无论您是注册还是跳过该步骤,应用程序都会提示您重置插头。 开玩笑吧,我们领先一步! 单击“下一步”,然后忽略提示以重置设备。 该应用程序将开始搜索设备。 不必担心它似乎什么也没做–在搜索过程中,没有任何指示符,它表示未找到任何设备,但随后,您的设备会突然出现。 给它至少30-60秒。
Select the found device and click “Continue”.
选择找到的设备,然后单击“继续”。
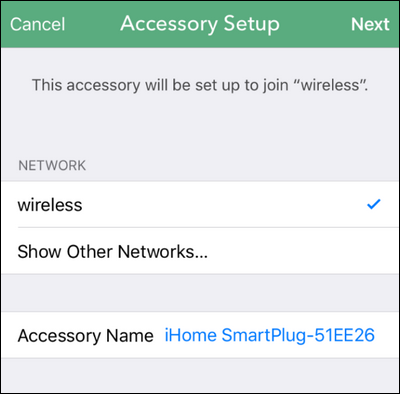
Next, you’ll be prompted to connect it to your Wi-Fi network. Select the Wi-Fi network you wish to use–if your iOS device has logged into this network before it will automatically provide the login credentials, otherwise fill them out.
接下来,系统将提示您将其连接到Wi-Fi网络。 选择您要使用的Wi-Fi网络-如果您的iOS设备已登录到该网络,然后它会自动提供登录凭据,否则请填写。
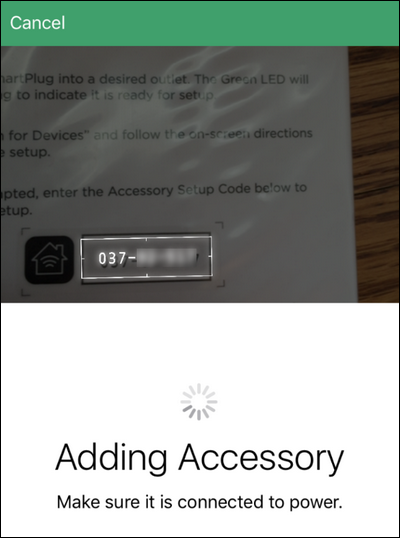
Once connected to the Wi-Fi network, you’ll be prompted to scan the HomeKit accessory code for the device. The accessory code is located on both the plug and the cover of the product manual (seen below).
连接到Wi-Fi网络后,系统会提示您扫描设备的HomeKit配件代码。 附件代码位于产品手册的插头和盖子上(如下所示)。
Once the device is connected to your HomeKit system you’ll be prompted to name it. Select a name that reflects what the plug controls as this name will be how Siri identifies the device. For example if you were going to use the plug to control a disco light, you would want to name it “Party Light” or “Disco Ball” and not “Living Room Plug”.
将设备连接到HomeKit系统后,系统将提示您对其进行命名。 选择一个反映插头控制内容的名称,因为该名称将成为Siri识别设备的方式。 例如,如果您要使用插头控制迪斯科灯,则需要将其命名为“派对灯”或“迪斯科舞会”,而不是“客厅插头”。

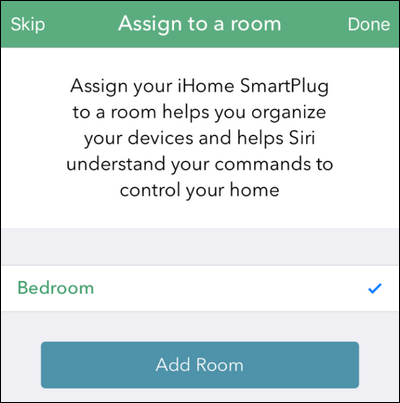
After naming the device you’ll be prompted to assign it to a room. Again, use names that sound natural when spoken as whatever you name the room will become part of the identification process Siri uses to locate it.
命名设备后,系统会提示您将其分配给房间。 再次,使用听起来很自然的名称,就像您为房间命名一样,它将成为Siri用来定位房间的识别过程的一部分。
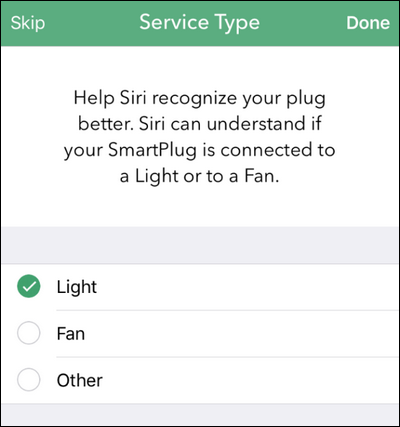
Finally, the iHome app will prompt you to identify the type of device it is–a light, a fan, or “other” for any other electrical device. This step isn’t particularly critical, but it does help improve how Siri understands your requests. If, for example, Siri knows that the plug controls a lamp in your bedroom, then she will respond to the command “turn the bedroom lights off”.
最后,iHome应用程序将提示您确定设备的类型-灯,风扇或其他任何电气设备的“其他”设备。 这个步骤并不是特别关键,但是它确实有助于改善Siri理解您的请求的方式。 例如,如果Siri知道插头可以控制您卧室的灯,那么她将响应“关闭卧室灯”命令。
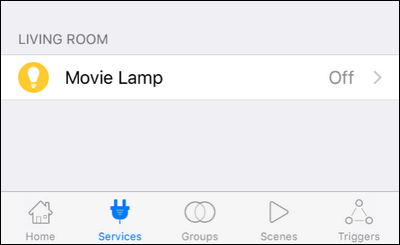
After that final step, you’ll see your plug in the list of devices, like so.
完成最后一步后,您将在设备列表中看到您的插件,如下所示。
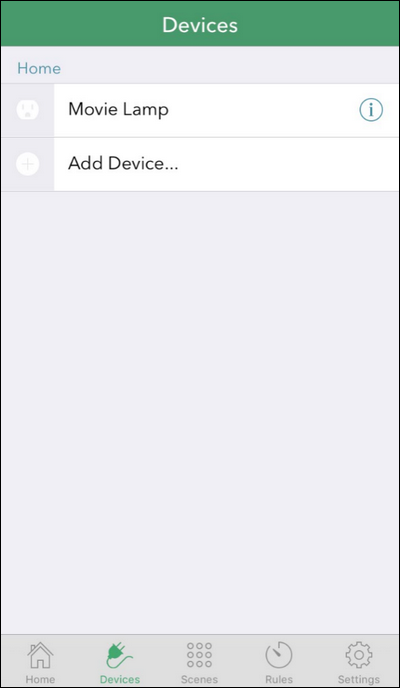
Test the plug by tapping the the plug icon. Even if you don’t anything plugged into it, the little H indicator light in the corner of the plug will blink on and you’ll here a little click sound as the internal switch activates.
点击插头图标,测试插头。 即使您没有插入任何东西,插头角落的小H指示灯也会闪烁,并且在内部开关激活时您会听到一点喀哒声。
控制插头 (Controlling the Plug)
As we just demonstrated, you can control the plug by opening the iHome device and tapping on the entry to toggle the power on and off. You can also physically turn the plug on and off by pressing the button on the plug (the same one you used to reset it). But let’s be real here: you want the futuristic experience where you control your home with your voice or automate it.
正如我们刚刚演示的那样,您可以通过打开iHome设备并点击相应条目以打开和关闭电源来控制插头。 您也可以通过按下插头上的按钮来物理地打开和关闭插头(用于重置它的按钮)。 但让我们成为现实:您想要一种未来感的体验,您可以用声音控制房屋或使其自动化。
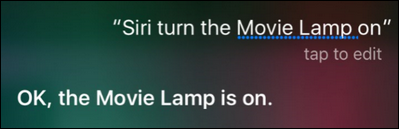
To control the plug with your voice, you can summon Siri and issue a command like “Siri, turn the lights on” (if you told Siri the plug was for a lamp) or “Turn the bedroom on”, or by addressing the device by name like “Siri, turn the movie lamp on” if the plug is connected to an eye-saving bias light behind your beautiful HDTV.
要用声音控制插头,您可以召唤Siri并发出诸如“ Siri,打开灯”(如果您告诉Siri插头是用于电灯)或“打开卧室”之类的命令,或通过寻址设备如果插头已连接到漂亮的HDTV后面的醒目的偏光灯,则名称应为“ Siri,打开电影灯”。
In addition to controlling the plug via voice, however, you can incorporate the plug into your HomeKit scenes, groupings, and so on. The iHome app does offer the ability to group the plug, create scenes, and set up simple timer-based triggers, but there’s one big shortcoming: it only works with other iHome devices. While that might be fine if you just want to set the plug to turn a lamp on at night while you’re on vacation, or some such thing, it doesn’t help integrate the plug smoothly into your greater HomeKit system.
但是,除了通过语音控制插头外,您还可以将插头合并到HomeKit场景,分组等中。 iHome应用程序确实具有对插头进行分组,创建场景以及设置基于计时器的简单触发器的功能,但是有一个很大的缺点:它仅适用于其他iHome设备。 如果您只是想将插头设置为在假期度假时晚上打开灯,或者这样做之类的话,这可能会很好,但这无助于将插头平稳地集成到更大的HomeKit系统中。
Fortunately, though, the setup process we completed in the previous section gave the plug a name and room based identifier that is recognized across the HomeKit system. You know what that means? It means any application that can control the HomeKit system can tap into your plug.
幸运的是,尽管如此,我们在上一节中完成的设置过程为插件提供了名称和基于房间的标识符,该标识符在HomeKit系统中可以识别。 你知道这意味着什么? 这意味着可以控制HomeKit系统的任何应用程序都可以接入您的插件。
We’ve showed you how to combine different HomeKit products into rooms, zones, and scenes with the excellent Home app, and upon opening that app right after setting up the iHome plug, the plug was there and read to incorporate into whatever scenes or triggers we wanted to create.
我们已经向您展示了如何使用出色的Home应用程序将不同的HomeKit产品组合到房间,区域和场景中,并在设置iHome插件后立即打开该应用程序,然后将插件插入其中并阅读以将其合并到任何场景或触发器中我们想创造。
This is far more flexible than using the iHome app, as it means the iHome plug can exist along side all our other HomeKit devices (and without the hassle of using two separate apps to configure everything).
这比使用iHome应用程序灵活得多,因为这意味着iHome插头可以与我们所有其他HomeKit设备一起使用(并且无需使用两个单独的应用程序来配置所有内容的麻烦)。
With very little expense and a few minutes configuring everything, you can easily turn any dumb appliance or device into a smart HomeKit enabled one.
花费很少的钱,花几分钟的时间配置所有东西,您可以轻松地将任何哑设备或设备变成启用智能HomeKit的设备。


 5399
5399

 被折叠的 条评论
为什么被折叠?
被折叠的 条评论
为什么被折叠?
 到【灌水乐园】发言


