


Have you ever noticed that you normally can not enable Aero in a Windows 7 or Vista virtual machine? The latest VMware Player beta lets you do just that, and we have a full walk-through on how to accomplish it.
您是否曾经注意到您通常无法在Windows 7或Vista虚拟机中启用Aero? 最新的VMware Player beta版可让您做到这一点,并且我们全面介绍了如何实现。

Note: VMware Player is available for Windows and Linux. Keep in mind that this is Beta Software and will occasionally be temperamental.
注意:VMware Player可用于Windows和Linux。 请记住,这是Beta版软件,偶尔会有气质。
Installing VMware Player
安装VMware Player
The install process is not complicated, but relevant install windows are shown here. Also keep in mind that the entire process will take more than a few minutes to finish while everything is being installed.
安装过程并不复杂,但是此处显示了相关的安装窗口。 还请记住,在安装所有组件时,整个过程将花费几分钟以上。
Note: During the install process you will not see the EULA for VMware Player.
注意:在安装过程中,您不会看到EULA for VMware Player。
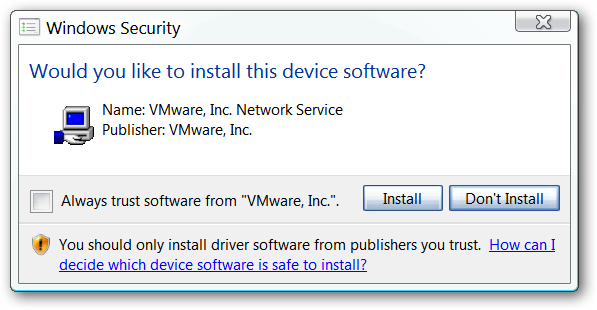
During the install process you will most likely be presented with the following message window asking confirmation to install driver software. Click “Install”.
在安装过程中,您很可能会看到以下消息窗口,询问确认安装驱动程序软件。 点击“安装”。
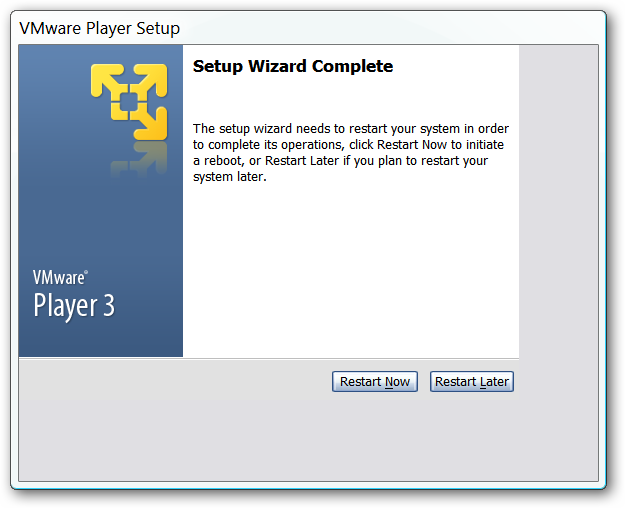
Once the install process has finished you will be asked to restart your computer.
安装过程完成后,系统将要求您重新启动计算机。
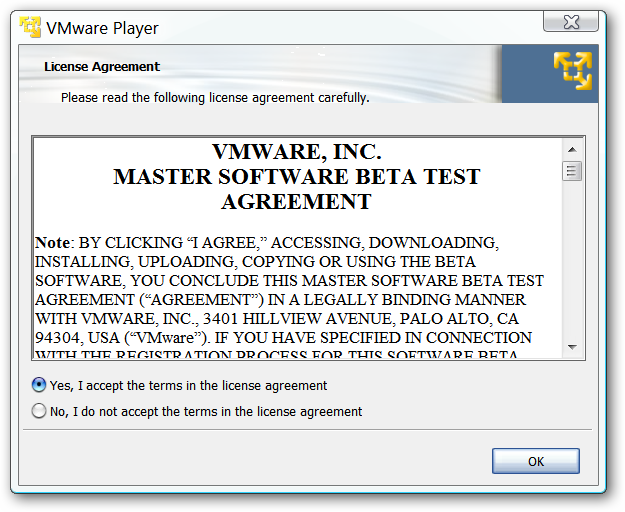
After you have restarted your computer and started VMware Player for the first time, then you will be presented with the EULA. You will need to accept in order to use the software.
重新启动计算机并首次启动VMware Player后,将看到EULA。 您需要接受才能使用该软件。
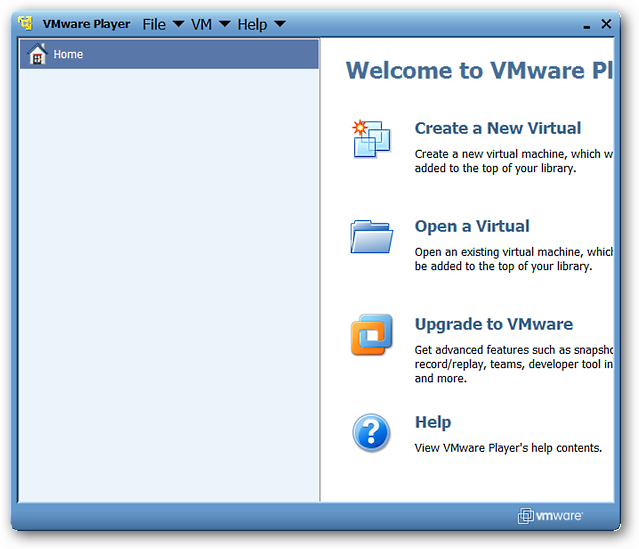
This is the “Main Window”. Since it is still in beta it did display a little oddly on our system as shown in the following screenshot. But it functioned without any problems whatsoever for us.
这是“主窗口”。 由于它仍处于测试阶段,因此确实在我们的系统上显示了一些奇怪的地方,如以下屏幕截图所示。 但这对我们来说没有任何问题。
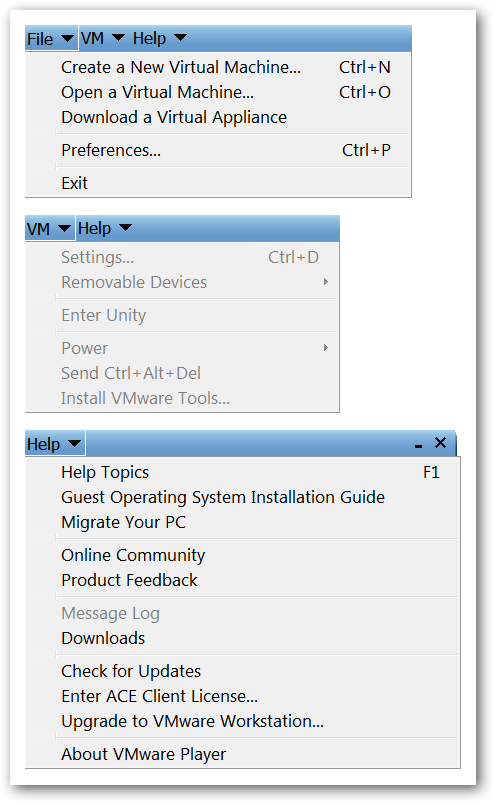
These are the menus for VMware Player…easy access to everything that you need to get started. Notice the link for the Guest Operating System Installation Guide in the “Help Menu”.
这些是VMware Player的菜单,可轻松访问入门所需的所有内容。 请注意“帮助菜单”中“客户操作系统安装指南”的链接。
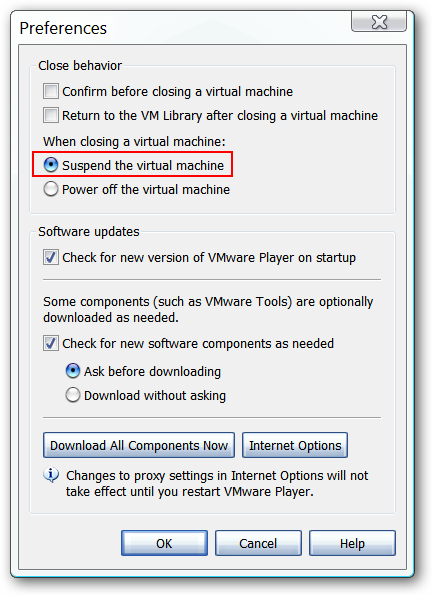
These are the “Preferences”. If for some reason it is not selected, then make certain that “Suspend the virtual machine” is activated so that your virtual O.S. can be preserved when you are finished with it for the day (or night).
这些是“首选项”。 如果由于某种原因未选择该虚拟机,请确保已激活“挂起虚拟机”,以便在白天(或晚上)用完虚拟机后可以保留该虚拟机。
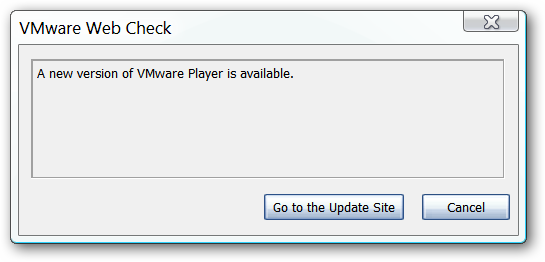
If there is a newer beta version available you will be presented with the following message window each time you start the program (unless you have update checks disabled in the “Preferences”). If you click on “Go to the Update Site” you will have to register for an account in order to download the newest version. At this point it is much simpler to wait for the latest release to become available on one of the software download websites such as Softpedia…
如果有较新的Beta版本可用,则每次启动程序时都会显示以下消息窗口(除非在“首选项”中禁用了更新检查)。 如果单击“转到更新站点”,则必须注册一个帐户才能下载最新版本。 在这一点上,等待最新版本在软件下载网站之一(例如Softpedia)上可用要容易得多。
Installing a System in VMware Player
在VMware Player中安装系统
When you get ready to install an operating system, there are two ways to start the process: 1.) Go to the “File Menu” and select “Create a New Virtual Machine…” or 2.) Click on “Create a New Virtual” in the “Main Window Sidebar”.
准备安装操作系统时,有两种方法可以启动该过程: 1.)转到“文件菜单”,然后选择“创建新的虚拟机…”或2.)单击“创建新的虚拟机” 。 ”在“主窗口侧栏”中。
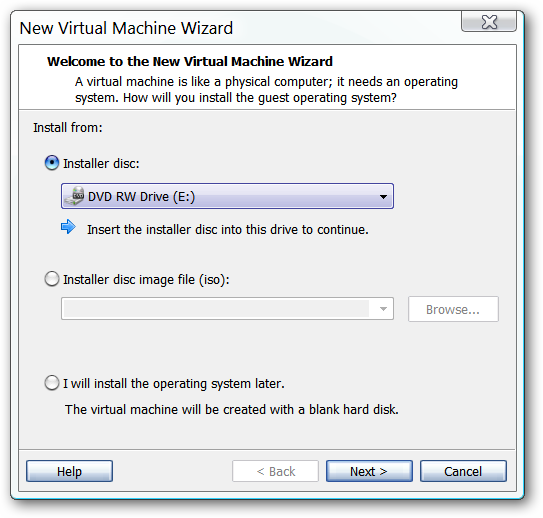
This is the process that you will need to go through to set up your new system. In the first window you will need to select the install source (i.e. DVD or ISO file). Notice that you can also create a blank hard disk if desired… Click “Next” once you have chosen your source.
这是设置新系统所需的过程。 在第一个窗口中,您将需要选择安装源(即DVD或ISO文件)。 请注意,如果需要,您还可以创建一个空白硬盘...选择源后,单击“下一步”。
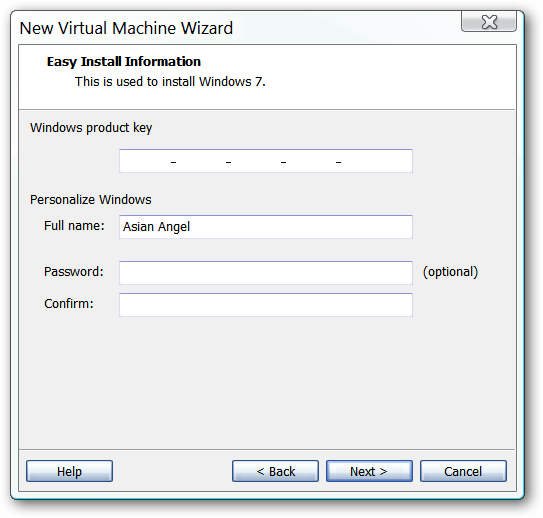
We chose to install directly from an ISO file. As you can see VMware Player automatically detected the type of install and provided the opportunity to enter the “Windows Product Key” now instead of having to do it later. Click “Next” once you have entered the necessary information.
我们选择直接从ISO文件安装。 如您所见,VMware Player自动检测到安装类型,并提供了现在输入“ Windows产品密钥”的机会,而不必以后再进行。 输入必要的信息后,单击“下一步”。
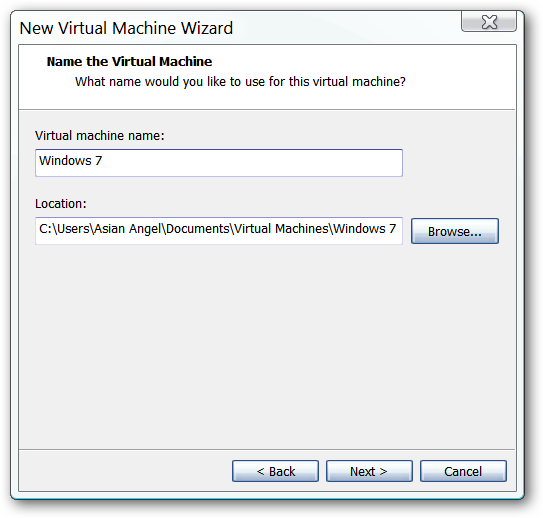
Choose the name for your new virtual O.S. and the location for the new “hard disk”. Click “Next” to proceed.
选择新虚拟操作系统的名称和新“硬盘”的位置。 点击“下一步”继续。
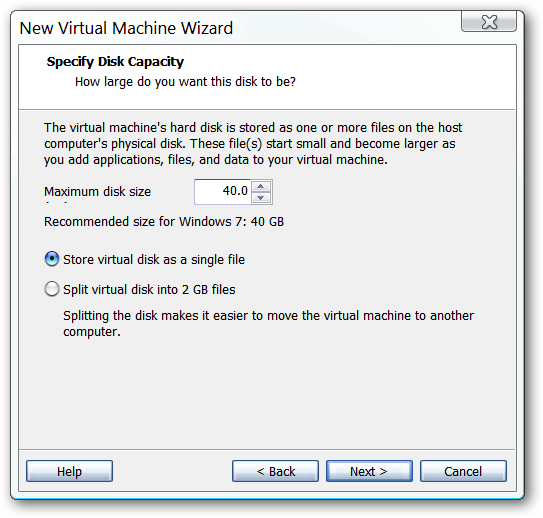
Determine the disk size and what form you would like to have your new O.S. stored in. Click “Next”.
确定磁盘大小以及您要存储新OS的格式。单击“下一步”。
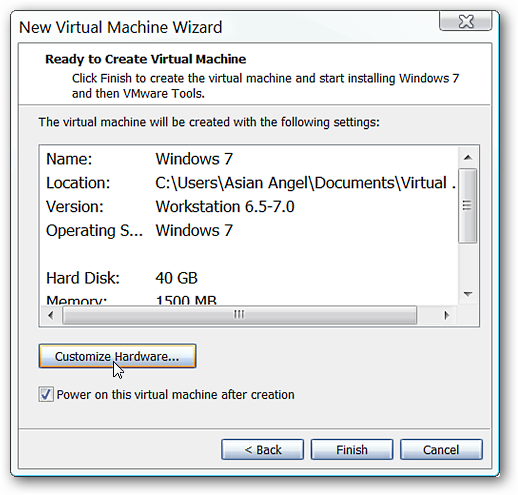
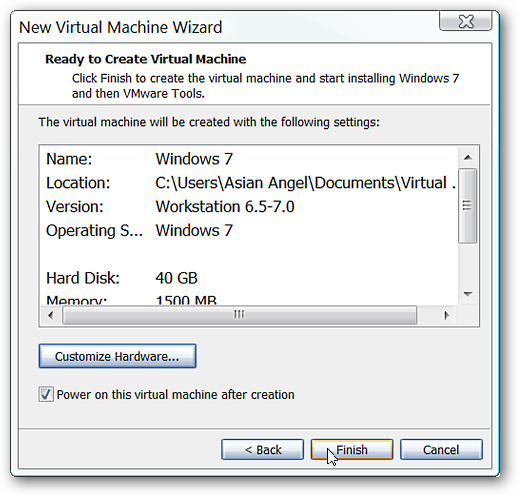
At this point you are nearly ready to begin installation…but first you should click on “Customize Hardware…” to make any desired changes to the settings.
此时,您几乎可以开始安装了……但是首先您应该单击“ Customize Hardware…”,对设置进行任何所需的更改。
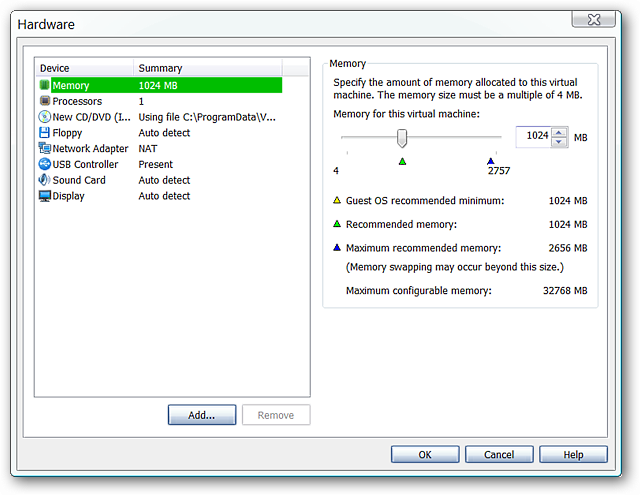
There are eight areas to sort through in the “Settings Window” but none of it is complicated. In the first area determine if you would like to use the recommended Memory or change it to a higher/lower setting. We chose 1500 MB for our O.S. install…
在“设置窗口”中可以对八个区域进行分类,但都不是很复杂。 在第一个区域中,确定您是要使用推荐的内存还是将其更改为更高/更低的设置。 我们为操作系统安装选择了1500 MB…
Note: The only change from the defaults that we made was for the Memory size…everything else was already set up very well for our purposes.
注意:我们对默认值所做的唯一更改是“内存大小”…对于我们的目的,其他所有设置都很好。
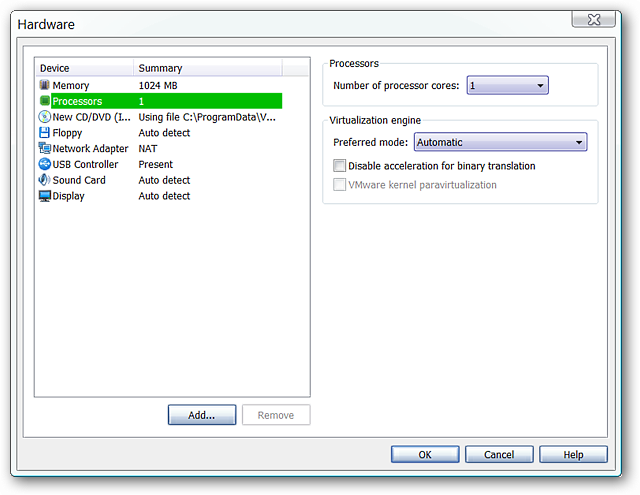
Make any desired changes for the number of processor cores or the preferred mode for the virtualization engine.
对处理器核心数或虚拟化引擎的首选模式进行任何所需的更改。
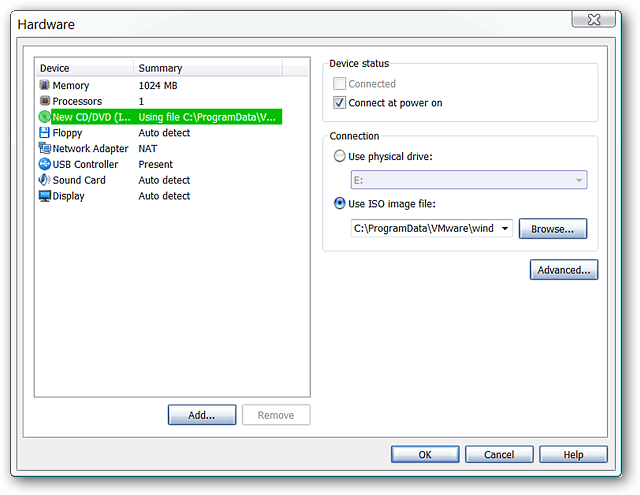
Make changes for the CD/DVD access if needed.
如果需要,对CD / DVD访问进行更改。
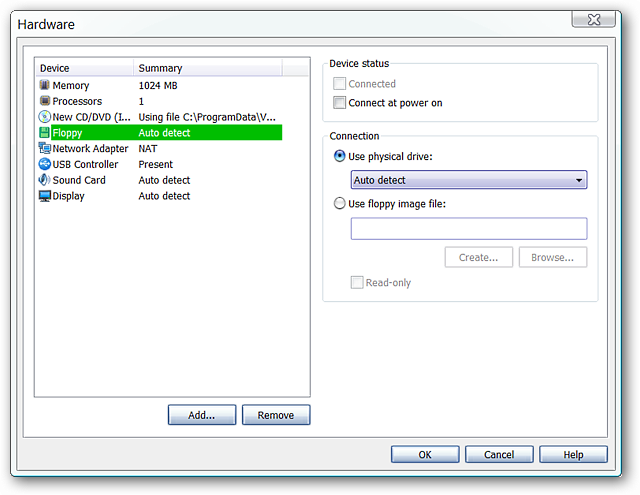
You should not need to do anything regarding the Floppy settings…
您无需对软盘设置做任何事情……
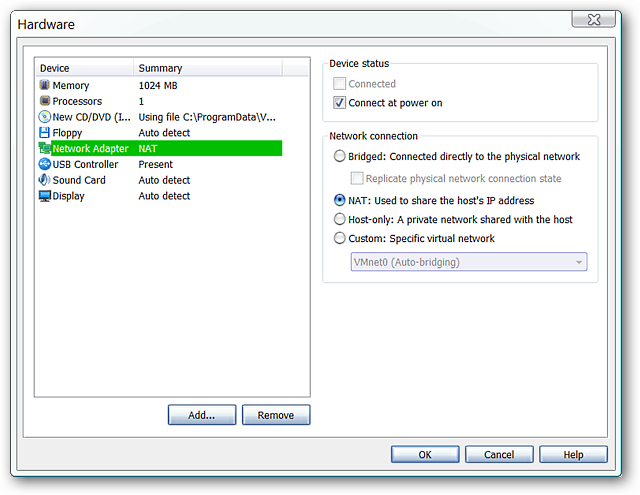
Modify the Network settings (if desired) to best suit your needs.
修改网络设置(如果需要)以最适合您的需求。
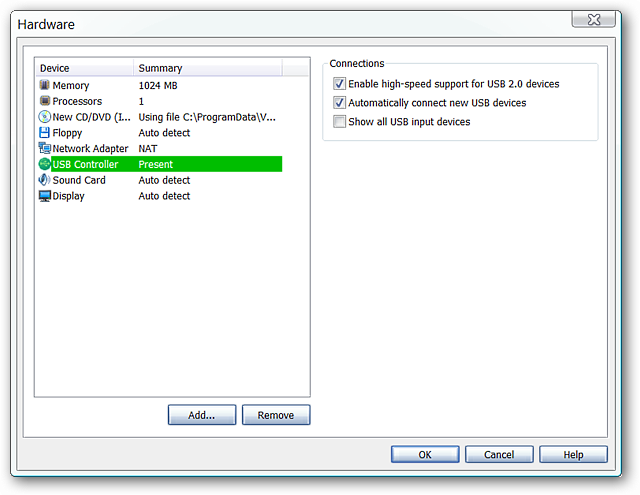
Enable or disable USB capability.
启用或禁用USB功能。
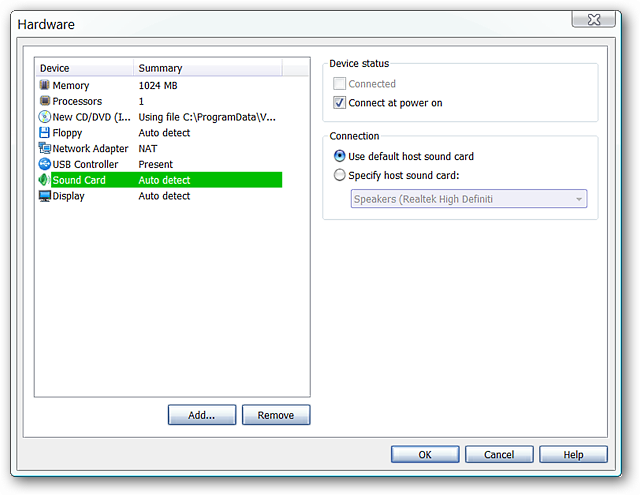
Change the access to the host Sound Card and/or choose a specific one if you need to do so.
更改对主机声卡的访问权限,和/或根据需要选择特定的声卡。
Make any necessary changes for the Display… Click “OK” when you have finished with the settings to return to the virtual O.S. creation wizard screen
对显示进行必要的更改…完成设置后,单击“确定”以返回到虚拟OS创建向导屏幕

At this point you are ready to click “Finish” and get things started.
此时,您可以单击“完成”并开始操作。
As the setup is proceeding you may or may not see a message window letting you know how to access any external storage devices…it will depend on what is hooked up to your host computer.
随着设置的进行,您可能会或可能不会看到一个消息窗口,让您知道如何访问任何外部存储设备……这取决于连接到主机的内容。
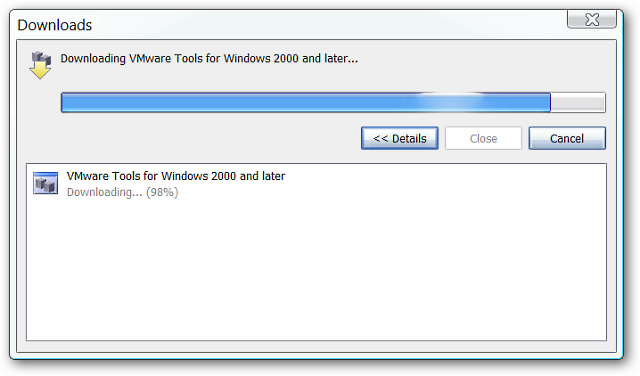
You will also see the following window asking to download and install VMware Tools. Click “Download”.
您还将看到以下窗口,要求下载和安装VMware Tools。 点击“下载”。

This same window will display as the VMware Tools are downloading and installing/updating…
当VMware Tools正在下载和安装/更新时,将显示该窗口。
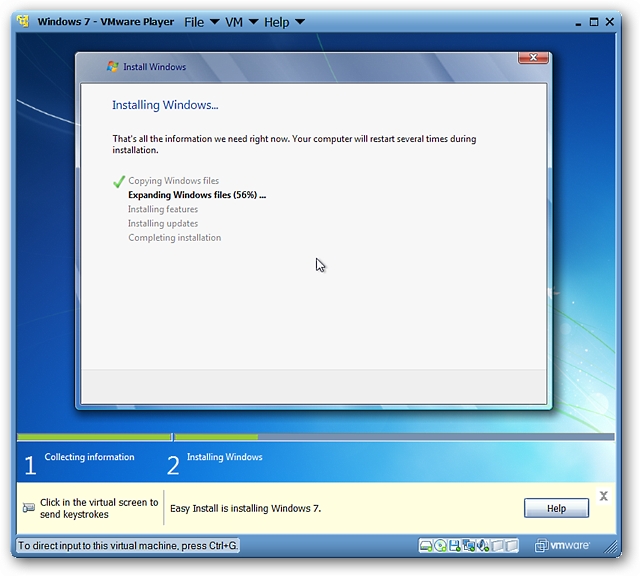
While the VMware Tools are downloading/installing, you will notice that your new O.S. will also be installing at the same time. Here you can see our Windows 7 system getting settled in. There will be the “traditional” restarts for your new system to complete the installation and a restart for new VMware Drivers that need to be added in to help your new O.S. run smoothly. Let all of the VMware Drivers install…there were four for our particular installation.
在下载/安装VMware Tools时,您会注意到新操作系统也将同时安装。 在这里,您可以看到我们的Windows 7系统已安装完毕。新系统将以“传统”方式重启以完成安装,而新VMware Drivers的重启方式则需要添加进来,以帮助您的新OS顺利运行。 让所有的VMware Drivers安装。。。我们的特定安装有四个。
Note: If you are installing Windows 7, it will start up with the Basic theme and you will need to turn Aero on.
注意:如果要安装Windows 7,它将以“基本”主题启动,并且需要打开Aero。
Windows 7 in VMware Player
VMware Player中的Windows 7
Here is our new Windows 7 installation set at full screen with Aero enabled. Although it did not show up in our screenshot, there will be a short (approximately one-third screen width) and thin VMware Toolbar at the top of the screen.
这是启用了Aero的全屏新Windows 7安装集。 尽管它没有出现在我们的屏幕快照中,但屏幕顶部将有一个较短的屏幕(大约三分之一的屏幕宽度)和较薄的VMware Toolbar。
Note: It is very easy to move between your virtual and actual operating systems…simply drop out of full-screen mode using the “Minimize/Maximize Button” in the upper right corner to gain access to your regular system. There are also hotkey combinations available…
注意:在虚拟操作系统和实际操作系统之间切换非常容易,只需使用右上角的“最小化/最大化按钮”退出全屏模式即可访问常规系统。 也有热键组合可用…

A close-up look at the “Start Menu & Taskbar Area”…
仔细查看“开始菜单和任务栏区域”…

Shut Down Process & Extra Settings
关闭流程和其他设置
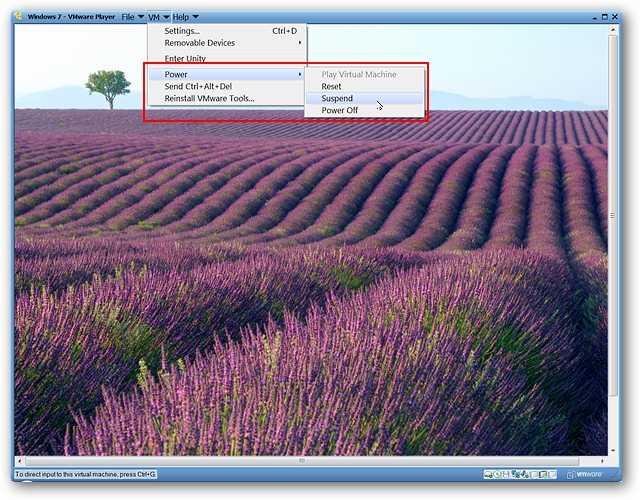
Here is our virtual O.S. “popped out” of full-screen mode. To save the current state of your O.S. when you shut down go to the “VM Menu”, then “Power”, and select “Suspend”.
这是我们的虚拟操作系统从全屏模式“弹出”。 要在关机时保存操作系统的当前状态,请依次转到“ VM菜单”,“电源”,然后选择“挂起”。
Note: A “Snapshot Function” is not available at this time.
注意:“快照功能”目前不可用。
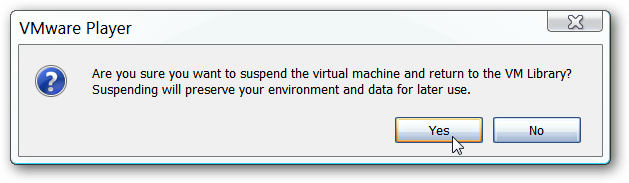
We enabled the closing messages in the “Preferences”, so the following message window appeared when we selected “Suspend”. Click “Yes” to start the shut down process…
我们在“首选项”中启用了结束消息,因此当我们选择“挂起”时会出现以下消息窗口。 单击“是”开始关闭过程…
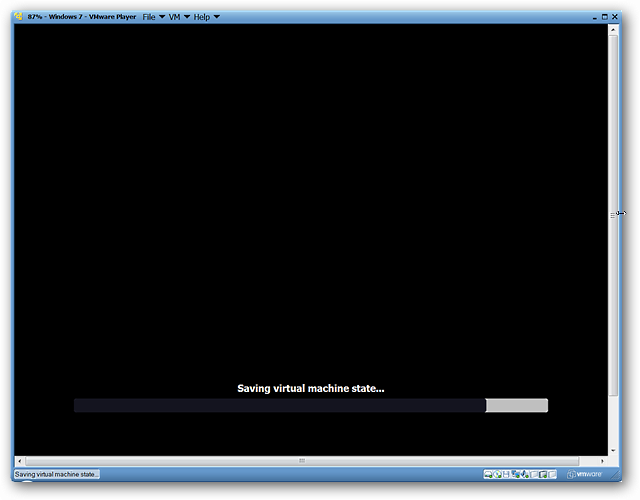
Here you can see the “Save Process” in action…
在这里您可以看到“保存过程”的实际运用…
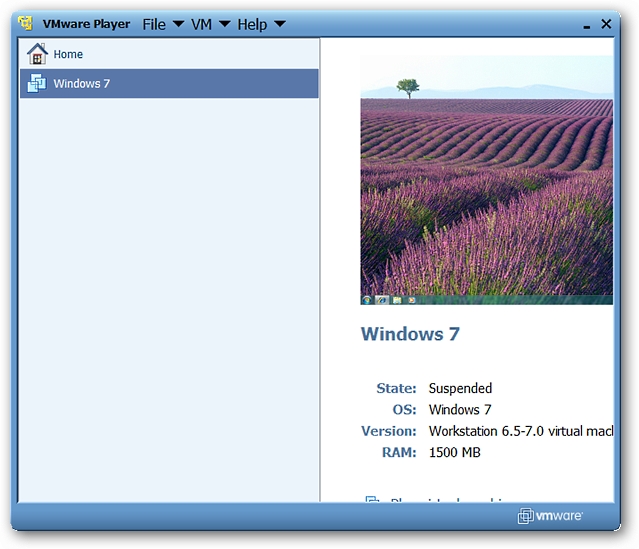
Once your O.S has finished shutting down you will be returned to the “Main Window”. Notice that there is a small screenshot of the desktop along with some basic information about that particular system…
一旦操作系统完成关闭,您将返回到“主窗口”。 注意,桌面上有一个小的屏幕快照,以及有关该特定系统的一些基本信息……
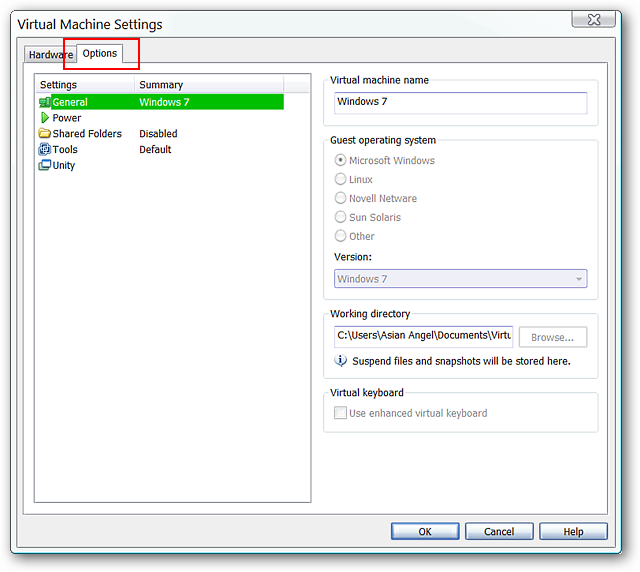
Once you have closed a freshly installed O.S. you will find access to a whole new set of “Options” for the system in the “Settings Window”.
关闭新安装的操作系统后,您将可以在“设置窗口”中找到系统的全新“选项”集。
There is not really a lot to change or modify in the first area outside of the virtual O.S. name and home directory. You can enable a virtual keyboard if desired…
在虚拟OS名称和主目录之外的第一个区域中,实际上没有太多更改或修改。 您可以根据需要启用虚拟键盘…
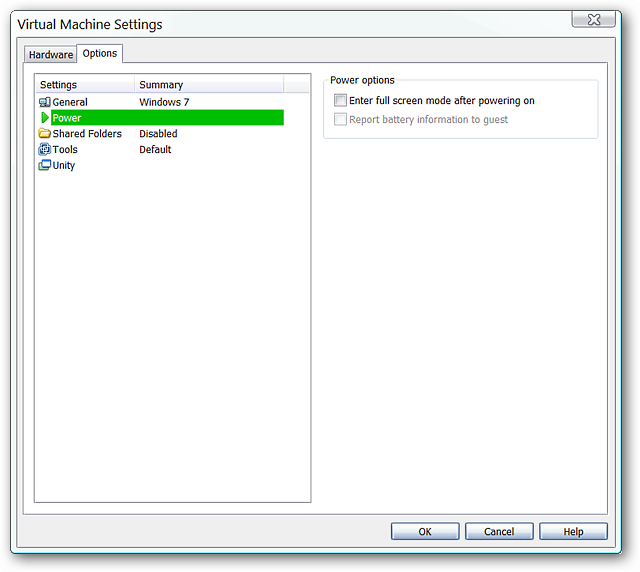
Decide if you want to automatically enter full-screen mode or not when you power up your virtual systems.
确定在启动虚拟系统时是否要自动进入全屏模式。
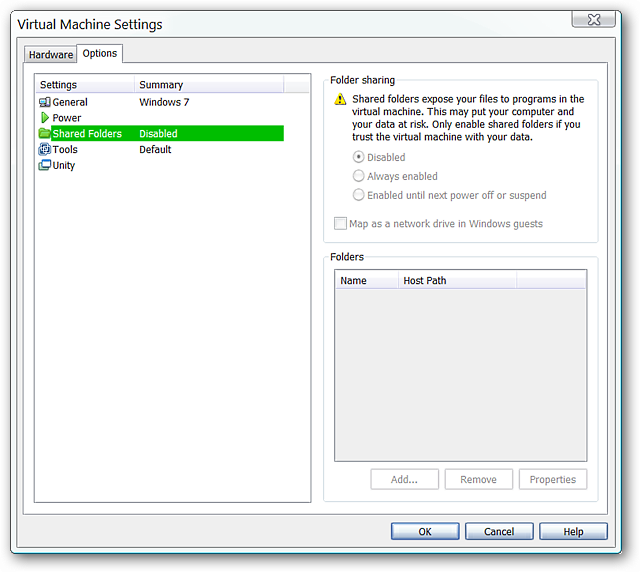
Set up Folder Sharing if desired…
如果需要,设置文件夹共享…
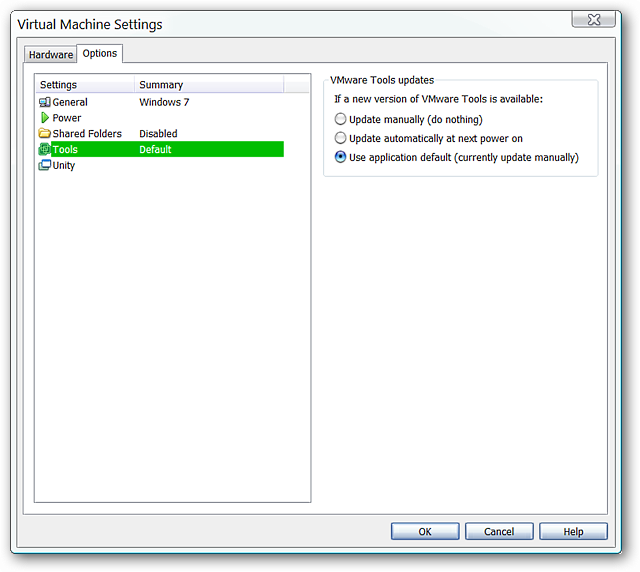
Select the update style for VMware Tools that best suits your needs.
选择最适合您需求的VMware Tools更新样式。
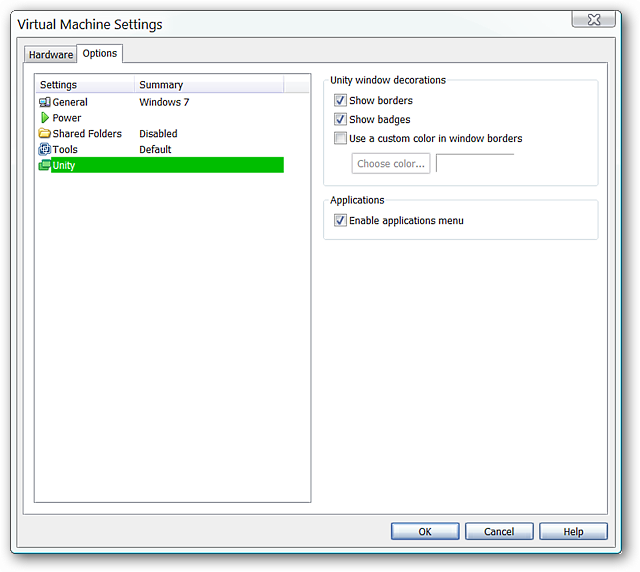
Enable or disable window decorations and/or the “Applications Menu”.
启用或禁用窗口装饰和/或“应用程序菜单”。
Bonus
奖金
During our tests we found that we could easily copy and paste items such as links & images back and forth between the virtual and host systems with no problems.
在测试过程中,我们发现我们可以轻松地在虚拟系统和主机系统之间来回复制和粘贴诸如链接和图像之类的项目,而不会出现问题。
Conclusion
结论
VMware Player provides a very nice way to install and enjoy full-screen Aero goodness in a virtual operating system.
VMware Player提供了一种非常不错的方式来在虚拟操作系统中安装和享受全屏Aero优势。
Links
链接
*Download VMware Player without an account*
*无需帐户即可下载VMware Player *
Download VMware Player (version 3.0.0.197124) – Softpedia
下载VMware Player(版本3.0.0.197124)– Softpedia
*VMware Player website requires an account*
* VMware Player网站需要一个帐户*
Download VMware Player (version 3.0.203739) – VMware Player Homepage
下载VMware Player(版本3.0.203739)– VMware Player主页
翻译自: https://www.howtogeek.com/howto/6047/install-aero-enabled-operating-systems-in-vmware-player/


 被折叠的 条评论
为什么被折叠?
被折叠的 条评论
为什么被折叠?
 到【灌水乐园】发言


