


Animating objects in your PowerPoint presentation, when done properly, lets you help control the pace at which you give your audience information. We’ve shown you how to hide an object in PowerPoint. Now, let’s look at the various ways to make an object appear.
正确完成PowerPoint演示文稿中的动画对象后,即可帮助您控制向观众提供信息的速度。 我们已经向您展示了如何在PowerPoint中隐藏对象。 现在,让我们看看使对象出现的各种方法。
动画对象 (Animate Your Objects)
In a bit, we’re going to go through how to set the start time and speed of an animation, but first, we need to decide which type of animation we want to give our objects.
稍后,我们将介绍如何设置动画的开始时间和速度,但是首先,我们需要确定要为对象提供哪种类型的动画。
If you haven’t already inserted an image in your presentation, go ahead and do that now by heading to the “Insert” tab and clicking the “Pictures” button.
如果您尚未在演示文稿中插入图像,请继续进行操作,方法是转到“插入”选项卡,然后单击“图片”按钮。
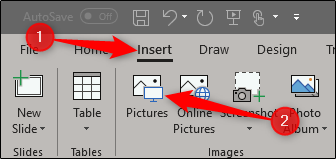
Go ahead and position the image where you want it and apply any formatting you want. Then, with your picture selected, switch over to the “Animations” tab.
继续,将图像放置在所需位置,然后应用所需的任何格式。 然后,选择图片后,切换到“动画”选项卡。
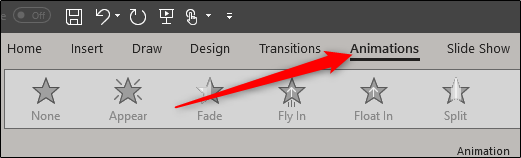
You’ll the most common animations displayed right on the ribbon; click one to use it.
您将在功能区上显示最常见的动画。 单击一个使用它。
If you don’t see one you like, click the little down arrow at the bottom right of the animations to see the full list.
如果没有找到您喜欢的一个,请单击动画右下方的向下小箭头以查看完整列表。
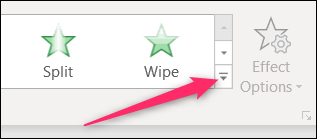
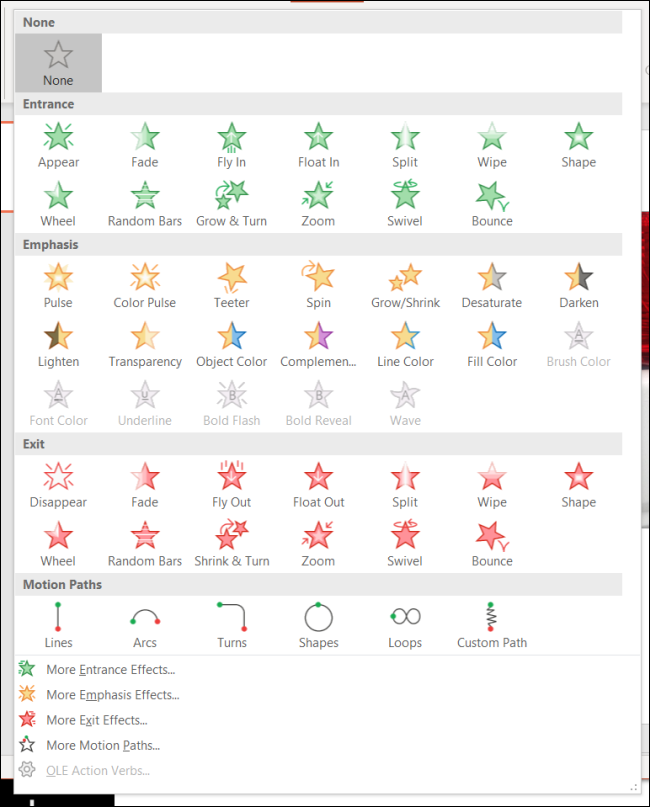
In the drop-down menu, you’ll see a lot more animations you can use, and you can find even more by clicking any of the “More…” options at the bottom of the menu. PowerPoint offers a lot of animations.
在下拉菜单中,您会看到更多可以使用的动画,并且可以通过单击菜单底部的任何“更多...”选项找到更多动画。 PowerPoint提供了很多动画。
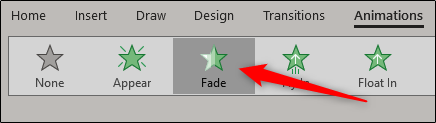
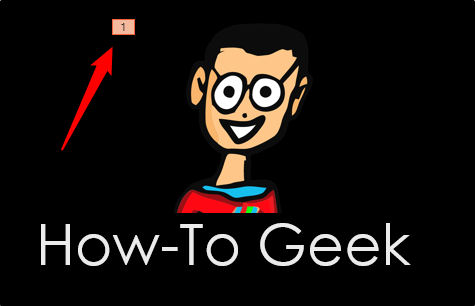
We’re going to go with a simple Fade animation for our example here, but the same techniques apply no matter what you choose. Once you select your animation, a number will appear at the top-left of the object. This number indicates the order in which the object will appear on the slide if you have more than one animation. In this example, we have only one object with an animation, so we’ll only see the number “1.”
在这里,我们将使用一个简单的Fade动画作为示例,但是无论您选择什么,都可以应用相同的技术。 选择动画后,一个数字将出现在对象的左上方。 此数字指示如果您具有多个动画,则对象在幻灯片上显示的顺序。 在此示例中,我们只有一个带有动画的对象,因此我们只会看到数字“ 1”。
Now, if we play our presentation, the image will appear after you click your mouse (that’s the default method for initiating an animation, but more on that later).
现在,如果我们播放演示文稿,则图像将在您单击鼠标后显示(这是启动动画的默认方法,但稍后会介绍更多信息)。

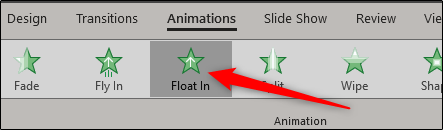
If we throw in another image into the mix and give it an animation, we’ll see the number “2” appear next to it, meaning it will be the second object to appear on the slide. Let’s try it out. On the second image, we’re going to select the “Float In” animation.
如果我们将另一张图像投入到混合中并为其制作动画,我们将看到数字“ 2”出现在其旁边,这意味着它将是出现在幻灯片上的第二个对象。 让我们尝试一下。 在第二张图像上,我们将选择“ Float In”动画。
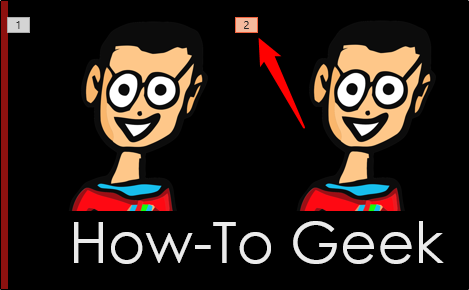
Now you’ll see the number 2 appear next to the object.
现在,您将看到数字2出现在对象旁边。
And here’s what it would look like in the actual presentation.
这就是实际演示中的外观。
Pretty neat, right? As you can see, you can control which image appears first and how it appears in the presentation.
很整洁吧? 如您所见,您可以控制首先显示哪个图像以及它在演示文稿中的显示方式。
You can also apply multiple animations to a single object. This is handy for all kinds of things. You could use multiple animations for extra emphasis, or you make an object appear on and then disappear from the slide before moving on.
您还可以将多个动画应用于单个对象。 这对于各种事情都很方便。 您可以使用多个动画来增强重点,或者使对象先出现然后在幻灯片上消失,然后再继续。
In this example, we’re going to make an object appear, then give it a little extra emphasis afterward.
在此示例中,我们将使一个对象出现,然后再对其进行一些额外的强调。
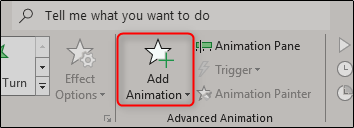
First, select the object and then head over to the “Animations” tab. This time, click the “Add Animation” button. You must select the animations from here if you want to apply multiple animations.
首先,选择对象,然后转到“动画”选项卡。 这次,单击“添加动画”按钮。 如果要应用多个动画,则必须从此处选择动画。
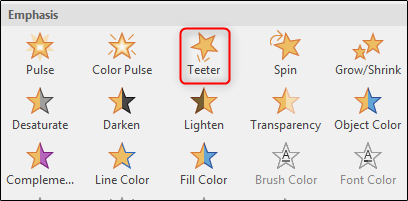
Once selected, a drop-down menu will appear that looks just like the expanded animations drop-down we showed you earlier. We already applied the Fade animation to our object, so this time we’re going to select the “Teeter” animation from the “Emphasis” section.
选择后,将出现一个下拉菜单,其外观类似于我们之前向您展示的扩展动画下拉菜单。 我们已经将Fade动画应用于对象,因此这次我们将从“ Emphasis”部分中选择“ Teeter”动画。
Now you’ll see both the number 1 and 2 next to the object, indicating the order in which the animations will happen.
现在,您将在对象旁边看到数字1和2,指示动画发生的顺序。
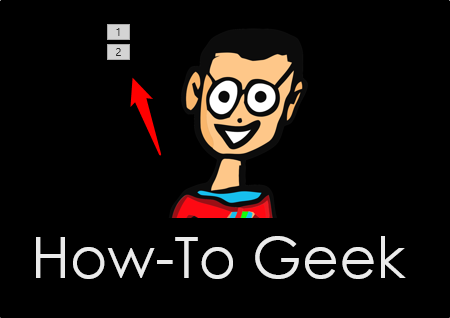
Here’s what it looks like in action. First, it fades in, and then it teeters a bit.
这是实际的样子。 首先,它会逐渐消失,然后摇晃一下。

Now that you understand how to use animations let’s talk about how to control their timing.
现在您已经了解了如何使用动画,下面我们来讨论如何控制动画的时间。
设置动画的开始时间和速度 (Setting the Animation Start Time and Speed)
There are three options available for making your animation start:
可以使用以下三个选项来启动动画:
On Click: This makes the animation begin when you click your mouse. It’s also the default trigger.
单击时:单击鼠标时,动画开始。 这也是默认触发器。
With Previous: This initiates the object animation at the same time as the previous animation.
使用上一个:与上一个动画同时启动对象动画。
After Previous: This makes the animation begin after the last animation finishes.
在上一个之后:这使动画在最后一个动画结束后开始。
To find these settings, select the object you’re animating, head to the “Animations” tab, and then click the box next to “Start.”
要找到这些设置,请选择要设置动画的对象,转到“动画”选项卡,然后单击“开始”旁边的框。
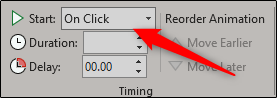
Select the start option you want from the drop-down menu.
从下拉菜单中选择所需的开始选项。

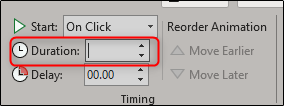
You can also set a duration for the animation. Changing the duration makes the animation run slower or faster. If, for example, you have an object enter by flying in from the left, but it’s flying in a little to quickly, you could increase the duration to make it move more slowly.
您还可以设置动画的持续时间。 更改持续时间会使动画运行得更快或更慢。 例如,如果您有一个物体从左飞入而进入,但它飞得有点快,那么您可以增加持续时间以使其移动得更慢。
You can also add a delay that happens before the animation starts. This delay happens based on what start setting you use. For example, if your start setting is “On Click” and you have a delay of two seconds, the animation will start two seconds after clicking. If your start setting is “After Previous” and you have a delay of five seconds, the animation will start five seconds after the previous animation finishes.
您还可以添加在动画开始之前发生的延迟。 延迟的发生取决于您使用的开始设置。 例如,如果开始设置为“单击时”,并且延迟了两秒钟,则动画将在单击后两秒钟开始。 如果您的开始设置是“ After Previous”,并且有五秒钟的延迟,则动画将在上一个动画完成五秒钟后开始播放。

The options you have available for manipulating how and when objects appear are nearly endless. Play around with these features a bit, and you’ll be making a great presentation in no time!
您可以用来操纵对象出现方式和时间的选项几乎是无限的。 试一下这些功能,您将立即进行出色的演示!
翻译自: https://www.howtogeek.com/398134/how-to-control-when-a-picture-appears-in-powerpoint/


 被折叠的 条评论
为什么被折叠?
被折叠的 条评论
为什么被折叠?
 到【灌水乐园】发言


