


photoshop初学视频

Photoshop is named “Photoshop” for a reason; it’s for editing photographs. Take a look through some basic photo-editing techniques and learn how you can improve your own family photographs.
由于某种原因,Photoshop被称为“ Photoshop”。 用于编辑照片。 了解一些基本的照片编辑技术,并了解如何改善自己的家庭照片。
This is part 5 of a multi-part series. If you need a primer on the tools and skills covered in part 5, you can start at part 1, and learn about the toolbox. But, if you’re ready, we can cover four techniques that can help you create better memories.
这是一个多部分系列的第5部分。 如果需要有关第5部分中介绍的工具和技能的入门知识,则可以从第1部分开始,并了解工具箱。 但是,如果您准备好了,我们可以介绍四种可以帮助您创建更好记忆的技术。
裁剪图像以获得更好的构图 (Cropping Images for Better Composition)
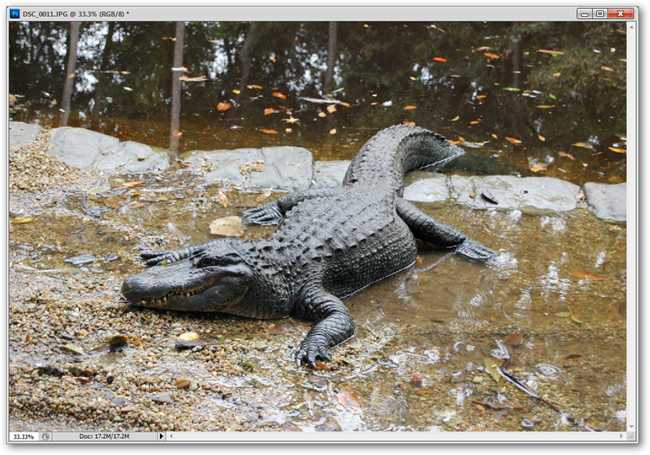
Oftentimes, when you take a digital photograph, you’ll end up with a lot of information that you may not want. One of the first things you’re going to want to do is learn how to crop your images, and the most convenient way to do this is using the Crop Tool.
通常,当您拍摄数码照片时,会得到很多您可能不想要的信息。 您要做的第一件事就是学习如何裁剪图像,最方便的方法是使用裁剪工具。
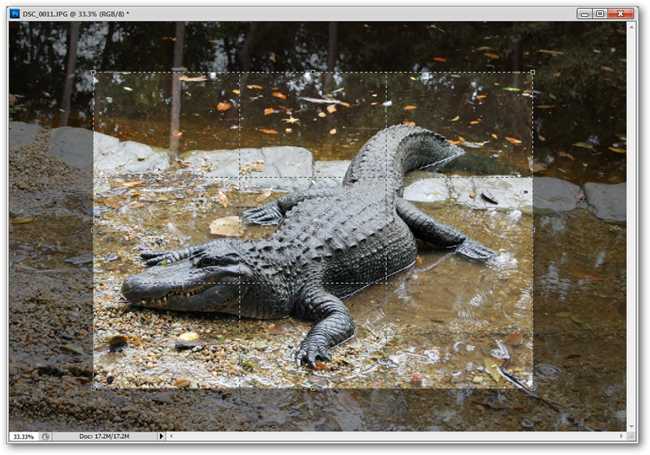
Press the key to select your crop tool. Use your mouse to click and drag, creating a box inside your photograph.
按键选择您的裁剪工具。 使用鼠标单击并拖动,在照片内部创建一个框。
You’ll notice a tick-box in the corners of your crop-box. You can move and resize your crop area to select the precise area you wish to crop.
您会在裁剪框的角落看到一个复选框。 您可以移动并调整裁剪区域的大小以选择要裁剪的精确区域。
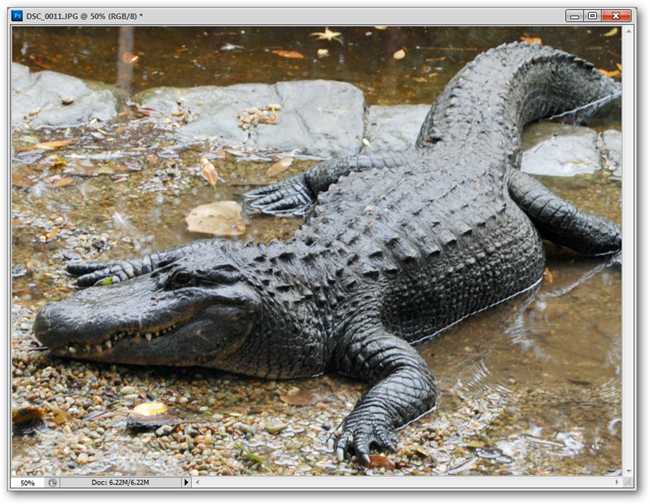
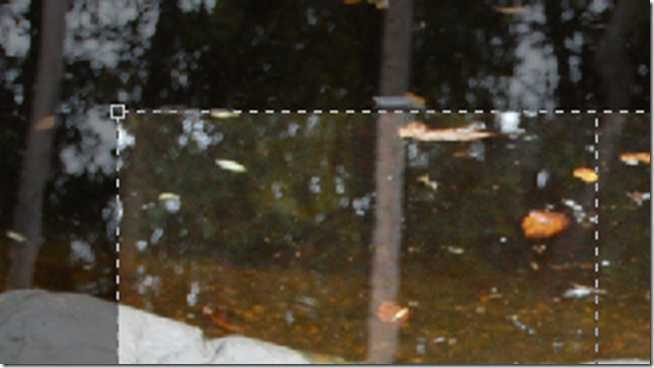
You can press the key to release your crop. You can undo with and redo your crop at any time, if you feel so inclined. Cropping can eliminate areas of your image that you don’t want to see, or can also create a more interesting composition for prints or the web.
您可以按键释放农作物。 如果您愿意,可以随时撤消并重做您的作物。 裁剪可以消除您不想看到的图像区域,也可以为打印件或网络创建更有趣的构图。
使用色阶工具调整对比度 (Adjusting Contrast with the Levels Tool)
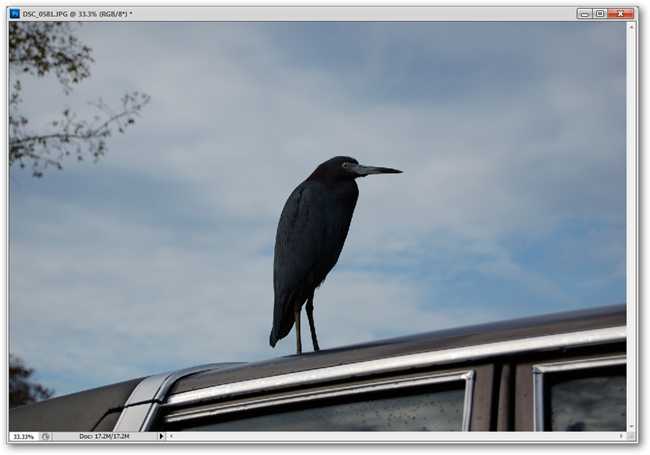
Shooting images on overcast days can give you gloomy images that are either too dark or devoid of detail. While the Brightness and Contrast tool is an acceptable way to adjust your images, the best tool to use is usually the Levels tool.
在阴暗的日子拍摄图像可能会给您带来阴暗的图像,这些图像太暗或没有细节。 虽然可以使用“亮度和对比度”工具来调整图像,但是最好使用的工具通常是“色阶”工具。
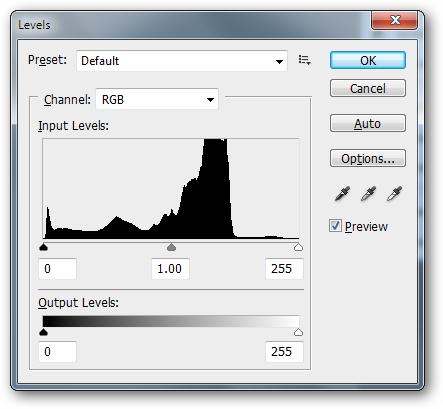
With your photograph open, simply press to open your levels dialog box. By default, this is what it looks like.
打开您的照片后,只需按打开您的级别对话框。 默认情况下,这是它的外观。
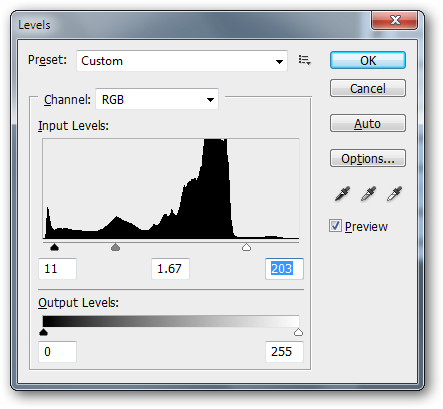
The three sliders (the arrows illustrated above) represent Shadows (your photograph’s darkest areas), Mid-tones (the middle darkest areas), and Highlights (the brightest areas of your photo). By adjusting them as illustrated above, brighter whites are created, mildly darker shadows, and the Mid-Tone point is moved closer to the shadows, allowing for more space between the Mid-Tones and the Highlights.
三个滑块(如上所示的箭头)分别表示阴影(照片的最暗区域),中间色调(中间的最暗区域)和突出显示(照片的最亮区域)。 通过如上所示调整它们,可以创建更亮的白色,稍微暗一些的阴影,并且将中音点移近阴影,从而在中色调和高光之间留出更多空间。

Clicking OK will close the Levels and render them. Immediately, we see more detail in the bird, and our sky is less overcast and gloomy. With little effort at all, you can give your photographs a more naturalistic look and bring out detail you might not have known that you even had!
单击确定将关闭色阶并渲染它们。 立刻,我们看到了鸟儿的更多细节,而我们的天空也变得阴暗而阴沉。 毫不费吹灰之力,您可以使照片看起来更加自然,并展现出您可能不知道的细节!
调整变色照明 (Adjusting Color-Shifted Lighting)
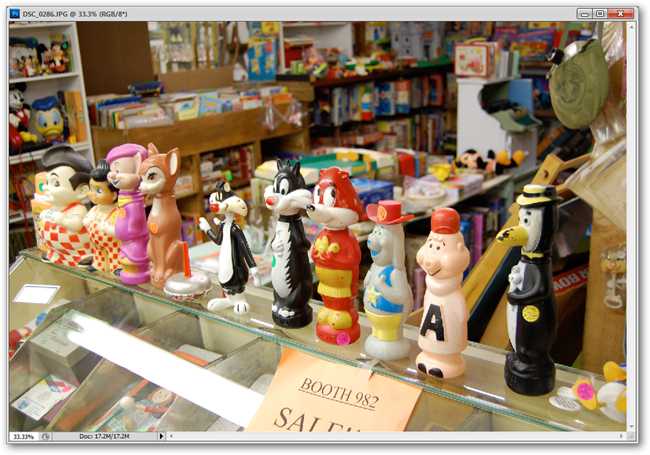
One of the biggest problems with taking pictures indoors is that a lot of indoor lighting will be tinted with a yellow, red, or blue cast. Your eyes may not pick up the difference, but your camera “sees” light very differently than our eyes do. Here’s a simple way to remove reduce the color of an overwhelmingly yellow image.
在室内拍照的最大问题之一是,许多室内照明将采用黄色,红色或蓝色的色调。 您的眼睛可能看不到差异,但是相机“看到”的光线与我们的眼睛截然不同。 这是一种消除绝大多数黄色图像颜色的简单方法。
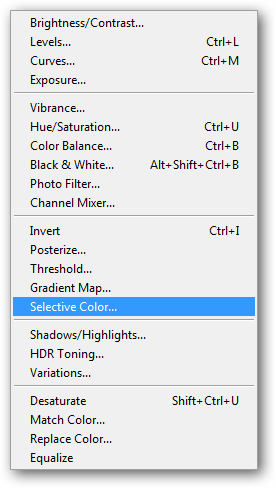
You’ll want to navigate to Image > Adjustments > Selective Color.
您将要导航至图像>调整>可选颜色。
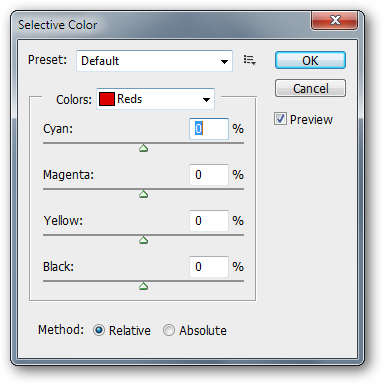
Selective Color is a tool that allows you to adjust your image through various primary colors. These are: Red, Green and Blue, the primary colors of light; Cyan, Magenta, Yellow, and Black, the primary colors of printing; and also by Whites and Neutrals.
选择性颜色是一种工具,可让您通过各种原色来调整图像。 它们是:红色,绿色和蓝色,光的原色; 青色,品红色,黄色和黑色,它们是印刷的原色; 还有怀特和中立。
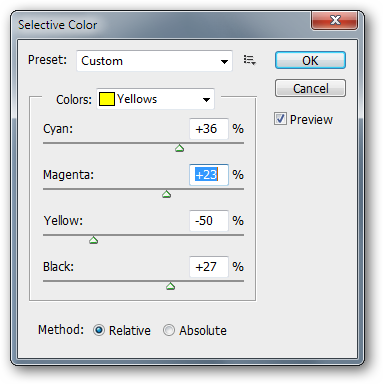
Since our image has a yellow cast to it, I select “Yellows” from the “Color” menu box. You can use the adjustments illustrated above, or find the ones that work for your image. The basic premise is to reduce the color(s) you wish to remove (in this case, Yellow) and, in some cases, add color to the opposing primary colors (in this case, Cyan, Magenta, and Black.) That’s basically a complicated way of saying “less yellow, more red, blue, and black.”
由于我们的图像上有黄色偏色,因此我从“颜色”菜单框中选择“黄色”。 您可以使用上述调整,或者找到适合您图像的调整。 基本前提是减少要删除的颜色(在这种情况下为黄色),在某些情况下,将颜色添加为相对的原色(在这种情况下为青色,洋红色和黑色)。表示“少黄色,多红色,蓝色和黑色”的复杂方式。
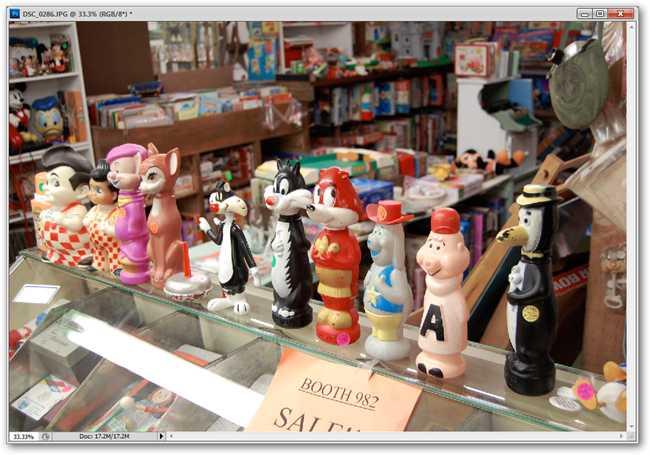
Compared to the original image, the lighting on this now appears as clear and white as natural sunlight and the original looks aged and yellowed. If you notice this yellow cast on your images and want to remove it, this can often be your best bet.
与原始图像相比,该图像上的照明现在看起来像自然的阳光一样清晰和白色,并且原始图像看起来变黄了。 如果您发现图像上出现这种黄色偏色并希望将其删除,那么通常这是最好的选择。
锐化模糊照片而不会损害色彩 (Sharpen Blurry Photographs without Damaging Color)

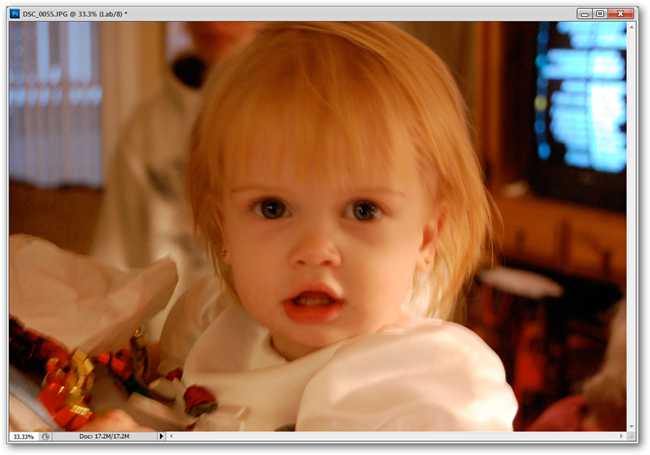
Sometimes dim indoor lighting can give a warm and fuzzy effect to your photography. Unfortunately, the “fuzzy” bit is a problem, as dim indoor lighting tends to make images come out blurry. There are many Photoshop filters that can sharpen an image, but many can damage color or heavily distort an image. This surprisingly easy trick can help sharpen shots and keep color intact.
有时昏暗的室内照明会给您的摄影带来温暖而模糊的效果。 不幸的是,“模糊”位是一个问题,因为昏暗的室内照明往往会使图像模糊。 有许多可以使图像锐化的Photoshop滤镜,但是许多滤镜会损坏颜色或使图像严重变形。 这个出奇的简单技巧可以帮助提高照片清晰度并保持色彩不变。
Lab color is an alternate color space, like RGB and CMYK. It is unusual and most digital art files outside of the professional photography world will not use it.
Lab颜色是备用颜色空间,例如RGB和CMYK。 这很不寻常,专业摄影界以外的大多数数字艺术文件都不会使用它。
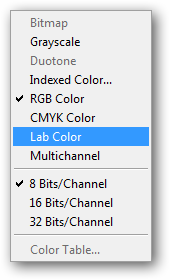
In order to switch your photograph to Lab color, to go Image > Mode > Lab Color, as illustrated above.
为了将您的照片切换为Lab颜色,请转到图像>模式> Lab颜色,如上所述。
Changing images to CMYK will give you a color shift—not so with Lab color. Your RGB image remains identical without any sort of color shift. On to the next step.
将图像更改为CMYK将为您带来色彩偏移,而Lab颜色则不然。 您的RGB图像保持不变,没有任何颜色偏移。 继续下一步。
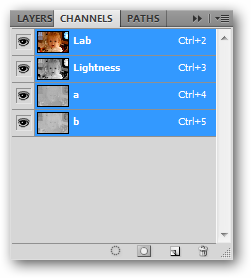
Flip to your Channels Panel. If you cannot find it, you can always retrieve it by going to your menu Window > Channels.
转到“频道面板”。 如果找不到它,则可以始终通过进入菜单窗口>频道来检索它。
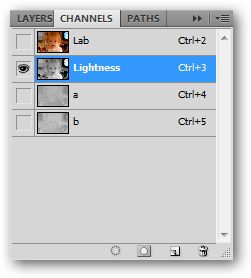
Pick the “Lightness” channel, which will look like a grayscale version of your image.
选择“亮度”通道,它将看起来像图像的灰度版本。
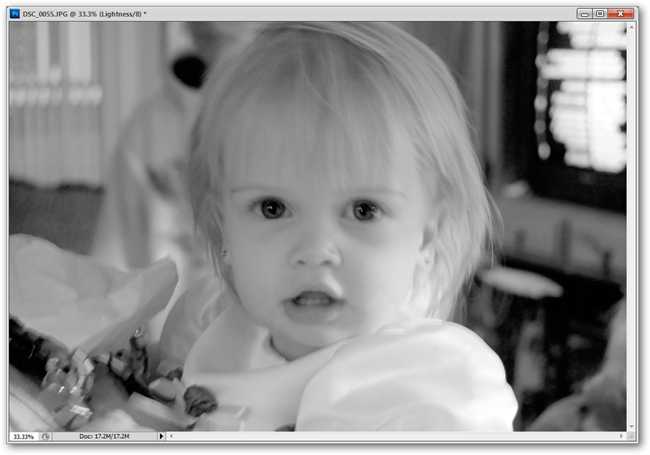
If your image doesn’t change to grayscale, try again. We need to work exclusively in this grayscale channel for this tip to work.
如果您的图像未更改为灰度,请重试。 我们需要专门在此灰度通道中工作,才能使此技巧正常工作。
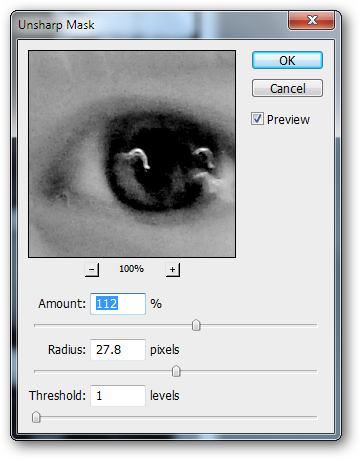
Navigate to Filters > Sharpen > Unsharp Mask. Unsharp Mask can increase contrast and tighten edges Photoshop perceives in images. The illustrated values are overdoing it somewhat—find values that work well with your own image.
导航到过滤器>锐化>钝化蒙版。 锐化蒙版可以增加对比度并收紧Photoshop在图像中感知到的边缘。 图示值在某种程度上超越了它-查找适合您自己的图像的值。
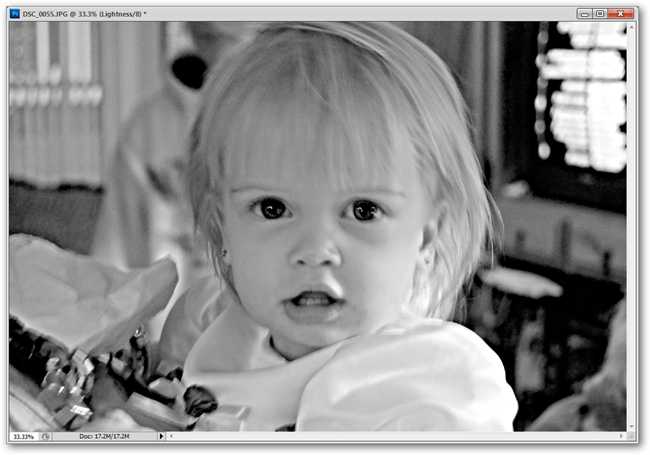
Still in our Lightness channel, renders our filter. Oftentimes the Unsharp Mask filter can create to many harsh darks, so for this particular soft image, a round of Level adjustment can help counter the harshness of the filter.
仍在我们的亮度通道中,渲染我们的滤镜。 通常,“不锐化蒙版”滤镜会产生许多刺眼的黑暗,因此对于此特定的柔和图像,一轮“电平”调整可以帮助抵消滤镜的刺眼度。
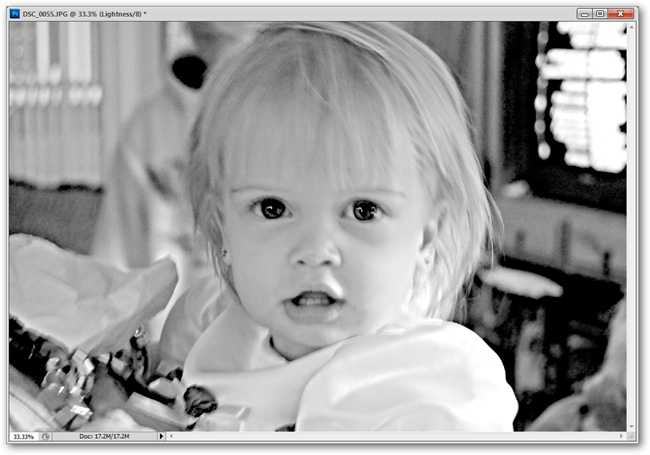
brings up the levels tool. Adjusting the Midtones and Highlights (as in the example earlier) can create a softer look without sacrificing the faux-sharpness added to the image.
调出关卡工具。 调整中间色调和高光(如前面的示例中所示)可以创建更柔和的外观,而不会牺牲添加到图像中的人造清晰度。

Our final result is a fair improvement over the soft-edged original. You can return your image to RGB color by navigating to Image > Mode > RGB and save it as a PSD or JPG file. It’s also a good habit to save multiple versions of your Photographs in order to return to the original, effectively undoing your edits if needed.
我们的最终结果是比原始的软边版有了明显的改进。 您可以通过导航到“图像”>“模式”>“ RGB”将图像恢复为RGB颜色,并将其另存为PSD或JPG文件。 保存照片的多个版本以返回原始版本也是一个好习惯,如果需要,可以有效地撤消您的编辑。
Photoshop tips left you confused? Start at the Beginning! Check out the previous installments of the How-To Geek Guide to Learning Photoshop.
Photoshop提示让您感到困惑? 从头开始! 请查阅“如何学习Photoshop极客指南”的前几期。
Come back to How-To Geek for the next installment of the How-To Geek Guide to Learning Photoshop, where we’ll cover tools for design, painting, and filters to create great works of digital art! 返回到How-To Geek的下一期“ How-To Geek学习Photoshop指南”中,我们将介绍设计,绘画和滤镜工具,以创建出色的数字艺术作品!
All images created by the author, hereby released under Creative Commons 3.0 Unported License.
作者创作的所有图像,均已根据Creative Commons 3.0 Unported License发布。
photoshop初学视频


 被折叠的 条评论
为什么被折叠?
被折叠的 条评论
为什么被折叠?
 到【灌水乐园】发言


