


When I was new to Django, one of the most frustrating things I experienced was the need to run a bit of code periodically. I wrote a nice function that performed an action that needed to run daily at 12am. Easy, right? Wrong. This turned out to be a huge problem to me since at the time I was used to “Cpanel-type” web hosting where there was a nice handy GUI for setting up cron jobs for this very purpose.
当我刚接触Django时,我经历过的最令人沮丧的事情之一就是需要定期运行一些代码。 我编写了一个不错的函数,该函数执行的操作需要每天凌晨12点运行。 容易吧? 错误。 事实证明,这对我来说是一个巨大的问题,因为那时我习惯了“ Cpanel型”网络托管,那里有一个非常方便的GUI用于为此目的设置cron作业。
After much research, I found a nice solution – Celery, a powerful asynchronous job queue used for running tasks in the background. But this led to additional problems, since I couldn’t find an easy set of instructions to integrate Celery into a Django Project.
经过大量研究,我找到了一个不错的解决方案– Celery ,一个强大的异步作业队列,用于在后台运行任务。 但这导致了其他问题,因为我找不到一套简单的说明将Celery集成到Django项目中。
Of course I eventually did manage to figure it – which is what this article will cover: How to integrate Celery into a Django Project and create Periodic Tasks.
当然,我最终确实设法弄清楚了-这就是本文将要介绍的内容: 如何将Celery集成到Django项目中并创建周期任务。
This project utilizes Python 3.4, Django 1.8.2, Celery 3.1.18, and Redis 3.0.2.
总览 (Overview)
For your convenience, since this is such a large post, please refer back to this table for brief info on each step and to grab the associated code.
为了方便起见,由于这是一个很大的职位,因此请参考此表以获取每个步骤的简要信息并获取相关的代码。
| Step | 步 | Overview | 总览 | Git Tag | Git标签 | ||
|---|---|---|---|---|---|---|---|
| Boilerplate | 样板 | Download boilerplate | 下载样板 | v1v1 | |||
| Setup | 建立 | Integrate Celery with Django | 将Celery与Django集成 | v2v2 | |||
| Celery Tasks | 芹菜任务 | Add basic Celery Task | 添加基本芹菜任务 | v3v3 | |||
| Periodic Tasks | 定期任务 | Add Periodic Task | 添加定期任务 | v4v4 | |||
| Running Locally | 本地运行 | Run our app locally | 在本地运行我们的应用 | v5v5 | |||
| Running Remotely | 远程运行 | Run our app remotely | 远程运行我们的应用 | v5v5 |
什么是芹菜? (What is Celery?)
“Celery is an asynchronous task queue/job queue based on distributed message passing. It is focused on real-time operation, but supports scheduling as well.” For this post, we will focus on the scheduling feature to periodically run a job/task.
“ Celery是基于分布式消息传递的异步任务队列/作业队列。 它专注于实时操作,但也支持调度。” 对于本文,我们将重点关注计划功能以定期运行作业/任务。
Why is this useful?
为什么这有用?
- Think of all the times you have had to run a certain task in the future. Perhaps you needed to access an API every hour. Or maybe you needed to send a batch of emails at the end of the day. Large or small, Celery makes scheduling such periodic tasks easy.
- You never want end users to have to wait unnecessarily for pages to load or actions to complete. If a long process is part of your application’s workflow, you can use Celery to execute that process in the background, as resources become available, so that your application can continue to respond to client requests. This keeps the task out of the application’s context.
- 想想您将来必须执行某项任务的所有时间。 也许您需要每小时访问一个API。 或者,您可能需要在一天结束时发送一批电子邮件。 无论大小,Celery都可以轻松安排此类定期任务。
- 您永远不希望最终用户不必要地等待页面加载或操作完成。 如果较长的过程是应用程序工作流程的一部分,则可以在资源可用时使用Celery在后台执行该过程,以便您的应用程序可以继续响应客户端请求。 这使任务脱离了应用程序的上下文。
建立 (Setup)
Before diving into Celery, grab the starter project from the Github repo. Make sure to activate a virtualenv, install the requirements, and run the migrations. Then fire up the server and navigate to http://localhost:8000/ in your browser. You should see the familiar “Congratulations on your first Django-powered page” text. When done, kill the sever.
在深入Celery之前,请从Github存储库中获取入门项目。 确保激活virtualenv,安装要求并运行迁移。 然后启动服务器并在浏览器中导航到http:// localhost:8000 / 。 您应该看到熟悉的“在第一个Django驱动的页面上的祝贺”文本。 完成后,杀死服务器。
Next, let’s install Celery:
接下来,让我们安装Celery:
|
Now we can integrate Celery into our Django Project in just three easy steps.
现在,我们只需三个简单的步骤即可将Celery集成到我们的Django项目中。
第1步:添加celery.py (Step 1: Add celery.py)
Inside the “picha” directory, create a new file called celery.py:
在“ picha”目录中,创建一个名为celery.py的新文件:
|
Take note of the comments in the code.
注意代码中的注释。
第2步:导入新的Celery应用 (Step 2: Import your new Celery app)
To ensure that the Celery app is loaded when Django starts, add the following code into the __init__.py file that sits next to your settings.py file:
为确保在Django启动时加载Celery应用,请将以下代码添加到settings.py文件旁边的__init__.py文件中:
|
Having done that, your project layout should now look like:
完成之后,您的项目布局现在应如下所示:
|
步骤3:将Redis安装为芹菜“经纪人” (Step 3: Install Redis as a Celery “Broker”)
Celery uses “brokers” to pass messages between a Django Project and the Celery workers. In this tutorial, we will use Redis as the message broker.
Celery使用“ 代理 ”在Django项目和Celery 工作人员之间传递消息。 在本教程中,我们将使用Redis作为消息代理。
First, install Redis from the official download page or via brew (brew install redis) and then turn to your terminal, in a new terminal window, fire up the server:
首先,从官方下载页面或通过brew( brew install redis )安装Redis ,然后转到您的终端,在新的终端窗口中启动服务器:
|
You can test that Redis is working properly by typing this into your terminal:
您可以通过在终端中输入以下命令来测试Redis是否正常工作:
|
Redis should reply with PONG – try it!
Redis应该回复PONG –试试吧!
Once Redis is up, add the following code to your settings.py file:
Redis启动后,将以下代码添加到settings.py文件中:
|
You also need to add Redis as a dependency in the Django Project:
您还需要在Django项目中将Redis添加为依赖项:
|
That’s it! You should now be able to use Celery with Django. For more information on setting up Celery with Django, please check out the official Celery documentation.
而已! 您现在应该可以将Celery与Django一起使用。 有关使用Django设置Celery的更多信息,请查阅官方Celery 文档 。
Before moving on, let’s run a few sanity checks to ensure all is well…
在继续之前,让我们进行一些健全性检查,以确保一切正常……
Test that the Celery worker is ready to receive tasks:
测试Celery工作人员已准备好接收任务:
|
Kill the process with CTRL-C. Now, test that the Celery task scheduler is ready for action:
使用CTRL-C终止该进程。 现在,测试Celery任务计划程序已准备好采取行动:
|
Boom!
繁荣!
Again, kill the process when done.
同样,完成后请终止该进程。
芹菜任务 (Celery Tasks)
Celery utilizes tasks, which can be thought of as regular Python functions that are called with Celery.
Celery利用任务 ,可以将其视为Celery调用的常规Python函数。
For example, let’s turn this basic function into a Celery task:
例如,让我们将此基本功能转换为Celery任务:
|
First, add a decorator:
首先,添加一个装饰器:
|
Then you can run this task asynchronously with Celery like so:
然后,您可以使用Celery异步运行此任务,如下所示:
|
Simple, right?
简单吧?
So, these types of tasks are perfect for when you want to load a web page without making the user wait for some background process to complete.
因此,这些类型的任务非常适合您想要加载网页而无需使用户等待某些后台进程完成的情况。
Let’s look at an example…
让我们看一个例子……
Going back to the Django Project, grab version three, which includes an app that accepts feedback from users, aptly called feedback:
回到Django项目,获取版本3 ,其中包括一个接受用户反馈的应用程序,简称为feedback :
|
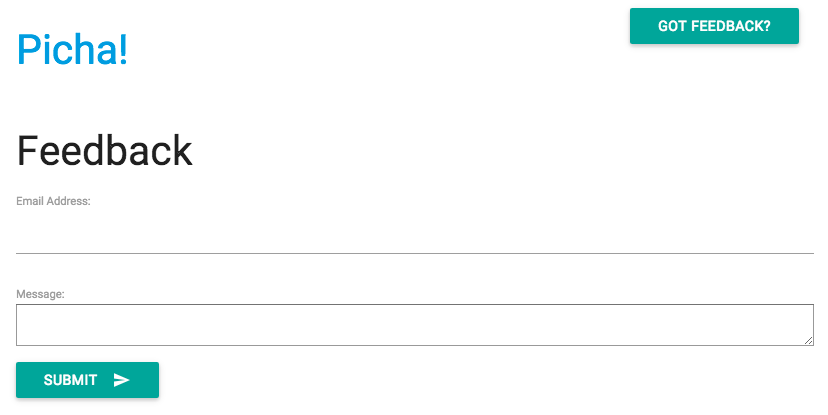
Install the new requirements, fire up the app, and navigate to http://localhost:8000/feedback/. You should see:
安装新要求,启动应用程序,然后浏览至http:// localhost:8000 / feedback / 。 您应该看到:
Let’s wire up the Celery task.
让我们完成芹菜任务。
添加任务 (Add the Task)
Basically, after the user submits the feedback form, we want to immediately let him continue on his merry way while we process the feedback, send an email, etc., all in the background.
基本上,在用户提交反馈表之后,我们希望在后台处理反馈,发送电子邮件等时立即让他继续愉快地前进。
To accomplish this, first add a file called tasks.py to the “feedback” directory:
为此,首先将一个名为tasks.py的文件添加到“ feedback”目录中:
|
Then update forms.py like so:
然后像这样更新forms.py:
|
In essence, the send_feedback_email_task.delay(email, message) function processes and sends the feedback email in the background as the user continues to use the site.
本质上,当用户继续使用该站点时, send_feedback_email_task.delay(email, message)函数将在后台处理并发送反馈电子邮件。
NOTE: The
success_urlin views.py is set to redirect the user to/, which does not exist yet. We’ll set this endpoint up in the next section.注 :
success_url在views.py设置为将用户重定向到/,它并不存在。 我们将在下一部分中设置此端点。
定期任务 (Periodic Tasks)
Often, you’ll need to schedule a task to run at a specific time every so often – i.e., a web scraper may need to run daily, for example. Such tasks, called periodic tasks, are easy to set up with Celery.
通常,您需要安排任务经常在特定时间运行-例如,网络刮板可能需要每天运行。 这些任务称为定期任务 ,很容易通过Celery设置。
Celery uses “celery beat” to schedule periodic tasks. Celery beat runs tasks at regular intervals, which are then executed by celery workers.
芹菜使用“芹菜拍子”来安排定期任务。 芹菜节拍定期运行任务,然后由芹菜工作者执行。
For example, the following task is scheduled to run every fifteen minutes:
例如,以下任务计划每十五分钟运行一次:
|
Let’s look at more robust example by adding this functionality into the Django Project…
让我们看看通过将功能添加到Django项目中的更强大的示例……
Back to the Django Project, grab version four, which includes another new app, called photos, that uses the Flickr API to get new photos for display on the site:
返回Django项目,获取第四个版本,其中包括另一个名为photos新应用,该应用使用Flickr API获取新照片以在网站上显示:
|
Install the new requirements, run the migrations, and then fire up the server to make sure all is well. Try testing out the feedback form again. This time it should redirect just fine.
安装新要求,运行迁移,然后启动服务器以确保一切正常。 尝试再次测试反馈表。 这次它应该重定向很好。
What’s next?
下一步是什么?
Well, since we would need to call the Flickr API periodically to add more photos to our site, we can add a Celery task.
好吧,由于我们需要定期调用Flickr API才能向我们的网站添加更多照片,因此我们可以添加Celery任务。
添加任务 (Add the Task)
Add a tasks.py to the photos app:
将task.py添加到photos应用中:
|
Here, we run the save_latest_flickr_image() function every fifteen minutes by wrapping the function call in a task. The @periodic_task decorator abstracts out the code to run the Celery task, leaving the tasks.py file clean and easy to read!
在这里,我们通过将函数调用包装在task每隔十五分钟运行一次save_latest_flickr_image()函数。 @periodic_task装饰器提取出运行Celery任务的代码,使task.py文件清晰易读!
本地运行 (Running Locally)
Ready to run this thing?
准备运行此东西?
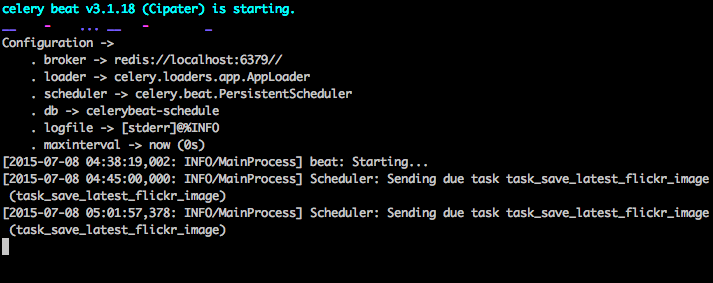
With your Django App and Redis running, open two new terminal windows/tabs. In each new window, navigate to your project directory, activate your virtualenv, and then run the following commands (one in each window):
在Django App和Redis运行的情况下,打开两个新的终端窗口/选项卡。 在每个新窗口中,导航到您的项目目录,激活virtualenv,然后运行以下命令(每个窗口中一个):
|
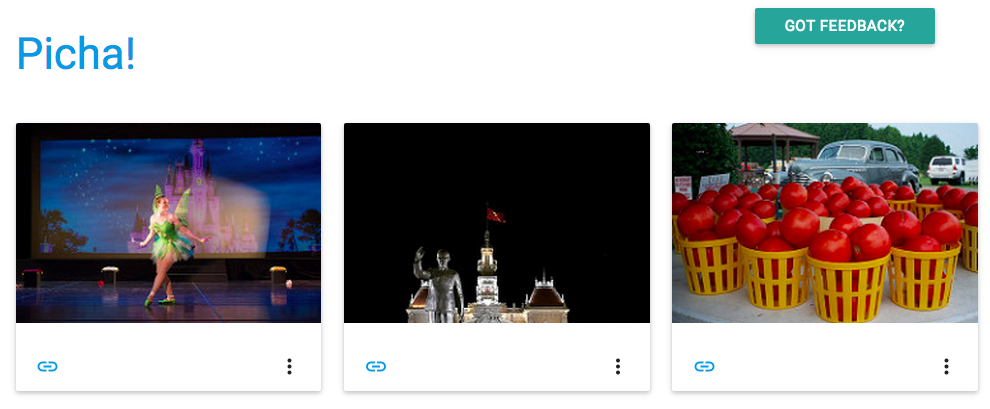
When you visit the site on http://127.0.0.1:8000/ you should now see one image. Our app gets one image from Flickr every 15 minutes:
当您访问http://127.0.0.1:8000/上的站点时,现在应该看到一张图像。 我们的应用每15分钟从Flickr获取一张图像:
Take a look at photos/tasks.py to see the code. Clicking on the “Feedback” button allows you to… send some feedback:
看看photos/tasks.py以查看代码。 单击“反馈”按钮,您可以…发送一些反馈:
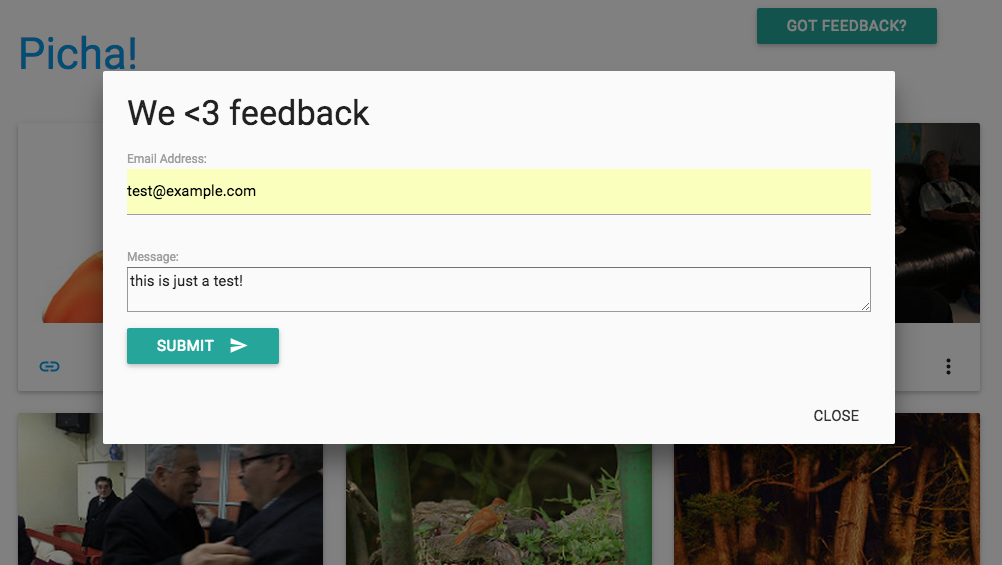
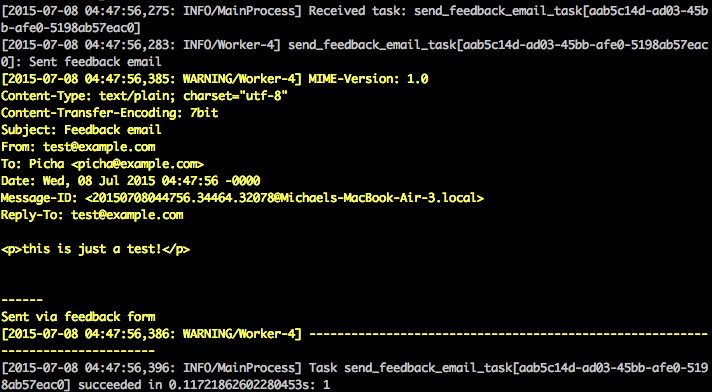
This works via a celery task. Have a look at feedback/tasks.py for more.
这通过芹菜任务起作用。 请查看feedback/tasks.py了解更多信息。
That’s it, you have the Picha project up and running!
就是这样,您已经启动并运行了Picha项目!
This is good for testing while developing your Django Project locally, but does not work so well when you need to deploy to production – like on DigitalOcean, perhaps. For that, it is recommended that you run the Celery worker and scheduler in the background as a daemon with Supervisor.
这对于在本地开发Django Project时进行测试非常有用,但是在需要部署到生产环境时(例如在DigitalOcean上)效果不佳 。 为此,建议您使用Supervisor作为后台程序在后台运行Celery worker和Scheduler。
远程运行 (Running Remotely)
Installation is simple. Grab version five from the repo (if you don’t already have it). Then SSH into your remote server and run:
安装很简单。 从仓库中获取版本五 (如果您还没有的话)。 然后SSH到您的远程服务器并运行:
|
We then need to tell Supervisor about our Celery workers by adding configuration files to the “/etc/supervisor/conf.d/” directory on the remote server. In our case, we need two such configuration files – one for the Celery worker and one for the Celery scheduler.
然后,我们需要通过将配置文件添加到远程服务器上的“ /etc/supervisor/conf.d/”目录中来告知Supervisor我们的Celery工作者。 在我们的例子中,我们需要两个这样的配置文件–一个用于Celery worker,一个用于Celery Scheduler。
Locally, create a folder called “supervisor” in the project root. Then add the following files…
在本地,在项目根目录中创建一个名为“ supervisor”的文件夹。 然后添加以下文件…
Celery Worker: picha_celery.conf
芹菜工人:picha_celery.conf
|
Celery Scheduler: picha_celerybeat.conf
芹菜调度程序:picha_celerybeat.conf
|
Make sure to update the paths in these files to match the remote server’s filesystem.
确保更新这些文件中的路径以匹配远程服务器的文件系统。
Basically, these supervisor configuration files tell supervisord how to run and manage our ‘programs’ (as they are called by supervisord).
基本上,这些主管配置文件告诉主管如何运行和管理我们的“程序”(由主管调用)。
In the examples above, we have created two supervisord programs named “pichacelery” and “pichacelerybeat”.
在上面的示例中,我们创建了两个名为“ pichacelery”和“ pichacelerybeat”的监督程序。
Now just copy these files to the remote server in the “/etc/supervisor/conf.d/” directory.
现在,只需将这些文件复制到“ /etc/supervisor/conf.d/”目录中的远程服务器即可。
We also need to create the log files that are mentioned in the above scripts on the remote server:
我们还需要在远程服务器上创建上述脚本中提到的日志文件:
|
Finally, run the following commands to make Supervisor aware of the programs – e.g., pichacelery and pichacelerybeat:
最后,运行以下命令以使Supervisor知道程序–例如pichacelery和pichacelerybeat :
|
Run the following commands to stop, start, and/or check the status of the pichacelery program:
运行以下命令以停止,启动和/或检查pichacelery程序的状态:
|
You can read more about Supervisor from the official documentation.
您可以从官方文档中了解有关Supervisor的更多信息。
最后提示 (Final Tips)
- Do not pass Django model objects to Celery tasks. To avoid cases where the model object has already changed before it is passed to a Celery task, pass the object’s primary key to Celery. You would then, of course, have to use the primary key to get the object from the database before working on it.
- The default Celery scheduler creates some files to store its schedule locally. These files would be “celerybeat-schedule.db” and “celerybeat.pid”. If you are using a version control system like Git (which you should!), it is a good idea to ignore this files and not add them to your repository since they are for running processes locally.
- 不要将Django模型对象传递给Celery任务。 为了避免在将模型对象传递给Celery任务之前将其更改的情况,请将对象的主键传递给Celery。 然后,您当然必须在处理数据库之前使用主键从数据库中获取对象。
- 默认的Celery计划程序会创建一些文件以将其计划存储在本地。 这些文件将是“ celerybeat-schedule.db”和“ celerybeat.pid”。 如果您使用的是Git之类的版本控制系统(应该使用!),则最好忽略此文件并将其添加到存储库中,因为它们是用于本地运行进程的。
下一步 (Next steps)
Well, that’s it for the basic introduction to integrating Celery into a Django Project.
好了,这就是将Celery集成到Django项目中的基本介绍。
Want more?
想要更多?
- Dive into the official Celery User Guide to learn more.
- Create a Fabfile to setup Supervisor and the configuration files. Make sure to add the commands to
rereadandupdateSupervisor. - Fork the Project from the repo and open a Pull Request to add a new Celery task.
- 深入了解《 Celery官方用户指南》以了解更多信息。
- 创建一个Fabfile来设置Supervisor和配置文件。 确保添加命令以
reread和updateSupervisor。 - 从存储库中分叉项目,然后打开“拉取请求”以添加新的Celery任务。
翻译自: https://www.pybloggers.com/2015/07/asynchronous-tasks-with-django-and-celery/


 603
603

 被折叠的 条评论
为什么被折叠?
被折叠的 条评论
为什么被折叠?
 到【灌水乐园】发言


