


集成react环境
Say hello to the new perf hotness - a profiler built into React. This announcement blog post shows how to use it as a Chrome Extension, but you can also use it in your code, to get insight into real world interactions, even in production. Let's see how.
向新的性能热点打个招呼-React内置的事件探查器。 此公告博客文章显示了如何将其用作Chrome扩展程序,但您也可以在代码中使用它,以深入了解实际的交互,甚至在生产中也是如此。 让我们看看如何。
创建一个新的React应用 (Create a new react app)
If you're not familiar, there's a create-react-app tool that gets you started quickly with a new app.
如果您不熟悉,可以使用create-react-app工具来快速开始使用新应用。
npm i -g create-react-app
npx create-react-app my-app
cd my-app
npm start
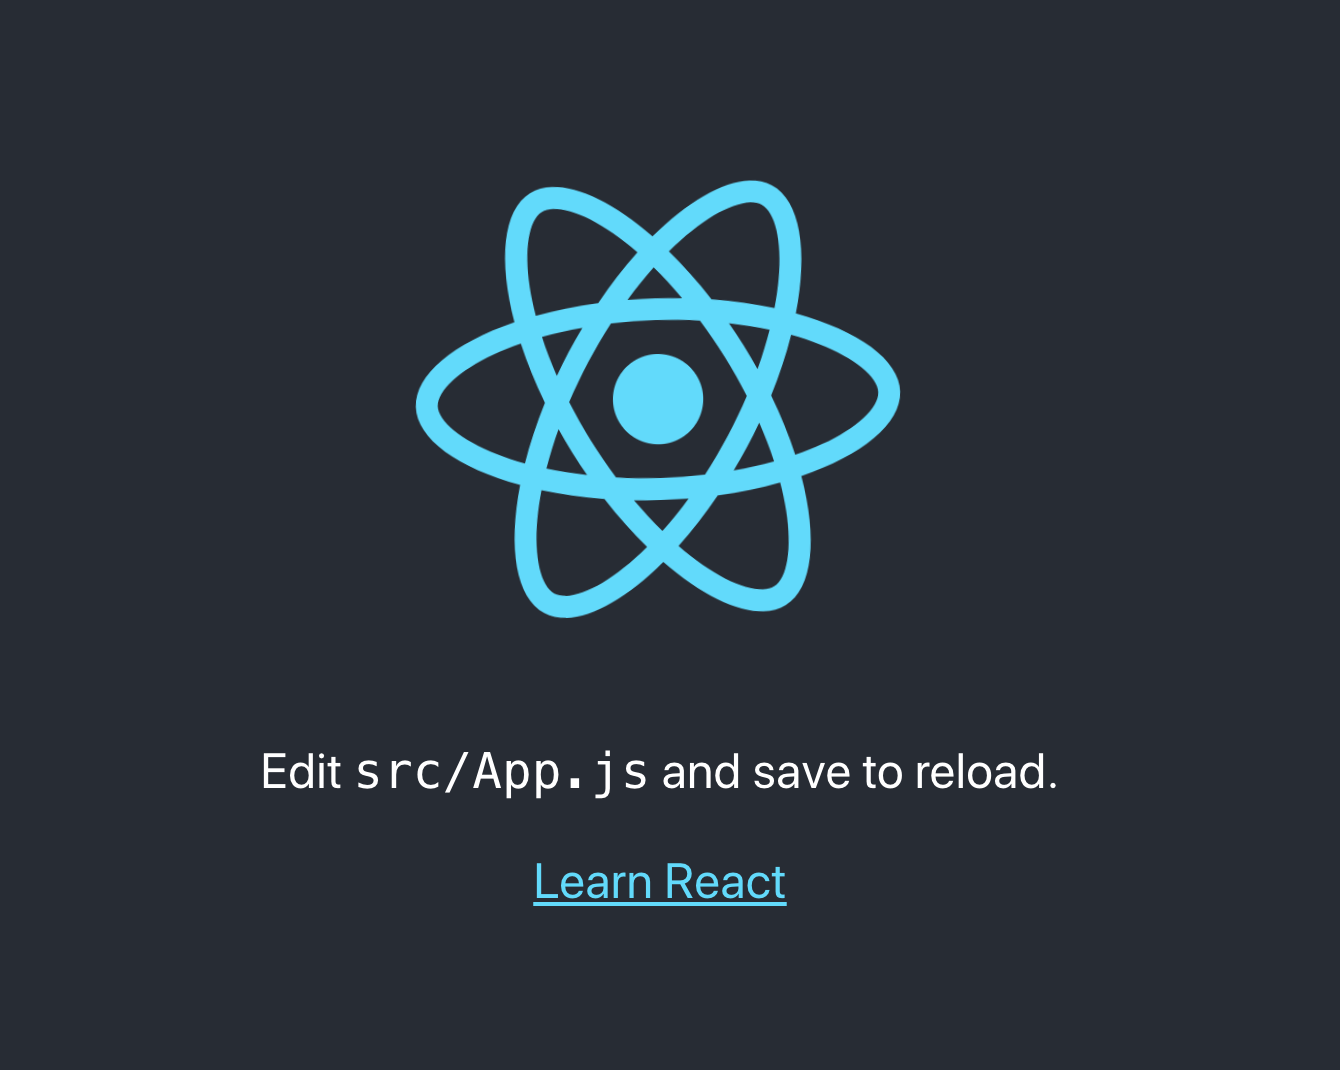
Boom! A new app is born, showing a rotating logo.
繁荣! 一个新的应用程序诞生了,显示了旋转的徽标。
停止旋转 (Stop spinning)
Now let's make that logo start/stop spinning on click. Tweak the CSS first.
现在,让徽标在单击时开始/停止旋转。 首先调整CSS。
Before:
之前:
.App-logo {
  animation: App-logo-spin infinite 20s linear;
  height: 40vmin;
  pointer-events: none;
}
After:
后:
.App-logo-spin {
  animation: App-logo-spin infinite 20s linear;
}
Then handle the click:
然后处理点击:
Before:
之前:
<img src={logo} className="App-logo" alt="logo" />
After:
后:
<img
  src={logo}
  className={this.state.spin ? 'App-logo App-logo-spin' : 'App-logo'}
  alt="logo"
  onClick={() => this.setState({spin: !this.state.spin})}
/>
... which also requires a spin state:
...这也需要spin状态:
constructor(props) {
  super(props);
  this.state = {
    spin: true,
  };
}
Now clicking on the logo toggles the spinning.
现在,单击徽标可切换旋转。
个人资料 (Profile)
Profiling this interaction (and any other in your app) is simply a question of wrapping the interesting part (even your whole app) in a Profiler component. Let's wrap everything, which means something like:
对这种交互(以及您的应用程序中的其他任何应用程序)进行概要分析只是将有趣的部分(甚至整个应用程序)包装到Profiler组件中的问题。 让我们包装所有内容,这意味着:
// require
import React, {Component, unstable_Profiler as Profiler} from 'react';
And then wrap:
然后换行:
<Profiler id="profi" onRender={onRender}>
  <div className="App">etc.</div>
</Profiler>
So you give the profiler an ID since you can have multiple interesting parts of the app profiled, and an onRender callback.
因此,您可以为探查器指定一个ID,因为您可以对应用程序的多个有趣部分进行分析,并提供onRender回调。
Now this callback is invoked every time ReactDOM does a "commit" to the actual DOM. Which is usually the expensive part, and something you want to do as fewer times as practical. And what goes into the callback? Here's an example:
现在,每次ReactDOM对实际DOM进行“提交”时,都会调用此回调。 通常这是最昂贵的部分,而您想要做的事却比实际次数少。 回调中包含什么? 这是一个例子:
function onRender(id, phase, actualDuration, baseDuration, startTime, commitTime) {
  if (id !== 'profi') { // optional
    return;
  }
  console.log(arguments);
}
So now what happens when you load the app and click the logo twice? You see the initial rendering (phase: mount) and the two updates (phase: update)
那么,当您加载应用程序并单击徽标两次时,会发生什么呢? 您会看到初始渲染(阶段:安装)和两个更新(阶段:更新)
["profi", "mount", 5.500000013853423, 1.0450000263517722, 10696.320000002743, 10703.885000009905]
["profi", "update", 0.9149999968940392, 0.37500001781154424, 21110.35499999707, 21111.57500000263]
["profi", "update", 0.37000000884290785, 0.14500002725981176, 24351.725000000442, 24352.49499999918]
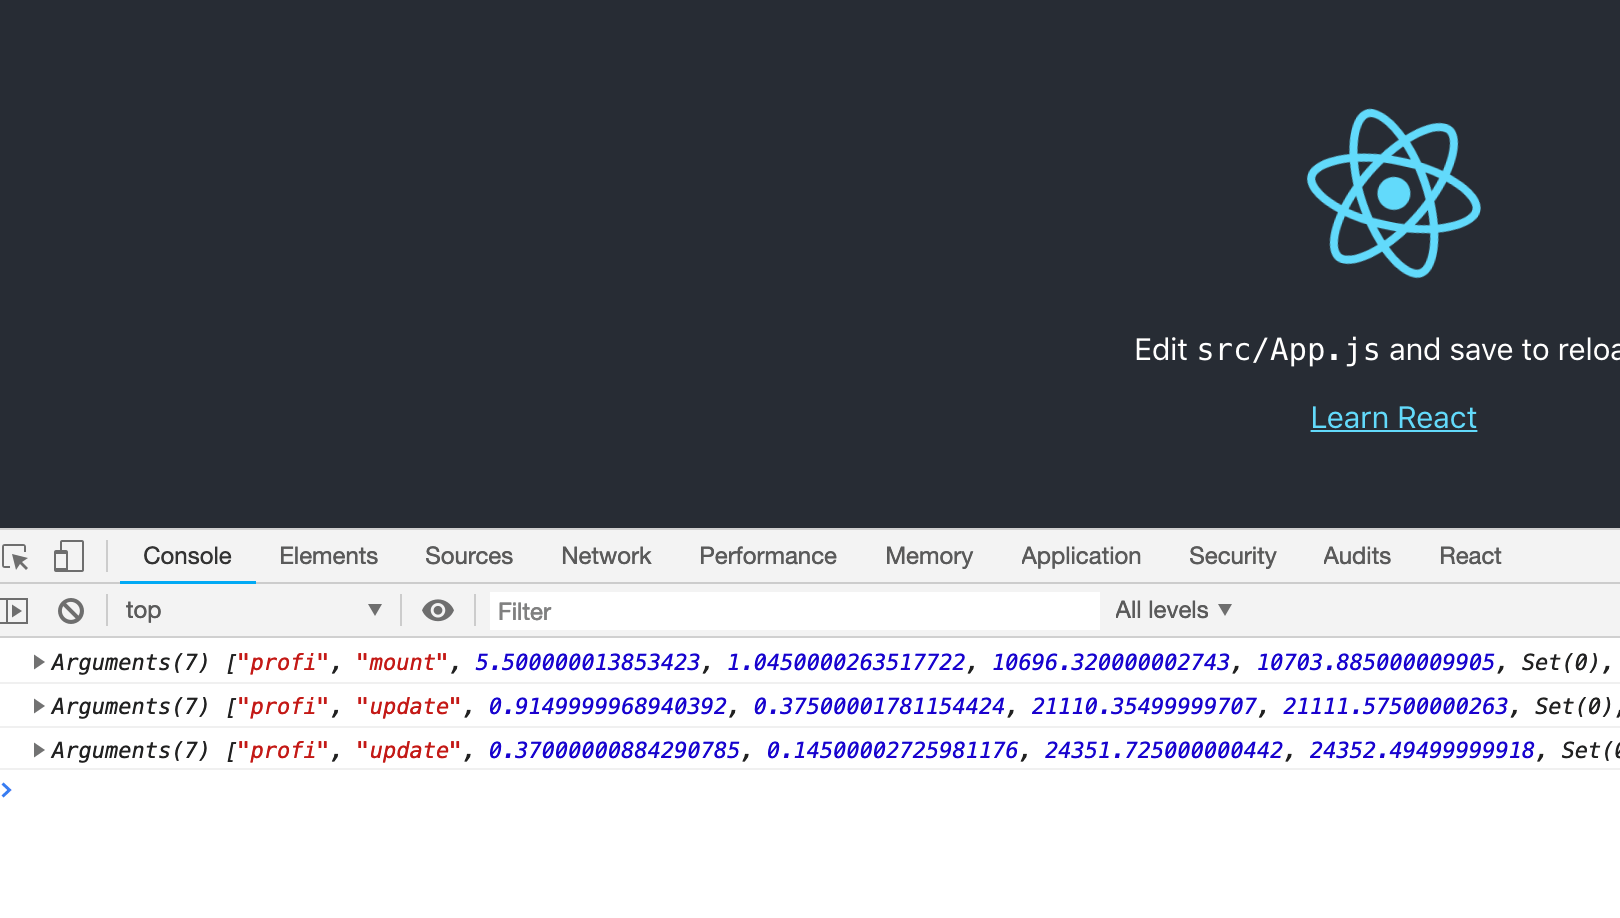
What do these numbers mean? The first two are durations (actual and base) explained here. The other two are when the commit is starting when it's done, explained here.
这些数字是什么意思? 前两个是此处说明的持续时间(实际时间和基准时间)。 另外两个是完成时开始提交的时间,在此说明。
And finally: the profiling React build, see here. Now in addition to "dev" and "prod" you have "profiling" which is prod+profiling, in other words a fast prod version without all the dev overhead.
最后:分析React构建,请参阅此处。 现在,除了“ dev”和“ prod”之外,还有“ profiling”,即prod + profiling,换句话说,是一个快速的prod版本,没有所有开发开销。
And that's about it - time to get profiling!
就是这样-是时候进行剖析了!
Tell your friends about this post on Facebook and Twitter
在Facebook和Twitter上告诉您的朋友有关此帖子的信息
集成react环境


 402
402

 被折叠的 条评论
为什么被折叠?
被折叠的 条评论
为什么被折叠?
 到【灌水乐园】发言


