Today, we’ll be discussing Android Wear with a basic hello world application using Android Studio and a Wear OS Emulator.
今天,我们将使用Android Studio和Wear OS模拟器与基本的hello world应用程序讨论Android Wear。
Android Wear应用类型 (Android Wear App Types)
Android Wear Apps can be of two types:
Android Wear Apps可以有两种类型:
- Standalone App 独立应用
- Companion App – this has an equivalent phone app which can communicate with the wear app. 伴侣应用程序 –具有等效的电话应用程序,可以与穿戴应用程序进行通信。
Let’s start by creating a Simple Standalone Wear OS App in our Android Studio Project.
让我们从在Android Studio项目中创建一个简单的独立Wear OS应用程序开始。
Android Wear Hello World应用程序入门 (Getting Started with Android Wear Hello World App)
Choose Wear OS project template from the wizard as shown below:
从向导中选择Wear OS项目模板,如下所示:

Android Wear Hello World Getting Started 1
Android Wear Hello World入门1

Android Wear Hello World Getting Started 2
Android Wear Hello World入门2
项目结构 (Project Structure)
This how our project structure looks like:
我们的项目结构如下所示:

Android Wear Hello World Project Structure
Android Wear Hello World项目结构
The dependencies for wear in the build.gradle are:
build.gradle中的磨损依赖项为:
dependencies {
    implementation 'com.google.android.support:wearable:2.4.0'
    implementation 'com.google.android.gms:play-services-wearable:16.0.1'
    implementation 'com.android.support:percent:28.0.0'
    implementation 'com.android.support:support-v4:28.0.0'
    implementation 'com.android.support:recyclerview-v7:28.0.0'
    implementation 'com.android.support:wear:28.0.0'
    compileOnly 'com.google.android.wearable:wearable:2.4.0'
}
AndroidManifest.xml (AndroidManifest.xml)
The Wear OS App’s manifest is slightly different from the normal Android Phone Apps.
Here, we need to specify the feature and wear OS library along with some metadata.
Wear OS App的清单与普通的Android Phone Apps略有不同。
在这里,我们需要指定功能并安装OS库以及一些元数据。
<manifest xmlns:android="https://schemas.android.com/apk/res/android"
    package="com.journaldev.androidwearoshelloworld">

    <uses-permission android:name="android.permission.WAKE_LOCK" />

    <uses-feature android:name="android.hardware.type.watch" />

    <application
        android:allowBackup="true"
        android:icon="@mipmap/ic_launcher"
        android:label="@string/app_name"
        android:supportsRtl="true"
        android:theme="@android:style/Theme.DeviceDefault">
        <uses-library
            android:name="com.google.android.wearable"
            android:required="true" />

        <!--
               Set to true if your app is Standalone, that is, it does not require the handheld app to run.
        -->
        <meta-data
            android:name="com.google.android.wearable.standalone"
            android:value="true" />

        <activity
            android:name=".MainActivity"
            android:label="@string/app_name">
            <intent-filter>
                <action android:name="android.intent.action.MAIN" />

                <category android:name="android.intent.category.LAUNCHER" />
            </intent-filter>
        </activity>
    </application>

</manifest>
布局 (Layout)
The most common layout used for smartwatches having wear os is BoxInsetLayout.
具有磨损os的智能手表最常用的布局是BoxInsetLayout 。
<android.support.wearable.view.BoxInsetLayout>
   ...
   <LinearLayout
      ...
      app:layout_box="all">
</android.support.wearable.view.BoxInsetLayout>
Another layout commonly used is SwipeDismissFrameLayout. This enables swipe from left to right.
另一个常用的布局是SwipeDismissFrameLayout 。 这样可以从左向右滑动。
The RecyclerView equivalent class for wear os is WearableRecyclerView.
磨损os的RecyclerView等效类是WearableRecyclerView 。
android.support.wearable.view.CircledImageView provides a circular layout to display the image.
android.support.wearable.view.CircledImageView提供圆形布局以显示图像。
The code for the activity_main.xml layout is given below:
下面给出了activity_main.xml布局的代码:
<?xml version="1.0" encoding="utf-8"?>
<android.support.wear.widget.BoxInsetLayout
    xmlns:android="https://schemas.android.com/apk/res/android"
    xmlns:app="https://schemas.android.com/apk/res-auto"
    xmlns:tools="https://schemas.android.com/tools"
    android:layout_width="match_parent"
    android:layout_height="match_parent"
    android:background="@color/dark_grey"
    android:padding="@dimen/box_inset_layout_padding"
    tools:context=".MainActivity"
    tools:deviceIds="wear">


    <FrameLayout
        android:layout_width="match_parent"
        android:layout_height="match_parent"
        android:padding="@dimen/inner_frame_layout_padding"
        app:boxedEdges="none">


        <android.support.wear.widget.SwipeDismissFrameLayout
            android:layout_width="match_parent"
            android:layout_height="match_parent"
            android:id="@+id/swipe_dismiss_root" >

            <TextView
                android:id="@+id/test_content"
                android:layout_width="match_parent"
                android:layout_height="match_parent"
                android:gravity="bottom"
                android:text="Swipe the screen to dismiss me." />
        </android.support.wear.widget.SwipeDismissFrameLayout>


        <TextView
            android:id="@+id/text"
            android:layout_width="wrap_content"
            android:layout_height="wrap_content"
            android:layout_gravity="center"
            android:text="@string/hello_world" />

    </FrameLayout>
</android.support.wear.widget.BoxInsetLayout>
Here we’ve added a swipe to dismiss layout with a text view in it.
在这里,我们添加了滑动以关闭带有文本视图的布局。
码 (Code)
The code for the MainActivity.java class is given below:
MainActivity.java类的代码如下:
package com.journaldev.androidwearoshelloworld;

import android.os.Bundle;
import android.support.wearable.activity.WearableActivity;
import android.widget.TextView;

public class MainActivity extends WearableActivity {

    private TextView mTextView;

    @Override
    protected void onCreate(Bundle savedInstanceState) {
        super.onCreate(savedInstanceState);
        setContentView(R.layout.activity_main);

        mTextView = findViewById(R.id.text);

        // Enables Always-on
        setAmbientEnabled();
    }
}
The always-on feature allows the app to control what to show on the watch while it’s in ambient mode.
常亮功能使应用可以控制在环境模式下手表上的显示内容。
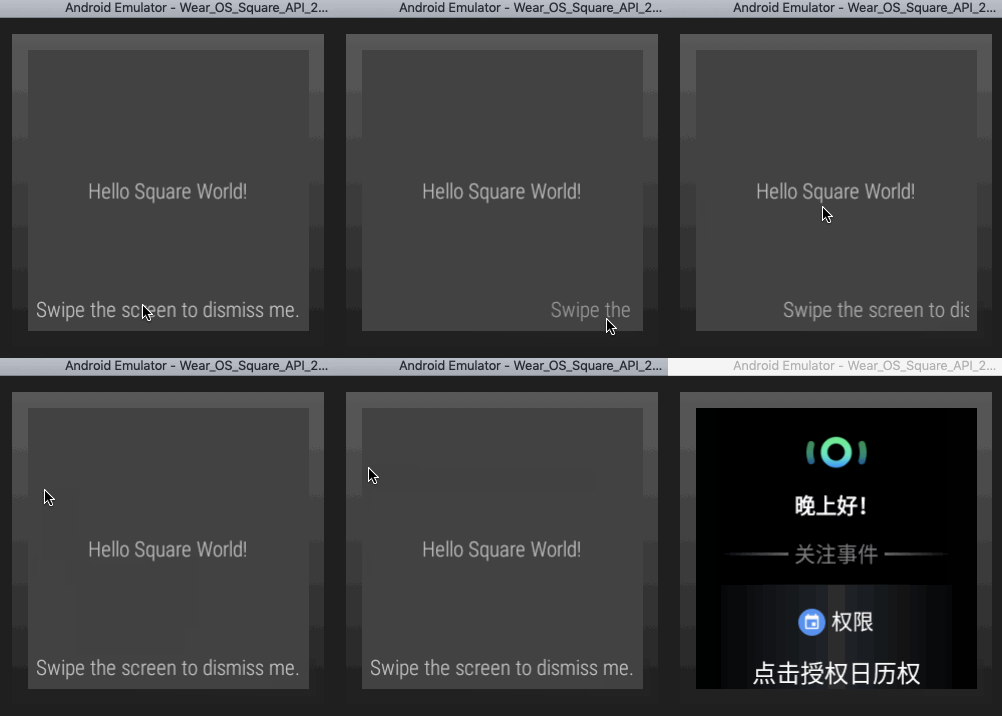
Let’s look at our Hello World Wear OS Application when run on the emulator:
让我们看一下在模拟器上运行的Hello World Wear OS应用程序:

Android Wear Os Hello World Output
Android Wear Os Hello World输出
That brings an end to this Hello World Wear OS Android Tutorial.
You can download the project from the link below or view the full source code in the Github Repository.
这样就结束了本《 Hello World Wear OS Android教程》。
您可以从下面的链接下载项目,或在Github存储库中查看完整的源代码。
翻译自: https://www.journaldev.com/28956/android-wear-hello-world


 4664
4664


 被折叠的 条评论
为什么被折叠?


