


android布局基础知识
先决条件: (Pre-requisites:)
1) Android Studio installed on your PC (Unix or Windows). You can learn how to install it here .
1)在您的PC(Unix或Windows)上安装了Android Studio。 您可以在此处了解如何安装它。
2) A real time android device (Smartphone or Tablet) configured with Android Studio. .
2) 使用Android Studio配置的实时android设备(智能手机或平板电脑) 。 。
3) A basic knowledge of Android lifecycle and different classes & functions used in Android Studio.
3)对Android生命周期以及 Android Studio中使用的不同类和函数的基本了解。
Android应用程序的基础知识: (
Basics of an Android App:)
- Activity: An activity is a class in Android SDK which is responsible for interaction between user and information on screen. So to add functionality in an App we need to extend different classes from Activity class. A simple one may require only one subclass, but a complex one could have more than one. 活动:活动是Android SDK中的类,负责用户和屏幕上的信息之间的交互。 因此,要在App中添加功能,我们需要从Activity类扩展不同的类。 一个简单的类可能只需要一个子类,而一个复杂的类可能有多个子类。
- Layout: A layout is what you see in front of you in Android App. All the buttons and text are arranged through layout. You can arrange different elements in different ways. A layout can be one of the following types: 布局:布局是您在Android App中看到的内容。 所有按钮和文本都是通过布局排列的。 您可以用不同的方式排列不同的元素。 布局可以是以下类型之一:
a) Linear layout: It arranges all the elements in a linear way which can be horizontal or vertical. The difference factor is orientation attribute. If you set orientation: horizontal then elements will be arranged in horizontal fashion and similarly for vertical.
a)线性布局:它以水平或垂直的线性方式排列所有元素。 差异因素是方向属性。 如果设置方向:水平,则元素将以水平方式排列,垂直方向也类似。
Note: By default it will take horizontal.
注意:默认情况下,它将是水平的。
LinearLayout is used in a linear layout.
LinearLayout用于线性布局。
<?xml version="1.0" encoding="utf-8"?>
<LinearLayout>
    xmlns:android="http://schemas.android.com/apk/res/android"
    xmlns:app="http://schemas.android.com/apk/res-auto"
    xmlns:tools="http://schemas.android.com/tools"
    android:layout_width="match_parent"
    android:layout_height="match_parent"
    app:layout_behavior="@string/appbar_scrolling_view_behavior"
    tools:context="com.androidtutorialpoint.newapplication.MillionaireApp"
    tools:showIn="@layout/activity_millionaire_app"

</LinearLayout>
This is how a linear layout is declared. If you are starter then you only need to know aboutlayout_width and layout_height which in this case is match_parent (it signifies its height and width will be equal to parent).
这就是声明线性布局的方式。 如果您是入门者,则只需要了解layout_width和layout_height (在这种情况下为match_parent) (表示其高度和宽度将等于父级)。
xmlns: implies XML namespace of the document. For example if you use android:idanywhere then xml will replace it with http://schemas.android.com/apk/res/android:id.Similarly tools: are added to reference elements or attributes.
xmlns:表示文档的XML名称空间。 例如,如果您在任何地方使用android:id ,那么xml都会将其替换为http://schemas.android.com/apk/res/android:id 。 类似的工具:添加到参考元素或属性。
Let’s go somewhat deeper to see how to declare horizontal and vertical layout.
让我们更深入地了解如何声明水平和垂直布局。
建立新专案 (
Creating new project)
Please follow following steps:
请按照以下步骤操作:
- Open Android Studio and make a new project with name “Android Layouts” and company domain application.example.com (I used my company domain i.e androidtutorialpoint.com. Similarly you can use yours). 打开Android Studio并创建一个名为“ Android Layouts”和公司域application.example.com的新项目(我使用了我的公司域,即androidtutorialpoint.com。同样,您也可以使用您的公司域)。
- Click Next and choose android version Lollipop. Again Click Next and Choose Blank Activity. 单击下一步,然后选择android版本Lollipop。 再次单击下一步,然后选择空白活动。
- Leave all things remaining same and Click Finish. 保留所有内容不变,然后单击“完成”。
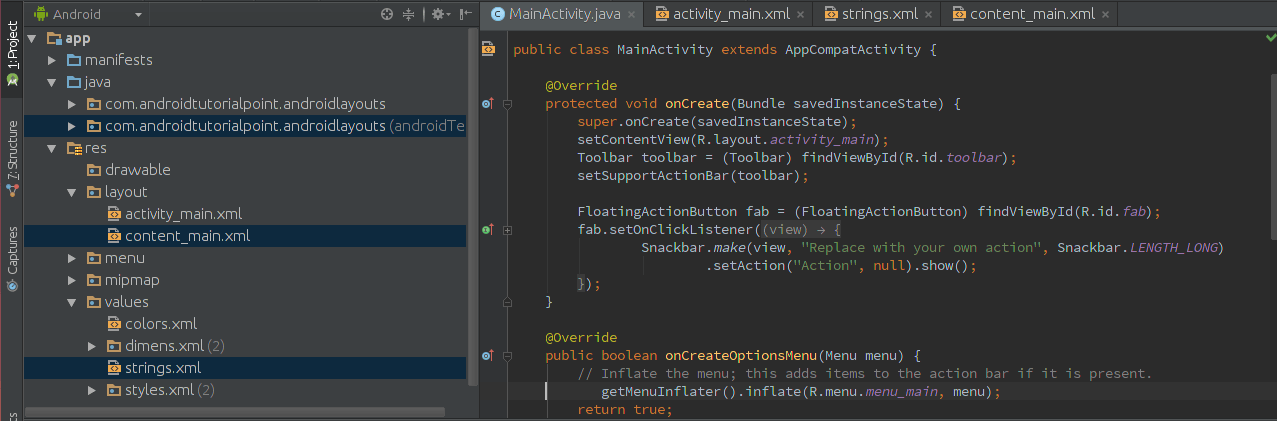
Now you can see MainActivity.java, content_main.xml and strings.xml. If you are not able to see them then click on the left window where these files can easily be located as shown in following figure:
现在,您可以看到MainActivity.java , content_main.xml和strings.xml 。 如果看不到它们,请单击左侧窗口,可以很容易地找到这些文件,如下图所示:
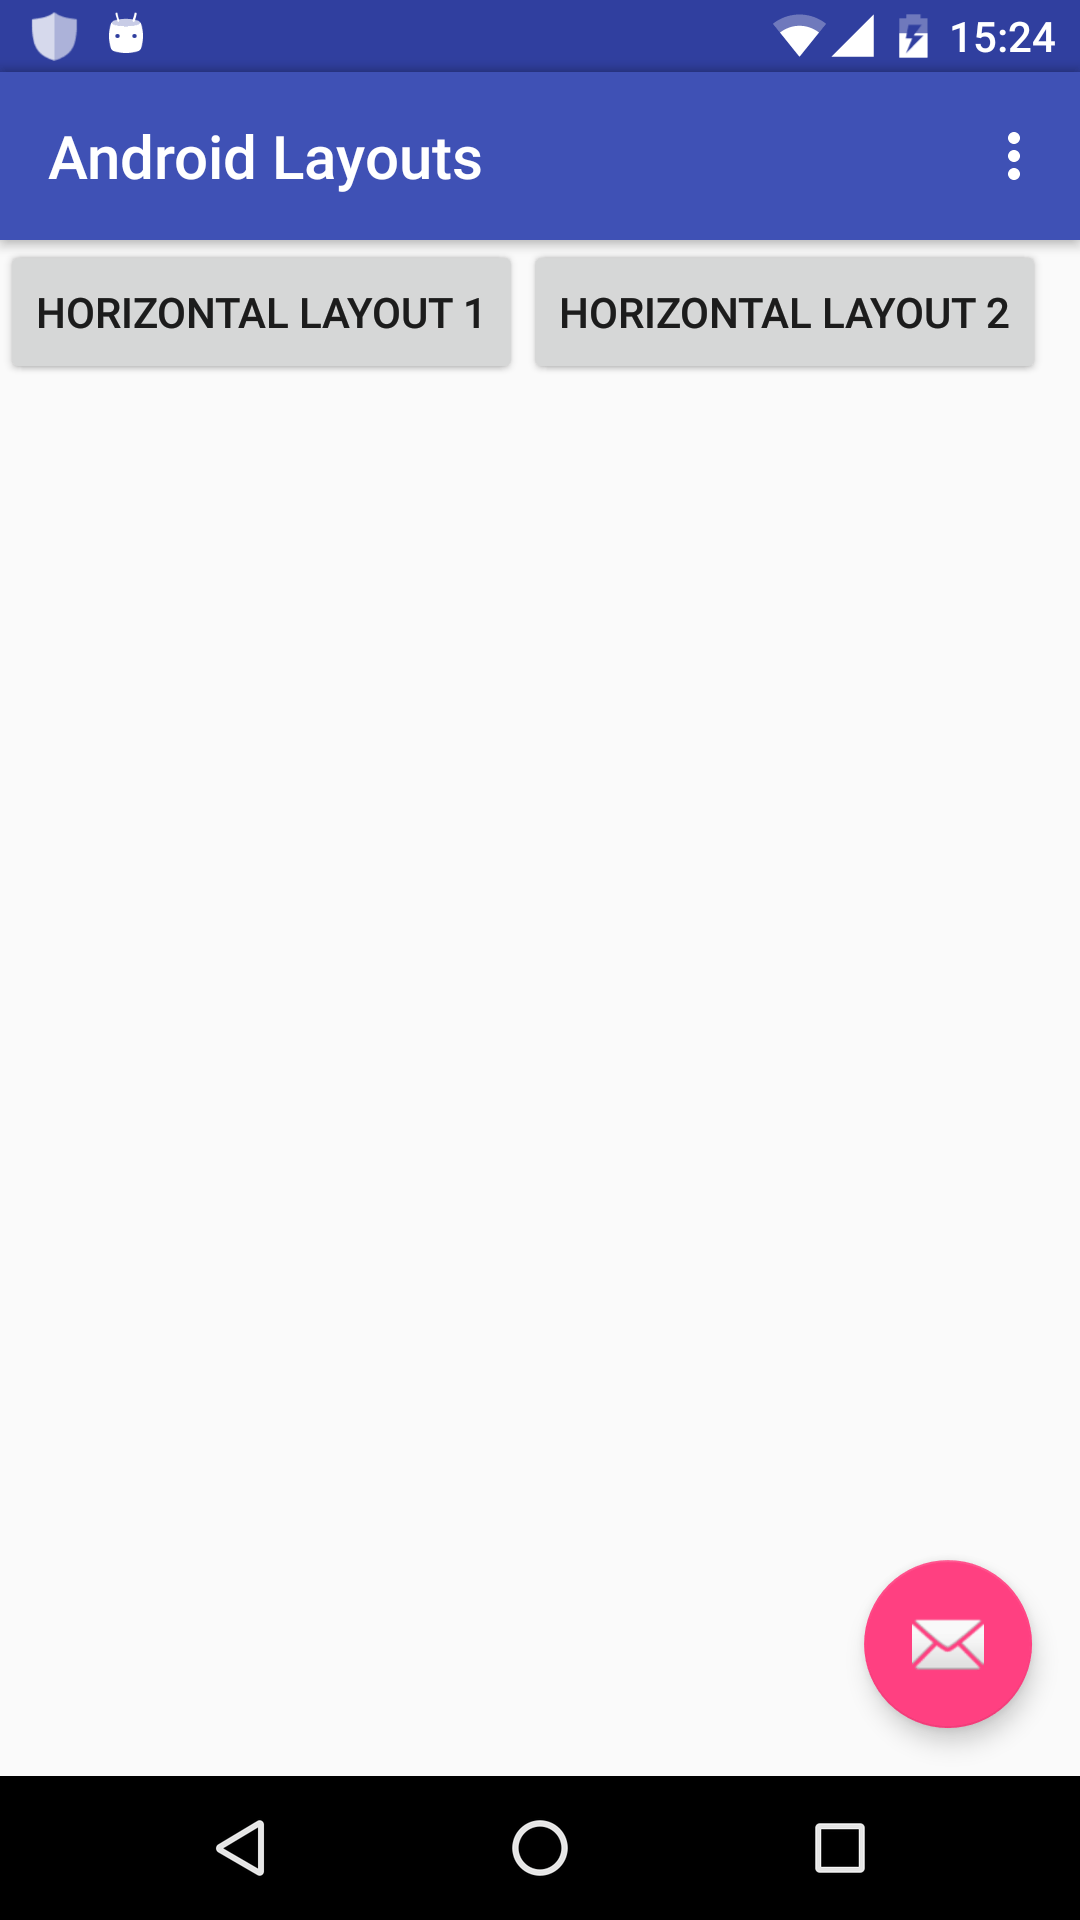
Horizontal Layout:
水平布局:
Comment previous code and add following code in content_main.xml (In an XML file comment is done using ):
注释先前的代码,并在content_main.xml中添加以下代码(在XML文件中,使用完成注释):
<?xml version="1.0" encoding="utf-8"?>

<!-- Horizontal Layout  -->
<LinearLayout
    xmlns:android="http://schemas.android.com/apk/res/android"
    xmlns:app="http://schemas.android.com/apk/res-auto"
    xmlns:tools="http://schemas.android.com/tools"
    android:layout_width="match_parent"
    android:layout_height="match_parent"
    app:layout_behavior="@string/appbar_scrolling_view_behavior"
    tools:context="com.androidtutorialpoint.androidlayouts.MainActivity"
    tools:showIn="@layout/activity_main"
    android:orientation="horizontal">

    <Button
        android:layout_width="wrap_content"
        android:layout_height="wrap_content"
        android:text="Horizontal layout 1" />
    <Button
        android:layout_width="wrap_content"
        android:layout_height="wrap_content"
        android:text="Horizontal layout 2" />

</LinearLayout>
Run this code and you will see following screen:
运行此代码,您将看到以下屏幕:
Vertical Layout:
垂直布局:
content_main.xml:
(content_main.xml:
)
<?xml version="1.0" encoding="utf-8"?>

<!-- Vertical Layout  -->
<LinearLayout
    xmlns:android="http://schemas.android.com/apk/res/android"
    xmlns:app="http://schemas.android.com/apk/res-auto"
    xmlns:tools="http://schemas.android.com/tools"
    android:layout_width="match_parent"
    android:layout_height="match_parent"
    app:layout_behavior="@string/appbar_scrolling_view_behavior"
    tools:context="com.androidtutorialpoint.androidlayouts.MainActivity"
    tools:showIn="@layout/activity_main"
    android:orientation="vertical">

    <Button
        android:layout_width="wrap_content"
        android:layout_height="wrap_content"
        android:text="Vertical layout 1" />
    <Button
        android:layout_width="wrap_content"
        android:layout_height="wrap_content"
        android:text="Vertical layout 2" />

</LinearLayout>
Run this code and you will see following screen:
运行此代码,您将看到以下屏幕:

b)相对布局:相对布局用于相对于其他元素定位一个元素。 这里的其他元素可以是其父元素或同级元素或任何其他id。 以下属性用于将其排列在左侧或右侧,开始或结束,上方或下方。
android:layout_toEndOf – Positions the start edge of this view to the end of the given anchor view ID.
android:layout_toEndOf –将此视图的开始边缘定位到给定锚视图ID的末尾。
android:layout_toLeftOf – Positions the right edge of this view to the left of the given anchor view ID.
android:layout_toLeftOf –将此视图的右边缘定位到给定锚视图ID的左侧。
android:layout_toRightOf – Positions the left edge of this view to the right of the given anchor view ID.
android:layout_toRightOf –将此视图的左边缘定位在给定锚视图ID的右侧。
android:layout_toStartOf – Positions the end edge of this view to the start of the given anchor view ID.
android:layout_toStartOf –将此视图的末端边缘定位到给定锚视图ID的起点。
android:layout_below – Positions the top edge of this view below the given anchor view ID.
android:layout_below –将此视图的上边缘置于给定的锚视图ID下方。
android:layout_above – Positions the bottom edge of this view above the given anchor view ID.
android:layout_above –将该视图的底部边缘定位在给定的锚视图ID上方。
Here I am going to discuss one of the attributes. Take the rest as an exercise. Let me know if anything is blocking. I will try to provide solution.
在这里,我将讨论属性之一。 其余的作为练习。 让我知道是否有任何障碍。 我将尝试提供解决方案。
Let’s discuss android:layout_toRightOf :-
让我们讨论android:layout_toRightOf:-
Comment previous code of content_main.xml and Paste following code:
注释 content_main.xml的先前代码,并粘贴以下代码:
<?xml version="1.0" encoding="utf-8"?>

<!-- Relative Layout  -->
<RelativeLayout xmlns:android="http://schemas.android.com/apk/res/android"
                android:layout_width="match_parent"
                android:layout_height="wrap_content">

    <EditText android:id="@+id/inputEmail" android:layout_width="fill_parent"
              android:layout_height="wrap_content" />

    <Button android:id="@+id/parent_button" android:layout_width="wrap_content"
            android:layout_height="wrap_content" android:layout_below="@id/inputEmail"
            android:text="Button_1" />

    <Button android:layout_width="wrap_content" android:layout_height="wrap_content"
            android:layout_toRightOf="@id/parent_button" android:layout_below="@id/inputEmail"
            android:text="Button_2" />
</RelativeLayout>
You will see following image:
您将看到以下图像:
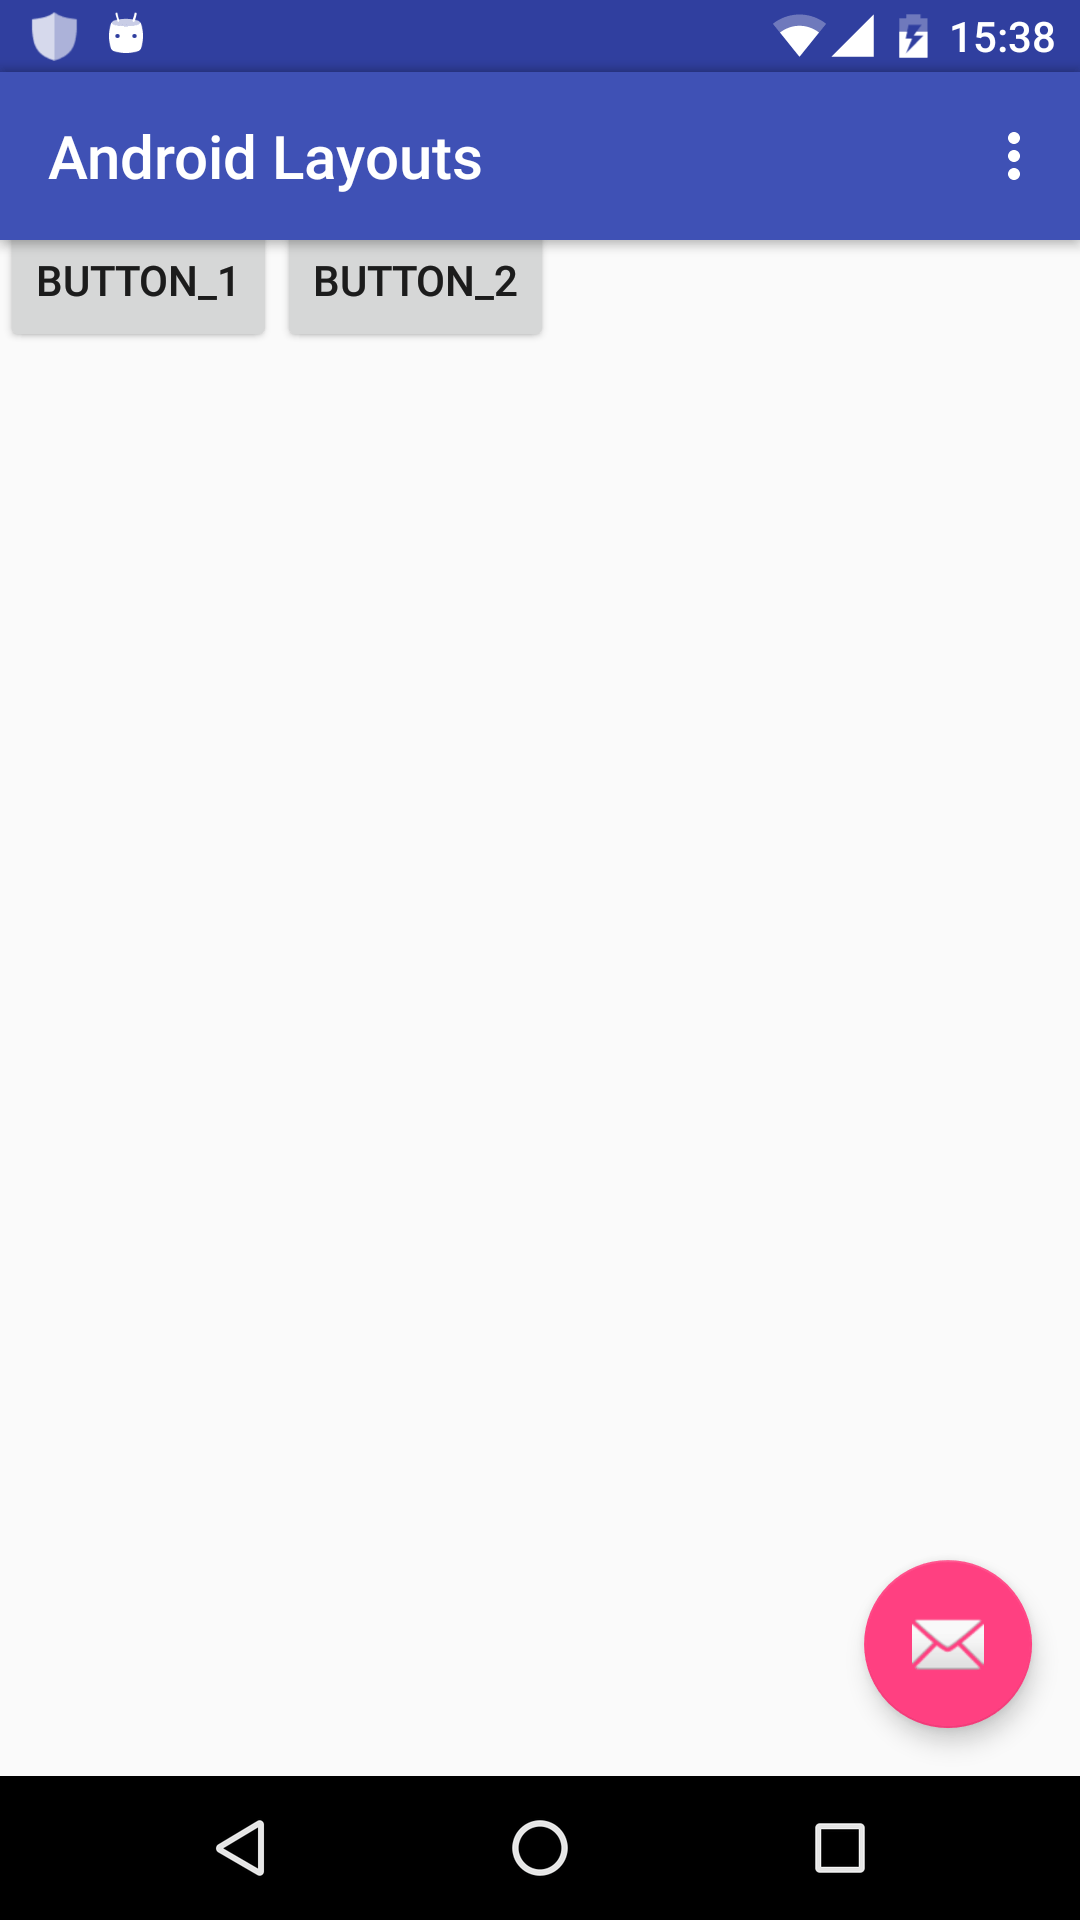
So here we first define button (<em>Button_1</em>) with a particular id <em>parent_button</em>. This id used as a reference for the second button (<em>button_2</em>).
因此,这里我们首先定义具有特定ID <em> parent_button </ em>的按钮(<em> Button_1 </ em>)。 此ID用作第二个按钮(<em> button_2 </ em>)的参考。
When we write <em>android:layout_toRightOf="@id/parent_button"</em> it implies place this element (in our case it is button_2) on right of element with id:parent_button (in our case it is button_1).
当我们编写<em> android:layout_toRightOf =“ @ id / parent_button” </ em>时,它意味着将此元素(在我们的情况下为button_2)放置在id:parent_button(在我们的情况下为button_1)元素的右侧。
Similarly we can use other attributes like <em>android:layout_toLeftOf</em>, <em>android:layout_toEndOf</em> etc. Try them.
同样,我们可以使用其他属性,例如<em> android:layout_toLeftOf </ em>,<em> android:layout_toEndOf </ em>等。尝试一下。
For detailed info. you can refer android developer guide <a href="http://developer.android.com/reference/android/widget/RelativeLayout.LayoutParams.html#attr_android:layout_below" target="_blank">here</a>.
有关详细信息。 您可以在<a href=" http://developer.android.com/reference/android/widget/RelativeLayout.LayoutParams.html#attr_android:layout_below“target="_blank">此处</a>上参阅。
Note: Sometimes it become confusing which one to choose between Relative and Linear Layout. So here is a trick: When you want to arrange elements linearly, in one line, choose Linear layout but if you want to arrange elements in a random manner then go for Relative. Following image describe it meaningfully:
注意:有时在相对布局和线性布局之间进行选择会引起混淆。 因此,这里有个窍门:如果要线性排列元素,请在一行中选择“线性布局”,但是如果要随机排列元素,请选择“相对”。 下图对其进行了有意义的描述:
下一步是什么 (What’s Next)
You can see our next tutorial of How to make a basic App. Here You will be able to make an App from scratch without any external help.
您可以查看我们的下一个有关如何制作基本App的教程。 在这里,您无需任何外部帮助即可从头开始制作应用。
Source: This tutorial originally posted at http://www.androidtutorialpoint.com/basics/android-layout/
来源:本教程最初发布在http://www.androidtutorialpoint.com/basics/android-layout/
翻译自: https://www.experts-exchange.com/articles/28699/Basics-of-an-Android-App-Activity-and-Layout.html
android布局基础知识


 782
782


 被折叠的 条评论
为什么被折叠?
被折叠的 条评论
为什么被折叠?
 到【灌水乐园】发言


