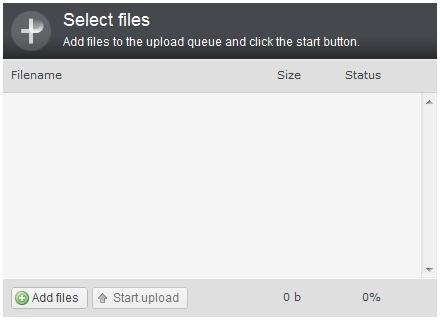
介绍 (Introduction)
本文介绍了如何使用开源的plupload控件上传多个图像。 在上传之前,在客户端上调整图像的大小,然后以块的形式完成上传。背景 (Background)
我必须为用户提供一种上传大量图片的方法。 问题在于照片是用12-16百万像素的相机以4000x3000分辨率拍摄的,因此图片文件很大(> 5MB)。 这使它变得不可行,因为即使上传50张图片进行服务器端处理也要花费很多时间,因此我必须找到一种在重新上传到服务器之前调整客户端上图像大小的方法。 在搜索中,我遇到了开源的plupload控件,该控件提供了出色的上传功能以及进度更新和客户端大小调整功能。 唯一的问题是所有示例都在PHP中,因此我花了一些时间才能使其与ASP.NET一起使用。 我正在写这篇文章,以帮助想要在ASP.NET中使用此控件的其他人。使用代码 (Using the Code)
可以从 http://www.plupload.com/index.php. http://www.plupload.com/index.php下载该控件。Once you unzip the contents to your project folder, you would need to provide two pages. One page needs to be an ASP.NET page while the other one can be either ASP.NET or simple HTML.
将内容解压缩到项目文件夹后,需要提供两个页面。 一页必须是ASP.NET页,而另一页可以是ASP.NET或简单HTML。
Here is the markup of the page that hosts the upload control:
这是托管上传控件的页面的标记:
<%@ Page Language="vb" AutoEventWireup="false"
CodeBehind="UploadToCRM.aspx.vb" Inherits="ImageUploader.UploadToCRM" %>

<!DOCTYPE html PUBLIC "-//W3C//DTD XHTML 1.0 Transitional//EN"
"http://www.w3.org/TR/xhtml1/DTD/xhtml1-transitional.dtd">

<html xmlns="http://www.w3.org/1999/xhtml">
<head runat="server">
    <title>Upload files to CRM</title>
    <link rel="stylesheet"
    href="js/jquery.plupload.queue/css/jquery.plupload.queue.css"
    type="text/css" media="screen" />

<script type="text/javascript"
src="https://ajax.googleapis.com/ajax/libs/jquery/1.5.1/jquery.min.js"></script>
<script type="text/javascript"
src="http://bp.yahooapis.com/2.4.21/browserplus-min.js"></script>

<script type="text/javascript" src="js/plupload.js"></script>
<script type="text/javascript" src="js/plupload.flash.js"></script>
<script type="text/javascript"
src="js/jquery.plupload.queue/jquery.plupload.queue.js"></script>

    <style type="text/css">
        #btnSubmit
        {
            width: 92px;
        }
    </style>

</head>
<body>
    <form id="form1" runat="server">
    <table>
     <tr>
      <td colspan="2">
         <h3>Upload Files To CRM</h3>
      </td>
     </tr>
     <tr>
      <td colspan="2">
       <br />
   	    <div style="float: left; margin-right: 20px">
		 <div id="flash_uploader" style="width: 450px;
		 height: 330px;">Your browser doesn't have Flash installed.</div>
	     </div>
         <br style="clear: both" />
      </td>
     </tr>
     <tr>
      <td colspan="2">
       <asp:Button id="btnSubmit" runat="server" Text="Save" Enabled="false" />
          <asp:Label ID="lblMessage" runat="server" ForeColor="Red"></asp:Label>
      </td>
     </tr>
    </table>
    </form>
    <script type="text/javascript">
        $(function () {
            // Setup flash version
            $("#flash_uploader").pluploadQueue({
                // General settings
                runtimes: 'flash',
                url: 'upload.aspx',
                max_file_size: '10mb',
                chunk_size: '1mb',
                unique_names: true,
                filters: [
			{ title: "Image files", extensions: "jpg" }
		],

                // Resize images on clientside if we can
                resize: { width: 800, height: 600, quality: 90 },

                // Flash settings
                flash_swf_url: 'js/plupload.flash.swf',

                init: { StateChanged: function (up) {
                    // Called when the state of the queue is changed
                    if (up.state == plupload.STOPPED) {
                        $("#btnSubmit").removeAttr("disabled");
                    }
                }
                }
            });
        });

    </script>
</body>
</html>
You need to make sure that the paths of other files being referenced in the markup are correct. For example, "flash_swf_url: 'js/plupload.flash.swf'," needs to point to the correct location of the swf file. Also, "url: 'upload.aspx'" is the address of the page which receives the uploaded files. I have a page called "upload.aspx" in the same directory as the above page so I simply provided the relative path of the page.
您需要确保标记中引用的其他文件的路径正确。 例如,“ flash_swf_url:'js / plupload.flash.swf'”需要指向swf文件的正确位置。 另外,“ URL:'upload.aspx'”是接收上载文件的页面的地址。 我在与上一页相同的目录中有一个名为“ upload.aspx”的页面,因此我只提供了该页面的相对路径。
The upload is performed by posting the files in chunks to the upload.aspx page. There is no special markup in the page, but the code behind looks like below:
通过将文件分块发布到upload.aspx页面来执行上传。 页面中没有特殊的标记,但是背后的代码如下所示:
Public Class upload
    Inherits System.Web.UI.Page

    Protected Sub Page_Load(ByVal sender As Object, ByVal e As System.EventArgs) _
	Handles Me.Load
        If IsNothing(Request.Form("chunk")) = False Then
            If Session("ID") Is Nothing Then
                Session("ID") = Guid.NewGuid.ToString
                IO.Directory.CreateDirectory(Server.MapPath("Uploads/" & Session("ID")))
            End If
            Dim chunk As Integer = Request.Form("chunk")
            Dim chunks As Integer = Request.Form("chunks")
            Dim filename As String = Request.Form("name")
            If chunk = 0 Then
                Request.Files(0).SaveAs(Server.MapPath("Uploads/") & _
		Session("ID") & "/" & Request.Files(0).FileName)
            Else
                Dim OutputStream As New IO.FileStream(Server.MapPath("Uploads/") & _
		Session("ID") & "/" & Request.Files(0).FileName, IO.FileMode.Append)
                Dim InputBytes(Request.Files(0).ContentLength) As Byte
                Request.Files(0).InputStream.Read(InputBytes, 0, _
			Request.Files(0).ContentLength)
                OutputStream.Write(InputBytes, 0, InputBytes.Length - 1)
                OutputStream.Close()
            End If
        End If
    End Sub

End Class
This page creates the session, and the temporary directory where the uploaded images will be saved. When a file, or a chunk of a file is uploaded, the Request.Form collection contains the current chunk number, number of total chunks, and the name of file. If the chunk is 0 (first chunk), we create the file. If the chunk is greater than 0(chunk of existing file), we append that chunk to the existing file.
该页面创建会话以及将保存上传图像的临时目录。 上载文件或文件块时,Request.Form集合包含当前块号,总块数和文件名。 如果块为0(第一个块),则创建文件。 如果该块大于0(现有文件的块),则将该块附加到现有文件中。
Finally, the code behind for the page that is hosting the upload control contains the code for Submit button. In my original page, I have other controls and code to do some database work but I have stripped that code out for this example and kept it simple.
最后,托管上传控件的页面的后面代码包含“提交”按钮的代码。 在我的原始页面中,我还有其他控件和代码来完成一些数据库工作,但是对于该示例,我已经删除了该代码,并使其保持简单。
Protected Sub btnSubmit_Click(sender As Object, e As EventArgs) Handles btnSubmit.Click
    If Session("ID") Is Nothing Then
        lblMessage.Text = "You don't seem to have uploaded any pictures."
        Exit Sub
    Else
        Dim FileCount As Integer = Request.Form(Request.Form.Count - 2)
        Dim FileName, TargetName As String
        Try
            Dim Path As String = "\\servername\foldername\"
            Dim StartIndex As Integer
            Dim PicCount As Integer
            For i As Integer = 0 To Request.Form.Count - 1
                If Request.Form(i).ToLower.Contains("jpg") Then
                    StartIndex = i + 1
                    Exit For
                End If
            Next
            For i As Integer = StartIndex To Request.Form.Count - 4 Step 3
                FileName = Request.Form(i)
                If IO.File.Exists(Path & FileName) Then
                    TargetName = Path & FileName
                    Dim j As Integer = 1
                    While IO.File.Exists(TargetName)
                        TargetName = Path & _
			IO.Path.GetFileNameWithoutExtension(FileName) & "(" & j & ")"_
			 & IO.Path.GetExtension(FileName)
                        j += 1
                    End While
                Else
                    TargetName = Path & FileName
                End If
                IO.File.Move(Server.MapPath("Uploads/" & Session("ID") & "/" _
			& FileName), TargetName)
                PicCount += 1
            Next
            lblMessage.Text = PicCount & IIf(PicCount = 1, " Picture", _
			" Pictures") & " Saved!"
            lblMessage.ForeColor = Drawing.Color.Black
        Catch ex As Exception
            lblMessage.Text = ex.ToString
	    End Try
    End If
End Sub
When the submit button is clicked, details of all the uploaded files are sent in the Request.Form collection. The code then loops through this collection to process each file and move it from the temporary folder to a share on a server.
单击提交按钮后,所有已上传文件的详细信息将发送到Request.Form集合中。 然后,代码循环遍历此集合以处理每个文件,并将其从临时文件夹移动到服务器上的共享。


 2241
2241

 被折叠的 条评论
为什么被折叠?


