


变分模态分解
在此示例中,我们将看到如何在主屏幕中创建一个可以打开弹出对话框的Android小部件。 如您所知,Android Widgets是小型应用程序,基本上可以做两件事。 按下时启动新的活动,或显示在确定的时间间隔更新的信息。
1.简介
小部件使用RemoteViews来显示其用户界面。 RemoteViews可以由具有与原始应用程序相同权限的另一个进程执行。 这样,小部件将以其定义的应用程序的权限运行。 这是官方的Android文档的形式:” RemoteView是一个类,描述了可以在另一个进程中显示的视图层次结构。 该层次结构是从布局资源文件扩展的,此类提供了一些基本操作来修改扩展的层次结构的内容。”
窗口小部件的用户界面由BroadcastReceiver定义。 此BroadcastReceiver将布局RemoteViews为小部件的RemoteViews 。 然后, RemoteViews将交付给Android,后者将更新主屏幕应用程序上的用户界面。
与“ Activities相比,小部件的功能和样式有限。 因此,您可能需要采取一些变通办法来做更复杂的事情,就像我们想做的那样。 因此,推出从这里我们的小窗口弹出的对话是我们做什么:当点击小工具,我们简单地推出一个新的Activity与android:theme="@android:style/Theme.Dialog"中的配置属性集Activity在AndroidManifest.xml 。
总结基本步骤,我们将:
- 创建一个Android小部件。
- 创建一个
Intent,当它发送到BroadcastReceiver它标志着新Activity的启动。 - 将
ClickListener注册到窗口小部件。 因此,当控件被按下时,上面的Intent将被发送到BroadcastReceiver。 - 收到此
Intent,将启动一个新的Activity,它看起来像一个弹出对话框。
让我们看看它是如何完成的。
2.创建一个新的Android小部件
对于本教程,我们将在Windows 64位平台上使用以下工具:
- JDK 1.7
- Eclipse 4.3开普勒
- Android SKD 4.3
2.1创建一个新的Android项目
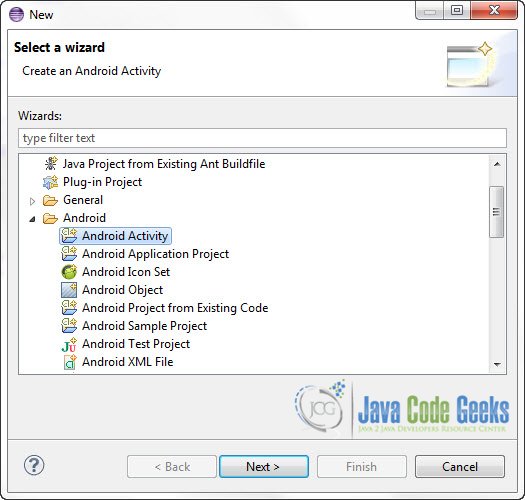
打开Eclipse IDE,然后转到File-> New-> Project-> Android-> Android Application Project。
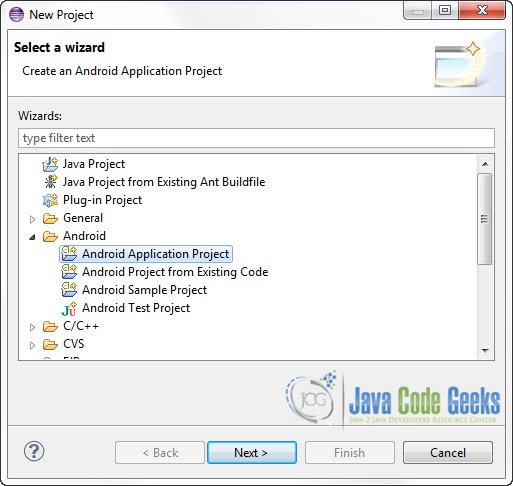

您必须在适当的文本字段中指定应用程序名称,项目名称和程序包名称,然后单击下一步。


在下一个窗口中取消选中“创建活动”选项,因为稍后我们将创建PopUpActivity 。
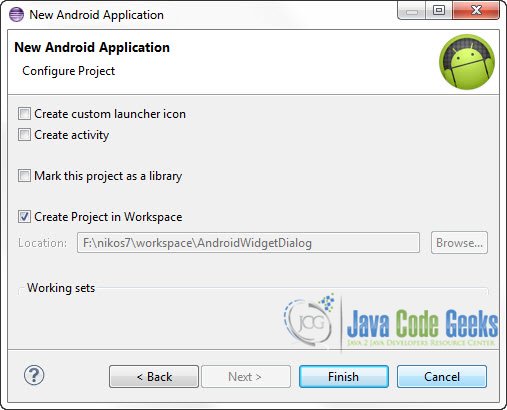

点击“完成”。
2.2为小部件定义自定义背景形状
转到程序包浏览器并打开/res/drawable-*文件夹。
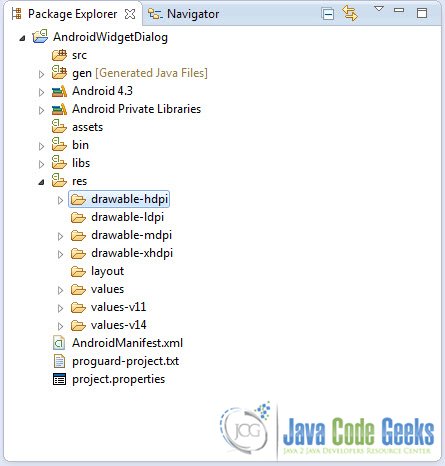

右键单击其中一个文件夹(我选择了/res/drawble-hdpi )->新建->其他-> /res/drawble-hdpi > Android XML文件
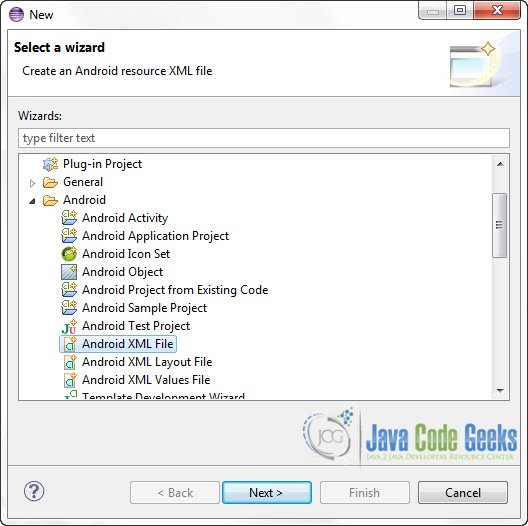

从“根元素”列表中选择形状,然后给文件命名custom_shape.xml:
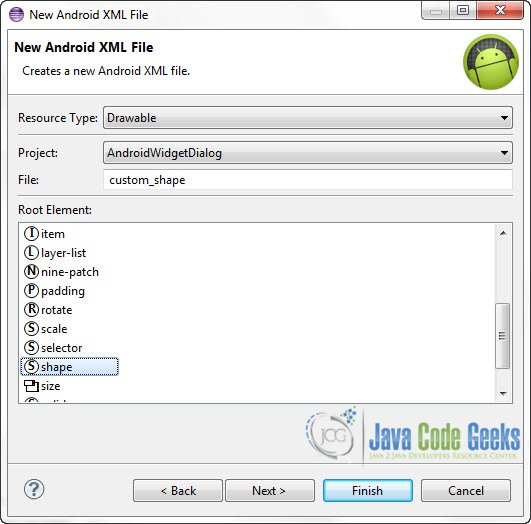

现在,打开该文件并粘贴以下代码,描述简单形状的布局。
custom_shape.xml:
<?xml version="1.0" encoding="UTF-8"?>
<shape xmlns:android="http://schemas.android.com/apk/res/android"
    android:shape="rectangle" >

    <gradient
        android:angle="90"
        android:endColor="#333"
        android:startColor="#333" />

    <corners
        android:bottomLeftRadius="2dp"
        android:bottomRightRadius="2dp"
        android:topLeftRadius="2dp"
        android:topRightRadius="2dp" />

    <stroke
        android:width="2dp"
        android:color="#333" />

</shape>
2.3为小部件定义简单的布局
导航到Package Explorer上的res/layout文件夹。 右键单击文件夹->新建->其他-> Android-> Android XML布局文件。 创建名称为widget_layout的文件。
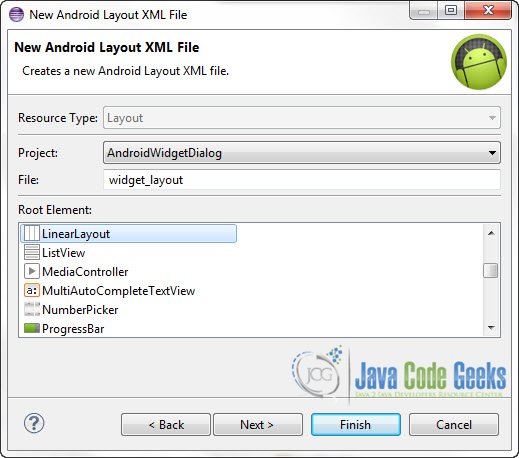

并粘贴以下代码:
widget_layout.xml :
<?xml version="1.0" encoding="utf-8"?>
<LinearLayout xmlns:android="http://schemas.android.com/apk/res/android"
    android:id="@+id/linearLayout"
    android:layout_width="match_parent"
    android:layout_height="match_parent"
    android:layout_margin="8dip"
    android:background="@drawable/custom_shape" >

    <TextView
        android:id="@+id/myText"
        style="@android:style/TextAppearance.Medium"
        android:layout_width="match_parent"
        android:layout_height="match_parent"
        android:layout_gravity="center"
        android:layout_margin="4dip"
        android:gravity="center_horizontal|center_vertical"
        android:text="Press Me"
        android:textColor="#FFF" >

    </TextView>

</LinearLayout>
2.4创建
转到文件->新建->其他->安卓->安卓XML文件。 从“资源类型”列表中选择“ AppWidget Provider”,并将文件命名为widget_provider.xml.
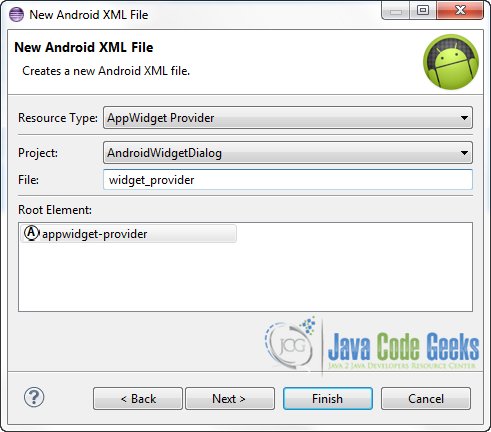

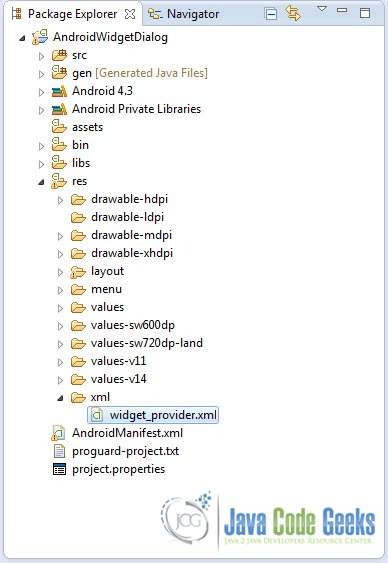
您将在新创建的/res/xml文件夹下找到该文件:

打开文件并粘贴以下代码,该代码基本上是AppWidgetProvider.元数据AppWidgetProvider.
widget_provider.xml:
<?xml version="1.0" encoding="utf-8"?>
<appwidget-provider xmlns:android="http://schemas.android.com/apk/res/android"
    android:initialLayout="@layout/widget_layout"
    android:minHeight="50dp"
    android:minWidth="120dp" >

</appwidget-provider>
2.5创建
现在在com.javacodegeeks.android.androidwidgetdialog包下创建一个扩展AppWidgetProvider的新类。 这将是小部件的BroadcastReceiver 。
AndroidWidget.java:
package com.javacodegeeks.android.androidwidgetdialog;

import android.app.PendingIntent;
import android.appwidget.AppWidgetManager;
import android.appwidget.AppWidgetProvider;
import android.content.ComponentName;
import android.content.Context;
import android.content.Intent;
import android.widget.RemoteViews;

public class AndroidWidget extends AppWidgetProvider {

	private static final String SHOW_POPUP_DIALOG_ACTION = "com.javacodegeeks.android.showpopupdialog";

	@Override
	public void onUpdate(Context context, AppWidgetManager appWidgetManager,
			int[] appWidgetIds) {

		ComponentName thisWidget = new ComponentName(context,
				AndroidWidget.class);

		// Obtain all instances of our widget
		// Remember that you can have as many instances of the same widget as you want on the home screen

		int[] allWidgetInstancesIds = appWidgetManager.getAppWidgetIds(thisWidget);
		for (int widgetId : allWidgetInstancesIds) {

			RemoteViews remoteViews = new RemoteViews(context.getPackageName(),
					R.layout.widget_layout);

			// Create an intent that when received will launch the PopUpActivity
			Intent intent = new Intent(context, AndroidWidget.class);
			intent.setAction(SHOW_POPUP_DIALOG_ACTION);

			PendingIntent pendingIntent = PendingIntent.getBroadcast(context,
					0, intent, PendingIntent.FLAG_UPDATE_CURRENT);

			// Set up the onClickListener of the widget
			// Now, when the widget is pressed the pendingIntent will be sent

			remoteViews.setOnClickPendingIntent(R.id.myText, pendingIntent);

			appWidgetManager.updateAppWidget(widgetId, remoteViews);

		}

		super.onUpdate(context, appWidgetManager, appWidgetIds);

	}

	@Override
	public void onReceive(final Context context, Intent intent) {

		// If the intent is the one that we've defined to launch the pop up dialog
		// then create and launch the PopUpActivity
		if (intent.getAction().equals(SHOW_POPUP_DIALOG_ACTION)) {

			Intent popUpIntent = new Intent(context, PopUpActivity.class);
			popUpIntent.setFlags(Intent.FLAG_ACTIVITY_NEW_TASK);
			context.startActivity(popUpIntent);

		}

		super.onReceive(context, intent);

	}

} 如您所见,我们使用PendingIntent实例。 PendingIntent是对Intent和要执行的目标操作的描述。 当您将PendingIntent赋予另一个应用程序时,即授予它以相同的权限和身份执行您指定的操作的权限。 因此,您应该谨慎使用PendingIntent 。 在此示例中,我们获得了调用getBroadcast方法的PendingIntent实例。 此方法将检索执行广播的PendingIntent ,例如调用Context.sendBroadcast() 。
现在执行流程如下:
- 按照定义,当将小部件安装在主屏幕上时,
onUpdate方法仅执行一次。 您可以通过在widget_provider.xml文件中定义android:updatePeriodMillis属性来设置执行onUpdate方法的时间间隔。 因此,当执行onUpdate方法时,首先我们检索用户已在主屏幕上安装的窗口小部件的所有实例ID。 - 然后,使用动作
com.javacodegeeks.android.showpopupdialog创建一个新的Intent。 检索新的广播PendingIntent - 向每个小部件的
RemoteView注册一个OnClickPendingIntent侦听器。 - 现在,当用户单击Widget时,将广播带有
com.javacodegeeks.android.showpopupdialog动作的Intent。 这是在以上代码的第32行中创建的Intent(也用于创建PendingIntent实例)。 - Intent将被接收,
onReceive将被执行。 如果收到的Intent具有com.javacodegeeks.android.showpopupdialog操作,PopUpActivity启动PopUpActivity类。
现在,让我们看一下PopUpActivity.的代码PopUpActivity.
3.创建
PopUpActivity是一个简单的Activity类,将作为“对话”框启动。
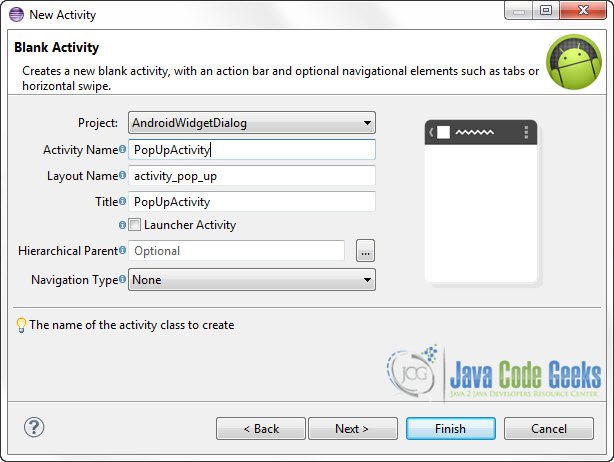
转到程序包资源管理器,然后右键单击com.javacodegeeks.android.androidwidgetdialog程序包->新建->其他-> com.javacodegeeks.android.androidwidgetdialog > Android活动。

将名称设置为“ PopUpActivity”。 如您所见,此活动的布局文件将自动创建,名称为“ activity_pop_up.xml”。

要设置活动的布局,请打开/res/layout/activity_pop_up.xml文件并粘贴以下代码。
activity_pop_up.xml:
<?xml version="1.0" encoding="utf-8"?>
<LinearLayout xmlns:android="http://schemas.android.com/apk/res/android"
    xmlns:tools="http://schemas.android.com/tools"
    android:layout_width="220dp"
    android:layout_height="wrap_content"
    android:gravity="center_horizontal"
    android:orientation="vertical" >

    <TextView
        android:id="@+id/mytxt"
        android:layout_width="fill_parent"
        android:layout_height="wrap_content"
        android:layout_marginBottom="10dp"
        android:layout_marginLeft="0dp"
        android:layout_marginRight="0dp"
        android:layout_marginTop="5dp"
        android:gravity="center_horizontal"
        android:textColor="#FFF"
        android:textSize="13sp" />

    <Button
        android:id="@+id/closBtn"
        android:layout_width="wrap_content"
        android:layout_height="wrap_content"
        android:text="Close" />

</LinearLayout> 这是PopUpActivity类的代码。
PopUpActivity.java:
package com.javacodegeeks.android.androidwidgetdialog;
import java.util.Random;
import android.app.Activity;
import android.os.Bundle;
import android.view.Menu;
import android.view.View;
import android.view.View.OnClickListener;
import android.view.Window;
import android.widget.Button;
import android.widget.TextView;
public class PopUpActivity extends Activity {
@Override
protected void onCreate(Bundle savedInstanceState) {
super.onCreate(savedInstanceState);
requestWindowFeature(Window.FEATURE_NO_TITLE);
setContentView(R.layout.activity_pop_up);
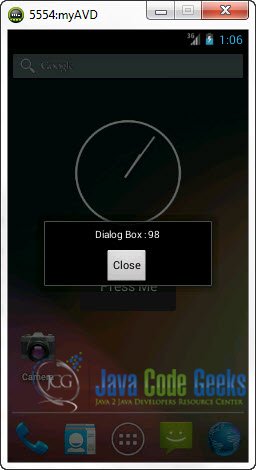
String dialogText = "Dialog Box : " + (new Random().nextInt(100));
TextView txt = (TextView) findViewById(R.id.mytxt);
txt.setText(dialogText);
Button dismissbutton = (Button) findViewById(R.id.closBtn);
dismissbutton.setOnClickListener(new OnClickListener() {
@Override
public void onClick(View v) {
PopUpActivity.this.finish();
}
});
}
} 上面的代码中没有任何空格。 我们简单地设置mytxt TextView的值。 并且我们为点击按钮注册了一个ClickListener 。 当按下按钮时, PopUpActivity将终止。
4.
这是本教程中非常重要的一步。 打开AndroidManifest.xml文件并粘贴以下代码:
AndroidManifest.xml:
<?xml version="1.0" encoding="utf-8"?>
<manifest xmlns:android="http://schemas.android.com/apk/res/android"
    package="com.javacodegeeks.android.androidwidgetdialog"
    android:versionCode="1"
    android:versionName="1.0" >

    <uses-sdk
        android:minSdkVersion="8"
        android:targetSdkVersion="18" />

    <application
        android:allowBackup="true"
        android:icon="@drawable/ic_launcher"
        android:label="@string/app_name"
        android:theme="@style/AppTheme" >

        <receiver
            android:name=".AndroidWidget"
            android:icon="@drawable/ic_launcher"
            android:label="Android Custom Widget" >
            <intent-filter>
                <action android:name="com.javacodegeeks.android.showpopupdialog" />
                <action android:name="android.appwidget.action.APPWIDGET_UPDATE" />
            </intent-filter>

            <meta-data
                android:name="android.appwidget.provider"
                android:resource="@xml/widget_provider" />
        </receiver>

        <activity
            android:name="com.javacodegeeks.android.androidwidgetdialog.PopUpActivity"
            android:label="@string/title_activity_pop_up"
            android:theme="@android:style/Theme.Dialog" >
        </activity>
    </application>

</manifest>
如您所见,我们已经设置了一个接收器,该接收器为我们的应用程序注册了代码> AppWidgetProvider,可以接收广播
- <action android:name =” com.javacodegeeks.android.showpopupdialog” />
- <action android:name =” android.appwidget.action.APPWIDGET_UPDATE” />
第一个是我们注册自己的意图。 第二个是Android发送的Intent。 我们还将元数据提供给AppWidgetProvider ,指向我们之前创建的widget_provider.xml资源文件。
重要的一点是第34行,在这里我们将应用程序的主题定义为android:theme="@android:style/Theme.Dialog" 。 这将创建一个带有弹出对话框主题的活动
让我们看看它在模拟器上的外观。
5.运行附件
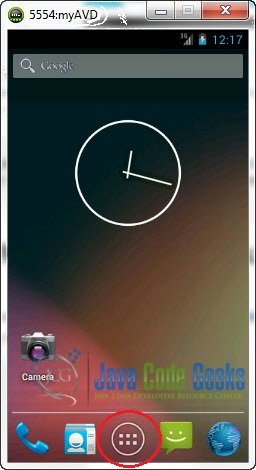
当您运行应用程序并启动模拟器时,请转到主屏幕上的“应用程序”按钮:

点击“小部件”。 将您的小部件拖放到主屏幕
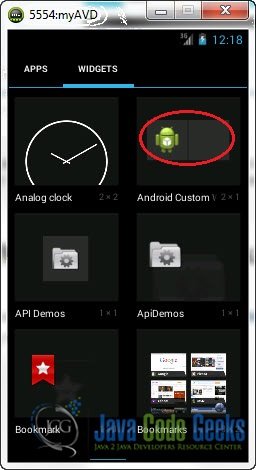

这里是:
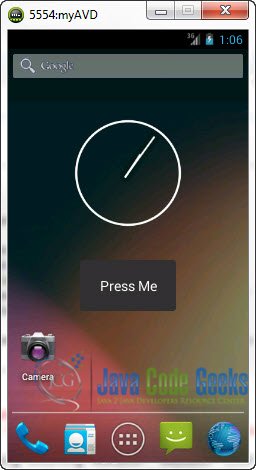

现在,当您单击窗口小部件时:

而已。
下载Eclipse项目
这是一个有关如何从Android小部件创建模态对话框(弹出窗口)的Android示例。 下载本教程的Eclipse项目: AndroidWidgetDialog.zip
翻译自: https://www.javacodegeeks.com/2013/05/modal-dialog-popup-from-android-widget-example.html
变分模态分解


 6531
6531


 被折叠的 条评论
为什么被折叠?
被折叠的 条评论
为什么被折叠?
 到【灌水乐园】发言


