


webgl 坐标系
After addressing 3D space and lighting, I rather rushed to the end of the previous article in order to gain a rendered image. In this piece I’ll backtrack a little, covering threeJS objects and materials in detail, before re-approaching the rendering process.
在解决了3D空间和照明问题之后,我宁愿赶到上一篇文章的末尾以获取渲染的图像。 在本文中,我将稍微回溯一下,详细介绍三个JS对象和材质,然后再重新进行渲染过程。
细节 (Details)
At the end of the last article, I created a sphere:
在上一篇文章的结尾,我创建了一个球形:
let marsGeo = new THREE.SphereGeometry (500, 32, 32),That sphere is 500 units in radius, and has 32 vertical segments and 32 horizontal segments. By default every object is created at the origin point of the scene (0 0 0), so we don’t have to move it.
该球体的半径为500个单位,并具有32个垂直段和32个水平段。 默认情况下,每个对象都是在场景的原点( 0 0 0 )创建的,因此我们不必移动它。
There are many different kinds of 3D shape supported in threeJS, and I’ll be covering more in future articles; spheres are just the easiest to start with.
threeJS支持多种类型的3D形状,我将在以后的文章中介绍更多内容。 球体是最容易入手的。
What happens if we reduce the number of segments to 4 in each direction for the sphere?
如果将球的每个方向上的段数减少到4,会发生什么?
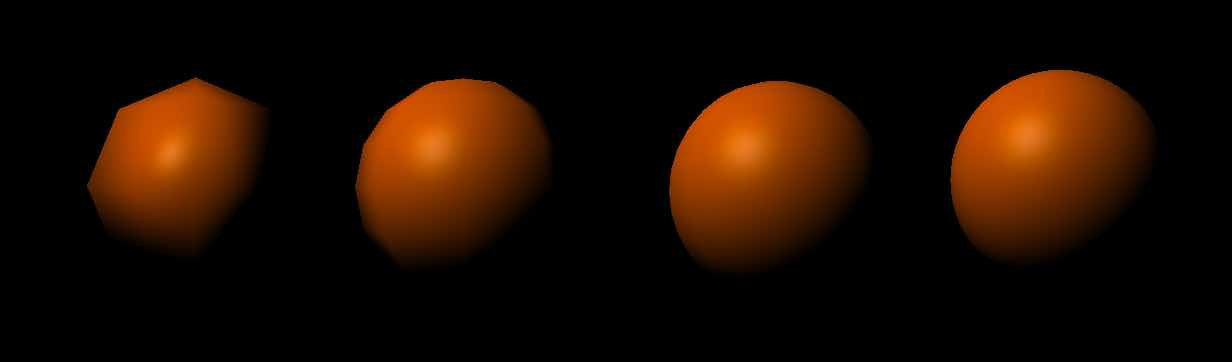
You can see that the edge of the sphere is “roughed in” at lower segment counts; the forward-facing part of the object only looks spherical due to a combination of lighting and shaders. (I’ll discuss shaders in a moment).
您会看到,球体的边缘在较低的线段数处被“粗糙化”; 由于照明和着色器的组合,对象的朝前部分仅看起来呈球形。 (我将在稍后讨论着色器)。
As a general rule, the more segments an object has, the smoother it will appear. However, this comes at a cost: more segments also means greater computation time for rendering the scene, and greater use of RAM.
通常,对象具有的细分越多,其显示就越平滑 。 但是,这是有代价的:更多的段也意味着更长的渲染场景所需的计算时间以及更多的RAM。
The best balance is to determine how much detail you need in an object. If a sphere is very small or very far away, it won’t need many segments in order to look circular. On the other hand, if we were making a close fly-by of the planet, we’d need rather more segments to ensure that the sphere continued to look smooth during our closest approach.
最佳的平衡是确定对象中需要多少细节 。 如果球体很小或很远,那么看起来圆形就不需要很多分段。 另一方面,如果我们要使行星近距离飞行,则需要更多的细分来确保在我们最接近的方法中,球体继续保持光滑。
材料三明治 (A Material Sandwich)
In the last example, I applied a Phong material to the sphere:
在最后一个示例中,我将Phong材质应用于球体:
marsMaterial = new THREE.MeshPhongMaterial( { color: 0xff6600 } ),Phong is a shader algorithm, written by Vietnamese computer graphics researcher Bùi Tường Phong. A shader essentially defines how light interacts with a 3D surface: Phong’s algorithm is fast and efficient, and ideal for rendering smooth surfaces. In threeJS, the material is merged with an existing 3D object to create a mesh:
Phong是一种着色器算法,由越南计算机图形学研究员BùiTườngPhong编写。 着色器本质上定义了光与3D表面的交互方式:Phong的算法快速有效,非常适合渲染平滑表面。 在threeJS中,将材质与现有3D对象合并以创建网格 :
marsMesh = new THREE.Mesh(marsGeo, marsMaterial);The rendered result, shown in the previous example, is a little simplistic for our purposes: we want a planet, not a shiny orange sphere. To create this impression, we’ll need to include several more material aspects to our sphere, via a Texture Loader.
上一个示例中所示的渲染结果对于我们的目的而言有点简单:我们想要一个行星 ,而不是一个有光泽的橙色球体。 为了产生这种印象,我们需要通过Texture Loader将更多的材料方面包括到我们的球体中。
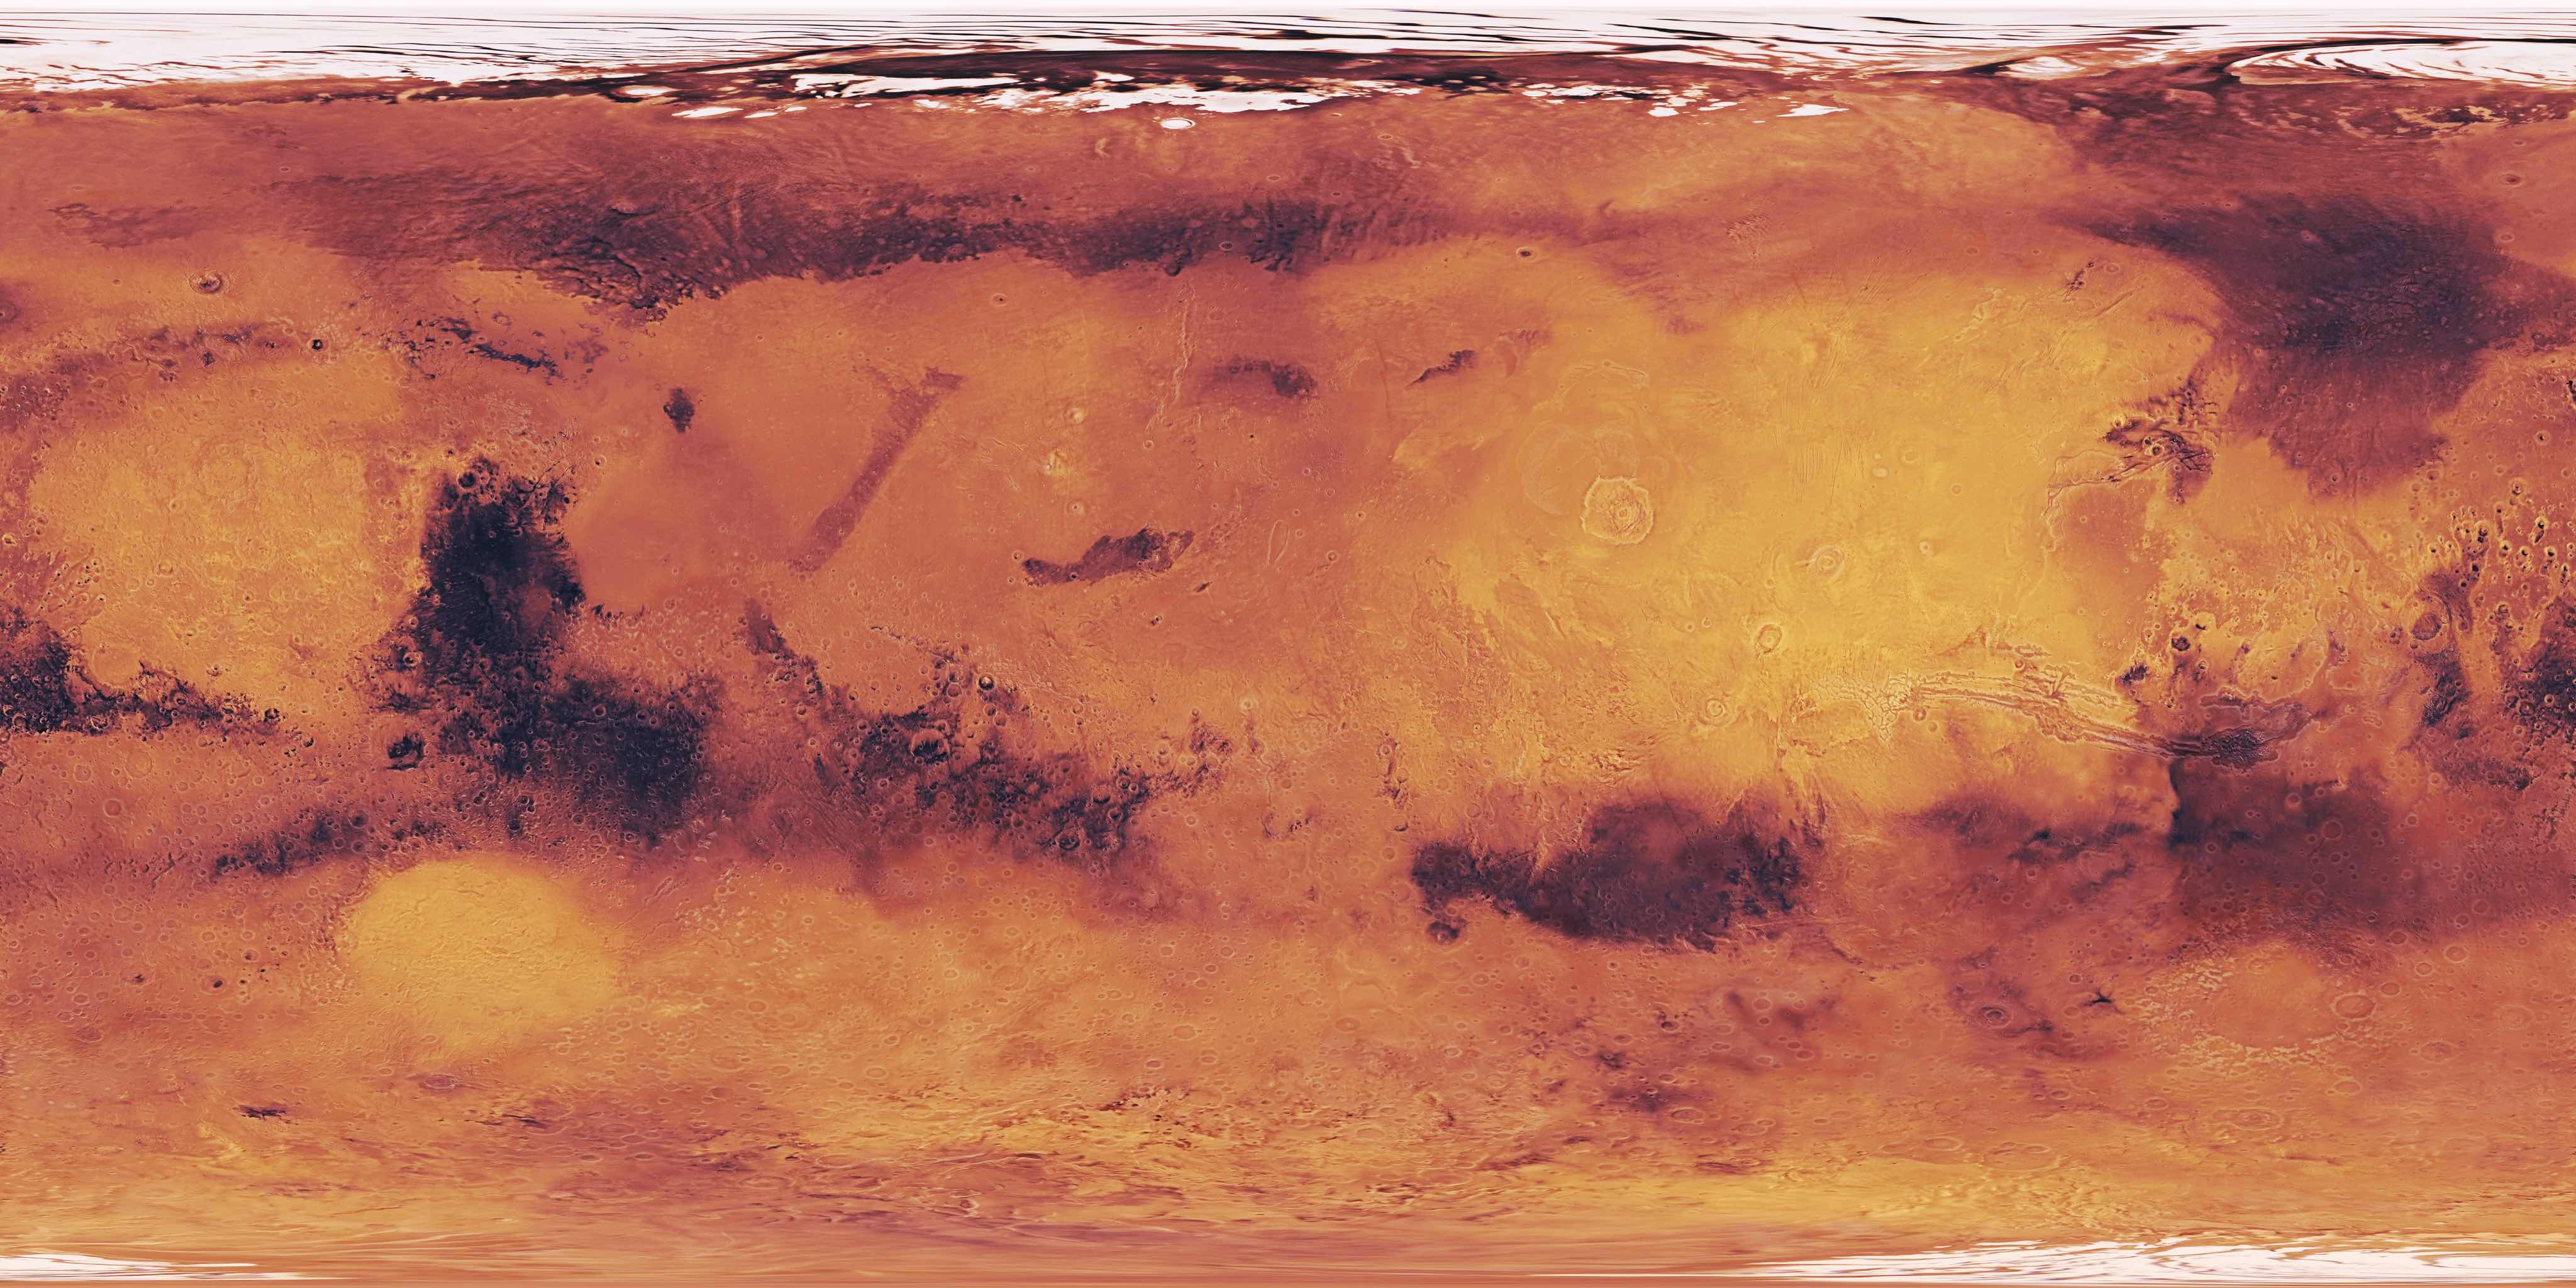
let loader = new THREE.TextureLoader();There are many material aspects to most objects. For Mars, the most obvious one is color: rather than being one consistent shade, the Martian surface is extremely varied. The solution is to take one of the many seamless visual maps of the planet made by recent probes - I used images from Celestia - and wrap it around the surface as a material map:
大多数对象都有许多实质性方面。 对于火星而言,最明显的一种是颜色:火星表面并非一成不变的阴影,而是千差万别。 解决方案是采用由最近的探测器制作的行星的许多无缝视觉地图之一-我使用了Celestia的图像-并将其包裹在表面上作为材质图:
marsMaterial.map = loader.load(imgLoc+"mars-map.jpg");(You’ll recall from the first article in the series that imgLoc was defined earlier in our code as the file location of our textures. You can download the finished texture here).
(您会从该系列的第一篇文章中回想起imgLoc在我们的代码中之前被定义为纹理的文件位置。您可以在此处下载完成的纹理)。
WebGL纹理大小 (WebGL Texture Size)
Just like the number of segments in an object, there’s a strong temptation use higher resolution texture maps, since it implies greater detail for a rendered object. However, doing so results in the same problems: greater RAM use and slower performance.
就像对象中的片段数量一样,使用更高分辨率的纹理贴图会产生强烈的诱惑,因为它暗示了渲染对象的更多细节。 但是,这样做会导致同样的问题:更多的RAM使用和更慢的性能。
WebGL currently balances this to some degree by imposing two limits on texture bitmaps:
WebGL当前通过对纹理位图施加两个限制来在某种程度上平衡这一点:
Texture bitmaps must have both width and height that are powers of 2: that is, 1, 2, 4, 8, 16, 32, 64, 128, 256, 512, 1024, 2048, 4096 or 8192 pixels across or high. (The numbers may be different, e.g. 1024 pixels wide by 512 pixels high).
纹理位图的宽度和高度必须为2的幂 :即1、2、4、8、16、32、64、128、256、512、1024、2048、4096或8192像素为高或高。 (数字可能不同,例如,宽1024像素,高512像素)。
Mobile browsers tend to have lower limits for texture sizes, although this has been rising of late (iOS 10 supports 4096 × 4096, for example; you can test different devices and platforms at webglreport.com.)
移动浏览器往往对纹理大小有较低的限制,尽管最近这种趋势有所提高(例如,iOS 10支持4096×4096;您可以在webglreport.com上测试不同的设备和平台)。
In the case of the texture applied in this example, I’ve sized the bitmap to 4096 × 2048 pixels.
在本示例中应用纹理的情况下,我将位图的大小调整为4096×2048像素。
It’s also important that the texture should be seamless: that is, when wrapped around an object, it’s edges should meet up without any apparent visual join.
同样重要的是,纹理应该是无缝的 :也就是说,当包裹在一个对象上时,其边缘应该汇合在一起而没有任何明显的视觉连接。
渲染图 (Rendering)
To produce anything visually, our work must be rendered. In our script, that’s accomplished with five lines of code, three of them inside a function:
为了视觉上产生任何东西,我们的作品必须被渲染 。 在我们的脚本中,这是用五行代码完成的,其中三行包含在一个函数中:
let renderer = new THREE.WebGLRenderer({antialiasing : true});
marsloc.appendChild(renderer.domElement);

function render(){
    renderer.setSize(window.innerWidth, window.innerHeight);
    renderer.clear();
    renderer.render(scene, camera);
}
renderer is the “capture state” of the current scene. While it has many options, the one I have used here is antialiasing, to smooth the rendered sphere of Mars against its background.
renderer是当前场景的“捕获状态”。 尽管它有很多选择,但我在这里使用的是antialiasing ,可以在背景下平滑火星渲染的球体。
marsLoc is the container element we made back in part one; the renderer is appended to that. Inside the render function, the size of this capture state is set to be the size of the browser window. Then, the canvas area is cleared and the scene rendered, using the current camera.
marsLoc是我们在第一部分中制作的容器元素; renderer将附加到该renderer 。 在render功能内部,此捕获状态的大小设置为浏览器窗口的大小。 然后,使用当前摄像机清除画布区域并渲染场景。
You’ll note that right now the result looks both flat and shiny, is fixed in space, and is not responsive; the steps taken in the next article in this series will correct those issues.
您会注意到,现在的结果看起来既平坦又有光泽,在空间上固定,并且没有响应; 本系列下一篇文章中采取的步骤将纠正这些问题。
翻译自: https://thenewcode.com/1184/A-WebGL-Tour-of-the-Solar-System-Mars-Part-Three
webgl 坐标系


 1245
1245

 被折叠的 条评论
为什么被折叠?
被折叠的 条评论
为什么被折叠?
 到【灌水乐园】发言


