


ps cc svg
In previous articles I’ve explained how to work with SVG in Adobe Illustrator, and how SVG export has been improved in the Adobe suite. The most recent versions of Adobe PhotoShop and Illustrator feature further enhancements that make modifying and generating SVG elements even easier and more productive:
在以前的文章中,我已经解释了如何在Adobe Illustrator中使用SVG ,以及如何在Adobe套件中改进了SVG导出 。 Adobe PhotoShop和Illustrator的最新版本具有进一步的增强功能,这些功能使修改和生成SVG元素变得更加容易和高效:
Adobe Illustrator中的新SVG功能 (New SVG Features In Adobe Illustrator)
The first new feature is perhaps the most remarkable: Adobe Illustrator treats SVG as a native format. That is, you can copy an element from Illustrator and paste it directly into an editor as SVG. Really. It’s that simple:
第一个新功能也许是最引人注目的功能: Adobe Illustrator将SVG视为本机格式。 也就是说,您可以从Illustrator复制元素并将其作为SVG直接粘贴到编辑器中。 真。 就这么简单:
While the pasted code could use a bit of a cleanup, this excellent feature will make it considerably easier to generate and modify SVG code.
尽管粘贴的代码可能需要一些清理工作 ,但是此出色的功能将大大简化生成和修改SVG代码的过程。
从Adobe PhotoShop导出SVG (SVG Export From Adobe PhotoShop)
Adobe PhotoShop is traditionally associated with bitmap image editing… but if you’re willing to put in a little extra work to gain a beta feature, you can get SVG documents out of PhotoShop almost as easily as you can from Illustrator:
传统上, Adobe PhotoShop与位图图像编辑相关联...但是,如果您愿意付出一些额外的工作来获得beta功能,则可以像从Illustrator中一样轻松地从PhotoShop中获取SVG文档:
- Ensure that Adobe PhotoShop CC is closed. 确保关闭Adobe PhotoShop CC。
In a text editor, insert the following lines in a new, blank document:
在文本编辑器中,将以下行插入新的空白文档中:
{ "generator-assets": { "svg-enabled": true } }Save the document as generator.json in your home folder: for Mac users, that’s in Macintosh HD > Users > yourname (where you’ll see folders like Applications, Desktop and Documents); in Windows, it’s C:\Users\yourname (which includes folders such as AppData, Contacts and Favorites)
将文档另存为generator.json在您的主文件夹中:对于Mac用户,在Macintosh HD>用户> yourname中 (您将在其中看到文件夹Applications , Desktop和Documents ); 在Windows中,它是C:\ Users \您的名字 (包括AppData , Contacts和收藏夹之类的文件夹 )
- Start PhotoShop CC, create a new document and draw a vector shape. 启动PhotoShop CC,创建一个新文档并绘制一个矢量形状。
Under the File menu, choose Generate > Image Assets
在“ 文件”菜单下,选择“ 生成”>“图像资产”
Save the PSD as something.psd: your Desktop would be a good place.
将PSD保存为something.psd :您的桌面将是一个好地方。
-
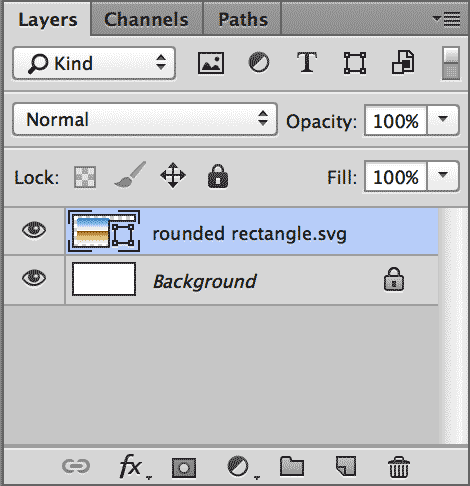
Layers palette and name the vector layer somethingelse.svg (note that the layer name cannot contain a hyphen)
 Move to the
图层”调板,并将矢量图层命名为somethingelse.svg (请注意,图层名称不能包含连字符)
Switch to the location where you saved the PSD. Alongside it you’ll now find an something-assets folder; inside that, a document named somethingelse.svg. It’s your layer, automatically saved, exported, and updated as an SVG.
切换到保存PSD的位置。 在它旁边,您现在会找到一个资产文件夹。 在其中,有一个名为somethingelse.svg的文档。 它是您的图层,可以自动保存,导出和更新为SVG。
Again, the exported SVG document needs a little improvement: you’ll find that the viewport may be a little small, and the code could be cleaned up somewhat; I expect that it will be fixed in future releases.
再次,导出的SVG文档需要一些改进:您会发现视口可能会变小,并且代码可能会被清除。 我希望它将在将来的版本中修复。
翻译自: https://thenewcode.com/886/More-Tricks-Tips-For-Working-With-SVG-in-Adobe-CC
ps cc svg


 1万+
1万+

 被折叠的 条评论
为什么被折叠?
被折叠的 条评论
为什么被折叠?
 到【灌水乐园】发言


