


 本文介绍如何在Spring Boot中创建一个SOAP Web服务,包括发布hello-world服务、配置服务端点、使用WebServiceTemplate以及创建SOAP客户端。通过详细步骤展示了如何从WSDL生成Java对象,最终成功调用并响应SOAP服务。

spring
在RESTful Web服务时代,我有机会使用SOAP Web Service。 为此,我选择了Spring ,这是因为我们已经在项目中使用Spring作为后端框架,其次它提供了一种直观的方式来与具有明确定义的边界的服务进行交互,以通过WebServiceTemplate促进可重用性和可移植性。
假设您已经了解SOAP Web服务,让我们开始创建在端口9999上运行的hello-world soap服务,并使用下面的步骤来使用相同的客户端:
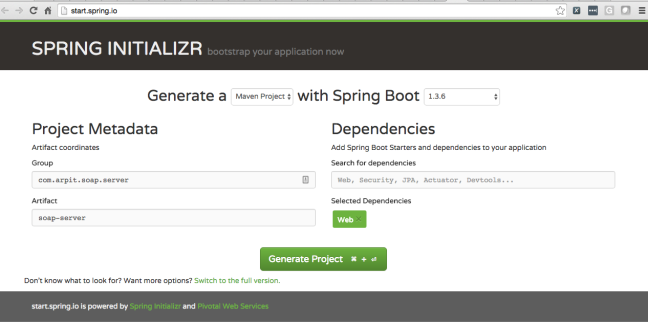
步骤1 :根据以下图像,转到start.spring.io并创建一个添加Web启动器的新项目soap-server :

步骤2:编辑SoapServerApplication.java,以在端点上发布hello-world服务-http:// localhost:9999 / service / hello-world ,如下所示:
package com.arpit.soap.server.main;

import javax.xml.ws.Endpoint;

import org.springframework.beans.factory.annotation.Value;
import org.springframework.boot.CommandLineRunner;
import org.springframework.boot.SpringApplication;
import org.springframework.boot.autoconfigure.SpringBootApplication;

import com.arpit.soap.server.service.impl.HelloWorldServiceImpl;

@SpringBootApplication
public class SoapServerApplication implements CommandLineRunner {

	@Value("${service.port}")
	private String servicePort;

	@Override
	public void run(String... args) throws Exception {
		Endpoint.publish("http://localhost:" + servicePort
				+ "/service/hello-world", new HelloWorldServiceImpl());
	}

	public static void main(String[] args) {
		SpringApplication.run(SoapServerApplication.class, args);
	}
}步骤3:编辑application.propertie
 最低0.47元/天 解锁文章


 1408
1408

 被折叠的 条评论
为什么被折叠?
被折叠的 条评论
为什么被折叠?
 到【灌水乐园】发言


