


将动态颜色选项添加到WordPress主题非常普遍。 Titan Framework允许您创建颜色选项。 让我们看看如何使用Titan框架在管理面板,元框或主题定制器部分中添加颜色选择器。
Titan Framework中的颜色类型选项
Titan Framework中有一个color类型字段,如下所示:
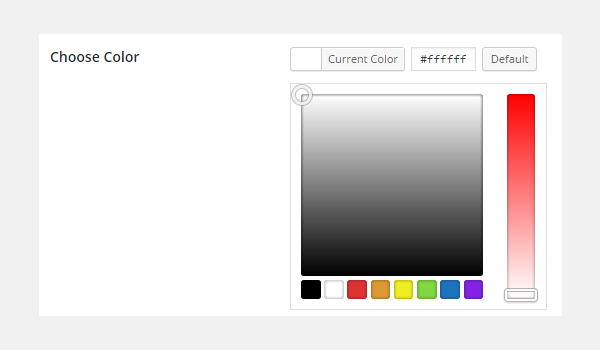
此选项将加载整个调色板,您可以从中选择任何颜色。 要在Titan框架中添加此选项,您需要了解其附带的参数,这些参数是:
- name :它控制选项的显示名称。
- id :此参数分配一个唯一的名称,该名称始终用于检索已保存的选项值。
- desc :此参数添加带有选项名称的简短描述。
- default :设置默认
color值。 - livepreview :(可选)它有助于在主题定制器部分中显示更改的实时预览。
- css :(可选)添加
color时,它会自动生成CSS 管理页面和/或主题定制器部分中的选项。
所有这些参数的共同点是它们的类型为string 。
颜色类型选项的可用容器
可以在以下区域添加此选项:
- 管理面板
- 管理员标签
- 元框
- 主题定制器部分
如何创建Textarea选项?
请按照以下步骤在这些容器中创建color类型选项:
- 通过
getInstance()函数获取实例。 - 通过
createOption()函数创建选项。 - 通过
getOption()函数获取保存的值。
您可以参考我以前的文章,以了解有关这些容器的创建的信息。
在管理面板中创建颜色类型选项
声明示例
首先,我将在管理面板中创建color类型选项:
<?php
    /**
     *
     * Create the options
     *
     */
    $aa_panel->createOption( array(

        'id'      => 'aa_color', // The ID which will be used to get the value of this option
        'type'    => 'color', // Type of option we are creating
        'name'    => 'My Color Option', // Name of the option which will be displayed in the admin panel
        'desc'    => 'This is our option', // Description of the option which will be displayed in the admin panel
        'default' => '#fffff' // Default value of the option which will be displayed in the admin panel
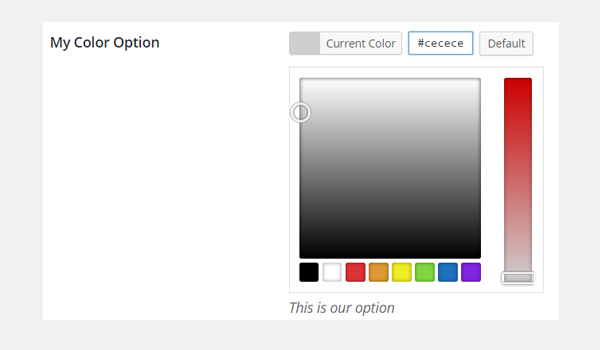
) ); 我在管理面板$aa_panel创建了color类型选项。 然后通过createOption()函数添加了一个ID为aa_color的color类型选项。 此函数占用选项类型支持的参数数组。 因此,将相应地使用id,类型,名称,desc和默认参数。 注意id的值,即aa_color ,应该始终是唯一的。

上面的截图显示一个color命名整齐选项管理面板中我的色彩选择选项。
用法示例
让我们获取保存的选项值。
<?php
// 1. Get the titan framework instance and save it to a variable
$titan = TitanFramework::getInstance( 'neat' ); // we will initialize $titan only once for every file where we use it.
// 2. Get the value via ID using getOption function
$aa_color_val = $titan->getOption( 'aa_color' );

/**
 *
 * Print Admin panel options
 *
 */
<h3> <?php echo $aa_color_val; ?> </h3> 要检索保存的选项值,请通过get Instance()函数获得一个唯一的实例。 然后,使用getOption()函数并将color类型选项的ID注册为参数。 将其值保存到新变量$aa_color_val ,然后在前端echo此变量。
在前端显示结果
假设我选择了任何颜色,例如#cecece ,并保存了它的值。
现在,根据代码,将如下所示打印所选颜色的十六进制值。

在本文的后面,我还将展示如何将此选项用作样式属性。
我们不会在生产主题中以这种方式打印它,而是将其用作内联样式或将通过Titan Framework自动生成CSS文件,但这将在本系列的后面部分讨论,这不在本系列的讨论范围之内。文章。
在管理标签内创建颜色类型选项
声明示例
<?php

    // Create options for $aa_panel2 inside the $aa_tab1
    $aa_tab1->createOption( array(

        'id'      => 'aa_color_in_tab1_panel2', // IDs should always be unique. The ID which will be used to get the value of this option
        'type'    => 'color', // Type of option we are creating
        'name'    => 'My Color Option', // Name of the option which will be displayed in the admin panel
        'desc'    => 'This is our option', // Description of the option which will be displayed in the admin panel
        'default' => '#fffff' // Default value of the option which will be displayed in the admin panel

) ); 这次,我在管理标签$aa_tab1内创建了一种color类型选项。 此选项的ID是aa_color_in_tab1_panel2 ,应该是唯一的。

您可以在管理面板“ 整洁的选项2”的选项卡1内找到color选项。
用法示例
现在,我将获取保存的选项值。
<?php
// 1. Get the titan framework instance and save it to a variable
$titan = TitanFramework::getInstance( 'neat' ); // we will initialize $titan only once for every file where we use it.
// Value of tab.
$aa_color_in_tab1_panel2_val = $titan->getOption( 'aa_color_in_tab1_panel2' );

/**
 *
 * Print Admin tab options
 *
 */
 <div>
    Value of my color is : <?php echo $aa_color_in_tab1_panel2_val; ?>
</div> 我将通过getInstance()函数获取一个实例,然后使用getOption()函数。 在此函数(第5行)中,我输入了ID aa_color_in_tab1_panel2作为其参数。 最后,我创建了一个div并将保存的值以文本形式打印出来。
在前端显示结果
这次我选择了#0bc47d 作为我的色彩价值。 因此,输出将如下所示:

在元框内创建颜色类型选项
声明示例
<?php
    /**
     *
     * Create the options for metabox
     *
     */
    $aa_metbox->createOption( array(

        'id'      => 'aa_mb_color', // The ID which will be used to get the value of this option
        'type'    => 'color', // Type of option we are creating
        'name'    => 'My Color Option', // Name of the option which will be displayed in the admin panel
        'desc'    => 'This is our option', // Description of the option which will be displayed
        'default' => '#fffff' // Default value of the option which will be displayed

) ); 现在,我将通过createOption()函数在$aa_metbox创建一个color类型选项。 该选项的ID为aa_mb_color ,用于检索保存的选项值。 该metabox出现在所有帖子/页面编辑屏幕上。
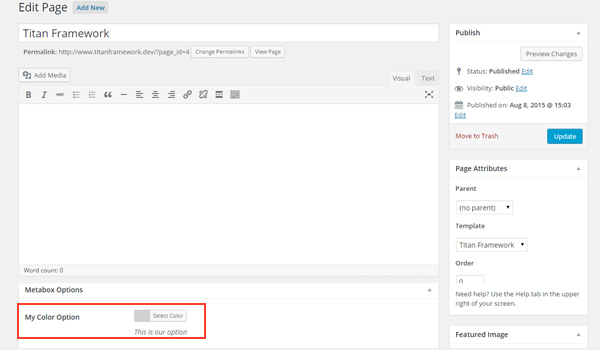
您可以在页面编辑屏幕末尾显示的metabox中找到color类型选项。
用法示例
接下来,我将获得选项值。
<?php
// 1. Get the titan framework instance and save it to a variable
$titan = TitanFramework::getInstance( 'neat' ); // we will initialize $titan only once for every file where we use it.
/**
 *
 * Getting Values.
 *
 * Notice the use of get_the_ID(). It is because metabox is created for all
 * the post types we defined. TO get the value of a metabox option for a specific page/post
 * we need to give getOptions() function the ID of our post/page. Which is done like this.
 *
 */
$aa_mb_color_val = $titan->getOption( 'aa_mb_color', get_the_ID() );

/**
 *
 * Print metabox options
 *
 */

<div class="aa_content" style= "background: <?php echo $aa_mb_color_val; ?>;"></div>
现在,此代码与为管理面板和标签编写的代码有所不同。 但是, getInstance()和getOption()函数的用法是相同的。 区别在于第13行,其中的getOption()函数带有两个参数:
-
aa_mb_color,它是颜色类型选项的ID
-
get_the_ID()函数,该函数返回当前帖子/页面/帖子类型的ID
接下来看第19行,我在div中使用了内联CSS样式。 这意味着color类型选项的值会像前端的颜色一样显示。
在前端显示结果
我选择#ffff00作为我的十六进制颜色值并发布了页面。 这是我得到的:

现在,您可以在上面的屏幕截图中看到保存的值显示为颜色,并且整个div更改了其背景颜色。
在主题定制器中创建颜色类型选项
声明示例
<?php

    /**
     *
     * Create the options for $aa_section1
     *
     */

    // Body bg color
    $aa_section1->createOption( array(

        'id'      => 'aa_sec_body_bg_clr', // The ID which will be used to get the value of this option
        'type'    => 'color', // Type of option we are creating
        'name'    => 'Site Background Color',// Name of the option which will be displayed in the admin panel
        'default' => '#fff' // Default value of our option

) ); createOption()函数在主题定制器部分$aa_section1添加color类型选项。 此选项的ID为aa_sec_body_bg_clr ,它设置主体背景颜色。

屏幕截图显示了自定义程序面板“ 我的部分”中名为“ 网站背景颜色”的color选项。
用法示例
最后,我将获得保存的选项值。
<?php
// 1. Get the titan framework instance and save it to a variable
$titan = TitanFramework::getInstance( 'neat' ); // we will initialize $titan only once for every file where we use it.

// Body bg color
$aa_sec_body_bg_clr_val = $titan->getOption( 'aa_sec_body_bg_clr' );

/**
 *
 * Print customizer options
 *
 */

<style>
/* ----------------------------------------------------------------------------
 * CSS values from customizer
 * ------------------------------------------------------------------------- */
    body{
        background: <?php echo $aa_sec_body_bg_clr_val; ?> !important;

    }
    h1,
    h2,
    h3,
    h4,
    h5,
    h6,
    a,

</style> 除了我通过<style>标记(第12至28行)中的内部CSS样式获取保存的值之外,所有内容几乎都相同。 第16行显示了一个echo命令,该命令显示变量$aa_sec_body_bg_clr_val的值。
在前端显示结果
这次我选择了#eeee22 作为我对color十六进制值。 因此,这是实时预览:
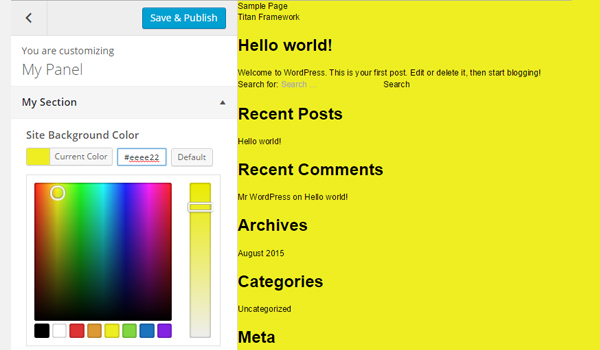
我的网站背景颜色从#ffffff更改为 #eeee22 。 凉!
上载档案
图像在使您的Web内容吸引人和引人注目方面起着至关重要的作用。 WordPress体系结构提供了一个CPT(自定义帖子类型),用于通过媒体库添加图像。 但是,如果您想在其他地方添加图片上传器怎么办?
创建此类选项的方法有多种,而Titan Framework还提供了图像上传器作为其选项类型之一。 因此,让我们看看如何在管理面板,元框或主题定制器部分中添加几行代码来添加媒体上传选项。
Titan Framework中的上载类型选项
Titan Framework中有一个upload类型选项,可以添加不同格式的图像文件,例如jpg,jpeg,gif,png等。它看起来像这样:

此选项具有以下参数集:
- name :此参数显示
upload选项的名称。 - id :它指定一个唯一名称,该名称将获取保存的选项值。
- desc :添加带有选项名称的单行描述。
- size :(可选)此参数定义可在
css参数内使用的图像的大小(稍后说明)。 它仅采用wp_get_attachment_image_src()函数的$size参数中定义的值( 有关此内容的更多信息 )。 - default :(可选)设置默认图像。
- livepreview :(可选)您可以使用此参数在主题定制器部分中找到更改的实时预览。
- css :(可选)当您在管理页面和/或主题定制器部分中添加
upload类型选项时,它将生成CSS 。 - 占位符 :(可选)此选项类型为空时,此参数显示伪文本。
上载类型选项的可用容器
可以在内部添加upload类型选项:
- 管理面板
- 管理员标签
- 元框
- 主题定制器部分
如果您想了解有关创建这些容器的更多信息,请浏览本系列的前几篇文章。
但是,请按照以下步骤添加此选项:
- 调用
getInstance()函数。 - 通过
createOption()函数创建选项类型。 - 通过
getOption()函数获取保存的选项值。
在管理面板中创建上传类型选项
声明示例
让我们编写其代码。
<?php
/**
* Create the options
*
* Now we will create options for our panel that we just created called $aa_panel
*
*/
$aa_panel->createOption( array(
'id' => 'aa_img_id', // The ID which will be used to get the value of this option
'type' => 'upload', // Type of option we are creating
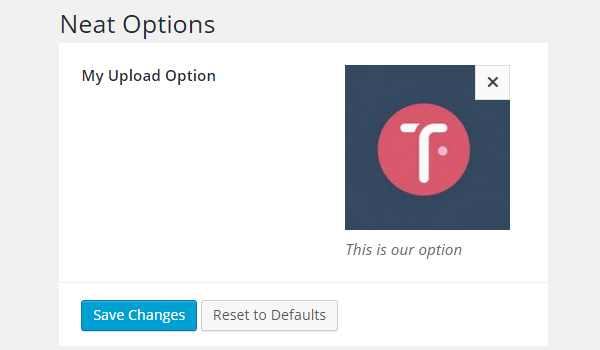
'name' => 'My Upload Option', // Name of the option which will be displayed in the admin panel
'desc' => 'This is our option' // Description of the option which will be displayed in the admin panel
) ); 我将通过createOption()函数在管理面板$aa_panel添加一个upload类型选项。 此函数占用参数数组,例如id,type,name和desc 。 保持您的ID唯一,因为这些ID将在整个过程中用于检索保存的值。 因此,此处的ID为aa_img_id 。

在上面的屏幕快照中,您可以在Neat Options管理面板中找到名为My Upload Option的图像上传器。
用法示例
现在,我将介绍重要的部分:检索保存的选项值。
<?php
// 1. Get the titan framework instance and save it to a variable
$titan = TitanFramework::getInstance( 'neat' ); // we will initialize $titan only once for every file where we use it.

// 2. Get the value via ID using getOption function
$aa_img_id_val = $titan->getOption( 'aa_img_id' );


/**
 *  Print the value saved in aa_img_id option
 */
$aa_img_URL_val= 'http://placehold.it/500x500';
if ( is_numeric( $aa_img_id_val ) ) {
    $aa_img_attachment = wp_get_attachment_image_src( $aa_img_id_val );
    $aa_img_URL_val = $aa_img_attachment[0];
}
?>

    <h2>The image is shown below:</h2>
<img src='<?php echo $aa_img_URL_val; ?>' /> 与我之前讨论的选项相比,获取upload类型选项的值的过程有些不同。 所以,让我解释一下它的代码。
第3行和第6行非常相似,在这里我调用了getInstance()函数来调用唯一的实例,该实例最好是您的主题名称(这就是为什么我的例子很neat )。 然后,我使用了getOption()函数,在其中写入了upload选项的ID作为参数。 我将其值保存在变量$aa_img_id_val 。
接下来,我使用了一个if语句,该语句调用is_numeric()函数来检查$aa_img_id_val的值是否为数字。 如果是真的,那么它将进一步处理代码。
为了通过附件ID获取上传的图像值的源URL,我创建了一个新变量$aa_img_URL_val (第12行),并为其分配了一个占位符图像(避免任何垃圾值,并为其提供演示占位符图像)。
附件ID可用于获取上传图片的URL; 在这方面,我已经使用了WordPress的wp_get_attachment_image_src()函数(第14行)。 此函数返回一个图像对象数组,该数组包含位置'0'处的图像src url的值(在Codex中了解更多信息)。
参数$aa_img_id_val中保存了ID aa_img_id 。 该函数的整体输出保存在新变量$aa_img_attachment 。
现在,我们知道, wp_get_attachment_image_sr()函数在数组的位置“ 0”处返回src url ,因此我定义了其在数组内的确切位置,即$aa_img_attachment[0] (第15行)。 然后,我将值分配给$aa_img_URL_val ,该值最初带有一个占位符图像。 现在, $aa_img_URL_val具有所选图像的源URL。
最后(第19行),我只是通过echo命令打印了图像。 我建议在这里使用esc_url()函数,该函数会转义图像URL。 我不会详细介绍,因为它超出了本文的范围。 但这是您可以修改第19行的方法:
<img src='<?php echo esc_url( $aa_img_URL_val ); ?>' />在前端显示结果
假设我上传了这张图片并保存了设置。
因此,这就是它出现在前端的方式。

在管理标签中创建上传类型选项
声明示例
现在,我将在管理标签中创建此选项。
<?php
    // Create options for $aa_panel2 inside the $aa_tab1
    $aa_tab1->createOption( array(

        'id'   => 'aa_img_in_tab1_panel2', // IDs should always be unique. The ID which will be used to get the value of this option
        'type' => 'upload', // Type of option we are creating
        'name' => 'My Upload Option', // Name of the option which will be displayed in the admin panel
        'desc' => 'This is our option' // Description of the option which will be displayed in the admin panel

) ); 在管理标签$aa_tab1创建了ID为aa_img_in_tab1_panel2的upload选项。

您可以在管理面板“ 整洁的选项2”的选项卡1中找到此选项。
用法示例
让我们获取保存的值。
<?php
// 1. Get the titan framework instance and save it to a variable
$titan = TitanFramework::getInstance( 'neat' ); // we will initialize $titan only once for every file where we use it.
// 2. Get the value via ID using getOption function
$aa_img_in_tab1_panel2_val = $titan->getOption( 'aa_img_in_tab1_panel2' );
/**
* Print the value saved in option
*/
$aa_img_in_tab1_panel2_URL_val= 'http://placehold.it/500x500';
if ( is_numeric( $aa_img_in_tab1_panel2_val ) ) {
$aa_img_in_tab1_panel2_attachment = wp_get_attachment_image_src($aa_img_in_tab1_panel2_val );
$aa_img_in_tab1_panel2_URL_val = $aa_img_in_tab1_panel2_attachment[0];
}
?>
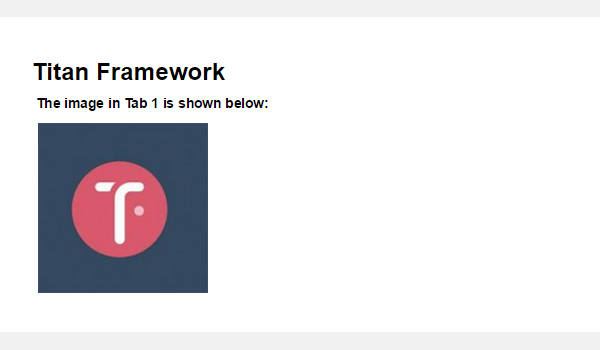
<h2>The image in Tab 1 is shown below:</h2>
<img src='<?php echo $aa_img_in_tab1_panel2_URL_val; ?>' />在前端显示结果
我再次上传相同的图像并保存。 在前端看起来像这样:
在元框内创建上传类型选项
声明示例
现在,我将在一个metabox中创建此选项。
<?php
    /**
     * Create the options for metabox
     *
     */
    $aa_metbox->createOption( array(

            'id'   => 'aa_mb_img', // The ID which will be used to get the value of this option
            'type' => 'upload', // Type of option we are creating
            'name' => 'My Upload Option', // Name of the option which will be displayed in the admin panel
            'desc' => 'This is our option' // Description of the option which will be displayed in the admin panel

) ); 通过createOption()函数在$aa_metbox创建一个upload类型选项。 它出现在所有页面/帖子编辑屏幕上。

在以上屏幕截图中,您可以在页面编辑屏幕末尾的metabox中找到名为My Upload Option的图像上传器。
用法示例
使用以下代码。
<?php
// 1. Get the titan framework instance and save it to a variable
$titan = TitanFramework::getInstance( 'neat' ); // we will initialize $titan only once for every file where we use it.
/**
    Getting values for metabox
 */

/**
 *
 *
 * Notice the use of get_the_ID(). It is because metabox is created for all
 * the post types we defined. TO get the value of a metabox option for a specific page/post
 * we need to give getOptions() function the ID of our post/page. Which is done like this.
 *
 */
$aa_mb_img_val = $titan->getOption( 'aa_mb_img', get_the_ID() );

/**
 * Print the value saved in option
 */
$aa_mb_img_URL_val= 'http://placehold.it/500x500';
if ( is_numeric( $aa_mb_img_val ) ) {
    $aa_mb_img_attachment = wp_get_attachment_image_src($aa_mb_img_val );
    $aa_mb_img_URL_val =  $aa_mb_img_attachment[0];
}
?>
    <h2>The image in Metabox is shown below:</h2>
    <img src='<?php echo $aa_mb_img_URL_val; ?>' />
在前端显示结果
让我们在前端查看结果:

在主题定制器部分中创建上传类型选项
声明示例
最后,我将在定制器中创建一个图像上传器字段。
<?php
    /**
     *
     * Create the options for $aa_section1
     *
     */

    $aa_section1->createOption( array(

        'id'   => 'aa_sec_img', // The ID which will be used to get the value of this option
        'type' => 'upload', // Type of option we are creating
        'name' => 'My Upload Option',// Name of the option which will be displayed in the admin panel
        'desc' => 'This is our option' // Description of our option

) ); upload类型选项显示在主题定制器部分$aa_section1 。 它的ID是aa_sec_img 。
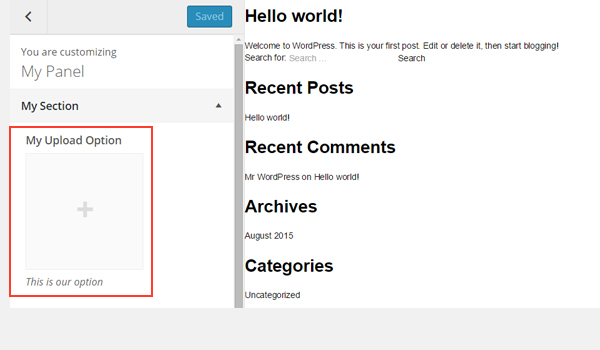
您可以在上图的“ 我的栏目”定制器面板中找到一个上载器字段。
用法示例
使用以下代码获取值:
<?php
// 1. Get the titan framework instance and save it to a variable
$titan = TitanFramework::getInstance( 'neat' ); // we will initialize $titan only once for every file where we use it.
// Sec Img
$aa_sec_img_val = $titan->getOption( 'aa_sec_img' );
/**
* Print the value saved in option
*/
$aa_sec_img_URL_val= 0;
if ( is_numeric( $aa_sec_img_val ) ) {
$aa_sec_img_attachment = wp_get_attachment_image_src($aa_sec_img_val );
$aa_sec_img_URL_val = $aa_sec_img_attachment[0];
}
?>
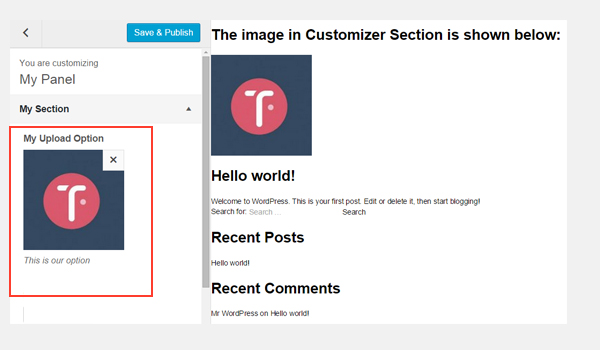
<h1>The image in Customizer Section is shown below:</h1>
<img src='<?php echo $aa_sec_img_URL_val; ?>' />在前端显示结果
让我们上传实时预览屏幕截图:
结论
就是这样!
颜色选项很容易在Titan框架中实现。 在接下来的文章中,我将向您展示如何通过此选项自动生成CSS文件或如何使用它创建实时预览工作。
我们还介绍了如何在Titan框架中引入上传选项。 您可以通过多种方式在WordPress插件或主题中使用此选项。 例如,您可以允许用户选择徽标或自定义背景图片。
仔细检查一下,如果您有任何疑问,请将其留在下面的评论框中,或者可以在Twitter上找到我。


 279
279

 被折叠的 条评论
为什么被折叠?
被折叠的 条评论
为什么被折叠?
 到【灌水乐园】发言


