


logger is a command-line tool used in Linux and Unix operating systems in order to add logs to the local /var/log/syslog file or remote Syslog server. logger provides different options for adding logs like setting priority, specifying a remote system or explicitly defining the Syslog port.
logger是Linux和Unix操作系统中使用的命令行工具,用于将日志添加到本地/var/log/syslog文件或远程Syslog服务器。 记录器提供了用于添加日志的不同选项,例如设置优先级,指定远程系统或显式定义Syslog端口。
记录器帮助和使用信息 (logger Help and Usage Information)
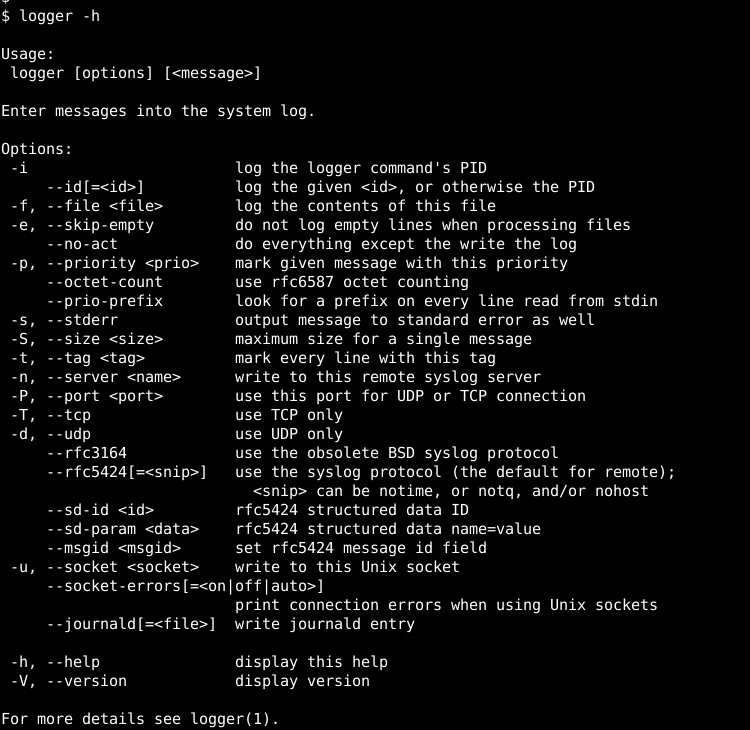
logger command is installed by default in most of the Linux distributions. So there is no need to install it explicitly. We can print the help and usage information with the -h option like below. The most used options of the logger command will be listed with some description.
默认情况下,大多数Linux发行版中都安装了logger命令。 因此,无需显式安装它。 我们可以使用-h选项打印帮助和用法信息,如下所示。 logger命令中最常用的选项将在列表中列出一些说明。
$ logger -h
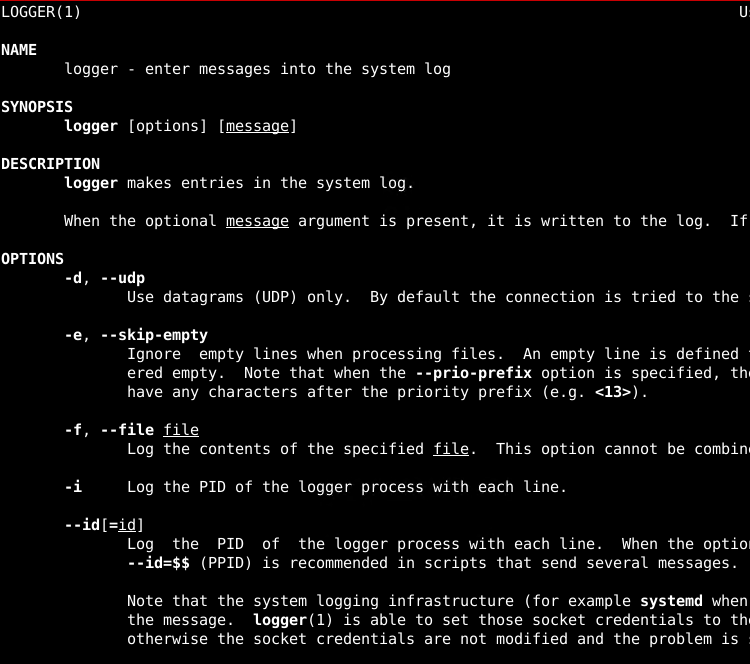
Alternatively for more detailed help and usage information we can look and use the man page of the logger command like below.
另外,有关更详细的帮助和使用信息,我们可以如下所示查找和使用logger命令的手册页。
$ man logger
logger命令语法(logger Command Syntax)
logger command has simple syntax where first options provided and then the log or message we want to send Syslog.
logger命令具有简单的语法,其中首先提供选项,然后提供我们要发送Syslog的日志或消息。
logger OPTIONS LOG
- `OPTIONS` are single or more options to set some attributes like remote server, port, log facility etc. OPTIONS是用于设置某些属性(如远程服务器,端口,日志工具等)的单个或多个选项。
- `LOG` is the log message we want to add or send. Surrounding with double quotes will make is more reliable. LOG是我们要添加或发送的日志消息。 用双引号括起来会更可靠。
Linux系统日志 (Linux Syslog)
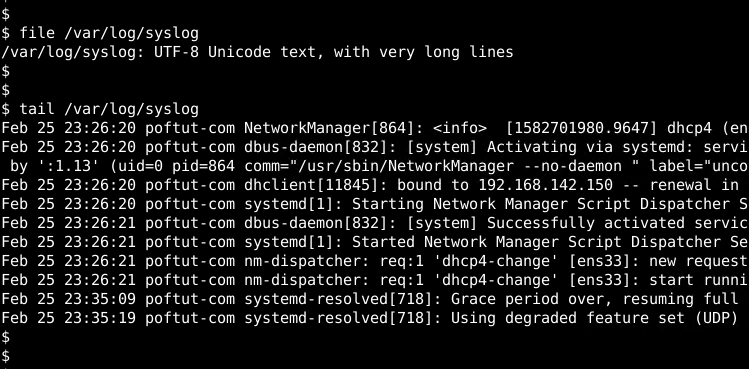
Syslog mechanism is an important part of the Linux logging. Most of the Linux distributions like Ubuntu, Debian, CentOS, Mint, RedHat, Suse stores the log files under the /var/log directory. There are different types of logs under this directory like auth, MySQL, apache, etc. Syslog is a generic log file and the system used to store logs related to the system, services, etc. The syslog file can be viewed with the tail command like below.
Syslog机制是Linux日志记录的重要组成部分。 大多数Linux发行版,例如Ubuntu,Debian,CentOS,Mint,RedHat,Suse,都将日志文件存储在/var/log目录下。 该目录下有不同类型的日志,例如auth,MySQL,apache等。Syslog是通用日志文件,系统用于存储与系统,服务等有关的syslog可以使用tail命令查看syslog文件。像下面一样。
$ tail /var/log/syslog
从Syslog打印日志(Print Logs From Syslog)
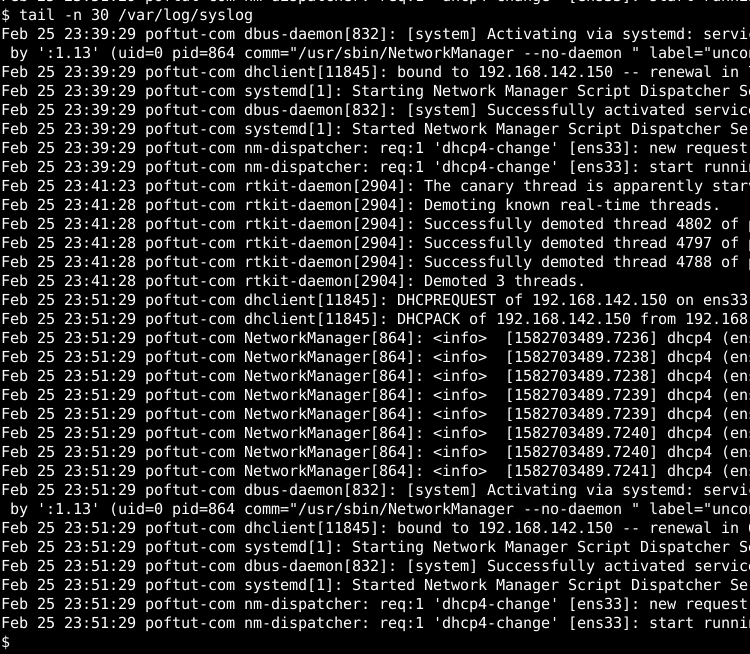
Before starting to add a log to the syslog file printing the current syslog file will be very beneficial. We can use different commands to print the syslog file. tail is a command used to print the last 10 lines of the given file. Alternatively, we can provide the line count we want to print explicitly. In the following example, we will print 30 lines from the /var/log/syslog. We will use the -n option in order to specify the line count.
在开始将日志添加到syslog文件之前,打印当前的syslog文件将非常有益。 我们可以使用不同的命令来打印syslog文件。 tail是用于打印给定文件的最后10行的命令。 或者,我们可以提供要显式打印的行数。 在下面的示例中,我们将从/var/log/syslog打印30行。 我们将使用-n选项来指定行数。
$ tail -n 30 /var/log/syslog
将日志添加到系统日志文件 (Add Log To Syslog File)
Let’s start with a simple example of the logger command. We will just add a single line to the syslog file without providing any option to the logger command. In the following example, we will add the line “This is just a simple log line” to syslog file. Then we will list by using the tail command.
让我们从logger命令的简单示例开始。 我们将只向系统日志文件添加一行,而无需为logger命令提供任何选项。 在以下示例中,我们将“这只是一条简单的日志行”行添加到syslog文件中。 然后,我们将使用tail命令列出。
$ logger "This is just a simple log line"
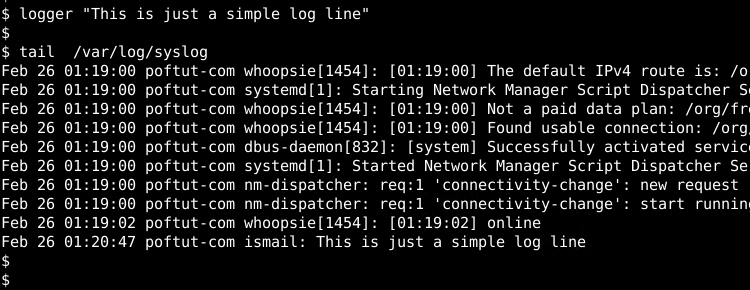
We can see that the log is added to the end of the file which is listed in the bottom. There is also some information about the log like below.
我们可以看到该日志已添加到底部列出的文件的末尾。 还有关于日志的一些信息,如下所示。
- `Feb 26 01:20:47` is the time stamp or date information about the log when it is added to the syslog file. “ Feb 26 01:20:47”是将日志添加到syslog文件时的时间戳或日期信息。
- `poftut-com` is the name of the system. “ poftut-com”是系统的名称。
- `ismail` is the user or logger name. ismail是用户或记录器名称。
指定日志优先级或功能(Specify Log Priority or Facility)
Generally, logs are prioritized by the log creating resources. This also called a facility used to categorize the logs. We can provide priority or facility by using the -p or --priority long-form option. If we do not provide the priority of facility the default one is user.notice. In the following example, we will set the lof priority as local3.info.
通常,日志由日志创建资源确定优先级。 这也称为用于对日志进行分类的工具。 我们可以使用-p或--priority长格式选项提供优先级或--priority 。 如果我们不提供便利的优先级,则默认的优先级是user.notice 。 在下面的示例中,我们将local3.info优先级设置为local3.info 。
$ logger -p "local3.info" "This is just a simple log line"
指定远程Syslog服务器IP地址 (Specify Remote Syslog Server IP Address)
By default, the logger command will put the given logline into the local system /var/log/syslog file. But this is not the case always. In enterprise environments, the logs should be collected and managed in a central log server. We can use the logger command in order to send the given log into the remote server by providing the IP address or hostname. We will use the -n or --server option to send the remote log server.
默认情况下,logger命令会将给定的日志行放入本地系统的/var/log/syslog文件中。 但这并非总是如此。 在企业环境中,应在中央日志服务器中收集和管理日志。 通过提供IP地址或主机名,我们可以使用logger命令将给定的日志发送到远程服务器。 我们将使用-n或--server选项发送远程日志服务器。
$ logger -n 192.168.1.10 "This is just a simple log line"
使用TCP作为系统日志协议 (Use TCP As Syslog Protocol)
Syslog uses the UDP protocol by default. UDP provides faster, low resource and easy transmission of log files. But UDP do not provide complete reliability where TCP comes in. We can change the default transmission protocol UDP into TCP by using the -T or --tcp option.
Syslog默认使用UDP协议。 UDP提供了更快,资源更少且易于传输日志文件的功能。 但是UDP不能保证TCP完全可靠。我们可以使用-T或--tcp选项将默认的传输协议UDP更改为TCP。
$ logger -n 192.168.1.10 -T "This is just a simple log line"
指定远程系统日志服务器端口号 (Specify Remote Syslog Server Port Number)
When sending a log from the local to the remote system the default port of the syslog is 514 for both UDP and TCP protocols. We can change the port number explicitly by using the -P or --port option by providing the port number.
从本地系统向远程系统发送日志时,UDP和TCP协议的syslog的默认端口均为514。 我们可以使用-P或--port选项,通过提供端口号来显式更改端口号。
$ logger -n 192.168.1.10 -P 1514 "This is just a simple log line"
将命令输出重定向为日志 (Redirect Command Output As Log)
Linux provides a lot of tools that log their actions precisely. We can use logger command in order to send these commands output as a log. e will just use the bash shell backticks to surround command. Below we will log the command who into the syslog.
Linux提供了许多工具来精确记录其操作。 我们可以使用logger命令,以便将这些命令的输出作为日志发送。 e只会使用bash shell反引号来包围命令。 下面,我们将把who到syslog中。
$ logger `who`
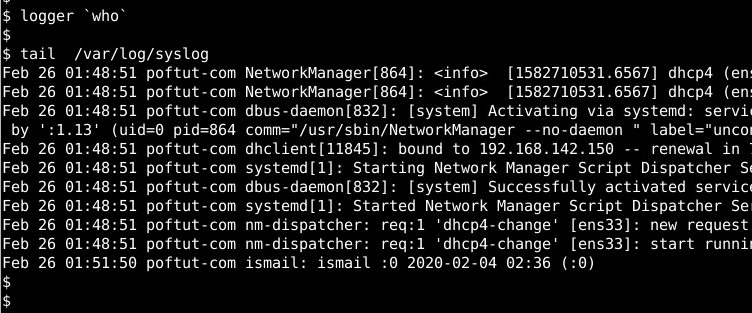
The last line of the syslog provides the output of the who command which contains username, console number, and date of the currently logged in user.
syslog的最后一行提供who命令的输出,其中包含用户名,控制台号和当前登录用户的日期。
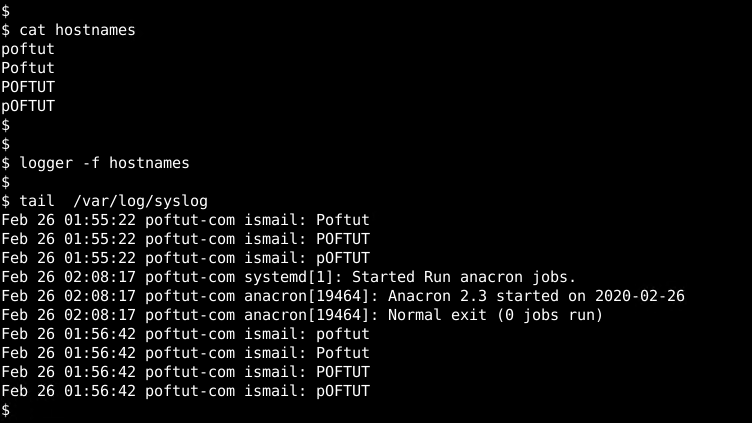
日志指定文件 (Log Specified File)
We can put a text files contents line by line into the syslog file. We will use the -f option and provide the file we want to log. In this example, we will log the file named hostnames.
我们可以将文本文件的内容逐行放入syslog文件中。 我们将使用-f选项并提供我们要记录的文件。 在此示例中,我们将记录名为hostnames的文件。
$ logger -f hostnames
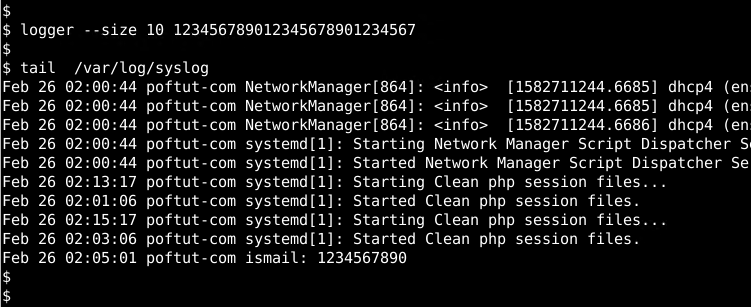
设置或限制日志大小(Set or Limit Log Size)
Logs are used to create simple information. So when there are some lines with a lot of data they should be translated or set limit. We can set a limit for the character count of the log lines by using the --size option and the character count we want to set. In the following example, we will set the count or limit as 10.
日志用于创建简单信息。 因此,当某些行中的数据很多时,应对其进行转换或设置限制。 我们可以使用--size选项和我们要设置的字符数来设置日志行字符数的限制。 在下面的示例中,我们将计数或限制设置为10。
$ logger --size 10 123456789012345678901234567
忽略空白行或空行(Ignore Blank or Empty Lines)
While reading log lines from a file there may be some blank or empty lines. Logging empty or blank lines are not efficient so we can ignore the blank or empty lines by using the -e option like below.
从文件读取日志行时,可能会有一些空行或空行。 记录空行或空行效率不高,因此我们可以通过使用-e选项来忽略空行或空行,如下所示。
$ logger -e -f hostnames
翻译自: https://www.poftut.com/linux-logger-command-usage-tutorial-with-examples/


 331
331

 被折叠的 条评论
为什么被折叠?
被折叠的 条评论
为什么被折叠?
 到【灌水乐园】发言


