


Kali is a Linux distribution or it is a security and penetration test distribution. It is beyond a Linux distribution and provides a lot of useful, popular and featureful tools to the security professionals. Some of popular tools Kali provides
Kali是Linux发行版,或者是安全和渗透测试发行版。 它超出了Linux发行版的范围,并为安全专业人员提供了许多有用,流行和功能强大的工具。 Kali提供的一些流行工具
- nmap纳帕
- metasploit元胞
- burp打
- sqlmapsqlmap
- masscan 马斯康
- nikto尼克托
- ……
下载Kali (Download Kali)
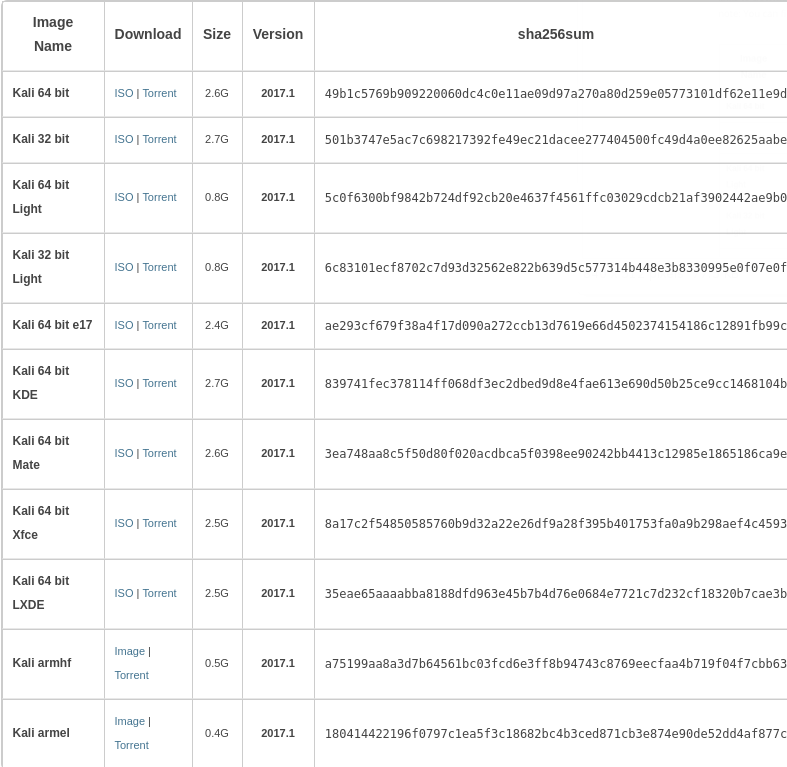
We should get Kali installation iso image from internet official Kali site. Light version provides only popular tools which seems to be enough for most of the situations. There are different type of alternatives about desktop environment. Default desktop environment of Kali is GNOME shell but also following desktop environments are provided in the download site.
我们应该从Internet官方Kali网站获得Kali安装iso映像。 精简版仅提供流行工具,对于大多数情况而言似乎已足够。 关于桌面环境,有不同类型的替代方法。 Kali的默认桌面环境是GNOME shell,但下载站点中还提供了以下桌面环境。
- KDE KDE
- Mate 伴侣
- XfceXfce
- LXDE LXDE
Kali can be run on small and embedded ARM devices with the following architectures.
Kali可以在具有以下架构的小型嵌入式ARM设备上运行。
- Armhf Armhf
- Armel Armel
https://www.kali.org/downloads/
https://www.kali.org/downloads/
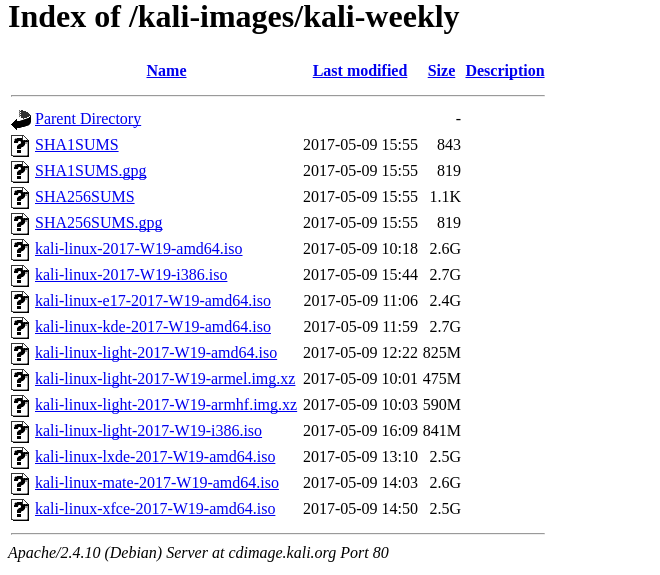
每周建造 (Weekly Builds)
Previous step provides links about Kali releases. But as we know Linux world is dynamic world where every day new update provided by software maintainers. After some time Kali installation iso images can become old. So Kali is provided also weekly builds which holds latest installation files and tools.
上一步提供了有关Kali版本的链接。 但是,众所周知,Linux世界是动态世界,软件维护者每天都会提供新的更新。 一段时间后,Kali安装iso映像可能会变旧。 因此,每周还会提供Kali版本,其中包含最新的安装文件和工具。
http://cdimage.kali.org/kali-images/kali-weekly/
http://cdimage.kali.org/kali-images/kali-weekly/
创建虚拟机并挂载ISO映像(Create VM and Mount ISO Image)
Kali works most of the popular virtualization systems like Vmware, Kvm, Virtualbox, Hyperv etc. We can chose whatever we want and which we are efficient to use. I have using Linux KVM virtualization. So we will create a virtual machine and give required hardware resources those have listed below.
Kali支持大多数流行的虚拟化系统,例如Vmware,Kvm,Virtualbox,Hyperv等。我们可以选择所需的任何东西,以及可以高效使用的东西。 我使用Linux KVM虚拟化。 因此,我们将创建一个虚拟机并提供以下列出的所需硬件资源。
- 2 CPU core 2 CPU核心
- 2 GB Ram2 GB内存
- 20 GB disk20 GB磁盘
- 1 Network interface1个网络接口
After that before starting vm we should put downloaded iso image into cdrom of the vm. We should mount it in order to start Kali installation procedure from cdrom.
之后,在启动vm之前,我们应该将下载的iso映像放入vm的cdrom中。 我们应该挂载它,以便从cdrom启动Kali安装过程。
启动Kali VM (Start Kali VM)
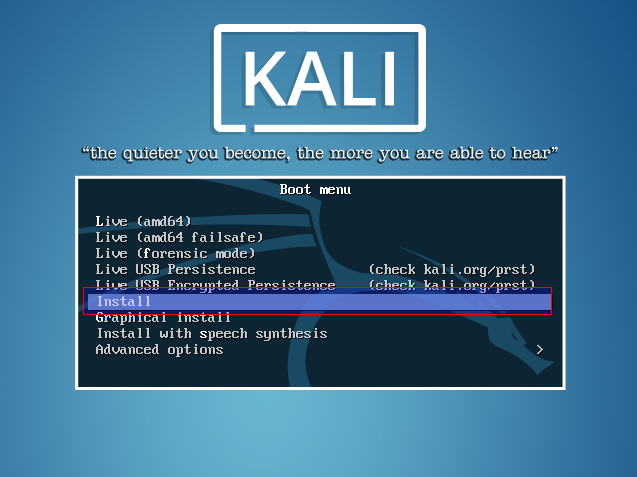
The first screen of the installation process is like below. Kali provides different options in order to boot. We will chose the install option. Here is what these boot options means.
安装过程的第一个屏幕如下所示。 Kali提供了不同的选项以进行引导。 我们将选择安装选项。 这是这些引导选项的含义。
Live (amd64)will open in live mode without installing it from ram.Live (amd64)将在不从ram安装的情况下以实时模式打开。Live (amd64 failsafe)is similar to previous one but work with less drivers and more reliabilityLive (amd64 failsafe)与以前的类似,但驱动程序更少,可靠性更高Live (forensic mode)will open without touching systems local disks in order to investigationLive (forensic mode)将打开而无需接触系统本地磁盘以进行调查Live USB Persistencewill open persistent mode but use USB drive to save dataLive USB Persistence将打开持久模式,但使用USB驱动器保存数据Live USB Encrypted Persistencewill open persistent mode with more secure way by encrypting themLive USB Encrypted Persistence将通过加密将以更安全的方式打开持久模式Installwill start installation of Kali into diskInstall将开始将Kali安装到磁盘Graphical Installwill start installation with more friendly GUIGraphical Install将使用更友好的GUI开始安装Advanced optionswill provide more configuration parameters while bootingAdvanced options将在引导时提供更多配置参数
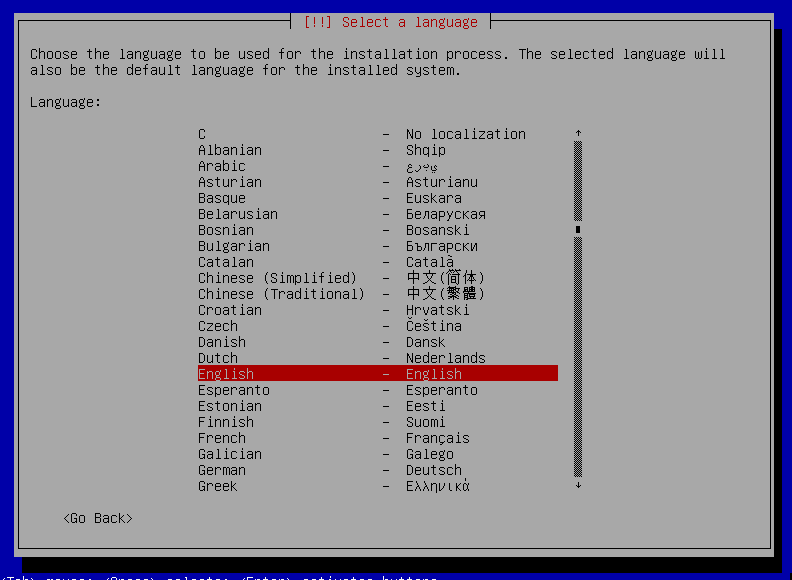
选择语言 (Select Language)
Kali comes with great language support. We can chose which language we want to use. This configuration will set general language preference for whole Kali.
Kali提供了强大的语言支持。 我们可以选择我们要使用的语言。 此配置将设置整个Kali的通用语言首选项。
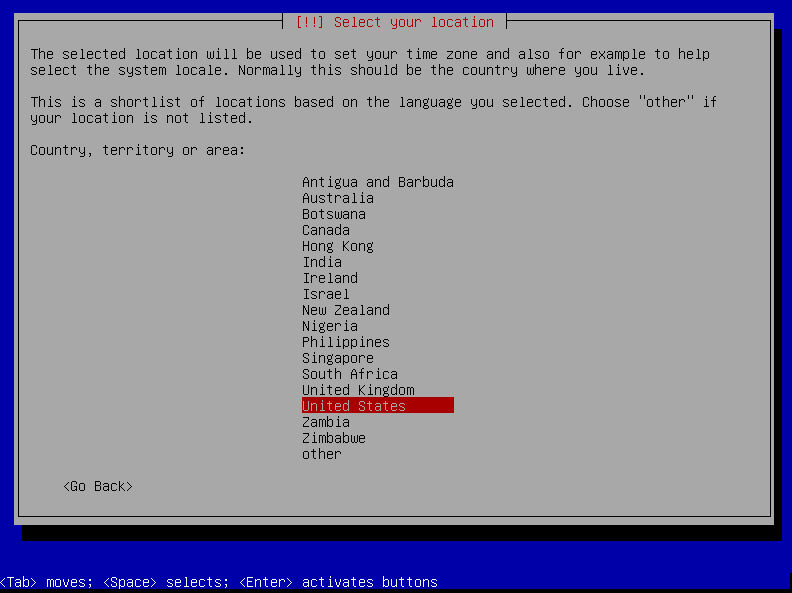
选择位置(Select Location)
Selecting location is required for setting time zone and system locale. This will be the country we are living.
选择位置是设置时区和系统区域设置所必需的。 这将是我们生活的国家。
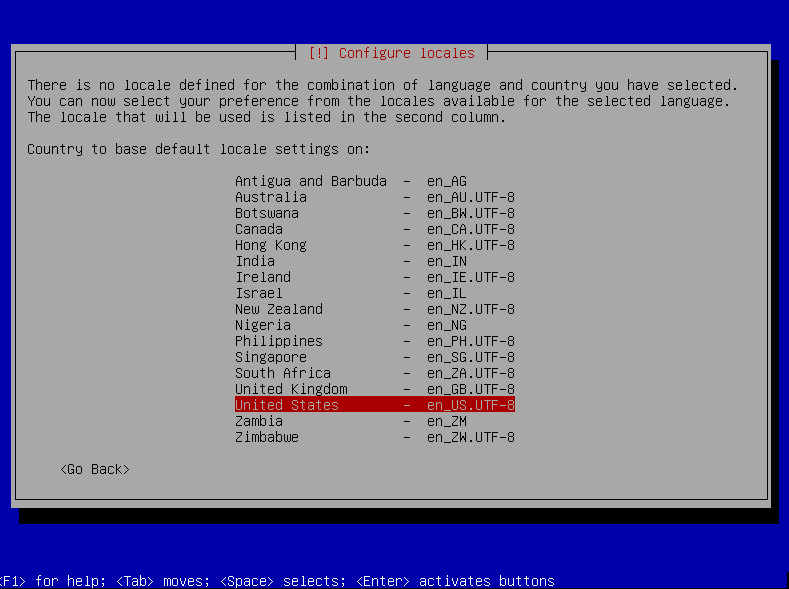
配置语言环境(Configure Locales)
This will set locale we want to use.
这将设置我们要使用的语言环境。
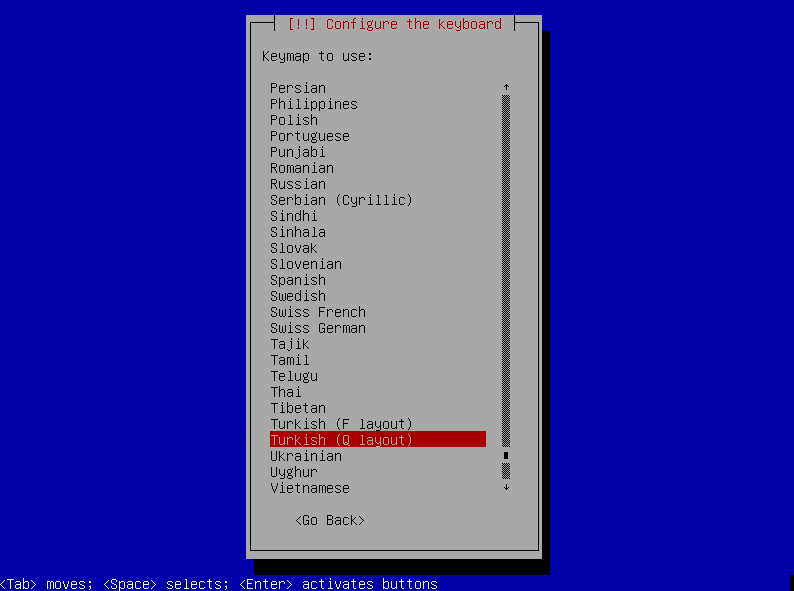
配置键盘(Configure Keyboard)
I think this is the one of the most important step. We will configure keyword map to use. Here I select Turkish (Q Layout) .
我认为这是最重要的步骤之一。 我们将配置要使用的关键字映射。 在这里,我选择Turkish (Q Layout) 。
助手应用(Helper Applications)
While waiting some helper or intermediate applications will be installed. These applications will be used to install main operating system.
等待期间,将安装一些帮助程序或中间应用程序。 这些应用程序将用于安装主操作系统。
DHCP网络配置 (DHCP Network Configuration)
At this step Kali will try to configure its network settings with DHCP. If everything goes expected this step will be automatically proceeded if not we need to fix DHCP or set network configuration manually.
在这一步,Kali将尝试使用DHCP配置其网络设置。 如果一切正常,如果不需要,此步骤将自动进行,我们需要修复DHCP或手动设置网络配置。
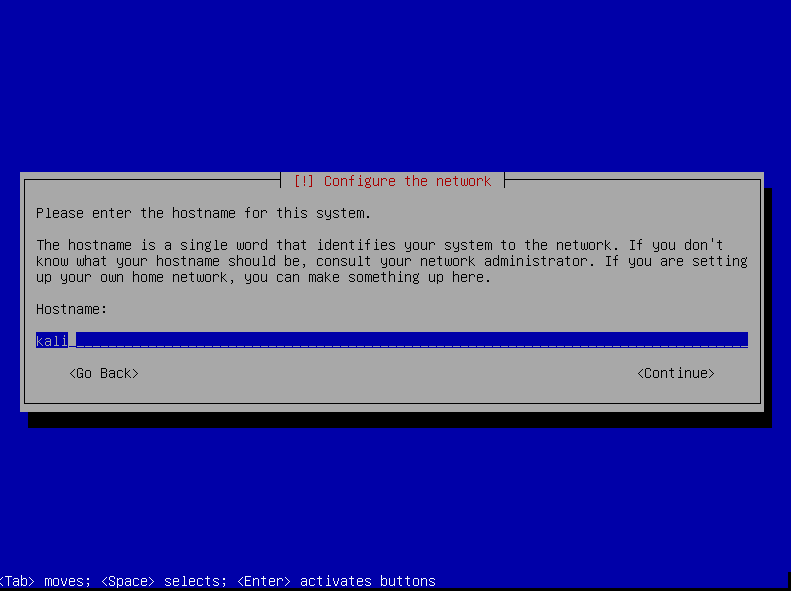
主机名 (Hostname)
At this step we will configure hostname of the Kali installation. Hostname will be used for network level naming of this system. Here we set hostname kali2
在这一步,我们将配置Kali安装的主机名。 主机名将用于此系统的网络级别命名。 在这里我们设置主机名kali2
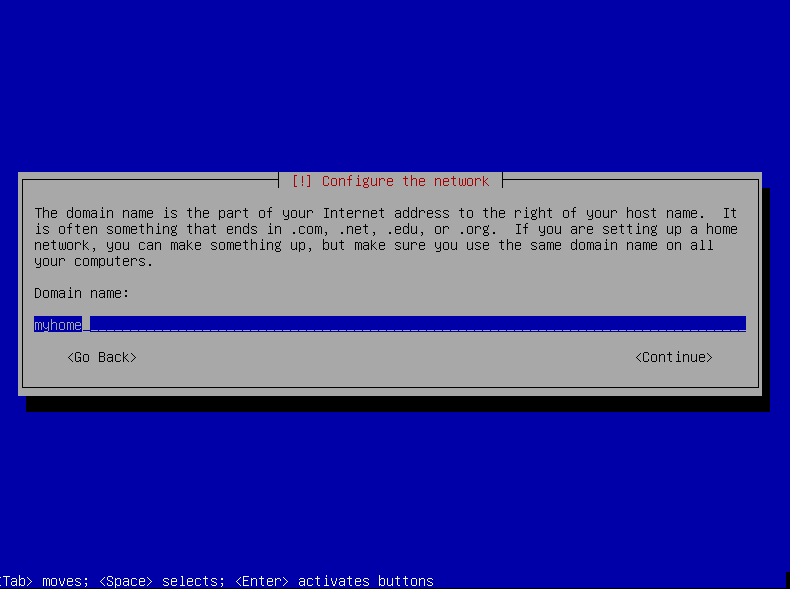
域名(Domain name)
Domain name specifies the network level group name this is generally not so important if you are not in a corporate environment. We set this as myhome but select whatever name you want.
域名指定了网络级别的组名,如果您不在公司环境中,那么这通常并不那么重要。 我们将其设置为myhome但是选择您想要的任何名称。
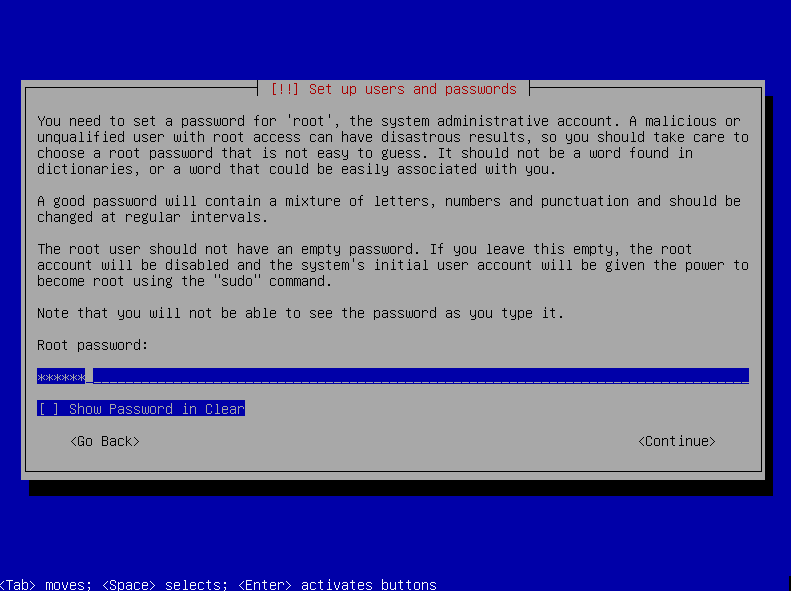
设置root用户密码(Set Password For Root User)
Now another important step. We will set root user password. Be sure that password is complex for attackers but easy to remember for yourself. If we need to show password in clear text not as masked we can select Show Password in Clear option below.
现在又是重要的一步。 我们将设置root用户密码。 确保密码对于攻击者而言很复杂,但对自己来说很容易记住。 如果我们需要以明文形式显示密码而不是使用掩码,则可以选择下面的以明文Show Password in Clear选项。
重新输入根密码(Re-Enter Root Password)
We should re-enter password for consistency and preventing mistakes which will lead to problems.
我们应该重新输入密码以保持一致性并防止可能导致问题的错误。

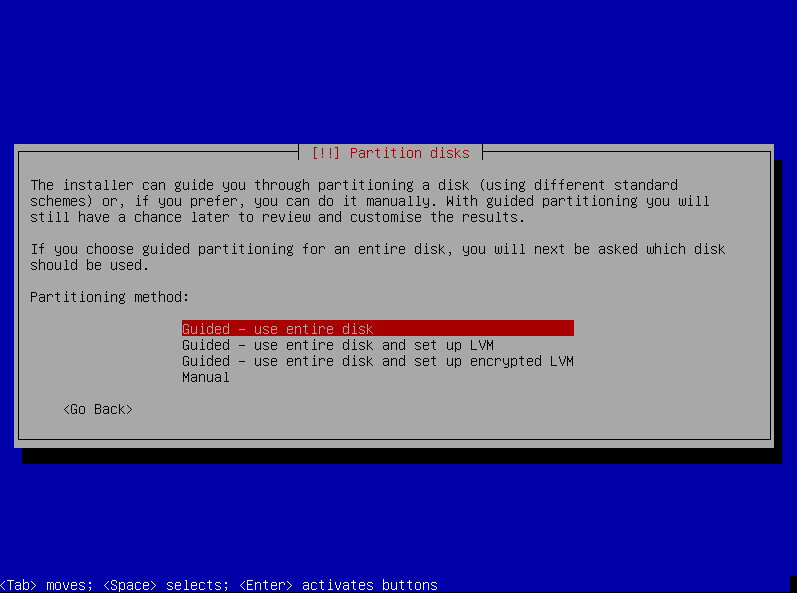
磁盘分区(Disk Partitioning)
We will create partitions where operating system data and user directories will be put. I prefer Guided - use entire disk which is generally ideal for most of the users.
我们将创建用于放置操作系统数据和用户目录的分区。 我更喜欢Guided - use entire disk ,这对于大多数用户而言通常是理想的选择。
Guided - use entire diskwill use given disk wholly and provided partition schema automatically to us.Guided - use entire disk将完全使用给定的磁盘并自动为我们提供分区模式。Guided - use entire disk and set up LVMwill use given disk wholly, and setup LVM which is a disk technology to extend disks with news one.Guided - use entire disk and set up LVM将完全使用给定的磁盘,而设置LVM是一种磁盘技术,用于扩展带有新闻的磁盘。Guided - use entire disk and set up encrypted LVMwill use given disk wholly, and setup encrypted LVM which is a disk technology to extend disks with news one. This is more secure way if we are using Kali physicallyGuided - use entire disk and set up encrypted LVM将完全使用给定的磁盘,并设置加密的LVM,这是一种将新闻扩展到磁盘的磁盘技术。 如果我们物理上使用Kali,这是更安全的方法Manualwill give control to us and we will select all partitions, file systems and parameters about disk.Manual将提供控制权,我们将选择所有分区,文件系统和有关磁盘的参数。
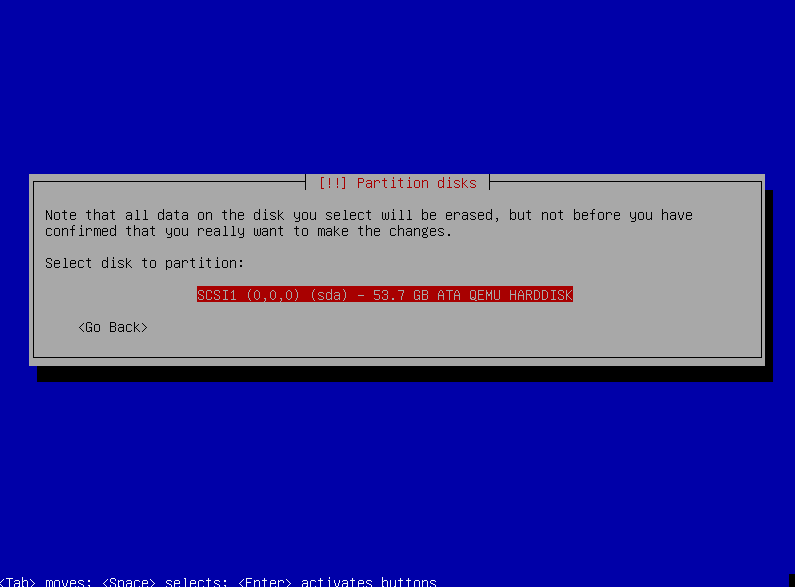
选择磁盘(Select Disk)
We will select which disk we want to use for partition and installation. In this example we have single disk.
我们将选择我们要用于分区和安装的磁盘。 在此示例中,我们只有一个磁盘。
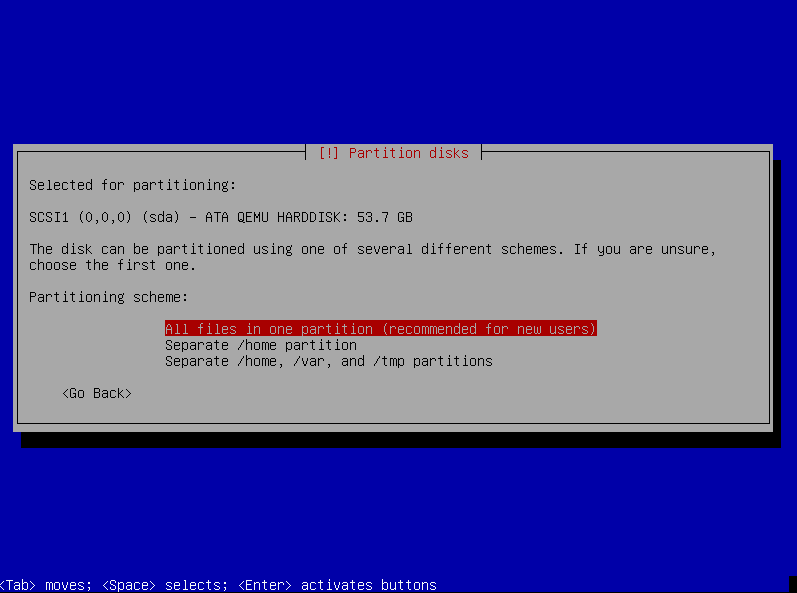
分区方案(Partition Schema)
Linux installations have different directories where some of them installed different partitions. We can set different partition for home directory where user files resides. But I prefer all files in one partition.
Linux安装具有不同的目录,其中一些安装了不同的分区。 我们可以为用户文件所在的home目录设置不同的分区。 但是我更喜欢所有文件在一个分区中。
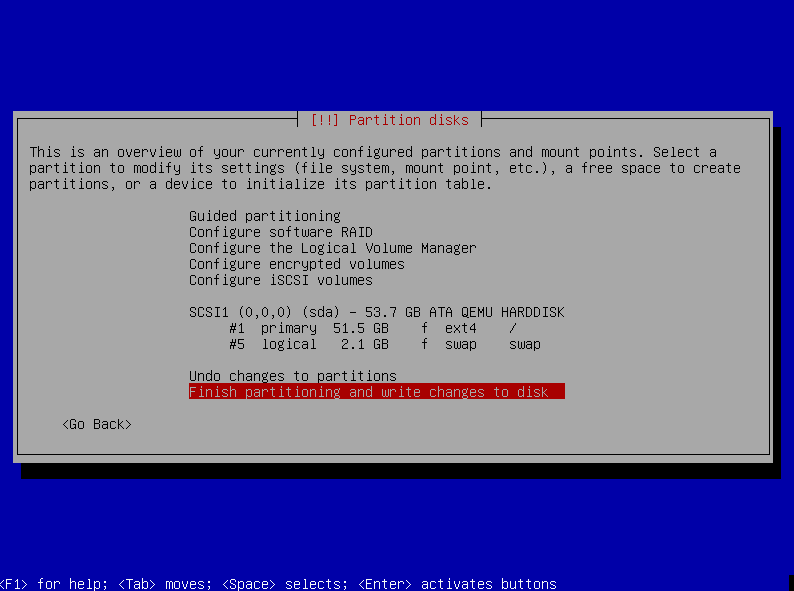
完成分区(Finish Partitioning)
We can review the partition table which will be applied after we accept it. We finish partitioning and write changes to disk.
我们可以查看接受分区表后将应用的分区表。 我们完成分区并将更改写入磁盘。
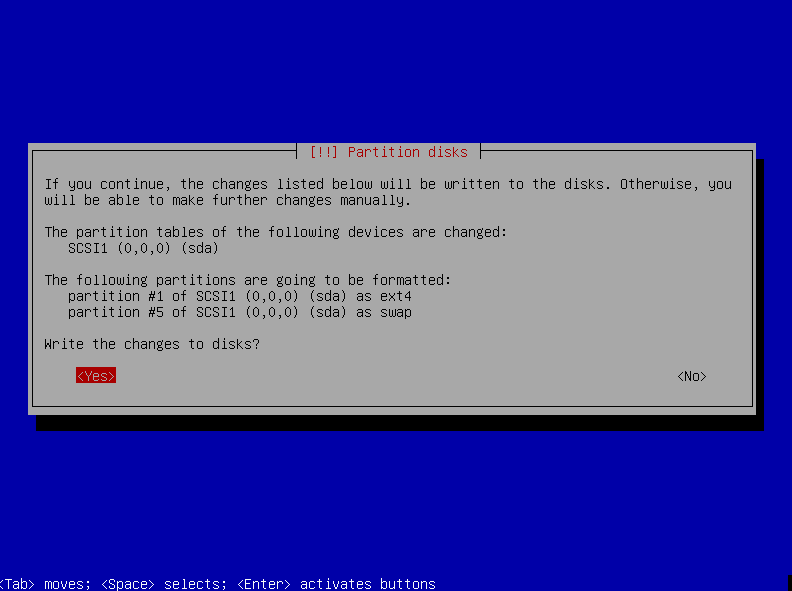
接受分区(Accept Partitioning)
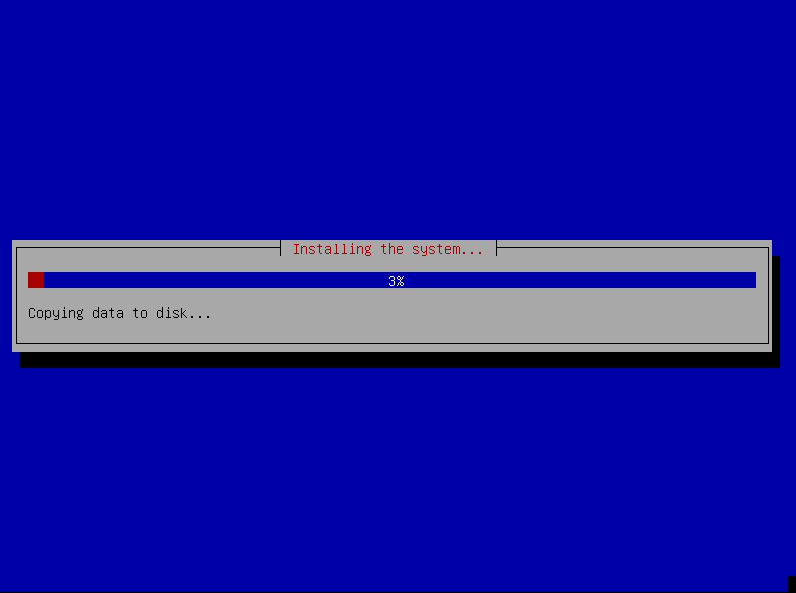
安装基本系统(Install Base System)
We do not need to make anything just the base system installation starts.
仅在基本系统安装开始时,我们不需要做任何事情。
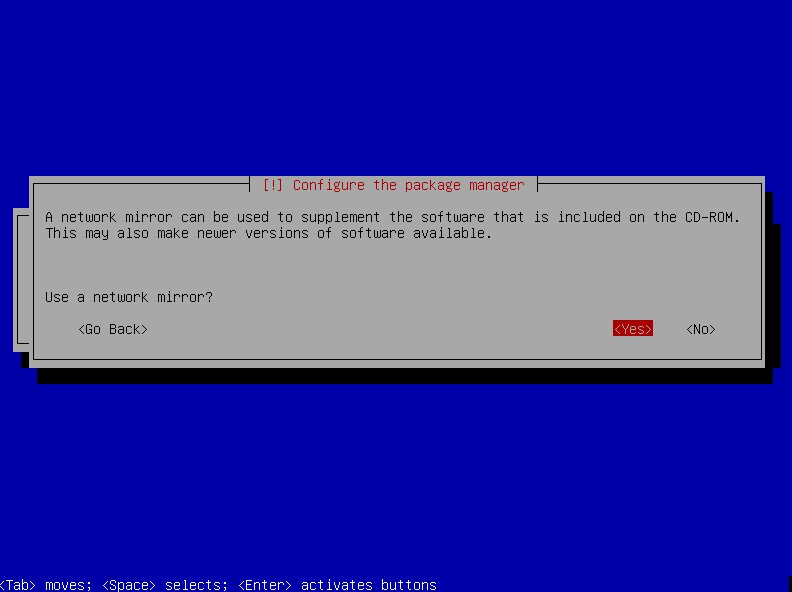
网络镜像(Network Mirror)
If we need we can set network mirror configuration. But generally we do not need one.
如果需要,我们可以设置网络镜像配置。 但通常我们不需要一个。
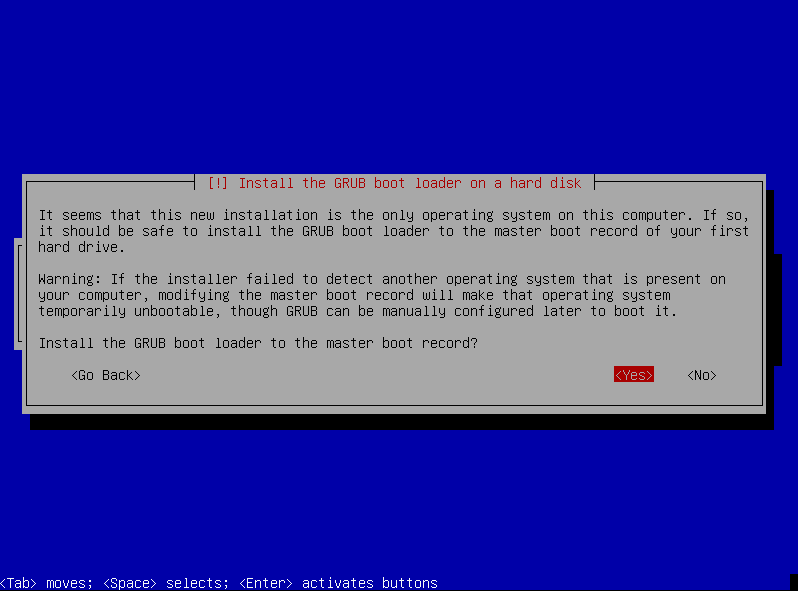
安装GRUB引导加载程序(Install GRUB Boot Loader)
GRUB is boot loader very popular in Linux distributions which used to load and start operating system. Naturally we select yes to install it.
GRUB是引导加载程序,在Linux发行版中非常流行,它用于加载和启动操作系统。 当然,我们选择“是”进行安装。
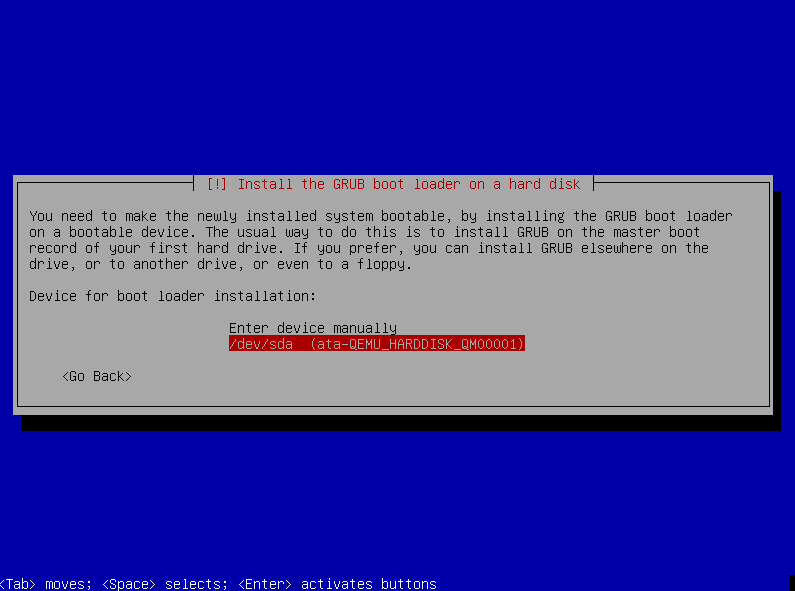
选择启动盘(Select Boot Disk)
We will select the disk we want to install GRUB bootloader.
我们将选择要安装GRUB bootloader的磁盘。
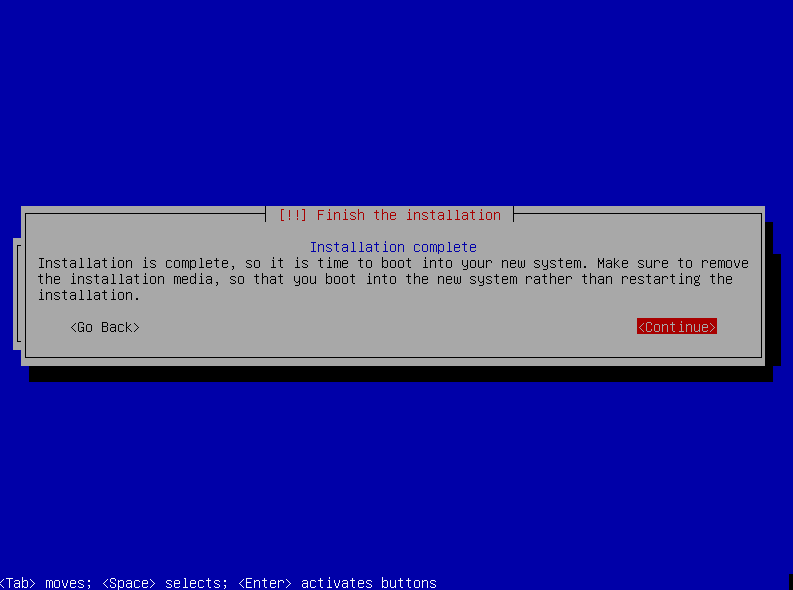
安装完成(Installation Finished)
After we click Continue the installation of the Kali will be finished and system will be restart.
单击Continue后,将完成Kali的安装并重新启动系统。
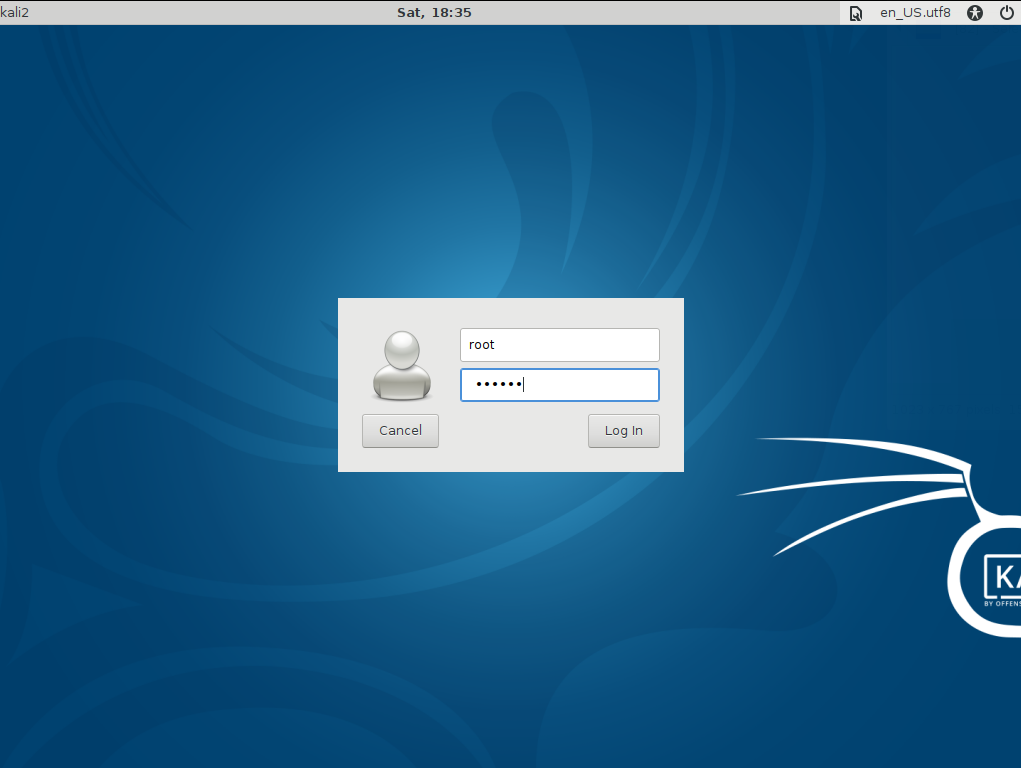
登录卡利(Login Kali)
Here we are. We can login by providing root and its password we have previously set.
我们来了。 我们可以通过提供先前设置的root及其密码来登录。
翻译自: https://www.poftut.com/download-install-kali-security-penetration-test-linux-distribution/


 1万+
1万+

 被折叠的 条评论
为什么被折叠?
被折叠的 条评论
为什么被折叠?
 到【灌水乐园】发言


