


Service是Android四大组件之一,使用的场景也很多,今天学习了Service的启动、绑定、同步数据以及通过其他应用启动Service,期间也碰到一些问题,记录下来,提醒自己。
启动、停止、绑定、解除绑定Service
创建Android Studio Project,创建Blank Activity
// 布局文件
<TextView
        android:id="@+id/textView"
        android:layout_width="wrap_content"
        android:layout_height="wrap_content"
        android:text="Hello World!" />
    <EditText
        android:layout_width="match_parent"
        android:layout_height="wrap_content"
        android:id="@+id/editText"
        android:text="这是默认值"/>
    <Button
        android:layout_width="wrap_content"
        android:layout_height="wrap_content"
        android:id="@+id/btnStartService"
        android:text="启动服务"/>
    <Button
        android:layout_width="wrap_content"
        android:layout_height="wrap_content"
        android:id="@+id/btnStopService"
        android:text="停止服务"/>
    <Button
        android:layout_width="wrap_content"
        android:layout_height="wrap_content"
        android:id="@+id/btnBindService"
        android:text="绑定服务"/>
    <Button
        android:layout_width="wrap_content"
        android:layout_height="wrap_content"
        android:id="@+id/btnUnbindService"
        android:text="解除绑定服务"/>
    <Button
        android:layout_width="wrap_content"
        android:layout_height="wrap_content"
        android:id="@+id/btnSyncData"
        android:text="同步数据"/>
新建Service,默认勾选Exported和Enabled
// Override onCreatehe 和onDestroy函数
@Override
    public void onCreate() {
        super.onCreate();
        System.out.println(2);
        running = true;
        new Thread(){
            @Override
            public void run() {
                super.run();
                int i = 0;
                while (running){
                    String str = i + ":"+ data;
                    System.out.println(str);
                    if (callback!=null){
                        callback.onDataChanged(str);
                    }
                    i++;
                    try {
                        sleep(1000);
                    } catch (InterruptedException e) {
                        e.printStackTrace();
                    }
                }
            }
        }.start();
    }

    @Override
    public void onDestroy() {
        running = false;
        super.onDestroy();
    }
MainActivity里为按钮增加点击事件
public void onClick(View view) {
        switch (view.getId()) {
            case R.id.btnStartService:
                intent.putExtra(DATA_KEY, editText.getText().toString());
                // 启动Service
                startService(intent);
                break;
            case R.id.btnStopService:
                // 停止Service
                stopService(intent);
                break;
            case R.id.btnBindService:
                // 绑定Service,需要实现onServiceConnected和onServiceDisconnected函数
                bindService(intent, this, Context.BIND_AUTO_CREATE);
                break;
            case R.id.btnUnbindService:
                // 解除绑定Service
                unbindService(this);
                break;
            case R.id.btnSyncData:
                if (binder != null){
                    binder.setData(editText.getText().toString());
                }
                break;
        }

}其中,intent = new Intent(MainActivity.this, AppService.class);
Service跟Activity类似,都可以通过Intent来启动,但Service启动后,进入后台仍可运行。
绑定Service,并且在TextView上显示输出,通过Binder连接,需要接受线程返回的字符串信息,且Android不允许线程直接操作UI,因此需要自定义一个Service的回调函数,通过handler方法来操作UI,主要代码如下:
// Service部分代码
    @Override
    public IBinder onBind(Intent intent) {
        return new Binder();
    }

    public class Binder extends android.os.Binder{
        public void setData(String str){
            AppService.this.data = str;
        }
        public AppService getService(){
            return AppService.this;
        }
    }
    private Callback callback = null;

    public Callback getCallback() {
        return callback;
    }

    public void setCallback(Callback callback) {
        this.callback = callback;
    }

    public interface Callback{
        public void onDataChanged(String msg);
   }
// MainActivity部分代码
@Override
public void onServiceConnected(ComponentName componentName, IBinder iBinder) {
System.out.println(1);
binder = (AppService.Binder) iBinder;
binder.getService().setCallback(new AppService.Callback() {
@Override
public void onDataChanged(String msg) {
Message message = new Message();
Bundle bundle = new Bundle();
bundle.putString(BUNDLE_KEY, msg);
message.setData(bundle);
handler.sendMessage(message);
}
});
}
private Handler handler = new Handler(){
@Override
public void handleMessage(Message msg) {
super.handleMessage(msg);
textView.setText(msg.getData().getString(BUNDLE_KEY));
}
};跨应用绑定启动Service
跨应用绑定启动Service,需要用到AIDL(Android Interface Definition Language)
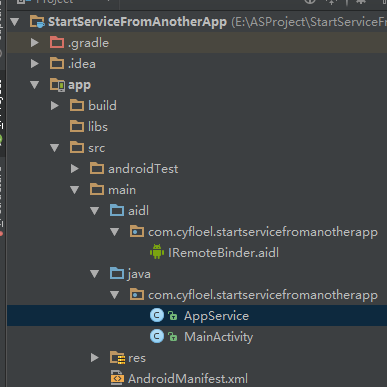
包含Service的StartServiceFromAnotherApp,代码与上面类似,创建时使用默认布局即可
新建AIDL接口文件(通过Android Studio建立,默认保存在src/main/aidl文件夹下)
// IRemoteBinder.aidl
interface IRemoteBinder {
    /**
     * Demonstrates some basic types that you can use as parameters
     * and return values in AIDL.
     */
    void basicTypes(int anInt, long aLong, boolean aBoolean, float aFloat,
            double aDouble, String aString);
    void setData(String data);
}
//Service部分代码
@Override
public IBinder onBind(Intent intent) {
// TODO: Return the communication channel to the service.
// 注意这里返回的是IRemoteBinder.Stub
return new IRemoteBinder.Stub() {
@Override
public void basicTypes(int anInt, long aLong, boolean aBoolean, float aFloat, double aDouble, String aString) throws RemoteException {
}
@Override
public void setData(String data) throws RemoteException {
AppService.this.data = data;
}
};
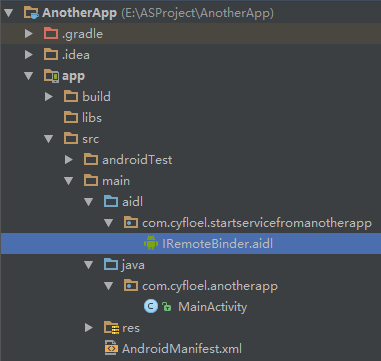
}在另一个AnotherApp里,同样需要新建aidl文件夹,并在此文件夹下,建立一个与StartServiceFromAnotherApp中aidl文件所在同名的package,最后将IRemoteBinder.aidl文件复制进去。
// AnotherAPP部分代码
@Override
    public void onClick(View view) {
        switch (view.getId()){
            case R.id.btnBindService:
                bindService(intent, this, Context.BIND_AUTO_CREATE);
                break;
            case R.id.btnUnbindService:
                unbindService(this);
                iRemoteBinder = null;
                break;
            case R.id.btnSyncData:
                if (iRemoteBinder!=null){
                    try {
                        iRemoteBinder.setData(editText.getText().toString());
                    } catch (RemoteException e) {
                        e.printStackTrace();
                    }
                }
                break;
        }
    }

    public void onServiceConnected(ComponentName componentName, IBinder iBinder) {
     /* 注意,这里直接进行类型转换会报错,
     ** 因为不能直接调用另外一个应用中的类来进行类型转换,
     ** 需要通过asInterface来进行转换
     */
     // iRemoteBinder = (IRemoteBinder) iBinder;
        iRemoteBinder = IRemoteBinder.Stub.asInterface(iBinder);
    }


 2207
2207

 被折叠的 条评论
为什么被折叠?
被折叠的 条评论
为什么被折叠?
 到【灌水乐园】发言


