


我这边采用快照的模式进行备份数据
备份源的es 版本要等于低于恢复elasticsearch集群的版本;
先看下:
ES集群快照存在版本兼容性问题:
Snapshot and restore | Elasticsearch Guide [8.13] | Elastic
首先为快照目录建立共享 我这边用的是nfs
安装nfs服务
yum install nfs-utils rpcbind -y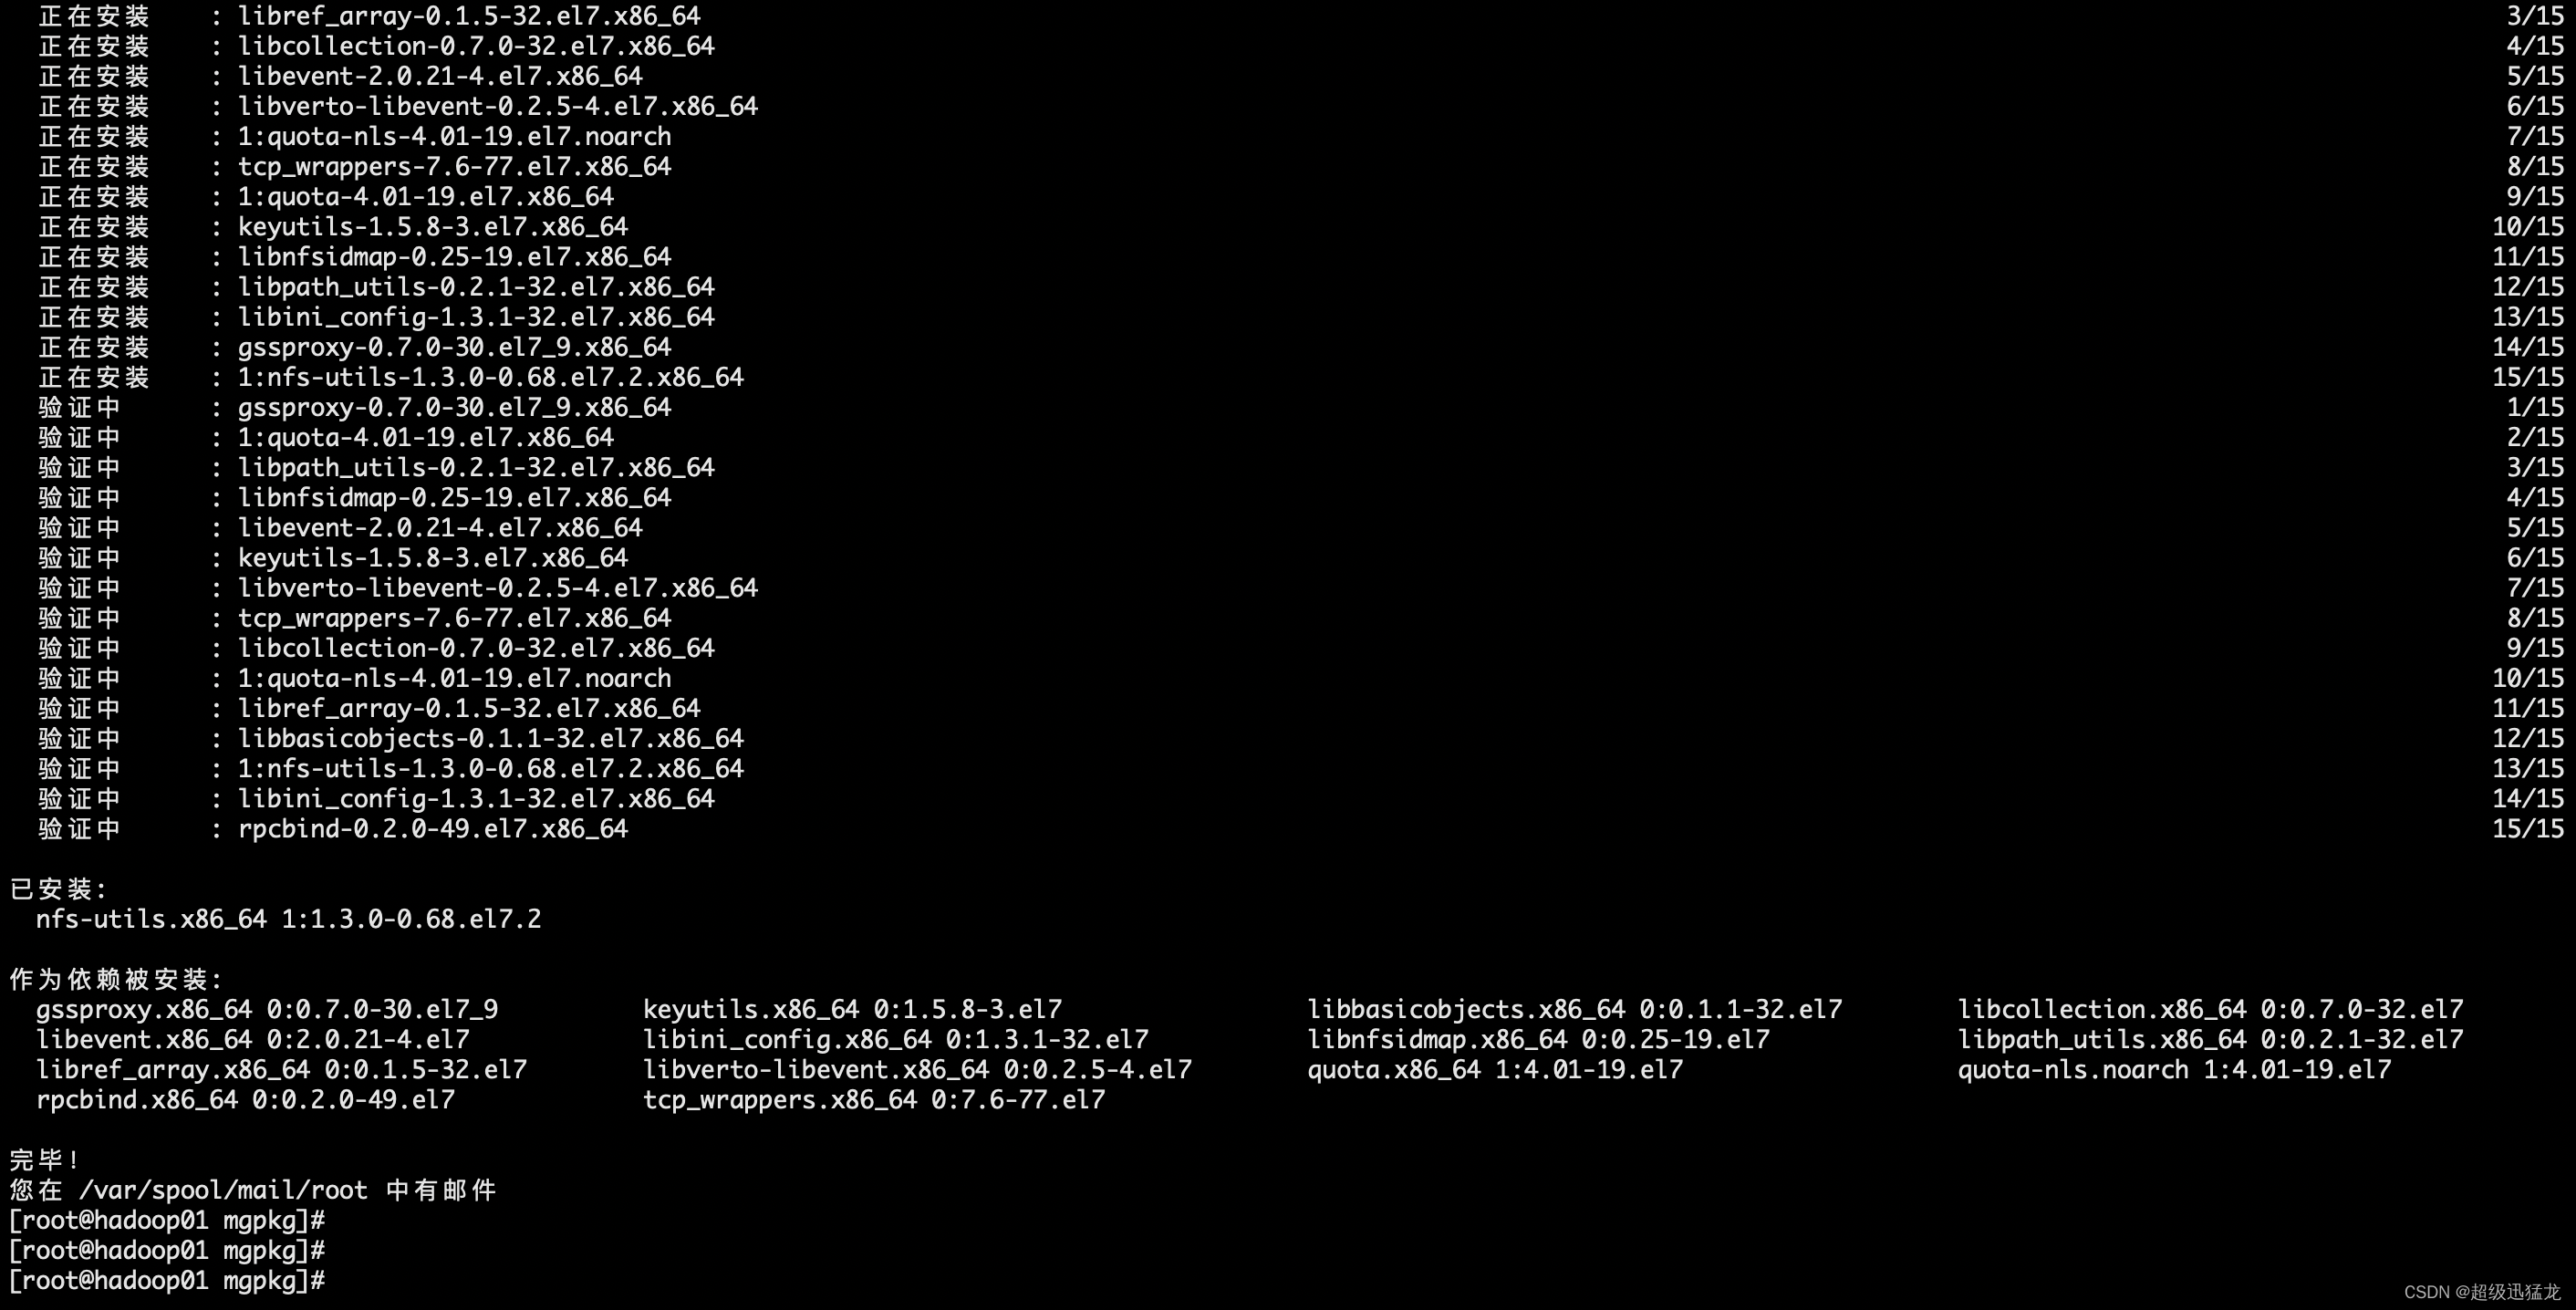
启动nfs服务
#启动nfs服务
systemctl start nfs
#设置nfs开机自启动
systemctl enable nfs
#查看nfs服务状态
systemctl status nfs
#重启nfs服务
systemctl restart nfs
首先创建一个目录用来备份数据
mkdir -p /data/es_backup
chown -R elsearch:elsearch /data/es_backup/
chmod -R 777 /data/es_backup
编辑共享目录配置(注意这个服务端端目录不能挂根上 一定要新的盘 不然会卡)
vim /etc/exports
/data/es_backup *(rw)

加载共享配置
exportfs -rv
客户端查看服务端共享目录信息
showmount -e 172.16.121.89
共享客户端,手动挂载
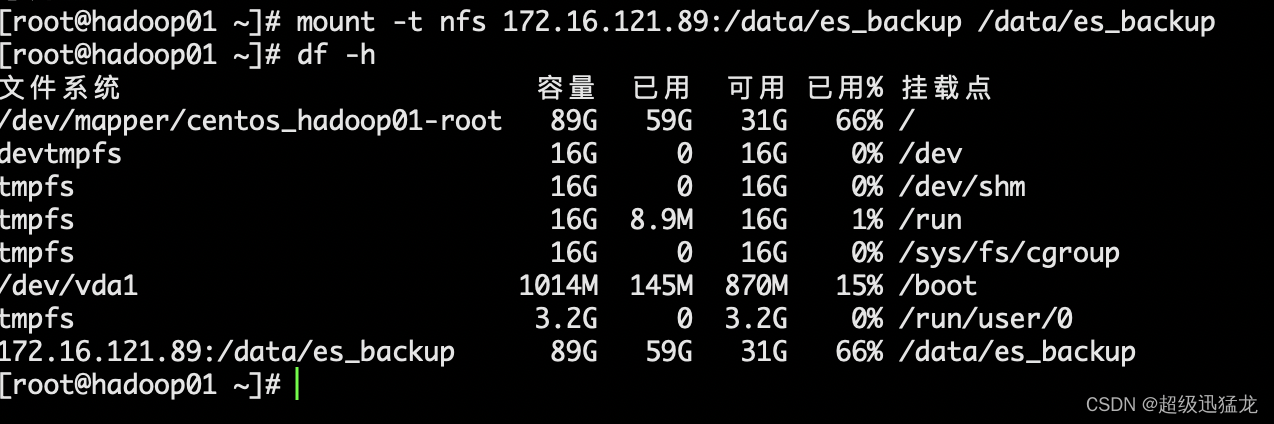
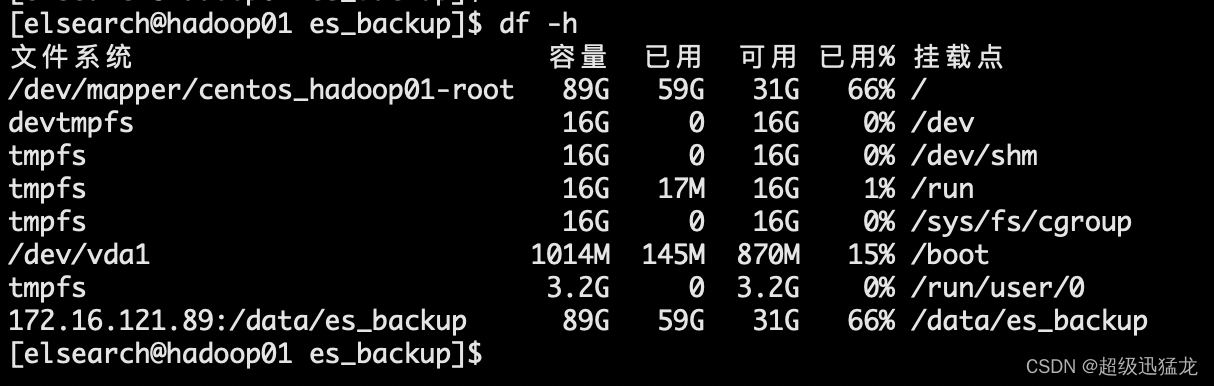
mount -t nfs 172.16.121.89:/data/es_backup /data/es_backupdf -h
附:强制取消挂载命令
umount -lf /data/es_backup/
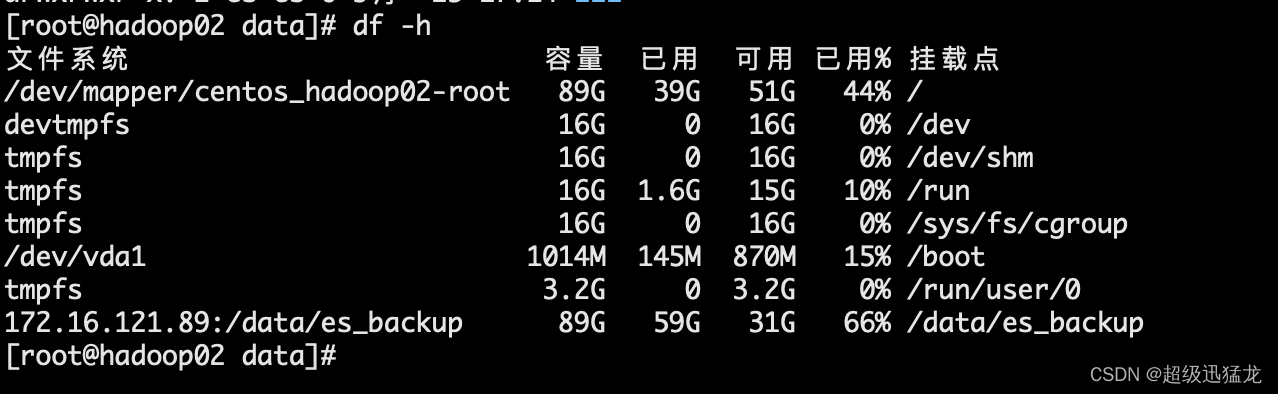
其他节点也要挂载好哦
可以使用curl或者elasticsearch-snapshot工具创建快照
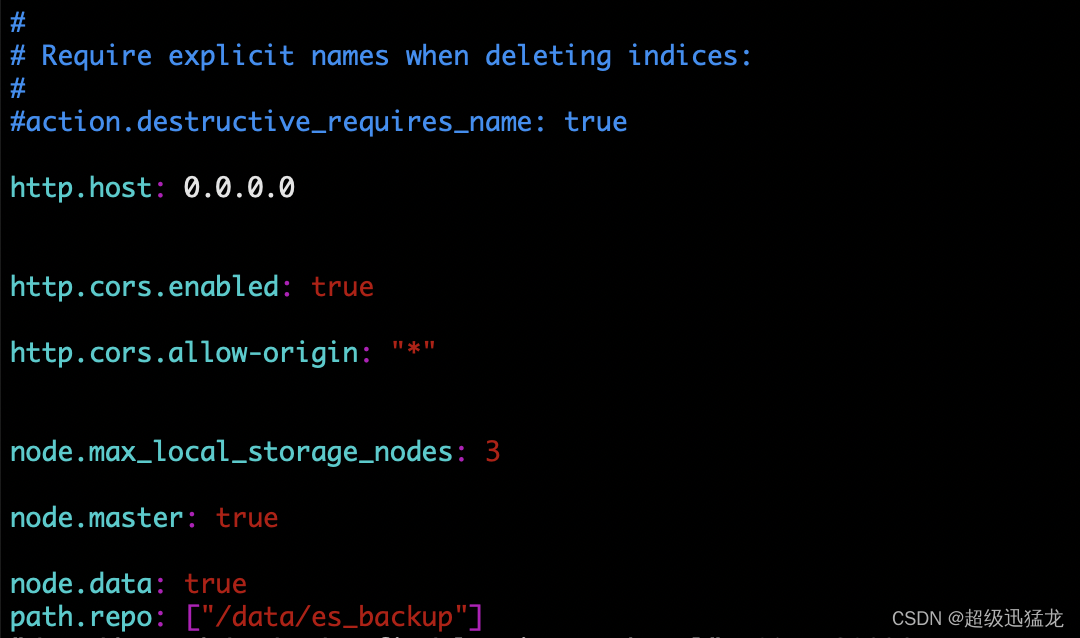
配置es/config/elasticsearch.yml配置中有配置快照地址:
path.repo: ["/data/es_backup"]echo 'path.repo: ["/data/es_backup"]' >> /opt/dtstack/es/es/config/elasticsearch.yml
然后创建一个快照仓库
curl -XPUT 'http://hadoop01:9200/_snapshot/my_backup' -H 'content-Type:application/json' -d '{"type": "fs","settings": {"location": "/data/es_backup","max_snapshot_bytes_per_sec": "50mb","max_restore_bytes_per_sec": "50mb"}}'

备份数据 我这边内网环境所以用curl啦
curl -XPUT "hadoop01:9200/_snapshot/my_backup/snapshot_2024-05-23?wait_for_completion=true"

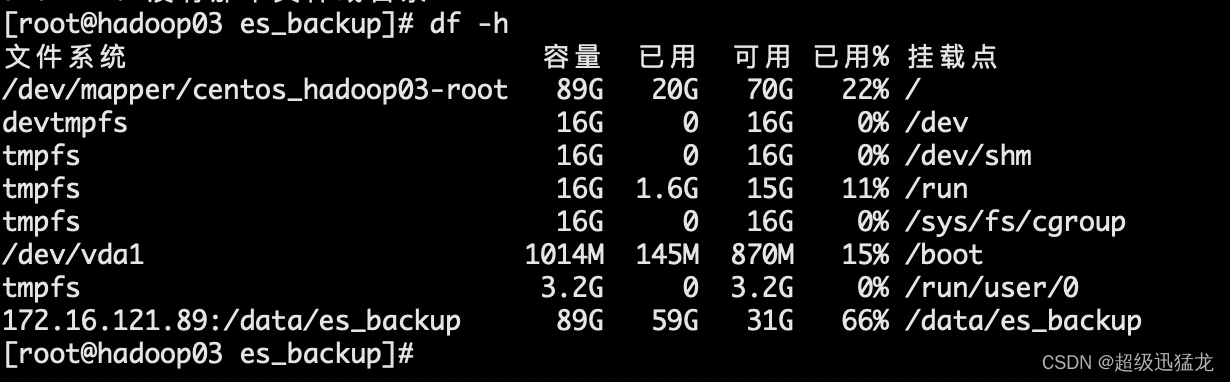
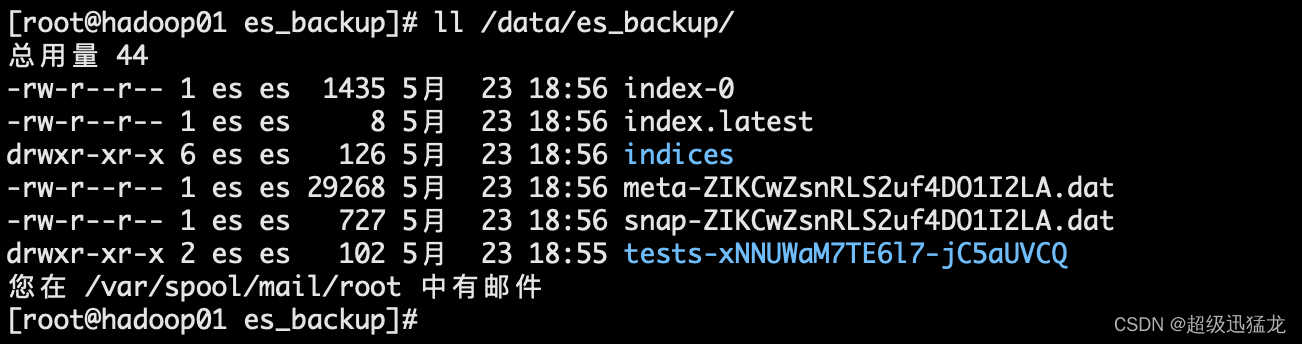
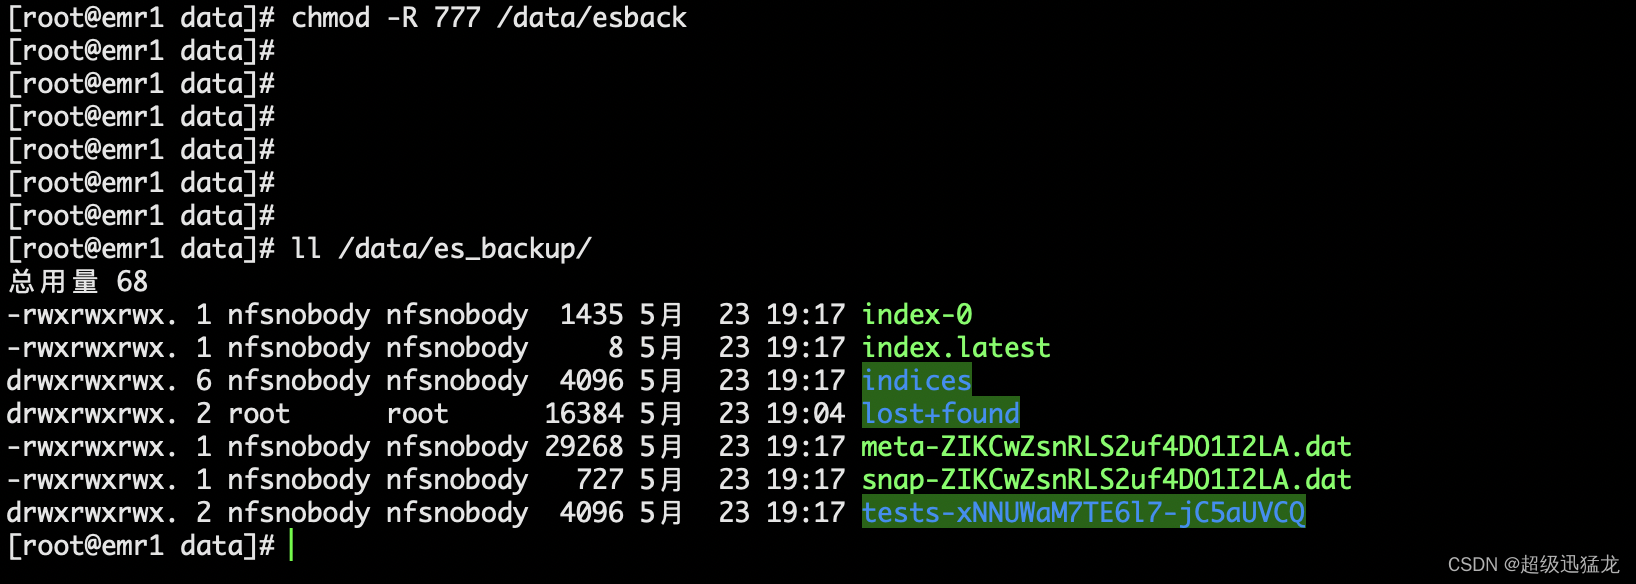
这部备份完一定要看下目录下的数据情况:
ll /data/es_backup/
查看备份情况
curl -XGET http://hadoop01:9200/_snapshot/my_backup/snapshot_2024-05-23

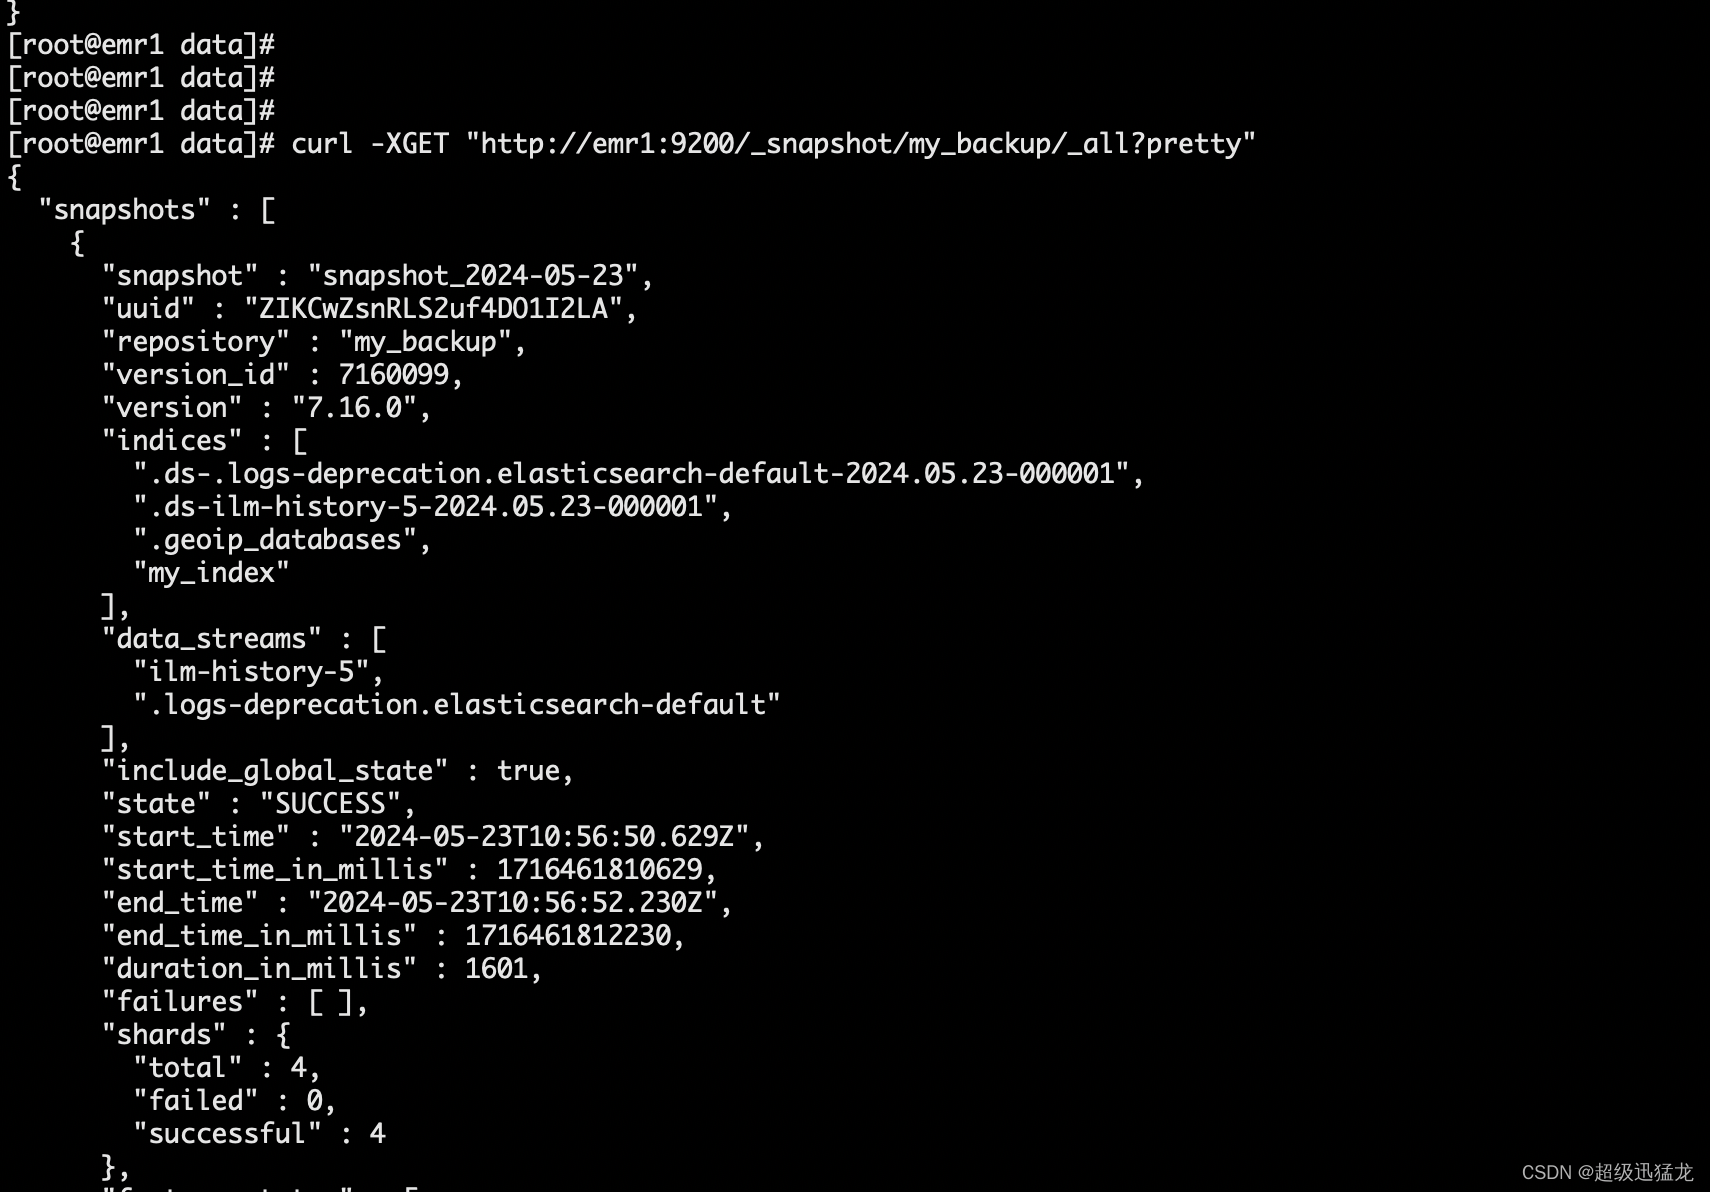
"snapshot": "snapshot_2024-05-23" - 这是快照的名称。"uuid": "vxfRfwyaRmeuHIyRCIaQDw" - 这是快照的唯一标识符。"repository": "my_backup" - 这是创建快照的仓库名称。"version_id": 7160099 和 "version": "7.16.0" - 这表示快照是由 Elasticsearch 7.16.0 版本创建的。"indices": ["my_index", ".geoip_databases", ".ds-.logs-deprecation.elasticsearch-default-2024.05.23-000001", ".ds-ilm-history-5-2024.05.23-000001"] - 这些是包含在快照中的索引列表。"data_streams": ["ilm-history-5", ".logs-deprecation.elasticsearch-default"] - 这些是包含在快照中的数据流列表。"include_global_state": true - 表示快照包含了 Elasticsearch 集群的全局状态信息。"state": "SUCCESS" - 表示快照创建成功。"start_time" 和 "end_time" - 快照的开始和结束时间。"duration_in_millis": 1400 - 快照创建持续的时间(毫秒)。"failures": [] - 快照创建过程中没有发生任何失败。"shards": {"total": 4, "failed": 0, "successful": 4} - 快照包含的分片数量及其成功/失败情况。"feature_states": [{"feature_name": "geoip", "indices": [".geoip_databases"]}] - 快照包含的特殊功能状态信息。
首先测试目标端是否可以恢复
搭建一套新的es集群 看看数据能不能恢复
配置新快照地址 注意要有这个配置 因为后面要创建快照仓库
path.repo: ["/data/es_backup"]

配置后要重启es哈
首先我们把备份数据迁移到新集群 注意新集群也是nfs
scp -r /data/es_backup/ 172.16.121.150:/datachmod -R 777 /data/es_backup
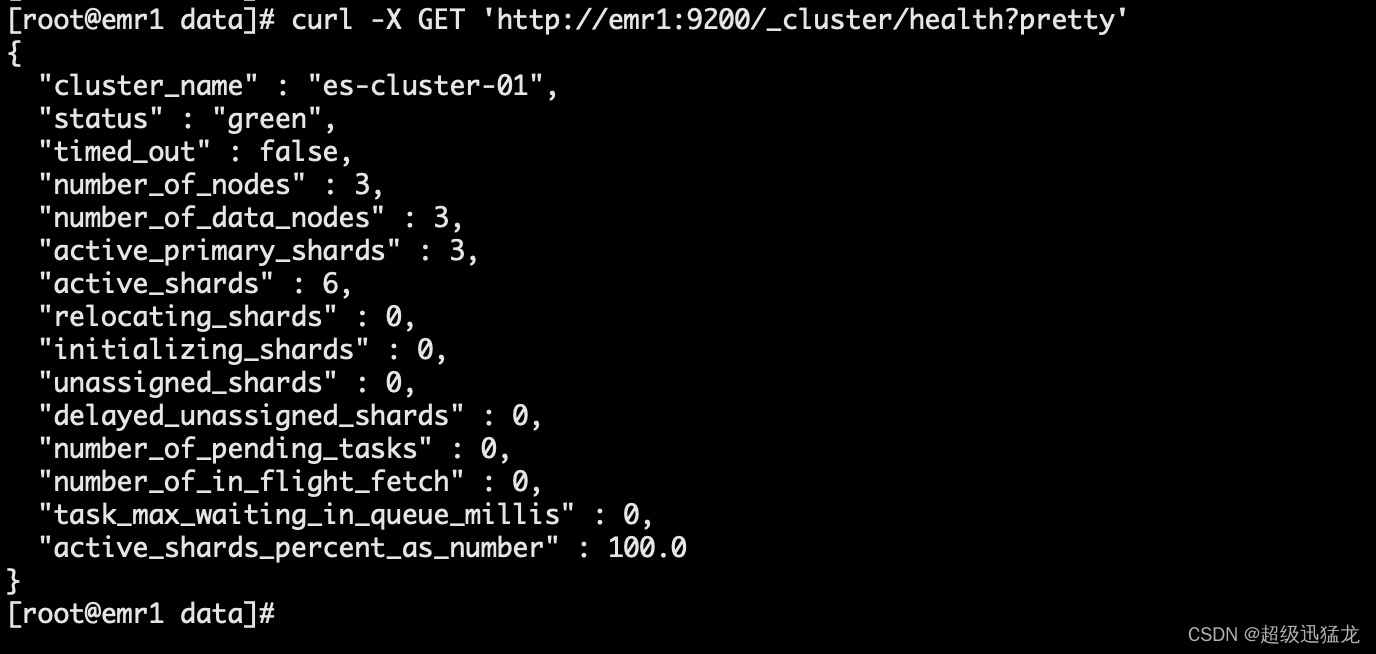
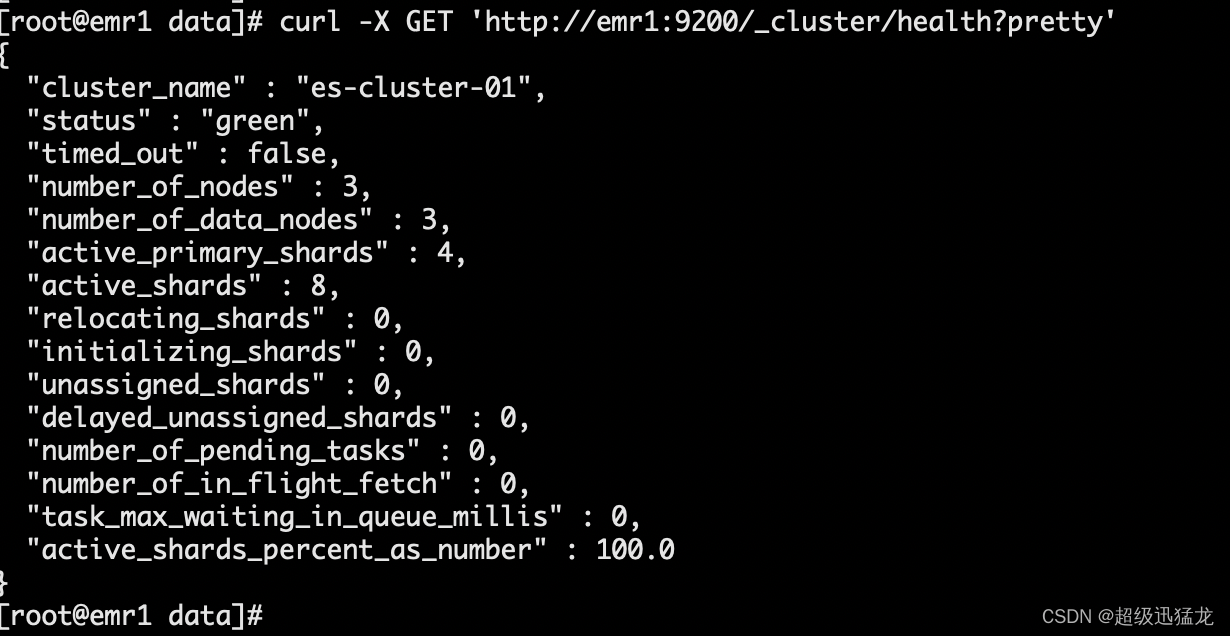
首先我们看一下 150的es确保是没数据的
curl -X GET 'http://emr1:9200/_cluster/health?pretty'
查看150上所有的分配信息
curl -XGET 'http://emr1:9200/_cat/shards?format=json'

查看原端的分配信息:
curl -XGET 'http://hadoop01:9200/_cat/shards?format=json'

格式化下
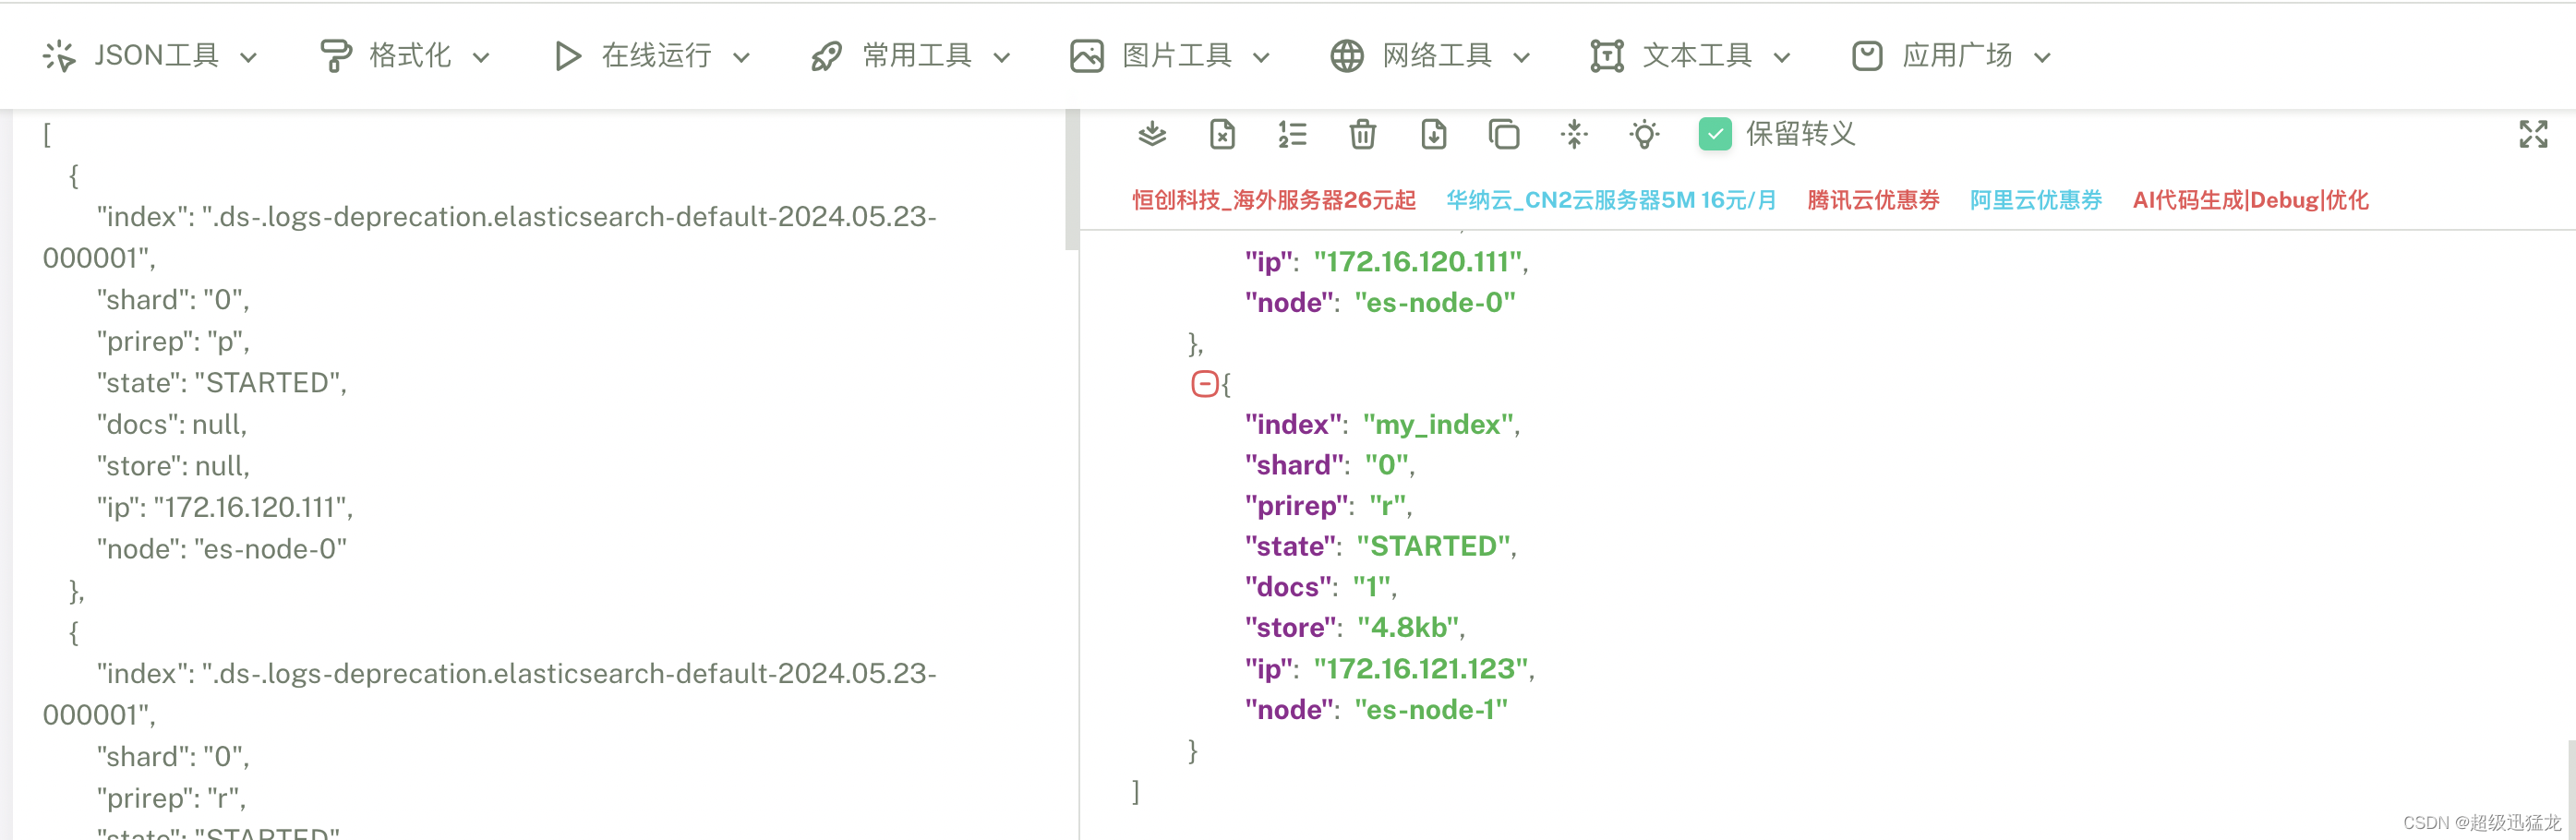
可以看出来源端是有my_index的但是150上没有
在新集群上注册之前备份的快照存储库/data/es_backup/ 目录下,
使用以下命令进行注册:
curl -XPUT "http://emr1:9200/_snapshot/my_backup" -H 'Content-Type: application/json' -d '{"type": "fs","settings": {"location": "/data/es_backup/"}}'

列出已注册的快照存储库并查看可用的快照
curl -XGET "http://emr1:9200/_snapshot/my_backup/_all?pretty"
恢复索引my_index时可通过-指定排除某些索引:
curl -XPOST 'emr1:9200/_snapshot/my_backup/snapshot_2024-05-23/_restore' -H 'Content-Type: application/json' -d'{ "indices":"my_index","ignore_unavailable": true, "include_global_state": false }'注意snapshot_2024-05-23 就是之前备份的名称

使用如下命令查看恢复进度
curl -XGET "http://emr1:9200/_snapshot/my_backup/snapshot_2024-05-23/_status?pretty"

在看下emr1上的数据情况
curl -X GET 'http://emr1:9200/_cluster/health?pretty'
已经有数据了
查看150上所有的分配信息
curl -XGET 'http://emr1:9200/_cat/shards?format=json?pretty'

查询数据
curl -X GET 'http://emr1:9200/my_index/_search?q=name:John'

完成。


 2963
2963

 被折叠的 条评论
为什么被折叠?
被折叠的 条评论
为什么被折叠?
 到【灌水乐园】发言


