


一直以来做项目都是直接加载生成好的so文件,然后调用相关的封装方法来实现外接硬件的调用。平常我们使用android通过串口与单片机进行通讯,只需要对接RS232的串口通讯协议就可以了,因为我们不需要直接驱动底层的硬件。但是最近是需求通过Android 开发板上的I2C总线直接加装一块定制的开发板去驱动一些底层硬件,例如直接控制LED灯、驱动马达等动作。这时候就需要使用到GPIO。
1.首先我们创建一个项目,新建一个GPIOControl.java文件
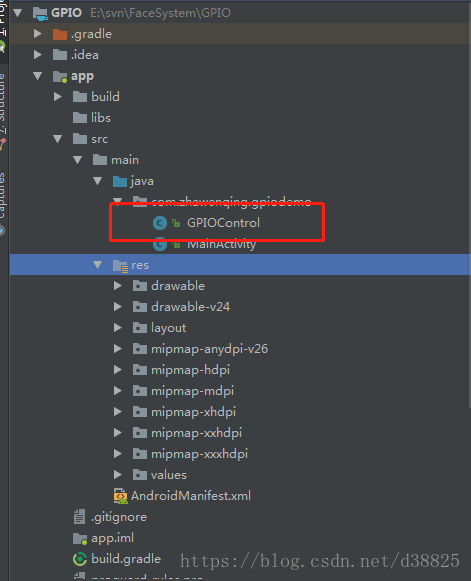
2.写入自己需要的调用方法
public class GPIOControl {
    static
    {
        System.loadLibrary("GPIOControl");
    }


    // JNI
    public static native int nativeReadGpio(String path);
    public static native int nativeWriteGpio(String path, String value);
}
3.点击build重构下项目

4.使用Terminal命令窗口创建.h头文件
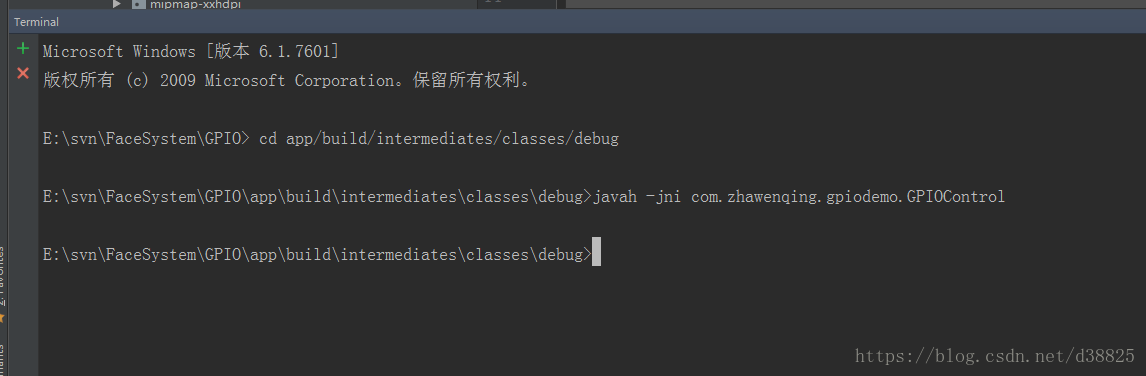
cd app/build/intermediates/classes/debug  //跳到指定的文件夹下

javah -jni com.zhawenqing.gpiodemo.GPIOControl    //编译c的头文件,jni后面是文件路径
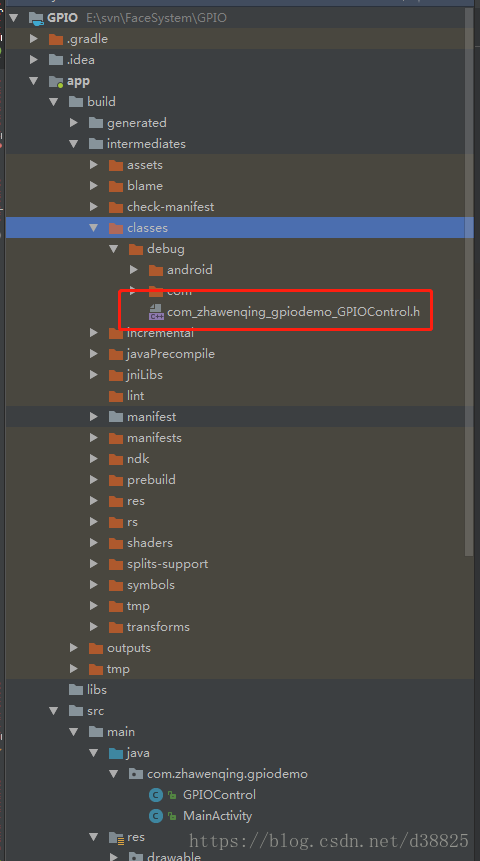
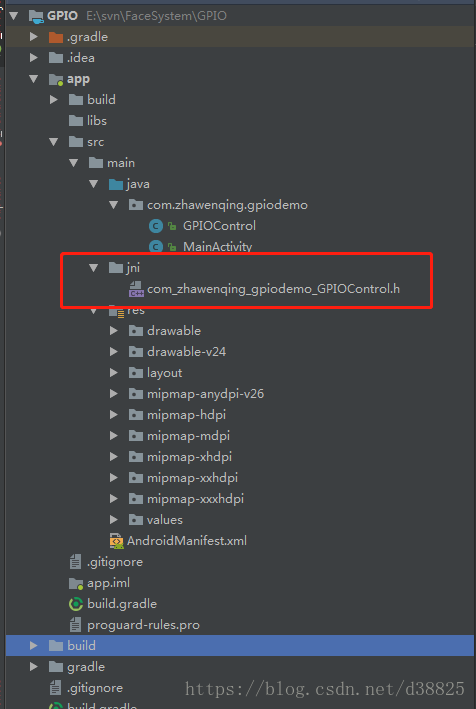
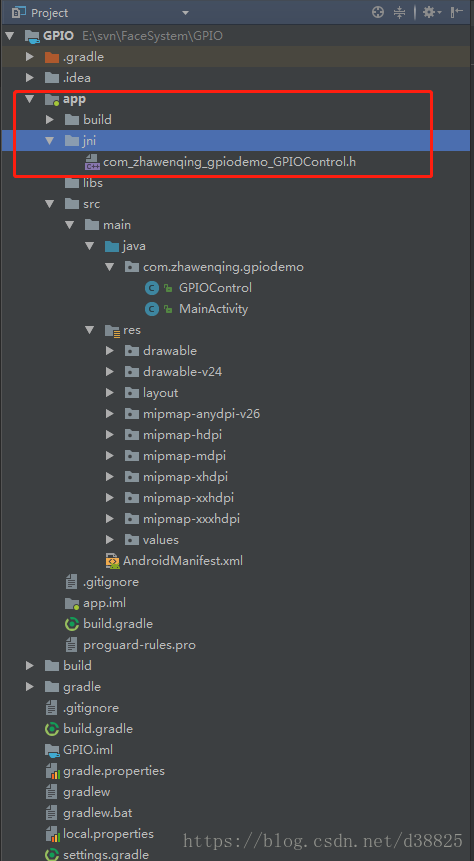
5.在app/build/intermediates/classes/debug目录下找到生成的.h文件复制,右键app新建一个jni文件夹放置.h文件。并且需要把jni文件夹移动到app目录下否则会报错,具体报错请往下看
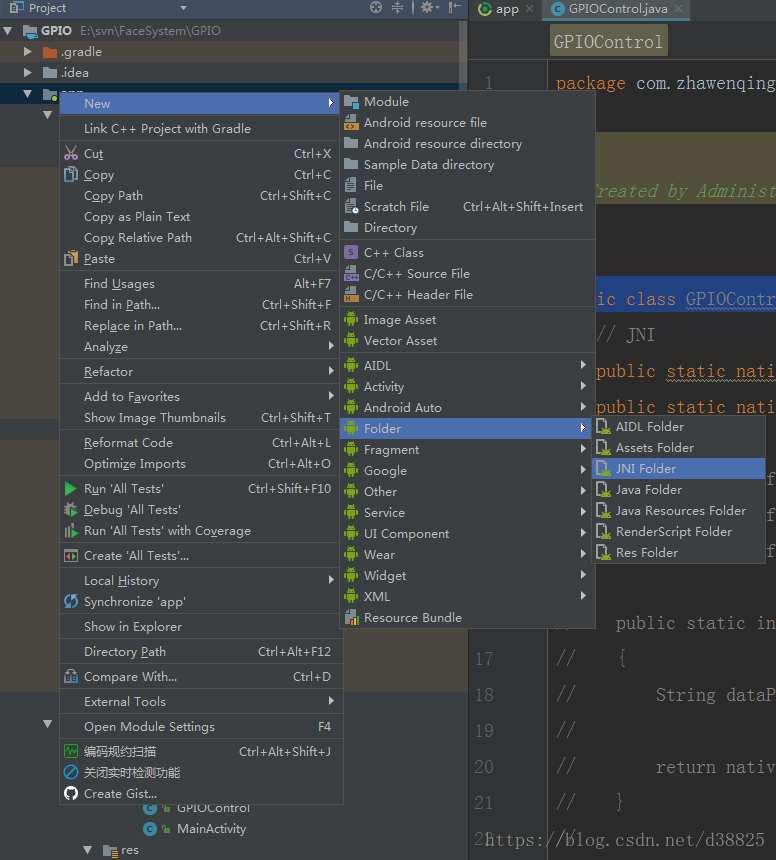
6.在jni文件夹新建GPIOControl.c文件并实现.h文件里面的方法
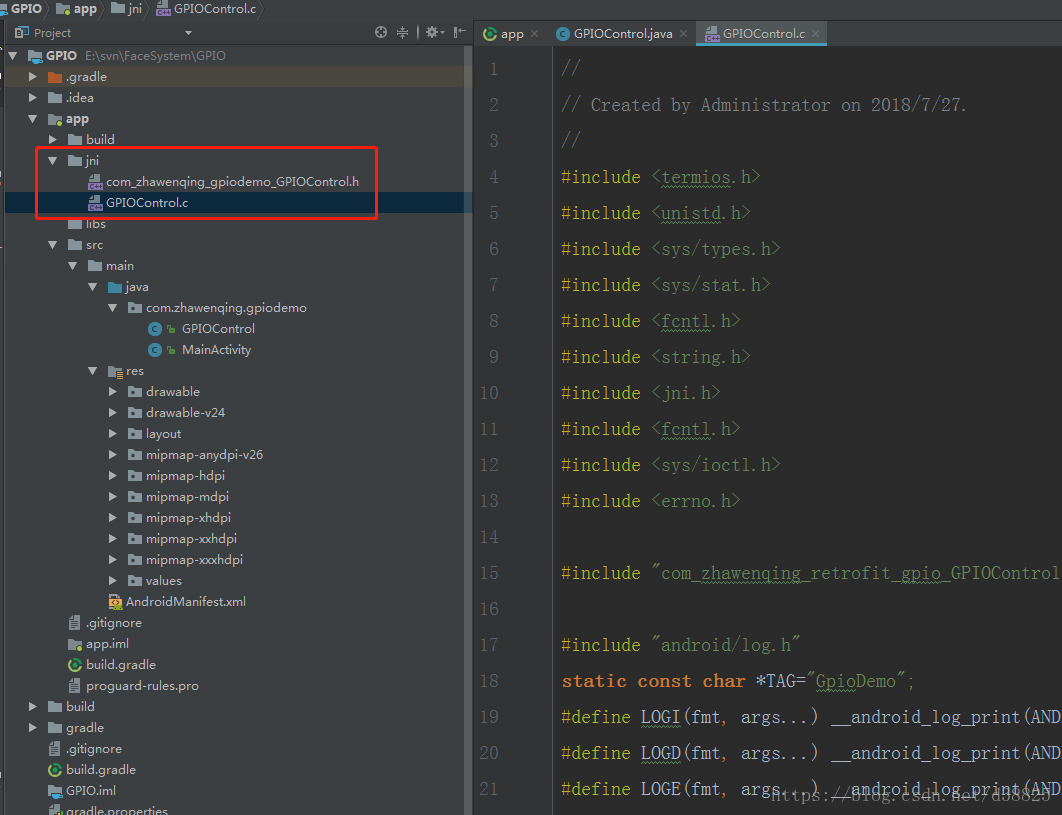
具体实现方法的相关代码,注意里面方法的方法名要与生成的.h里面的方法名必须保持一致
Java_com_zhawenqing_retrofit_gpio_GPIOControl_nativeReadGpio。需要将GPIOControl中封装方法添加完整。
下面是GPIOControl.java文件
package com.zhawenqing.gpiodemo;

/**
 * Created by Administrator on 2018/7/27.
 */

public class GPIOControl {
    // JNI
    public static native int nativeReadGpio(String path);
    public static native int nativeWriteGpio(String path, String value);

    private static final String  mPathstr      = "/sys/class/gpio/gpio";
    private static final String  mDirectDir     = "/direction";
    private static final String  mValueDir     = "/value";

    public static int writeGpioValue(int num, int value)	//设置gpio输出电平,value=0为低电平,value=1为高电平,num为gpio口序列号
    {
        String dataPath = composePinPath(num).concat(mValueDir);

        return nativeWriteGpio(dataPath, Integer.toString(value));
    }

    public static int readGpioValue(int num)
    {
        String dataPath = composePinPath(num).concat(mValueDir);

        return nativeReadGpio(dataPath);
    }

    public static int writeGpioDirection(int num, int value)	//设置gpio口输入输出状态,value=0为输入,value=1为输出,num为gpio口序列号
    {
        String dataPath = composePinPath(num).concat(mDirectDir);
        String direct;
        if(value == 0)
        {
            direct = "in";
        }
        else if(value == 1)
        {
            direct = "out";
        }
        else
        {
            return -1;
        }
        return nativeWriteGpio(dataPath, direct);
    }

    public static int readGpioDirection(int num)
    {
        String dataPath = composePinPath(num).concat(mDirectDir);

        return nativeReadGpio(dataPath);
    }

    private static String composePinPath(int num)
    {
        String  numstr;
        numstr = Integer.toString(num);
        return mPathstr.concat(numstr);
    }

    static
    {
        System.loadLibrary("GPIOControl");
    }
}
下面是GPIOControl.c文件
//
// Created by Administrator on 2018/7/27.
//
#include <termios.h>
#include <unistd.h>
#include <sys/types.h>
#include <sys/stat.h>
#include <fcntl.h>
#include <string.h>
#include <jni.h>
#include <fcntl.h>
#include <sys/ioctl.h>
#include <errno.h>

#include "com_zhawenqing_retrofit_gpio_GPIOControl.h"

#include "android/log.h"
static const char *TAG="GpioDemo";
#define LOGI(fmt, args...) __android_log_print(ANDROID_LOG_INFO,  TAG, fmt, ##args)
#define LOGD(fmt, args...) __android_log_print(ANDROID_LOG_DEBUG, TAG, fmt, ##args)
#define LOGE(fmt, args...) __android_log_print(ANDROID_LOG_ERROR, TAG, fmt, ##args)

JNIEXPORT jint JNICALL Java_com_zhawenqing_retrofit_gpio_GPIOControl_nativeReadGpio(JNIEnv *env, jclass thiz, jstring path)
{
	if(path == NULL)
	{
		return -1;
	}
	const char *chars = (*env)->GetStringUTFChars(env, path, NULL);
	int ret = readData(chars);
	(*env)->ReleaseStringUTFChars(env, path, chars);
	return ret;
}

JNIEXPORT jint JNICALL Java_com_zhawenqing_retrofit_gpio_GPIOControl_nativeWriteGpio(JNIEnv *env, jclass thiz, jstring path, jstring value)
{
	if(path == NULL)
	{
		return -1;
	}
	const char *chars = (*env)->GetStringUTFChars(env, path, NULL);
	const char *valueStr = (*env)->GetStringUTFChars(env, value, NULL);
	int ret = writeData(valueStr, strlen(valueStr), chars);
	(*env)->ReleaseStringUTFChars(env, path, chars);
	(*env)->ReleaseStringUTFChars(env, value, valueStr);
	return ret;
}

int readData(const char * filePath)
{
	int fd;
	int value;
	fd = open(filePath, O_RDWR);
	if(fd < 0){
		return -1;
	}
	char valueStr[32];
	memset(valueStr, 0, sizeof(valueStr));
	read(fd, (void *)valueStr, sizeof(valueStr) - 1);
	char *end;
	if(strncmp(valueStr,"in",2) == 0)
	{
		value = 0;
	}
	else if(strncmp(valueStr,"out",3) == 0)
	{
		value = 1;
	}
	else
	{
		value = strtol(valueStr, &end, 0);
		if(end == valueStr){
			close(fd);
			return -1;
		}
	}

	close(fd);
	return value;
}

int writeData(const char * data,int count,const char * filePath)
{
	int fd;
	fd = open(filePath, O_RDWR);
	if(fd < 0)
	{
		return -1;
	}
	int ret = write(fd, data, count);
	close(fd);
	return 0;
}
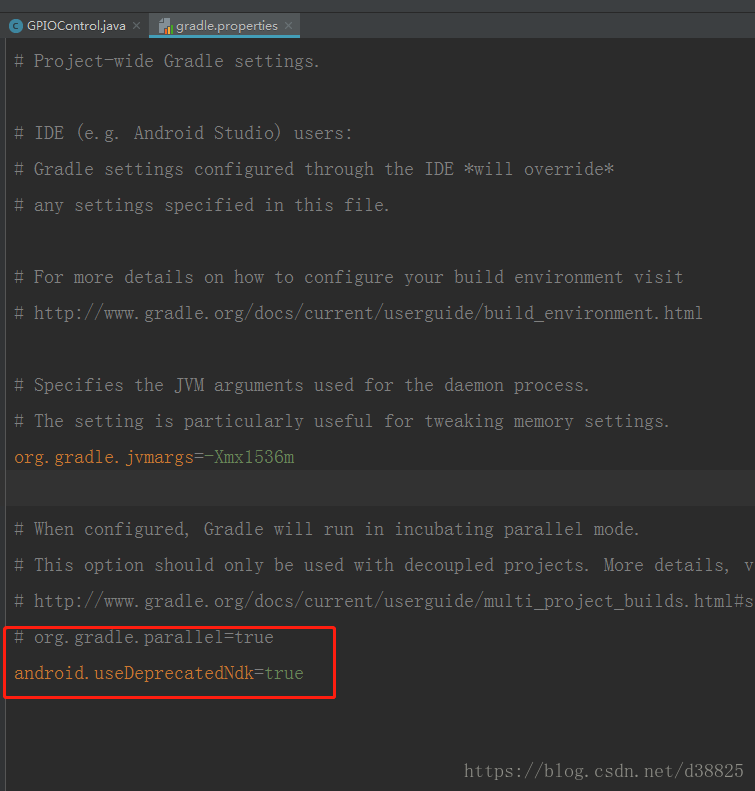
7.配置并打开ndk,在项目的gradle.properties文件中添加android.useDeprecatedNdk=true
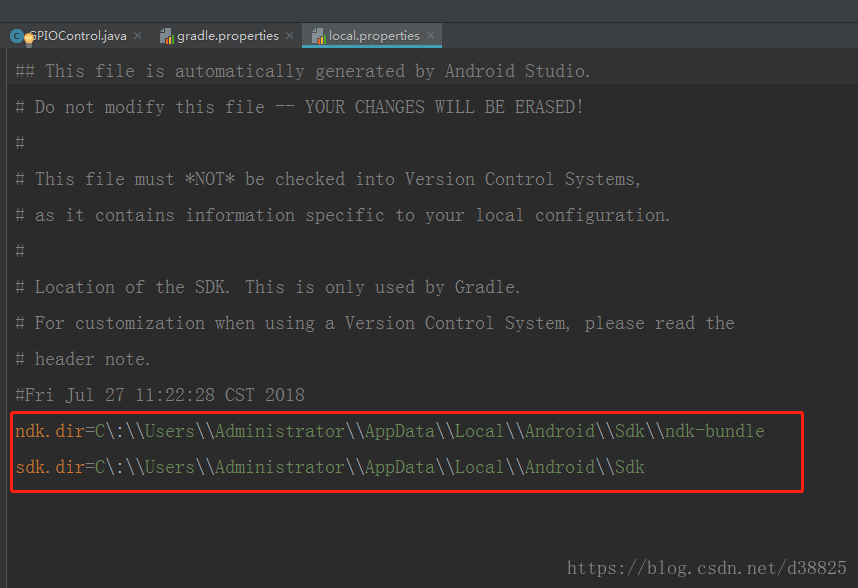
8.打开项目中local.properties文件,确认是否配置ndk
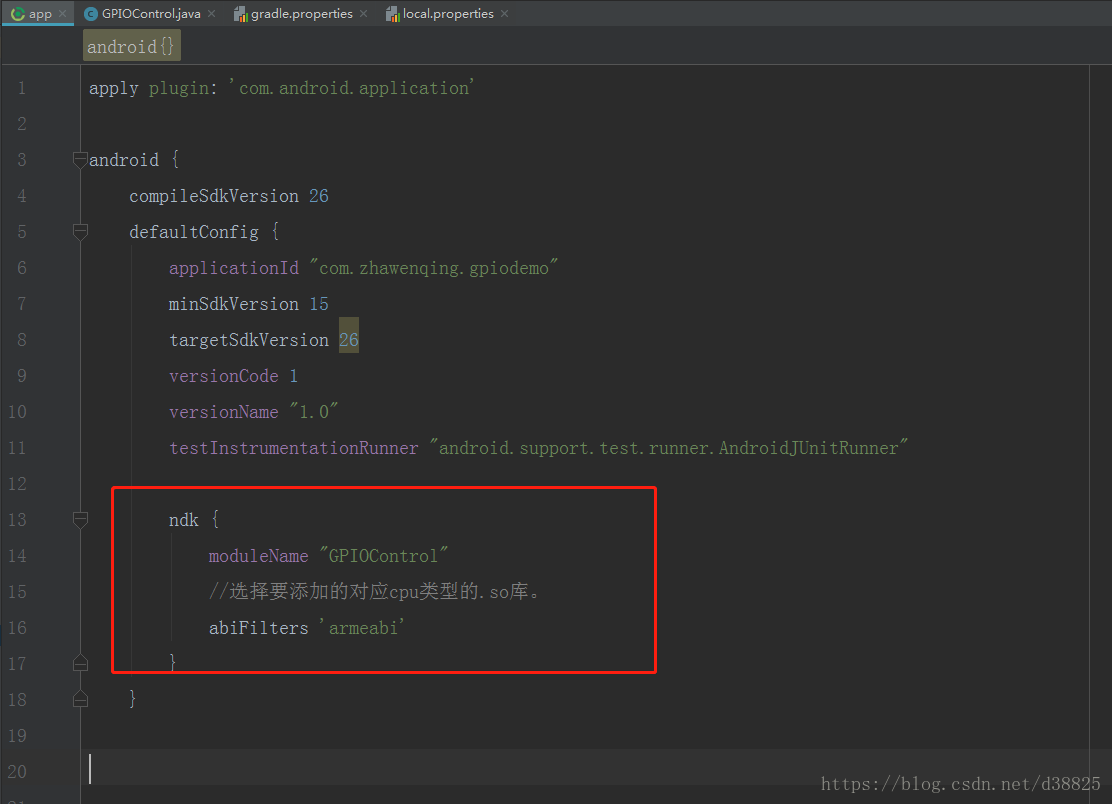
9.在app的build.gradle文件中添加ndk配置,这个需要具体根据开发用的Android板CPU框架,moudleName这个自定义的,保持和新建的方法封装库名称一致
ndk {
            moduleName "GPIOControl"
            //选择要添加的对应cpu类型的.so库。
            abiFilters 'armeabi'
        }

10.配置ndk-build
点击file->setting->tools->external tools 点击+新建一个tool
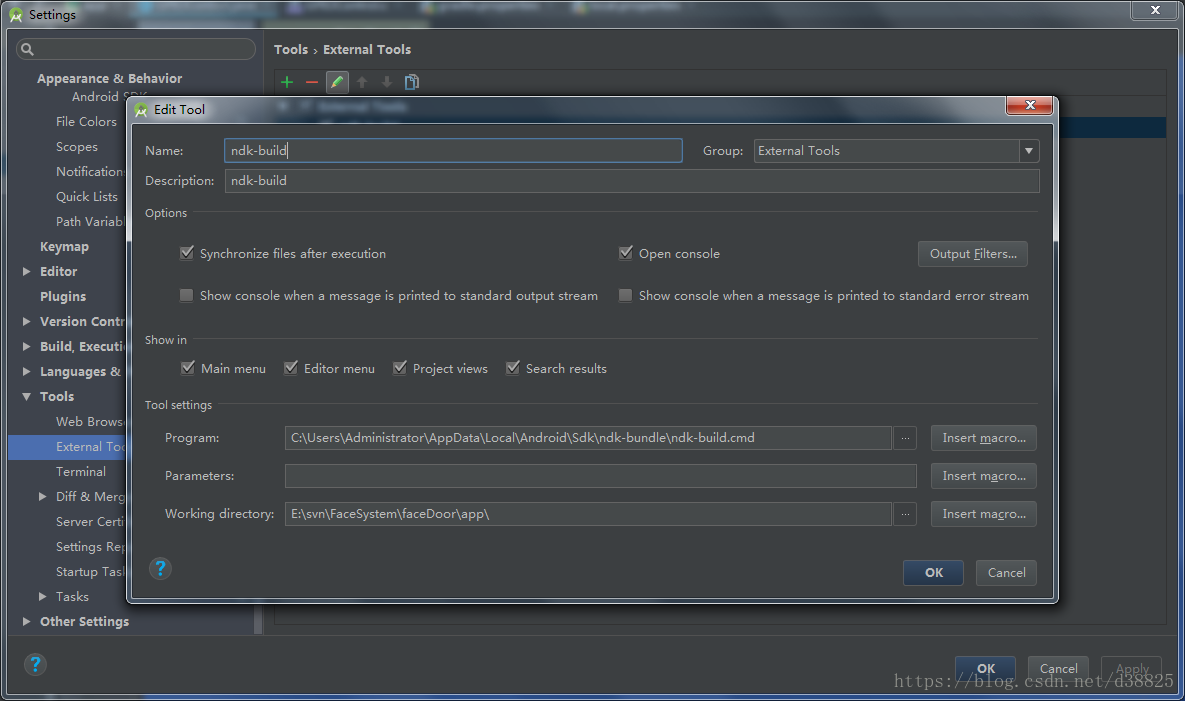
具体配置如下:
Program:C:\Users\Administrator\AppData\Local\Android\Sdk\ndk-bundle\ndk-build.cmd

Working directory: E:\svn\FaceSystem\faceDoor\app\
点击OK,完成ndk-build配置
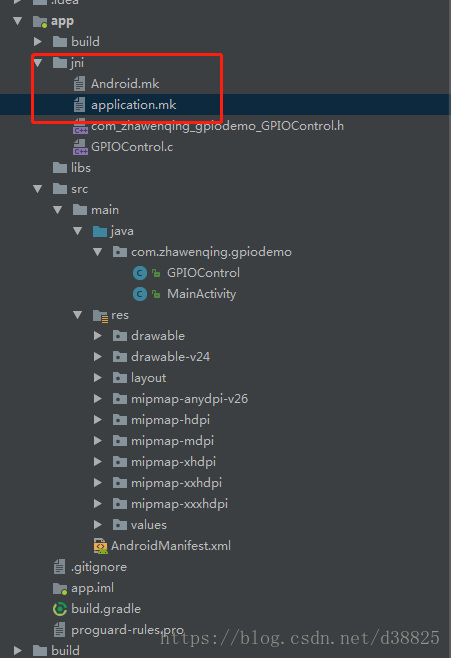
11.在jni文件夹创建.mk文件,让ndk-build动态生成so库
12…mk文件语法
1> LOCAL_PATH := $(call my-dir)
每个Android.mk文件必须以定义LOCAL_PATH为开始,它用于在开发tree中查找源文件,宏my-dir 则由Build System提供,返回包含Android.mk的目录路径。
2> include $(CLEAR_VARS)
CLEAR_VARS 变量由Build System提供。并指向一个指定的GNU Makefile,由它负责清理很多LOCAL_xxx.
3> LOCAL_MODULE模块必须定义,以表示Android.mk中的每一个模块。名字必须唯一且不包含空格
4> LOCAL_SRC_FILES变量必须包含将要打包如模块的C/C++ 源码,不必列出头文件,build System 会自动帮我们找出依赖文件。
application.mk文件代码:
APP_ABI := armeabi armeabi-v7a x86
Android.mk文件代码:
LOCAL_PATH := $(call my-dir)
include $(CLEAR_VARS)
TARGET_PLATFORM := android-23
LOCAL_MODULE := GPIOControl
LOCAL_SRC_FILES := GPIOControl.c
LOCAL_LDLIBS := -llog
include $(BUILD_SHARED_LIBRARY)
13.mk文件创建好后,我们重新ndk-build一下,我们将会成功编译好so库,将会自动生成一个obj文件夹
14.还需要手动创建一个jniLibs文件夹,将我们手动编译完成的so库复制,如果读取不到jniLibs文件夹里面的资源,需要
    sourceSets {
        main {
            jniLibs.srcDirs = ['libs']
        }
    }
对于以上的问题,如果出现以下错误
Error: Flag android.useDeprecatedNdk is no longer supported and will be removed in the next version of Android Studio.  Please switch to a supported build system.
  Consider using CMake or ndk-build integration. For more information, go to:
   https://d.android.com/r/studio-ui/add-native-code.html#ndkCompile
   To get started, you can use the sample ndk-build script the Android
   plugin generated for you at:
   E:\SwimmingSpace\ndktest\build\intermediates\ndk\debug\Android.mk
  Alternatively, you can use the experimental plugin:
   https://developer.android.com/r/tools/experimental-plugin.html
  To continue using the deprecated NDK compile for another 60 days, set
  android.deprecatedNdkCompileLease=1515138691572 in gradle.properties
这种错误是由于启动ndk时出错,在gradle.properties文件里把android.useDeprecatedNdk去掉换成android.deprecatedNdkCompileLease=1515138691572就行了。具体后面的值需要根据错误提示中的提示值填入就可以了。
调用GPIO
GpioControl.writeGpioDirection(192, 1); //设置PG0为输出
int nDirect = GpioControl.readGpioDirection(192); //读取PG0的输入输出状态
GpioControl.writeGpioValue(192, 1); //PG0为输出时,设置为高电平
int nValue = GpioControl.readGpioValue(192); //读取PG0的输出电平
具体PG口对应的序列号需要参考厂家的规格书上的定义。我这边是PG0对应192,以此类推。
最后如果出现奇特的编译器错误,那么就尝试从头开始,每完成一个步骤都尽量rebuild一下项目。NDK开发中jni的配置是一门玄学,需要静下心来慢慢探索属于自己的方法。我也是折腾了一天才能总结出以上步骤。


 410
410


 被折叠的 条评论
为什么被折叠?
被折叠的 条评论
为什么被折叠?
 到【灌水乐园】发言


