


一 简述
bones到目前为止没有提供基本的list控件,原因很简单list的风格多变,基本上在PC上使用DUI的软件 它们的列表都是自定义的。
原来打算只是写一个简单的列表来做个示范,恰巧前几天看到QQ电脑管家的一个列表比较有意思所以花了点时间模拟了一下,下文将简单讲下如何写这个列表。
二 列表结构
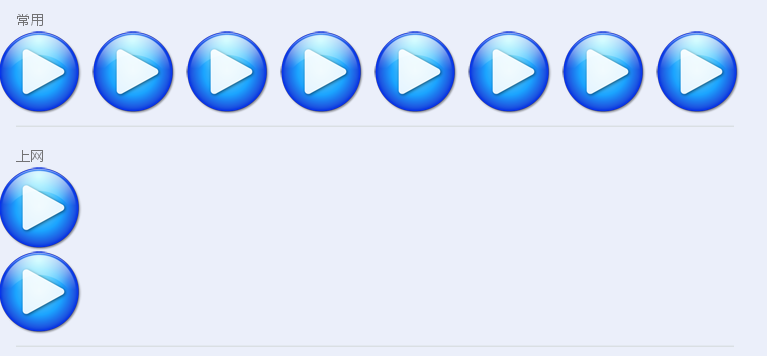
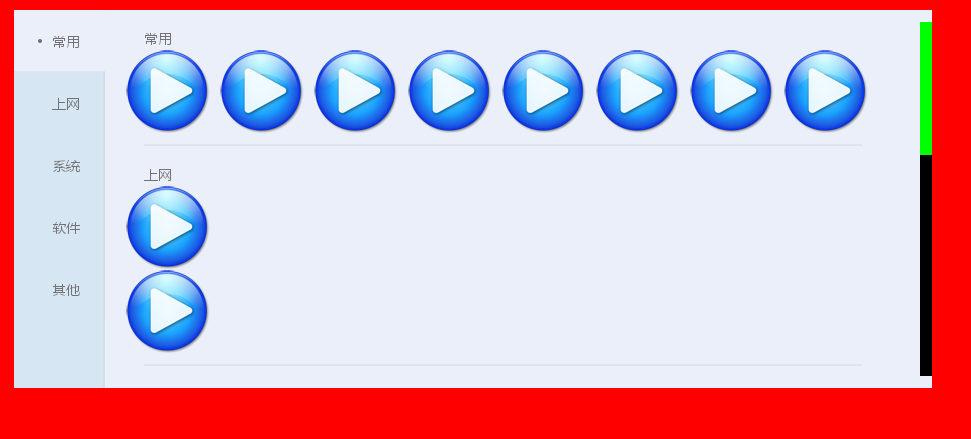
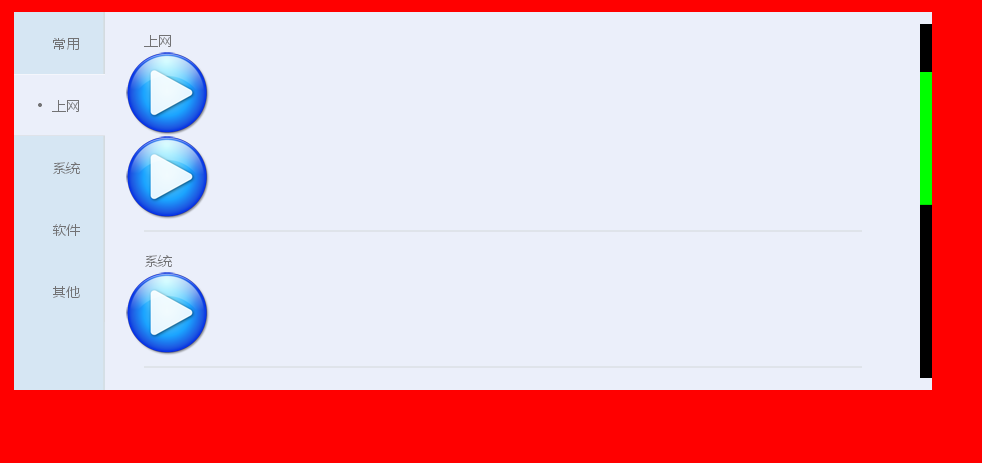
先看下电脑管家的列表长什么样 如下:
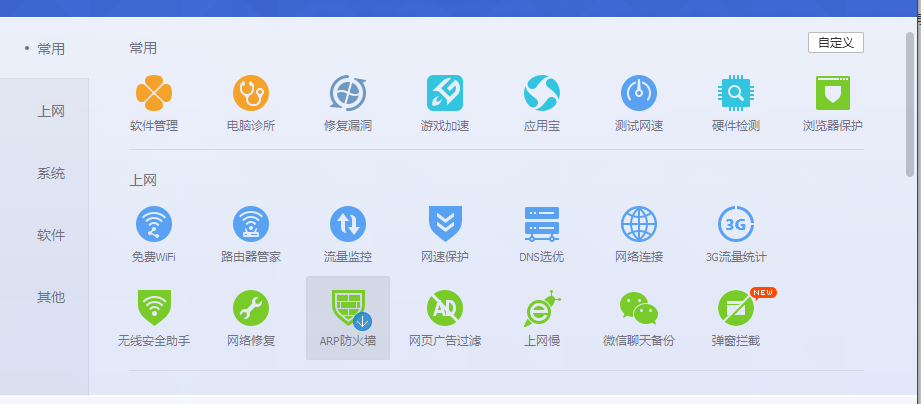
这个列表左边是个tab用于切页, 中间是一个可滚动的列表 右边则是滚动条
tab的切换会导致中间列表和滚动条滚动到正确的位置,点击滚动条滚动时列表也会跟着滚动 并且在滚动结束时(通常是鼠标左键弹起) tab也要切换到正确的页面
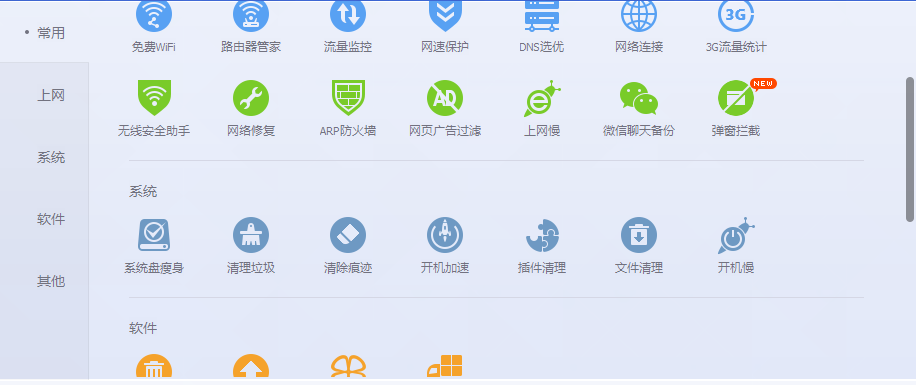
拖动滚动条
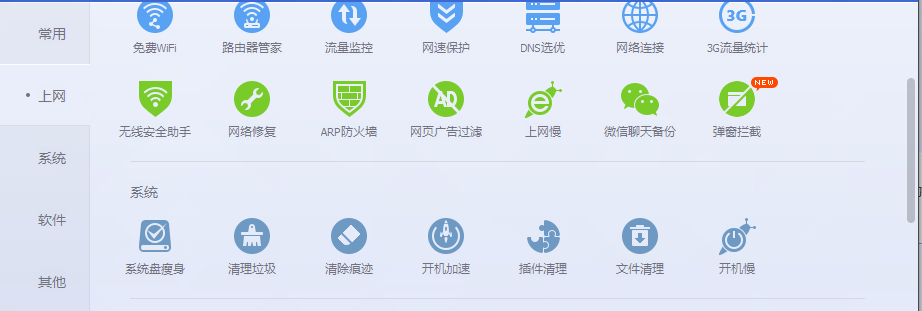
滚动结束
三 模拟列表
模拟列表中的用到的位置 尺寸和颜色 都是我用截图工具测量的,所以会跟电脑管家的列表有点区别,
诸如 常用条目下的 软件管理 电脑诊所等按钮用到的素材 我直接将前面演示按钮的位图缩放了一下来显示,
滚动条还是跟以前一样使用色块(没素材)。
由于缺乏各种素材 所以外观仍然不是很好看,但作为一个demo足够了。
3.1 scrollbar
这里使用 前面教程编写的scrollbar,但是要针对这个列表的逻辑做点修改
scrollbar会在mousemove事件中发出drag通知
--self是滑块
function mod.onSliderMouseMove(self, e)
    if self.click_ then
        local x, y = e:getRootLoc()
        local ydelta = y - self.last_y_
        local xdelta = x - self.last_x_
        local parent = self:getParent()
        local w, h = self:getSize()
        local cur = 0
        local horiz = parent.horiz_
        if horiz then
            cur = xdelta / w * parent.view_ + self.last_cur_
        else
            cur = ydelta / h * parent.view_ + self.last_cur_
        end
        if type(parent.onDelegate_) == "function" then
            parent:onDelegate_("drag", cur)
        end
    end
end
在mouse up事件中发送release通知
function mod.onSliderMouseUp(self, e)
    if e:isLeftMouse() then
        self.click_ = false
        self.last_x_ = -1
        self.last_y_ = -1

        local parent = self:getParent()
        if type(parent.onDelegate_) == "function" then
            parent:onDelegate_("release", parent.cur_)
        end
    end
end
要响应这2个高级事件 可以调用setDelegate方法
local function setDelegate(self, delegate)
    self.onDelegate_ = delegate
end
3.2 tab
tab前文没有讲过如何写,但这里用到了所以还需要写一个tab
tab由于电脑管家没有使用图片 所以我直接使用截图工具 看了下像素,虽然不是完全一样 但也差不了多少
tab使用扩展标签tabctrl来表示,同时tab是有多个子项 这里使用扩展标签tabitem来表示子项
3.2.1 tabitem
tabitem的结构
  <!--底色-->
  <shape>
    <!--上-->
    <shape></shape>
    <!--下-->
    <shape></shape>
    <!--右-->
    <shape></shape>
    <!--圆点-->
    <shape></shape>
    <!--文字-->
    <text></text>
    <notify name ='onCreate' module='tabitem' func='onCreate'></notify>
    <notify name ='onSizeChanged' module='tabitem' func='onSizeChanged'></notify>
    <event name ="onMouseMove" phase ="target" module ="tabitem" func ="onMouseMove"></event>
    <event name ="onMouseLeave" phase ="target" module ="tabitem" func ="onMouseLeave"></event>
    <event name ="onMouseDown" phase ="target" module ="tabitem" func ="onMouseDown"></event>
    <event name ="onMouseUp" phase ="target" module ="tabitem" func ="onMouseUp"></event>
  </shape>
tabitem在鼠标事件中改变自己的状态 来控制内置标签的显示
        if state == selected then
            self:setColor(0xffebeffa)
            self.top_line_:setVisible(true)
            self.right_line_:setVisible(false)
            self.bottom_line_:setVisible(true)
            self.circle_:setVisible(true)
        elseif state == highlight then
            self:setColor(0xffd7dced)
            self.top_line_:setVisible(false)
            self.right_line_:setVisible(true)
            self.bottom_line_:setVisible(false)
            self.circle_:setVisible(false)

        elseif state == common then
            self:setColor(0)

            --上颜色
            self.top_line_:setVisible(false)
            --右
            self.right_line_:setVisible(true)
            --下隐藏
            self.bottom_line_:setVisible(false)
            --圆隐藏
            self.circle_:setVisible(false)
            --text不变
        end
完整代码见tabitem.xml tabitem.lua
3.2.2 tabctrl
tabctrl由于包含5页 结构比较简单
  <shape>
    <!--垂直的一条线-->
    <shape></shape>
    <tabitem></tabitem>
    <tabitem></tabitem>
    <tabitem></tabitem>
    <tabitem></tabitem>
    <tabitem></tabitem>
    <notify name ='onCreate' module='tabctrl' func='onCreate'></notify>
    <notify name ='onSizeChanged' module='tabctrl' func='onSizeChanged'></notify>
  </shape>
tabctrl主要是有一个item的互斥 即一页被选中其他页都变为未选中状态
--这里的self是指 被点击的item
local function itemSelected(self)
    if self:isSelected() then
        return
    end

    local ctrl = self:getParent()
    local im = 0
    for i = 1, 5 do
        if self == ctrl.items_[i] then
            ctrl.items_[i]:setSelected(true)
            im = i
        else
            ctrl.items_[i]:setSelected(false)
        end
    end
    if type(ctrl.onDelegate_) == "function" then
        ctrl:onDelegate_(im)
    end
end
同样tabctrl会发送一个页面切换的事件,要处理这个事件同样调用tabctrl的setDelegate
--设置回调
local function setDelegate(self, delegate)
    self.onDelegate_ = delegate
end
注意这里tabctrl我直接包含了5个listitem节点,比较标准的写法则是有一个addItem的方法,在这个方法里动态调用bones.createObject来创建listitem节点,但我比较懒 所以就这么写了(listitem里动态创建button节点)
完整代码见 tabctrl.xml tabctrl.lua
3.2.3 效果图
3.3 list
中间的列表是一个可滚动显示的控件,这里使用扩展标签listctrl来表示,同样它是包含多个子项的所以也需要listitem来代表子项
3.3.1 listitem
listitem的结构:
  <!--线-->
  <shape>
    <!--标题-->
    <text></text>
    <notify name ='onCreate' module='listitem' func ='onCreate'></notify>
    <notify name ='onSizeChanged' module='listitem' func='onSizeChanged'></notify>
  </shape>
看起来比较简单 但内部使用了动态创建button来表示响应区域的
    local item = bones.createObject(self, "button")
    item:setBitmap(common, highlight, press, disable)
完整代码见listitem.xml listitem.lua
3.3.2 listctrl
listctrl 是可以滚动显示的,看过前面教程的人应该可以猜到listctrl肯定是包含一个scroller的
listctrl的结构:
  <scroller>
    <notify name ='onCreate' module='listctrl' func ='onCreate'></notify>
    <!--注册通知 关联滚动条-->
    <notify name ="onScrollRange" module ="listctrl" func ="onScrollRange"></notify>
    <notify name ="onScrollPos" module ="listctrl" func ="onScrollPos"></notify>

    <listitem></listitem>
    <listitem></listitem>
    <listitem></listitem>
    <listitem></listitem>
    <listitem></listitem>

  </scroller>
listctrl的scroller用法同样要做点修改,这里修改成事件传递而不是想前面教程简单粗暴的调用scrollbar
function mod.onScrollRange(self, min, max, view, horiz)
    if not horiz and type(self.onDelegate_) == "function" then
        self:onDelegate_("range", min, max, view)
    end
end

function mod.onScrollPos(self, cur, horiz)
    if not horiz and type(self.onDelegate_) == "function" then
        self:onDelegate_("pos", cur)
    end
end
它发送2个高级事件 要处理这2个事件同样需要调用setDelegate
local function setDelegate(self, delegate)
    self.onDelegate_ = delegate
end
完整代码见listctrl.xml listctrl.lua
3.3.3 效果图
3.4 组合
3.4.1 完整的控件
完整的列表控件结构
      <!--滚动list-->
      <shape class="list">
        <tabctrl></tabctrl>
        <!--list ctrl 就是scroller 注册scroller通知-->
        <listctrl></listctrl>
        <!--垂直滚动条-->
        <scrollbar></scrollbar>

        <notify name ="onCreate" module ="shape" func ="onListCreate"></notify>
        <notify name ="onSizeChanged" module ="shape" func ="onListSizeChanged"></notify>

      </shape>
在onCreate中需要注册回调来响应事件
    --先注册回调
    self.list_:setDelegate(onListDelegate)
    self.bar_:setDelegate(onBarDelegate)
    self.tab_:setDelegate(onTabDelegate)
对各个子控件事件的处理
--点击tab页产生的事件
local function onTabDelegate(self, im)
    local scroll_list = self:getParent()
    scroll_list.list_:scrollItem(im)
end
--list 滚动变化产生的事件
local function onListDelegate(self, action, min, max, view)
local scroll_list = self:getParent()
if "range" == action then
scroll_list.bar_:setScrollRange(min, max, view)
elseif "pos" == action then
local cur = min
scroll_list.bar_:setScrollPos(cur)
end
end--scrollbar 鼠标产生的高级事件
local function onBarDelegate(self, action, cur)
local scroll_list = self:getParent()
--拖动滚动滑块
if "drag" == action then
scroll_list.list_:setScrollPos(cur, false)
--鼠标在滑块上弹起 要将tab切换到list首个显示的item
elseif "release" == action then
scroll_list.tab_:switchItem(scroll_list.list_:getItem(cur))
end
end完整代码见test.xml test.lua
3.4.2 效果
本篇完整代码下载:
http://blog.csdn.net/dalixux/article/details/48830721


 495
495

 被折叠的 条评论
为什么被折叠?
被折叠的 条评论
为什么被折叠?
 到【灌水乐园】发言


