


 本文详细介绍了如何使用Firebase云消息传递在Android应用中实现推送通知。首先解释了推送通知的概念和作用,然后阐述了如何设置Firebase项目,并逐步指导读者添加依赖、获取设备令牌、创建服务以接收和显示通知。通过这个教程,读者将学会使用Firebase为Android应用添加推送通知功能。
这篇文章介绍了如何在Android中发送推送通知 。 过去,我们曾经使用Google Cloud消息传递服务在Android中发送推送通知。 最近,它引入了一种使用Firebase发送推送数据的新方法。 即使基本原理保持不变,Firebase还是引入了一些有趣的新功能。 Firebase支持其他服务,例如:
- 认证方式
- 远程配置
- 崩溃报告
这篇文章将逐步介绍如何从Firebase控制台向应用程序发送推送通知。
什么是推送通知?
在深入研究如何在Android中发送通知的细节之前,弄清什么是推送通知很有用。 使用Android推送通知,我们的应用可以将新事件通知用户。 即使我们的应用程序不在前台运行,也会发生这种情况。 使用此服务,我们可以在发生新事件时将数据从服务器发送到我们的应用程序。 保持连接到服务器(拉方法)以询问是否有新事件,这种范例的效率要高得多。
使用推送通知,我们可以使用户了解事件,而不会耗尽智能手机的电池。 当用户收到通知时,该通知将作为自定义图标显示在状态栏中。 发送推送通知时可以使用不同的范例:
消息到单个设备
给主题的消息(向订阅了特定主题的多个设备发送相同的消息。这实现了模型发布者/订阅者)
发送给群组的消息(多个设备共享用于识别智能手机的相同密钥)

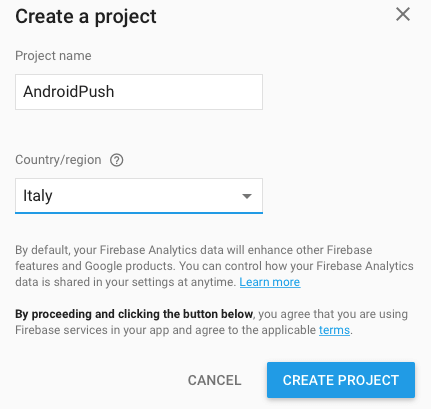
设置Firebase云消息传递项目
现在是时候开始了! 创建一个帐户以访问Firebase控制台并定义一个项目:
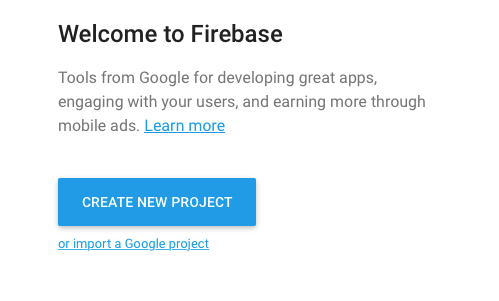
然后:
创建项目后,必须添加应用程序的程序包名称。 请注意,在Android Studio和Firebase控制台中使用相同的程序包名称:
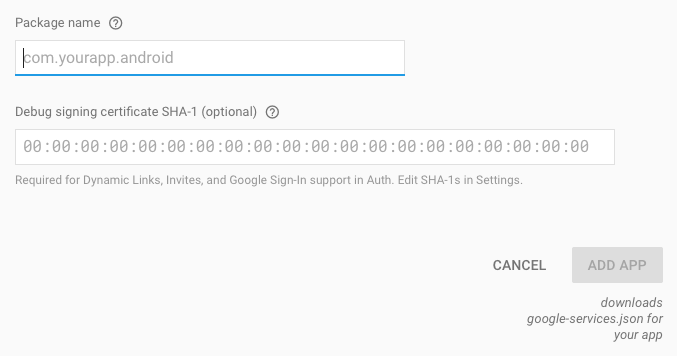
在此过程结束时,将在Firebase上配置您的项目,并准备开发Android应用程序。 最后,您将获得一个必须在应用程序模块级别复制的json文件。
如何使用Firebase实施Android推送通知
现在,我们可以开发与Firebase集成的Android应用。 第一步,我们必须将Firebase添加到我们的应用程序并修改gradle文件。 在项目级别,让我们将gradle fille修改为:
buildscript {
    repositories {
        jcenter()
    }
    dependencies {
        classpath 'com.android.tools.build:gradle:2.1.3'
        classpath 'com.google.gms:google-services:3.0.0'
    }
}
并使用模块名称(通常命名为app):
....
dependencies {
    compile fileTree(dir: 'libs', include: ['*.jar'])
    testCompile 'junit:junit:4.12'
    compile 'com.android.support:appcompat-v7:24.2.0'
    compile 'com.google.firebase:firebase-messaging:9.4.0'
}

apply plugin: 'com.google.gms.google-services'
在这种情况下,我们添加了消息传递依赖性。 一旦配置了gradle文件,下一步就是创建我们的应用程序。 在MainActivity我们添加一个Button以获取当前token 。 此令牌很重要,因为我们在Firebase控制台中使用它来设置正确的目标设备。
让我们假设,我们已经在Activity类中定义了包含按钮的布局:
Button btn = (Button) findViewById(R.id.btn);
btn.setOnClickListener(new View.OnClickListener() {
    @Override
    public void onClick(View view) {
      String tkn = FirebaseInstanceId.getInstance().getToken();
      Toast.makeText(MainActivity.this, "Current token ["+tkn+"]",
                     Toast.LENGTH_LONG).show();
      Log.d("App", "Token ["+tkn+"]");
     }
   });
} 请注意,我们使用FirebaseInstanceId单例来获取当前实例,然后获取当前令牌。 生成令牌可能需要一段时间,因此您可以在开始时获取一个空值。
此外,我们可以使用扩展FirebaseInstanceIdService的自定义服务来监视令牌创建过程,并在令牌可用时得到通知。 在这种情况下,我们重写onTokenRefresh方法。
public class FireIDService extends FirebaseInstanceIdService {
    @Override
    public void onTokenRefresh() {
        String tkn = FirebaseInstanceId.getInstance().getToken();
        Log.d("Not","Token ["+tkn+"]");

    }
}
在这种方法中,我们只记录令牌,但是它可以在真实应用中用于将令牌发送到服务器,以便服务端将其存储。
不要忘记在Manifest.xml声明此服务。
..
<service
     android:name=".FireIDService">
     <intent-filter>
        <action android:name="com.google.firebase.INSTANCE_ID_EVENT"/>
     </intent-filter>
 </service>
最后,我们实现了处理传入的推送通知的服务:
public class FireMsgService extends FirebaseMessagingService {

    @Override
    public void onMessageReceived(RemoteMessage remoteMessage) {
        super.onMessageReceived(remoteMessage);

        Log.d("Msg", "Message received ["+remoteMessage+"]");

        // Create Notification
        Intent intent = new Intent(this, MainActivity.class);
        intent.addFlags(Intent.FLAG_ACTIVITY_CLEAR_TOP);
        PendingIntent pendingIntent = PendingIntent.getActivity(this, 1410,
                        intent, PendingIntent.FLAG_ONE_SHOT);

        NotificationCompat.Builder notificationBuilder = new
                 NotificationCompat.Builder(this)
                .setSmallIcon(R.drawable.ic_stat_name)
                .setContentTitle("Message")
                .setContentText(remoteMessage.getNotification().getBody())
                .setAutoCancel(true)
                .setContentIntent(pendingIntent);
    }
} 在onMessageReceived方法中,我们仅显示包含已发送消息的通知。
运行该应用程序,我们将在以下视频中显示结果:
在本文的最后,您了解了如何在带Firebase的Android中使用推送通知。
翻译自: https://www.javacodegeeks.com/2016/09/push-notification-android-using-firebase-cloud-messaging.html


 3197
3197

 被折叠的 条评论
为什么被折叠?
被折叠的 条评论
为什么被折叠?
 到【灌水乐园】发言


