


QuickControl2
简介
quickcontrol 用于快速构建风格化的用户界面
它包括了以下几个预制的组件风格
- Default QT 默认风格
- Universal windows 桌面风格
- Material 谷歌推出的 MaterialDesign 风格
- Fusion
- Imagine
风格设置
官方文档对于风格设置提供了两种方式,此处就采用其中的一种,即使用 QQuickStyle
首先在 pro 文件内,添加对应库
QT += quick quickcontrols2
之后来到 main.cpp 设置我们的整体风格
注意,风格必须在 qml 初始化前设置,且一旦设置则全局使用此风格,不可变换!
#include <QGuiApplication>
#include <QQmlApplicationEngine>

// 第一步,导入头文件
#include <QQuickStyle>


int main(int argc, char *argv[])
{
#if QT_VERSION < QT_VERSION_CHECK(6, 0, 0)
    QCoreApplication::setAttribute(Qt::AA_EnableHighDpiScaling);
#endif

    QGuiApplication app(argc, argv);

    // 第二步,应用风格
    // 这里使用了google的material风格
    QQuickStyle::setStyle("Material");

    ...

    return app.exec();
}
最后回到我们的 qml 主文件,写一段简单的代码测试一下风格
main.qml 代码清单
import QtQuick 2.12
import QtQuick.Controls 2.12
// 默认此处根组件应该是Window,我这里用了ApplicationWindow,效果是一致的
ApplicationWindow {
visible: true
width: 640
height: 480
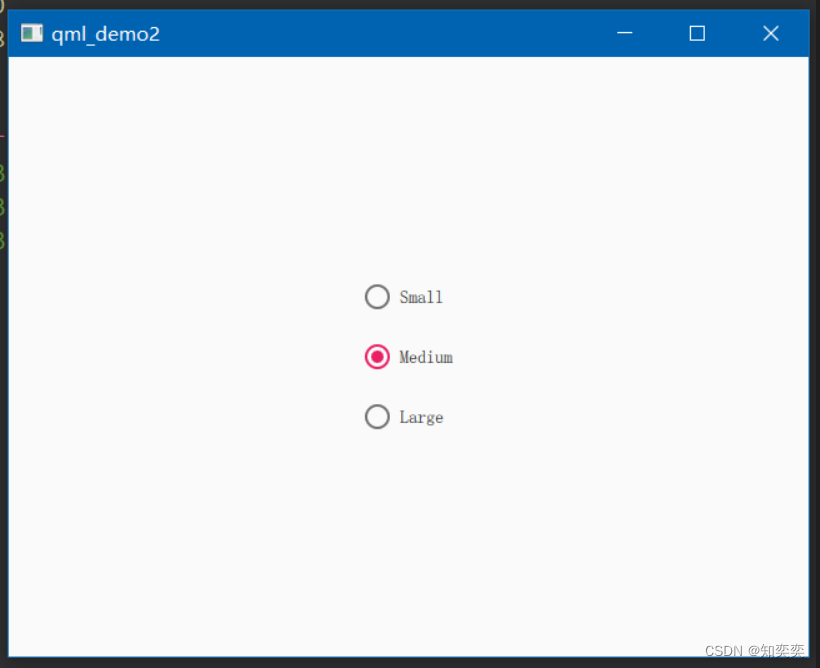
// 创建一个列表,包含三个单选按钮
Column {
anchors.centerIn: parent
RadioButton { text: qsTr("Small") }
RadioButton { text: qsTr("Medium"); checked: true }
RadioButton { text: qsTr("Large") }
}
}
如下图展示效果,风格成功应用上去了!
control 配置文件
对于普通项目,为便于开发,我们可以额外新建一个配置文件用于管理当前应用的整体风格
在与 main.qml 同级的目录下新建配置文件 qtquickcontrols2.conf (必须是这个名字!)
填入下方配置
; This file can be edited to change the style of the application
; Read "Qt Quick Controls 2 Configuration File" for details:
; http://doc.qt.io/qt-5/qtquickcontrols2-configuration.html

; 配置全局风格为MaterialDesign2
[Controls]
Style=Material
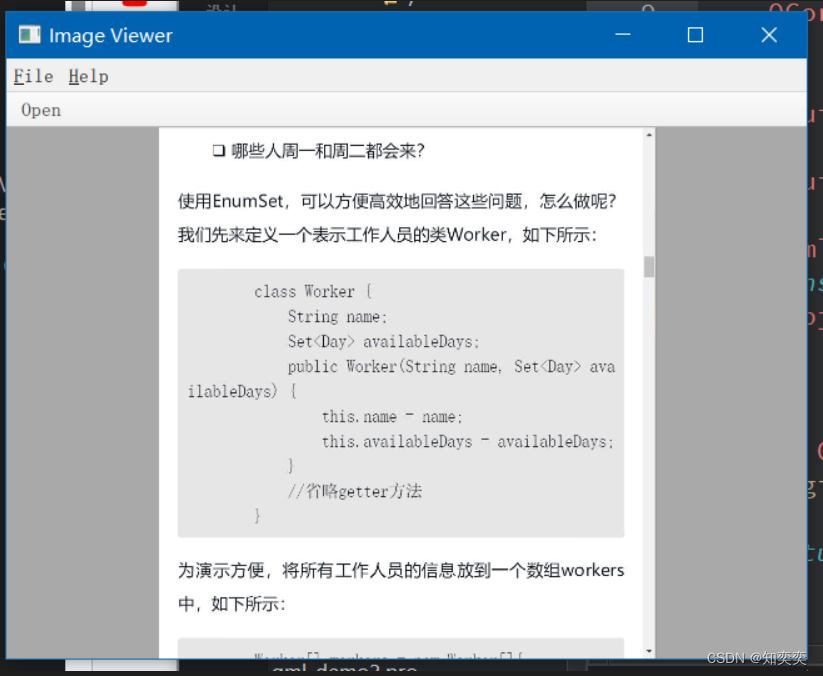
图像浏览器案例
推荐风格选择 Fusion
功能很简单,添加菜单栏和工具栏,选择文件并打开;
主要关注点为 FileDialog 的使用
下面是 main.qml 的完整代码
import QtQuick 2.12
import QtQuick.Controls 2.12
import QtQuick.Dialogs 1.2

ApplicationWindow {
    visible: true
    width: 640
    height: 480
    title: qsTr("Image Viewer")

    // 顶部菜单栏
    menuBar: MenuBar {
        // 主菜单项
        Menu {
            title: qsTr("&File")
            // 子菜单项
            MenuItem {
                text: qsTr("&Open...")
                icon.name: "document-open"
                // 点击后触发对应FileDialog
                onTriggered: fileOpenDialog.open()
            }
        }

        Menu {
            title: qsTr("&Help")
            MenuItem {
                text: qsTr("&About...")
                onTriggered: aboutDialog.open()
            }
        }
    }

    // 顶部工具栏
    header: ToolBar {
        // 流式布局
        Flow {
            anchors.fill: parent
            // 工具项
            ToolButton {
                text: qsTr("Open")
                icon.name: "document-open"
                onClicked: fileOpenDialog.open()
            }
        }
    }

    // 设置背景颜色
    background: Rectangle {
        color: "darkGray"
    }

    // 图片显示组件
    Image {
        id: image
        anchors.fill: parent
        fillMode: Image.PreserveAspectFit
        asynchronous: true
    }

    // 打开文件对话框
    FileDialog {
        id: fileOpenDialog
        title: "Select an image file"
        folder: shortcuts.documents
        nameFilters: [
            "Image files (*.png *.jpeg *.jpg)",
        ]
        onAccepted: {
            image.source = fileOpenDialog.fileUrl
        }
    }

    // About对话框
    Dialog {
        id: aboutDialog
        title: qsTr("About")
        Label {
            anchors.fill: parent
            text: qsTr("QML Image Viewer\nA part of the QmlBook\nhttp://qmlbook.org")
            horizontalAlignment: Text.AlignHCenter
        }

        standardButtons: StandardButton.Ok
    }
}
运行结果
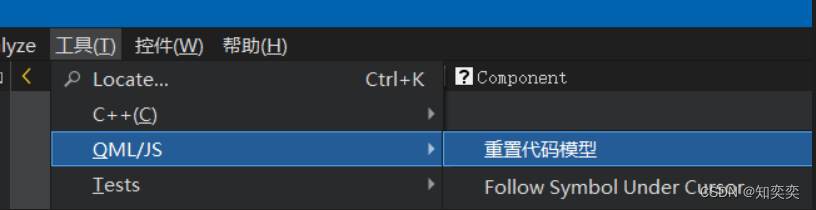
component 组件报错问题
当我们在需要使用 Component 定义一个组件时,通常会发现编辑器报错 Unknown component (M300)
解决方法很简单,点击编辑器菜单栏的 工具->QML/JS->重置代码模型 即可解决
StackView
StackView 可以实现多页面的堆栈管理,类似于 android 中的 view
下方代码实现效果:点击界面实现 push 和 pop 效果,并附带自定义界面切换效果
由于要使用动画过渡属性,故导入头文件时,control 需要使用 1.4 版本的 import QtQuick.Controls 1.4
简要介绍下方代码展示的主要内容及其对应含义:
initialItem设置初始展示页面/组件delegate设置当新页面 push 或者被 pop 后的过渡动画Component组件,根据 id 被 stackview 使用
代码清单 main.qml
import QtQuick 2.12

// 请使用1.4版本
import QtQuick.Controls 1.4

ApplicationWindow {
    visible: true
    width: 640
    height: 480
    title: qsTr("Image Viewer")

    StackView {
        id:sv
        anchors.fill: parent
        initialItem: mainView   // 设置初始页面

        // 设置页面push或pop后过渡动画
        // 动画设置中有两个可用变量:exitItem正在退出的元素;enterItem正在加入的元素;
        delegate: StackViewDelegate {
            // 当动画结束后,执行的对应方法
            function transitionFinished(properties)
            {
                properties.exitItem.x = 0
                properties.exitItem.rotation = 0
            }

            // push插入动画
            // 动画内容是:让当前组件从界面左侧移动走,然后自身再旋转360度
            pushTransition: StackViewTransition {
                // 顺序动画
                SequentialAnimation {
                    ScriptAction {
                        script: enterItem.rotation = 90
                    }
                    PropertyAnimation {
                        target: enterItem
                        property: "x"
                        from: enterItem.width
                        to: 0
                    }
                    PropertyAnimation {
                        target: enterItem
                        property: "rotation"
                        from: 90
                        to: 0
                    }
                }
                PropertyAnimation {
                    target: exitItem
                    property: "x"
                    from: 0
                    to: -exitItem.width
                }
            }

            // pop弹出动画
            // 动画内容:组件颜色渐变(非常实用,建议copy)
            popTransition: StackViewTransition {
                PropertyAnimation {
                    target: enterItem
                    property: "opacity"
                    from: 0
                    to: 1
                }
                PropertyAnimation {
                    target: exitItem
                    property: "opacity"
                    from: 1
                    to: 0
                }
            }
        }

        // 在stackview内部定义组件
        Component{
            id: mainView
            MouseArea{
                Rectangle{
                    id:mvRect
                    width: 100; height: 100
                    anchors.centerIn: parent
                    color: "orange"
                }
                onClicked: sv.push(sideView) // 点击后插入新页面
            }
        }

        // 定义的另一个组件
        Component{
            id: sideView
            MouseArea{
                Rectangle{
                    id:svRect
                    width: 100; height: 100
                    anchors.centerIn: parent
                    color: "deepskyblue"
                }
                onClicked: sv.pop() // 点击后弹出当前页面
            }
        }
    }
}
外部界面文件调用案例
注意,这里全部需要使用 import QtQuick.Controls 2.2
当然了,我们不可能把所有组件或者页面都以 Component 的形式写到 stackview 里面去,我们需要对其进行充分的解构
首先来看看主文件 main.qml
import QtQuick 2.12
import QtQuick.Controls 2.2

ApplicationWindow {
    visible: true
    width: 640
    height: 480
    title: qsTr("Image Viewer")

    StackView {
        id:sv
        anchors.fill: parent
        // 加载外部组件HomeView
        initialItem: HomeView{}
    }
}
主页面代码清单 HomeView.qml
import QtQuick 2.0
import QtQuick.Controls 2.2

// Page表示页面
Page{
    title: qsTr("Home")

    MouseArea{
        anchors.fill: parent
        Label {

            text: qsTr("Home Screen")
        }
        // sv就是我们在主页面定义的stackview组件
        // push内部直接写同级目录下的qml文件,就可以插入了
        onClicked: sv.push("SideView.qml")
    }
}
副页面代码清单 SideView.qml
import QtQuick 2.0
import QtQuick.Controls 2.2

Page{
    title: qsTr("Home")

    Button{
        id:btn
        width: 120; height: 40
        anchors.centerIn: parent
        text: qsTr("点击返回home")
        onClicked: sv.pop() // 弹出
    }
}
这里就实现了调用外部 qml 文件来执行 push 和 pop 操作
SwipeView
类似前端中的轮播图
同样的,需要注意导入 import QtQuick.Controls 2.2
import QtQuick 2.9
import QtQuick.Controls 2.2

ApplicationWindow {

    // ...

    visible: true
    width: 640
    height: 480

    title: qsTr("Side-by-side")

    // 滑动视图
    SwipeView {
        id: swipeView
        anchors.fill: parent

        // 这是三个外部Page组件,用于组成视图
        Current {
        }

        UserStats {
        }

        TotalStats {
        }

        // ...

    }

    // 导航指示点
    PageIndicator {
        anchors.bottom: parent.bottom
        anchors.horizontalCenter: parent.horizontalCenter

        currentIndex: swipeView.currentIndex
        count: swipeView.count
    }

    // ...

}
我们随机找一个 swipeview 用到的外部组件,该组件很简单,根部是 Page,点击按钮返回第一个轮播项
代码清单 TotalStats.qml
import QtQuick 2.9
import QtQuick.Controls 2.2

// 和stackview一样,这里的外部组件依然需要使用page定义
Page {
    header: Label {
        text: qsTr("Community Stats")
        font.pixelSize: Qt.application.font.pixelSize * 2
        padding: 10
    }

    Column {
        anchors.centerIn: parent
        spacing: 10
        Label {
            anchors.horizontalCenter: parent.horizontalCenter
            text: qsTr("Community statistics")
        }
        Button {
            anchors.horizontalCenter: parent.horizontalCenter
            text: qsTr("Back")
            onClicked: swipeView.setCurrentIndex(0); // 点按钮回到第一个轮播项
        }
    }
}
由于内容比较简单,其余的两个轮播项就不一一展示代码了,反正也就是对应的使用 Page 组件即可!


 1067
1067


 被折叠的 条评论
为什么被折叠?
被折叠的 条评论
为什么被折叠?
 到【灌水乐园】发言


