


前面已经使用xamarin+visual studio配置了Android开发环境,这一次,来测试一下使用visual studio开发Android程序。听上去还是蛮有趣的。
首先使用想到新建一个Android 程序。新建 ->“Blank App(android)”,向导会自动创建所需要文件列表。最终创建效果如下:
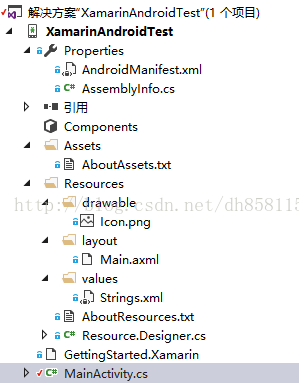
这里需要注意到的是layout文件夹下有个main.axml,相当于使用eclipse创建时候的xml文件,这里,向布局文件内拖入一些空间,与Winform程序很类似,最终得到布局文件
如下
<?xml version="1.0" encoding="utf-8"?>
<LinearLayout xmlns:android="http://schemas.android.com/apk/res/android"
    android:orientation="vertical"
    android:layout_width="match_parent"
    android:layout_height="match_parent"
    android:minWidth="25px"
    android:minHeight="25px">
    <Button
        android:text="Test Toast"
        android:layout_width="match_parent"
        android:layout_height="wrap_content"
        android:id="@+id/btnToast" />
    <TextView
        android:text="Large Text"
        android:textAppearance="?android:attr/textAppearanceLarge"
        android:layout_width="match_parent"
        android:layout_height="wrap_content"
        android:id="@+id/textView1" />
    <TextView
        android:text="Medium Text"
        android:textAppearance="?android:attr/textAppearanceMedium"
        android:layout_width="match_parent"
        android:layout_height="wrap_content"
        android:id="@+id/textView2" />
    <TextView
        android:text="Small Text"
        android:textAppearance="?android:attr/textAppearanceSmall"
        android:layout_width="match_parent"
        android:layout_height="wrap_content"
        android:id="@+id/textView3" />
    <Switch
        android:layout_width="match_parent"
        android:layout_height="wrap_content"
        android:id="@+id/switch1" />
    <RadioGroup
        android:minWidth="25px"
        android:minHeight="25px"
        android:layout_width="match_parent"
        android:layout_height="wrap_content"
        android:id="@+id/radioGroup1">
        <RadioButton
            android:layout_width="wrap_content"
            android:layout_height="wrap_content"
            android:checked="true"
            android:text="RadioButton"
            android:id="@+id/radioButton1" />
        <RadioButton
            android:layout_width="wrap_content"
            android:layout_height="wrap_content"
            android:text="RadioButton"
            android:id="@+id/radioButton2" />
        <RadioButton
            android:layout_width="wrap_content"
            android:layout_height="wrap_content"
            android:text="RadioButton"
            android:id="@+id/radioButton3" />
    </RadioGroup>
</LinearLayout>
这里使用线性布局,看上去与eclipse创建的布局语法无异。然后是针对于布局文件上的按钮进行编程,由于创建了activity,自动继承后,会重写
activity的oncreate方法,并设置main为主布局对象。与源生的Android编程不同,java中使用事件监听的方式,而C#使用委托的方法来实现点击事件。
java监听示例:
mPlayButton =(Button)v.findViewById(R.id.hellomoon_playButton);
        mPlayButton.setOnClickListener(new View.OnClickListener(){
            @Override
            public void onClick(View v) {
                mPlayer.play(getActivity());
            }
});using Android.App;
using Android.Widget;
using Android.OS;
using static Android.Views.View;
namespace App1
{
[Activity(Label = "TestApp", MainLauncher = true, Icon = "@drawable/icon")]
public class MainActivity : Activity
{
Button btnToast;
protected override void OnCreate(Bundle bundle)
{
base.OnCreate(bundle);
// Set our view from the "main" layout resource
SetContentView (Resource.Layout.Main);
btnToast = (Button)FindViewById(Resource.Id.btnToast);
btnToast.Click += BtnToast_Click;
}
private void BtnToast_Click(object sender, System.EventArgs e)
{
string str = "Button Clicked";
btnToast.Text = "Clicked!";
Toast.MakeText(ApplicationContext, str, ToastLength.Long).Show();
}
}
}


 486
486

 被折叠的 条评论
为什么被折叠?
被折叠的 条评论
为什么被折叠?
 到【灌水乐园】发言


