


背景:在上一篇文章使用consul和consul-template统一管理nginx配置文件中,我们提到使用consul实现对nginx配置文件的统一管理,本文我们将继续讲解nginx通过upsync模块,将注册进consul的服务自动加载到nginx的upstream配置文件中,实现后端服务的热更新,保证站点在发版期间的高可用。
upsync模块介绍
nginx-upsync-module 是微博开源的一个基于 Nginx 实现动态配置的模块,通过拉取 Consul 或 etcd (及其它)的上游数据,实现无需重新加载 Nginx ,动态修改后端服务器属性(weight,max_fails,down …)。
配置详解
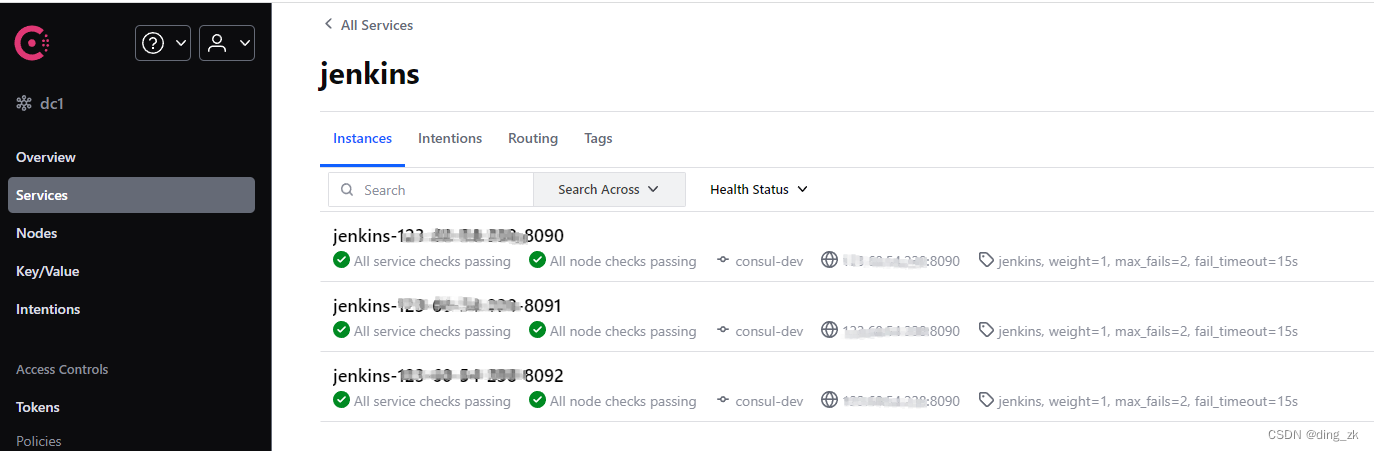
首先需要程序参考consul文档完成注册,注册结果如下图:
注册完成后,修改/data/config/upstreams/upstreams.ctmpl文件配置(此文件可参考本文开头中的链接文章,此处不再赘述)
首先创建如下目录和文件
mkdir /opt/openresty/nginx/upstreams-bak/
cd /opt/openresty/nginx/upstreams-bak/
touch demo1_upstream.conf
upstreams.ctmpl文件配置:(consul-clusterIP替换成实际的consul集群IP)
upstream demo {
upsync consul-clusterIP:8500/v1/health/service/jenkins upsync_timeout=6m upsync_interval=500ms upsync_type=consul_health strong_dependency=off;
upsync_dump_path /opt/openresty/nginx/upstreams-bak/demo1_upstream.conf;
include /opt/openresty/nginx/upstreams-bak/demo1_upstream.conf;
server  127.0.0.1:10001;
}
配置完成后执行:
/root/consul-init reload
查看生成后的nginx的upsteam文件
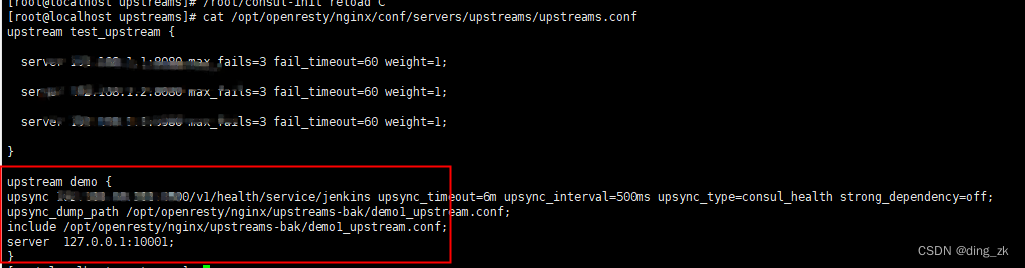
至此,配置已完成并能正确生成配置,nginx会通过upsync模块通过 upsync consul-clusterip:8500/v1/health/service/jenkins upsync_timeout=6m upsync_interval=500ms upsync_type=consul_health strong_dependency=off; 这条指令去consul中拉去对应的后端服务。是否拉取成功,可以通过上面配置中include下的文件中查看。如下图:

优势
使用此模块,首先解决了手动增删后端节点的问题,更加只能话,第二,也是最终要的一点,当后端某个节点有问题,consul会将其自动剔除,保证线上服务的正常运行。
注:在实际过程中,nginx获取upstream后端服务,只会通过upsync consul-clusterIP:8500/v1/health/service/jenkins upsync_timeout=6m upsync_interval=500ms upsync_type=consul_health strong_dependency=off;如果consul服务挂掉,为了不影响业务,才回去include中查找后端。


 574
574


 被折叠的 条评论
为什么被折叠?
被折叠的 条评论
为什么被折叠?
 到【灌水乐园】发言


