


Elastic-Job-Lite和Elastic-Job-Cloud提供统一作业接口,开发者仅需作业接口做自己的实现,再进行不同的配置以及部署即可完成一个分布式的Job。
Java配置启动
- 首先引入maven依赖
<dependency>
    <groupId>com.dangdang</groupId>
    <artifactId>elastic-job-lite-core</artifactId>
    <version>2.1.5</version>
</dependency>
- 接着实现统一作业接口进行业务操作
@Slf4j
public class MyElasticJob implements SimpleJob {
    @Override
    public void execute(ShardingContext context) {
        switch (context.getShardingItem()) {
            case 0:
                log.info("0000");
                break;
            case 1:
                log.info("1111");
                break;
            case 2:
                log.info("2222");
                break;
        }
    }
}
- 对作业进行配置工作
// 作业的基本配置内容
private static LiteJobConfiguration createJobConfiguration() {
    // 定义作业核心配置
    JobCoreConfiguration simpleCoreConfig = JobCoreConfiguration.newBuilder("demoSimpleJob", "0/15 * * * * ?", 10).build();
    // 定义SIMPLE类型配置
    SimpleJobConfiguration simpleJobConfig = new SimpleJobConfiguration(simpleCoreConfig, MyElasticJob.class.getCanonicalName());
    // 定义Lite作业根配置
    return LiteJobConfiguration.newBuilder(simpleJobConfig).build();
}
// zookeeper注册中心配置
private static CoordinatorRegistryCenter createRegistryCenter() {
    CoordinatorRegistryCenter regCenter = new ZookeeperRegistryCenter(new ZookeeperConfiguration("zk_host:2181", "elastic-job-demo"));
    regCenter.init();
    return regCenter;
}
- 启动运行作业
public class JavaMain {
    public static void main(String[] args) {
        new JobScheduler(createRegistryCenter(), createJobConfiguration()).init();
    }
}
通过控制台打印输出的内容,可以发现Demo编写运行成功,恭喜你! 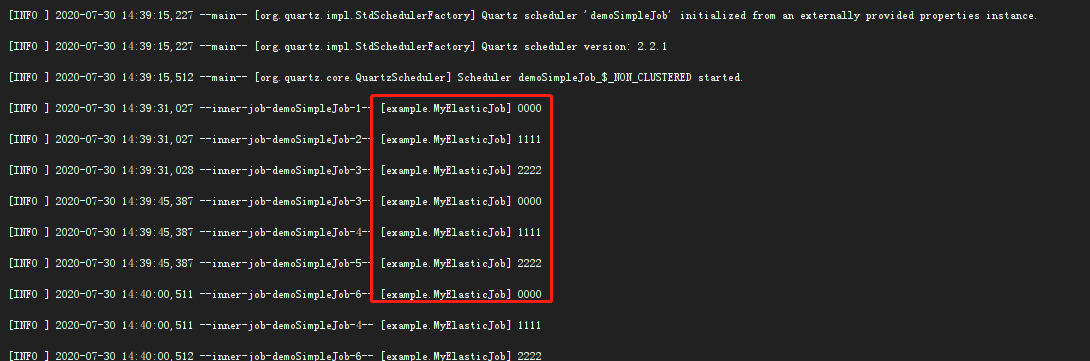

由于大部分人都用spring或Spring boot, 所以这2中方式接下来也是要介绍的。
使用Spring配置启动
- 添加如下maven 依赖
<dependency>
    <groupId>com.dangdang</groupId>
    <artifactId>elastic-job-lite-spring</artifactId>
    <version>2.1.5</version>
</dependency>
 <dependency>
    <groupId>org.springframework</groupId>
    <artifactId>spring-context</artifactId>
</dependency>
- 作业的Spring配置
在resource目录下添加文件applicationContext.xml,内容如下
<?xml version="1.0" encoding="UTF-8"?>
<beans xmlns="http://www.springframework.org/schema/beans"
       xmlns:xsi="http://www.w3.org/2001/XMLSchema-instance"
       xmlns:reg="http://www.dangdang.com/schema/ddframe/reg"
       xmlns:job="http://www.dangdang.com/schema/ddframe/job"
       xsi:schemaLocation="http://www.springframework.org/schema/beans
                        http://www.springframework.org/schema/beans/spring-beans.xsd
                        http://www.dangdang.com/schema/ddframe/reg
                        http://www.dangdang.com/schema/ddframe/reg/reg.xsd
                        http://www.dangdang.com/schema/ddframe/job
                        http://www.dangdang.com/schema/ddframe/job/job.xsd
                        ">
    <!--配置作业注册中心 -->
    <reg:zookeeper id="regCenter" server-lists="192.168.104.102:2181" namespace="dd-job" base-sleep-time-milliseconds="1000" max-sleep-time-milliseconds="3000"
                   max-retries="3"/>

    <!-- 配置作业-->
    <job:simple id="demoSimpleSpringJob" class="example.MyElasticJob" registry-center-ref="regCenter" cron="0/10 * * * * ?" sharding-total-count="3"
                sharding-item-parameters="0=A,1=B,2=C"/>
</beans>
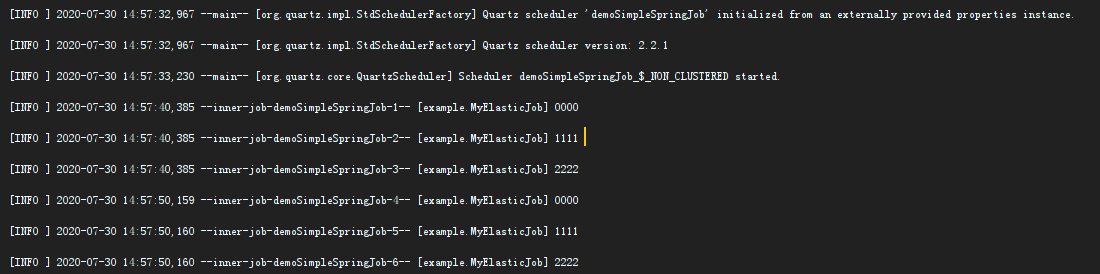
- 启动作业
程序启动读取Spring配置文件,作业将自动加载。
public class JavaMain {
    public static void main(String[] args) {
        new ClassPathXmlApplicationContext("classpath:applicationContext.xml");
    }
}

作业类型介绍
Elastic-Job提供Simple、Dataflow和Script 3种作业类型。
Simple类型作业
意为简单实现,未经任何封装的类型。需实现SimpleJob接口。该接口仅提供单一方法用于覆盖,此方法将定时执行。与Quartz原生接口相似,但提供了弹性扩缩容和分片等功能。
public class MyElasticJob implements SimpleJob {

    @Override
    public void execute(ShardingContext context) {
        switch (context.getShardingItem()) {
            case 0:
                // do something by sharding item 0
                break;
            case 1:
                // do something by sharding item 1
                break;
            case 2:
                // do something by sharding item 2
                break;
            // case n: ...
        }
    }
}
Dataflow类型作业
Dataflow类型用于处理数据流,需实现DataflowJob接口。该接口提供2个方法可供覆盖,分别用于抓取(fetchData)和处理(processData)数据。
可通过DataflowJobConfiguration配置是否流式处理。
流式处理数据只有fetchData方法的返回值为null或集合长度为空时,作业才停止抓取,否则作业将一直运行下去; 非流式处理数据则只会在每次作业执行过程中执行一次fetchData方法和processData方法,随即完成本次作业。
如果采用流式作业处理方式,建议processData处理数据后更新其状态,避免fetchData再次抓取到,从而使得作业永不停止。 流式数据处理参照TbSchedule设计,适用于不间歇的数据处理。
public class MyElasticJob implements DataflowJob<Foo> {

    @Override
    public List<Foo> fetchData(ShardingContext context) {
        switch (context.getShardingItem()) {
            case 0:
                List<Foo> data = // get data from database by sharding item 0
                return data;
            case 1:
                List<Foo> data = // get data from database by sharding item 1
                return data;
            case 2:
                List<Foo> data = // get data from database by sharding item 2
                return data;
            // case n: ...
        }
    }

    @Override
    public void processData(ShardingContext shardingContext, List<Foo> data) {
        // process data
        // ...
    }
}
Script类型作业
Script类型作业意为脚本类型作业,支持shell,python,perl等所有类型脚本。只需通过控制台或代码配置scriptCommandLine即可,无需编码。执行脚本路径可包含参数,参数传递完毕后,作业框架会自动追加最后一个参数为作业运行时信息。
#!/bin/bash
echo sharding execution context is $*
作业运行时会输出
sharding execution context is {“jobName”:“scriptElasticDemoJob”,“shardingTotalCount”:10,“jobParameter”:“”,“shardingItem”:0,“shardingParameter”:“A”}
以上方法中的参数shardingContext包含作业配置、片和运行时信息。可通过getShardingTotalCount(), getShardingItem()等方法分别获取分片总数,运行在本作业服务器的分片序列号等。
配置介绍
配置说明
Elastic-Job配置分为3个层级,分别是Core, Type和Root。每个层级使用相似于装饰者模式的方式装配。
Core对应JobCoreConfiguration,用于提供作业核心配置信息,如:作业名称、分片总数、CRON表达式等。
Type对应JobTypeConfiguration,有3个子类分别对应SIMPLE, DATAFLOW和SCRIPT类型作业,提供3种作业需要的不同配置,如:DATAFLOW类型是否流式处理或SCRIPT类型的命令行等。
Root对应JobRootConfiguration,有2个子类分别对应Lite和Cloud部署类型,提供不同部署类型所需的配置,如:Lite类型的是否需要覆盖本地配置或Cloud占用CPU或Memory数量等。
类似如下代码
// 定义作业核心配置
JobCoreConfiguration simpleCoreConfig = JobCoreConfiguration.newBuilder("demoSimpleJob", "0/15 * * * * ?", 10).build();
// 定义SIMPLE类型配置
SimpleJobConfiguration simpleJobConfig = new SimpleJobConfiguration(simpleCoreConfig, SimpleDemoJob.class.getCanonicalName());
// 定义Lite作业根配置
JobRootConfiguration simpleJobRootConfig = LiteJobConfiguration.newBuilder(simpleJobConfig).build();
Spring的配置说明
与Spring容器配合使用作业,可将作业Bean配置为Spring Bean,并在作业中通过依赖注入使用Spring容器管理的数据源等对象。可用placeholder占位符从属性文件中取值。Lite可考虑使用Spring命名空间方式简化配置。
<?xml version="1.0" encoding="UTF-8"?>
<beans xmlns="http://www.springframework.org/schema/beans"
    xmlns:xsi="http://www.w3.org/2001/XMLSchema-instance"
    xmlns:reg="http://www.dangdang.com/schema/ddframe/reg"
    xmlns:job="http://www.dangdang.com/schema/ddframe/job"
    xsi:schemaLocation="http://www.springframework.org/schema/beans
                        http://www.springframework.org/schema/beans/spring-beans.xsd
                        http://www.dangdang.com/schema/ddframe/reg
                        http://www.dangdang.com/schema/ddframe/reg/reg.xsd
                        http://www.dangdang.com/schema/ddframe/job
                        http://www.dangdang.com/schema/ddframe/job/job.xsd
                        ">
    <!--配置作业注册中心 -->
    <reg:zookeeper id="regCenter" server-lists="yourhost:2181" namespace="dd-job" base-sleep-time-milliseconds="1000" max-sleep-time-milliseconds="3000" max-retries="3" />

    <!-- 配置简单作业-->
    <job:simple id="simpleElasticJob" class="xxx.MySimpleElasticJob" registry-center-ref="regCenter" cron="0/10 * * * * ?" sharding-total-count="3" sharding-item-parameters="0=A,1=B,2=C" />

    <bean id="yourRefJobBeanId" class="xxx.MySimpleRefElasticJob">
        <property name="fooService" ref="xxx.FooService"/>
    </bean>

    <!-- 配置关联Bean作业-->
    <job:simple id="simpleRefElasticJob" job-ref="yourRefJobBeanId" registry-center-ref="regCenter" cron="0/10 * * * * ?" sharding-total-count="3" sharding-item-parameters="0=A,1=B,2=C" />

    <!-- 配置数据流作业-->
    <job:dataflow id="throughputDataflow" class="xxx.MyThroughputDataflowElasticJob" registry-center-ref="regCenter" cron="0/10 * * * * ?" sharding-total-count="3" sharding-item-parameters="0=A,1=B,2=C" />

    <!-- 配置脚本作业-->
    <job:script id="scriptElasticJob" registry-center-ref="regCenter" cron="0/10 * * * * ?" sharding-total-count="3" sharding-item-parameters="0=A,1=B,2=C" script-command-line="/your/file/path/demo.sh" />

    <!-- 配置带监听的简单作业-->
    <job:simple id="listenerElasticJob" class="xxx.MySimpleListenerElasticJob" registry-center-ref="regCenter" cron="0/10 * * * * ?" sharding-total-count="3" sharding-item-parameters="0=A,1=B,2=C">
        <job:listener class="xx.MySimpleJobListener"/>
        <job:distributed-listener class="xx.MyOnceSimpleJobListener" started-timeout-milliseconds="1000" completed-timeout-milliseconds="2000" />
    </job:simple>

    <!-- 配置带作业数据库事件追踪的简单作业-->
    <job:simple id="eventTraceElasticJob" class="xxx.MySimpleListenerElasticJob" registry-center-ref="regCenter" cron="0/10 * * * * ?" sharding-total-count="3" sharding-item-parameters="0=A,1=B,2=C" event-trace-rdb-data-source="yourDataSource">
    </job:simple>
</beans>
Java的配置说明
public final class JavaMain {
    public static void main(String[] args) {
        new JobScheduler(createRegistryCenter(), createJobConfiguration()).init();
    }

    private static CoordinatorRegistryCenter createRegistryCenter() {
        CoordinatorRegistryCenter regCenter = new ZookeeperRegistryCenter(
                new ZookeeperConfiguration("192.168.104.102:2181", "elastic-job-demo-quick-demo"));
        regCenter.init();
        return regCenter;
    }

    private static LiteJobConfiguration createJobConfiguration() {
        // 定义作业核心配置
        JobCoreConfiguration simpleCoreConfig = JobCoreConfiguration.newBuilder("demoSimpleJob", "0/15 * * * * ?", 10).build();
        // 定义SIMPLE类型配置
        SimpleJobConfiguration simpleJobConfig = new SimpleJobConfiguration(simpleCoreConfig, MyElasticJob.class.getCanonicalName());
        // 定义Lite作业根配置
        return LiteJobConfiguration.newBuilder(simpleJobConfig).build();
    }
}
最后小编在学习过程中整理了一些学习资料,可以分享给做软件测试工程师的朋友们,相互交流学习,需要的可以加入我的学习交流群 323432957 或加微dingyu-002即可免费获取Python自动化测开及Java自动化测开学习资料(里面有功能测试、性能测试、python自动化、java自动化、测试开发、接口测试、APP测试等多个知识点的架构资料)


 7370
7370


 被折叠的 条评论
为什么被折叠?
被折叠的 条评论
为什么被折叠?
 到【灌水乐园】发言


