


简介: 刚入手一个服务器 打算搭个个站, 平时工作都是用vue ;为了扩展自己的实战能力 来从头开始实战用用react吧;结合ant-design一起开发,然后后台nodejs来写; 编写我的第一个教程文章,从头到尾记录整个过程 因为是实战项目;部分基础的创建react的和基本语法什么的话各位就自便了 如果有需要的话 我是可以开篇博客的;需要的留言— —
ღ( ´・ᴗ・` )比心
因为并不是很熟悉这两个框架 所以如果有做的不好的 请各位大神指导下小弟 谢谢了
作者:webmxj
csdn博客名:div_ma
联系方式:webmxj@163.com
微信:webmxj
QQ交流群:734585334
QQ:642525655 加我请备注前端
相关链接:
react+ant.design 从零开始搭建个人博客实战01 —— 起步
react+ant.design 从零开始搭建个人博客实战02 —— 页面布局 公用头部尾部
react+ant.design 从零开始搭建个人博客实战03 —— 路由
react+ant.design 从零开始搭建个人博客实战04 —— 配置json-server 提供虚拟数据
react+ant.design 从零开始搭建个人博客实战05 —— 生成随机数据 mockjs的使用
上次我们配置完基本的框架 现在需要布局 为了方便布局和后期的数据交互 所以我们现在需要先配置一些虚拟数据的来布局;这我们使用json-server来提供虚拟数据
一.安装json-server
首先你的电脑中需要安装nodejs,建议使用最新版本。然后全局安装json server.
npm install json-server -g
安装成功后可以使用 json-server -h 检查是否安装成功 成功会出现
index.js [options] <source>

选项:
  --config, -c               Path to config file    [默认值: "json-server.json"]
  --port, -p                 Set port                             [默认值: 3000]
  --host, -H                 Set host                        [默认值: "0.0.0.0"]
  --watch, -w                Watch file(s)                                [布尔]
  --routes, -r               Path to routes file
  --middlewares, -m          Paths to middleware files                    [数组]
  --static, -s               Set static files directory
  --read-only, --ro          Allow only GET requests                      [布尔]
  --no-cors, --nc            Disable Cross-Origin Resource Sharing        [布尔]
  --no-gzip, --ng            Disable GZIP Content-Encoding                [布尔]
  --snapshots, -S            Set snapshots directory               [默认值: "."]
  --delay, -d                Add delay to responses (ms)
  --id, -i                   Set database id property (e.g. _id)  [默认值: "id"]
  --foreignKeySuffix, --fks  Set foreign key suffix (e.g. _id as in post_id)
                                                                  [默认值: "Id"]
  --quiet, -q                Suppress log messages from output            [布尔]
  --help, -h                 显示帮助信息                                 [布尔]
  --version, -v              显示版本号                                   [布尔]

示例:
  index.js db.json
  index.js file.js
  index.js http://example.com/db.json

https://github.com/typicode/json-server
二.运行
成功安装之后,新建mock文件夹在里面的创建一个db.json文件并写入虚拟数据

然后在文件夹根目录运行
json-server mock/db.json -p 3003 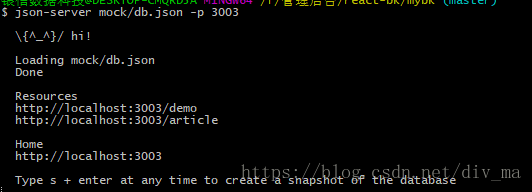
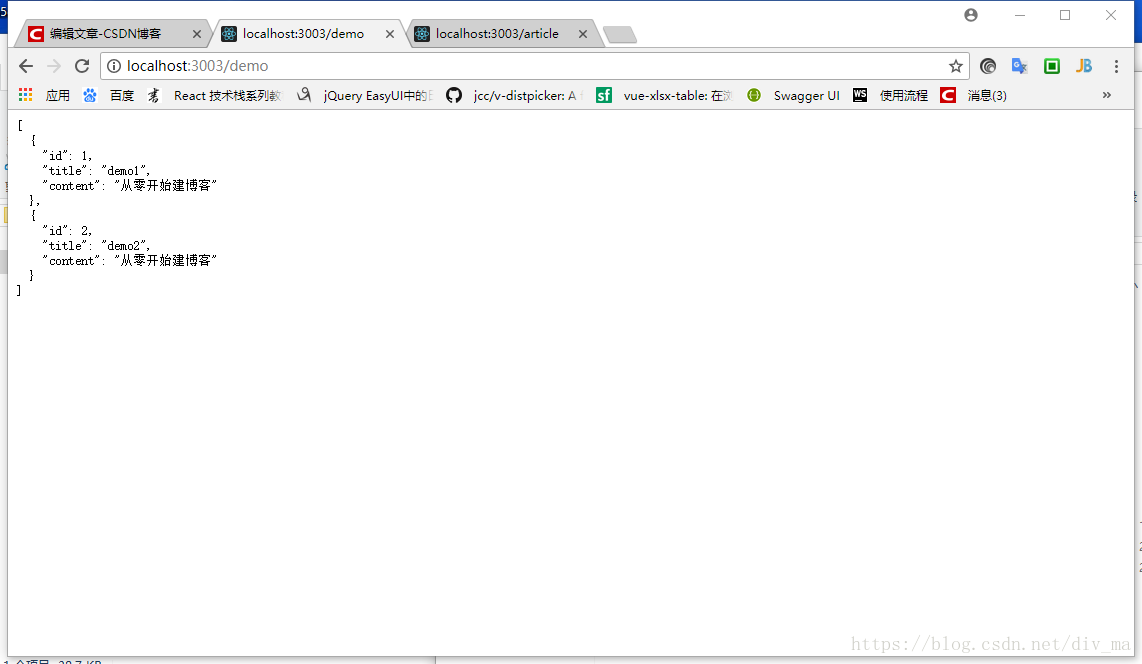
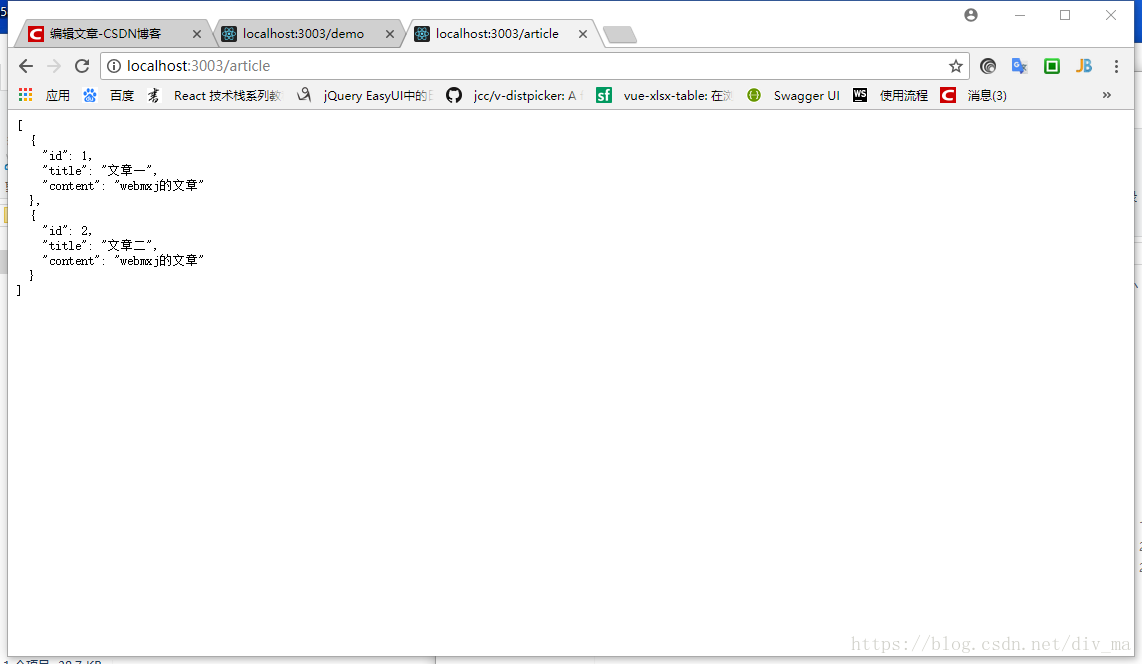
然后打开http://localhost:3003/demo 和 http://localhost:3003/article就可以看到刚刚定义的假数据了
但是这样我们每次使用虚拟数据都得单独去起这个服务,所以为了方便,我们来配置package.json 让执行npm run start的时候同时执行json-server mock/db.json -p 3003
要同时执行依赖于concurrently模块
我们全局安装concurrently模块
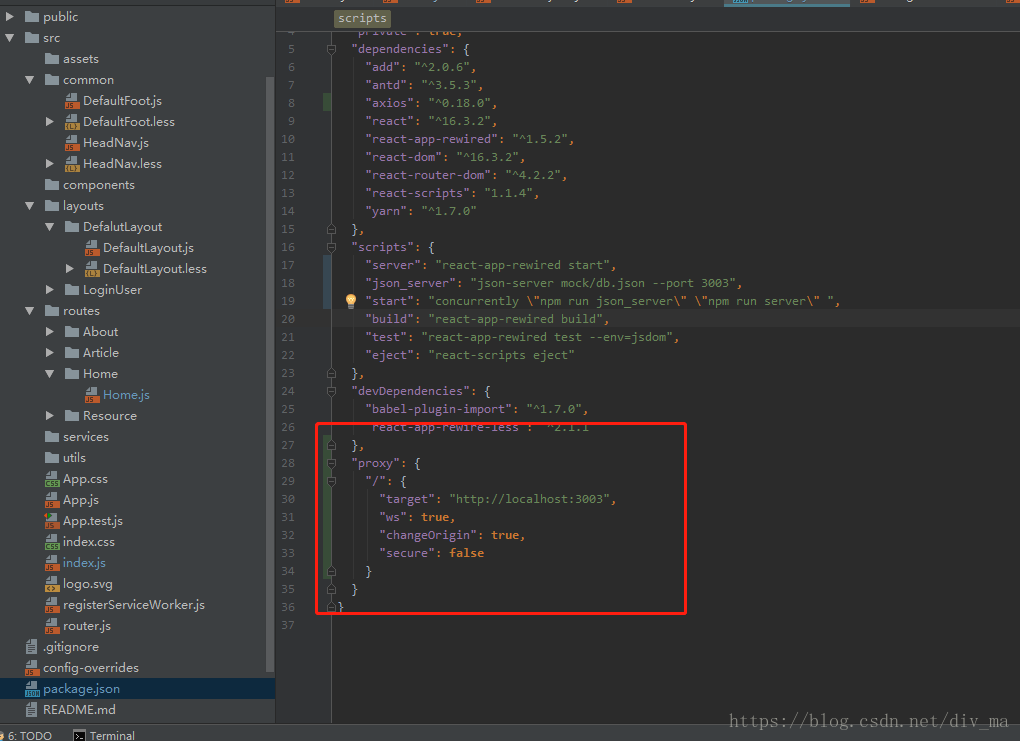
npm insatll -g concurrently然后修改package.json中的script
"server":"react-app-rewired start",
"json_server":"json-server mock/db.json --port 3003",
"start": "concurrently \"npm run json_server\" \"npm run server\" ",
然后我们执行一下npm run start 这个时候打开http://localhost:3000/#/home可以看到我们熟悉的画面,然后

然后打开http://localhost:3003/demo 也是照样可以看到数据
接着我们就通过接口拿数据了
三.配置package.json 引入数据测试
在package.json文件中增加以下代码
"proxy": {
    "/": {
      "target": "http://localhost:3003",
      "ws": true,
      "changeOrigin": true,
      "secure": false
    }
  }
proxy的配置
1.左边“/”代表:/ 字符后的链接都会被代理
2.“target”:代理到的地址 这里是我们json-server设置的 localhost:3000
3.”ws”:ws协议 不开启的话会报一个错误
4.”changeOrigin”:是否支持跨域 这里也是要打开的 因为端口号不同 跨域了
5.“secure”:安全协议 主要针对https的
然后在src/routes/Home.js中测试一下能否拿到数据
修改home.js为
/**
 * Created by webmxj@163.com 2018/5/28.
**/
import React,{Component} from "react";
export default class Home extends Component{
    constructor(props){
        super(props);
        fetch("/demo",{method:'GET'}).then(
            function(res){
                console.log(res);
                res.json().then(function(data){
                    console.log(data);
                });
            }
        )
    }
    render(){
        return (
            <div id="Home">
                首页
            </div>
        )
    }
}
然后我们运行npm run start 这里一定得重新运行因为改过package.json 得重启才会看得到效果;
然后打开localhost:3000/home 并按f12打开FireBug;
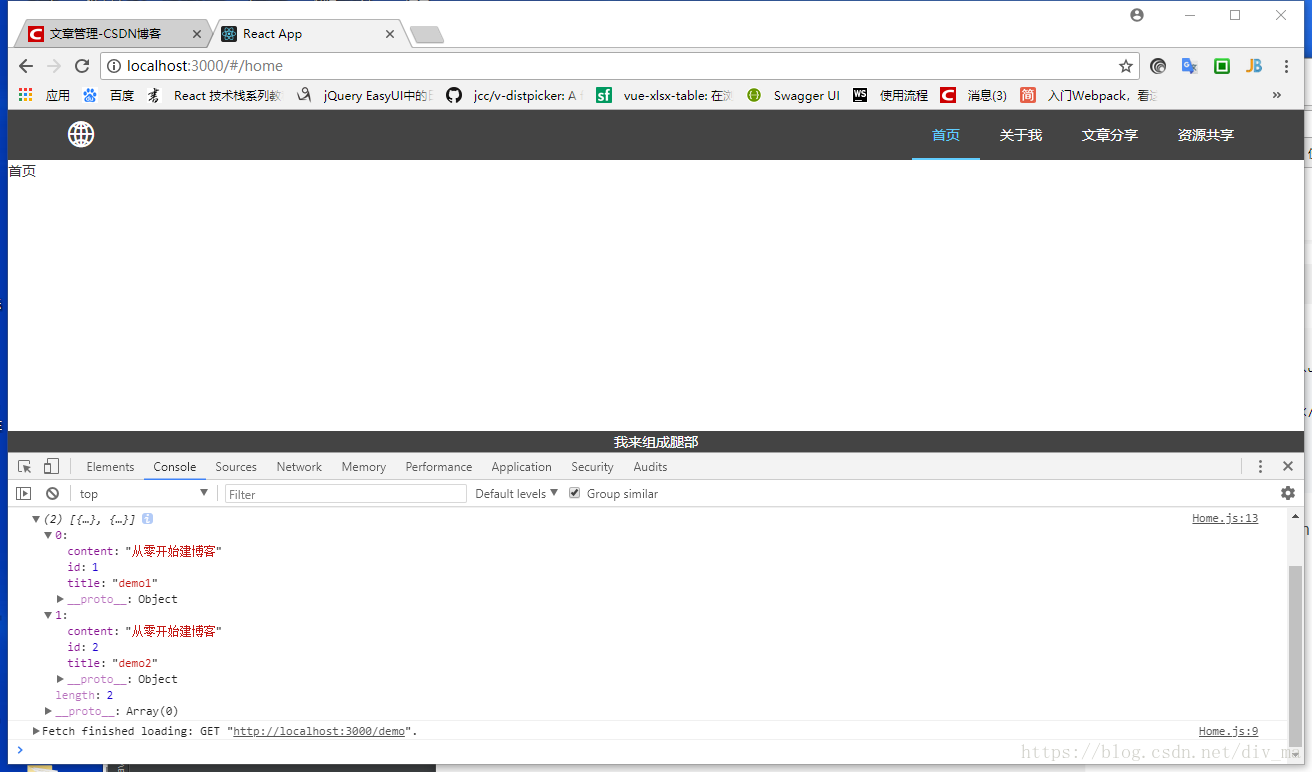
如图 可以看到我们定义的数据
这里我们要手动生成数据 那么有没有更方便的方法呢?
请看下一篇引入mockjs
相关链接:
react+ant.design 从零开始搭建个人博客实战01 —— 起步
react+ant.design 从零开始搭建个人博客实战02 —— 页面布局 公用头部尾部
react+ant.design 从零开始搭建个人博客实战03 —— 路由
react+ant.design 从零开始搭建个人博客实战04 —— 配置json-server 提供虚拟数据
react+ant.design 从零开始搭建个人博客实战05 —— 生成随机数据 mockjs的使用


 500
500


 被折叠的 条评论
为什么被折叠?
被折叠的 条评论
为什么被折叠?
 到【灌水乐园】发言


