


安装elasticsearch需要安装jdk,因此第一步需要安装jdk
###一、下载安装jdk18
wget http://download.oracle.com/otn-pub/java/jdk/8u171-b11/512cd62ec5174c3487ac17c61aaa89e8/jdk-8u171-linux-x64.rpm?AuthParam=1531461126_47127273bf1a78dda35ca8ffb0f0b284
mv jdk-8u171-linux-x64.rpm\?AuthParam\=1531461126_47127273bf1a78dda35ca8ffb0f0b284 jdk-8u171-linux-x64.rpm

或者
wget http://linux-1251121573.cosgz.myqcloud.com/soft/elk/jdk-8u171-linux-x64.rpm
yum -y localinstall jdk-8u171-linux-x64.rpm
java -version
###二、安装elasticsearch
elasticsearch可以直接下载安装包进行安装,然后直接运行bin文件夹下的elasticsearch文件即可
注意:elasticsearch不能使用root用户运行,需要使用普通用户运行,否则会报错
useradd es
wget http://linux-1251121573.cosgz.myqcloud.com/soft/elk/elasticsearch-6.2.2.zip
yum -y install unzip
unzip elasticsearch-6.2.2.zip
chown -R es:es  elasticsearch-6.2.2
mv elasticsearch-6.2.2 /usr/share/
cd /usr/share/elasticsearch-6.2.2/
后台运行elasticsearch
cd bin
./elasticsearch -d
如果直接root用户运行会报错
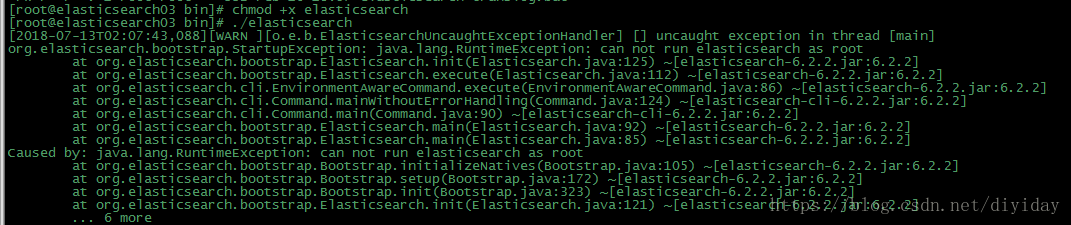
[root@elasticsearch03 bin]# chmod +x elasticsearch
[root@elasticsearch03 bin]# ./elasticsearch
[2018-07-13T02:07:43,088][WARN ][o.e.b.ElasticsearchUncaughtExceptionHandler] [] uncaught exception in thread [main]
org.elasticsearch.bootstrap.StartupException: java.lang.RuntimeException: can not run elasticsearch as root
        at org.elasticsearch.bootstrap.Elasticsearch.init(Elasticsearch.java:125) ~[elasticsearch-6.2.2.jar:6.2.2]
        at org.elasticsearch.bootstrap.Elasticsearch.execute(Elasticsearch.java:112) ~[elasticsearch-6.2.2.jar:6.2.2]
        at org.elasticsearch.cli.EnvironmentAwareCommand.execute(EnvironmentAwareCommand.java:86) ~[elasticsearch-6.2.2.jar:6.2.2]
        at org.elasticsearch.cli.Command.mainWithoutErrorHandling(Command.java:124) ~[elasticsearch-cli-6.2.2.jar:6.2.2]
        at org.elasticsearch.cli.Command.main(Command.java:90) ~[elasticsearch-cli-6.2.2.jar:6.2.2]
        at org.elasticsearch.bootstrap.Elasticsearch.main(Elasticsearch.java:92) ~[elasticsearch-6.2.2.jar:6.2.2]
        at org.elasticsearch.bootstrap.Elasticsearch.main(Elasticsearch.java:85) ~[elasticsearch-6.2.2.jar:6.2.2]
Caused by: java.lang.RuntimeException: can not run elasticsearch as root
        at org.elasticsearch.bootstrap.Bootstrap.initializeNatives(Bootstrap.java:105) ~[elasticsearch-6.2.2.jar:6.2.2]
        at org.elasticsearch.bootstrap.Bootstrap.setup(Bootstrap.java:172) ~[elasticsearch-6.2.2.jar:6.2.2]
        at org.elasticsearch.bootstrap.Bootstrap.init(Bootstrap.java:323) ~[elasticsearch-6.2.2.jar:6.2.2]
        at org.elasticsearch.bootstrap.Elasticsearch.init(Elasticsearch.java:121) ~[elasticsearch-6.2.2.jar:6.2.2]
        ... 6 more
于是需要创建普通用户
useradd es
由于使用root用户运行过一次,使用es用户继续运行还是会报错,报错如下:

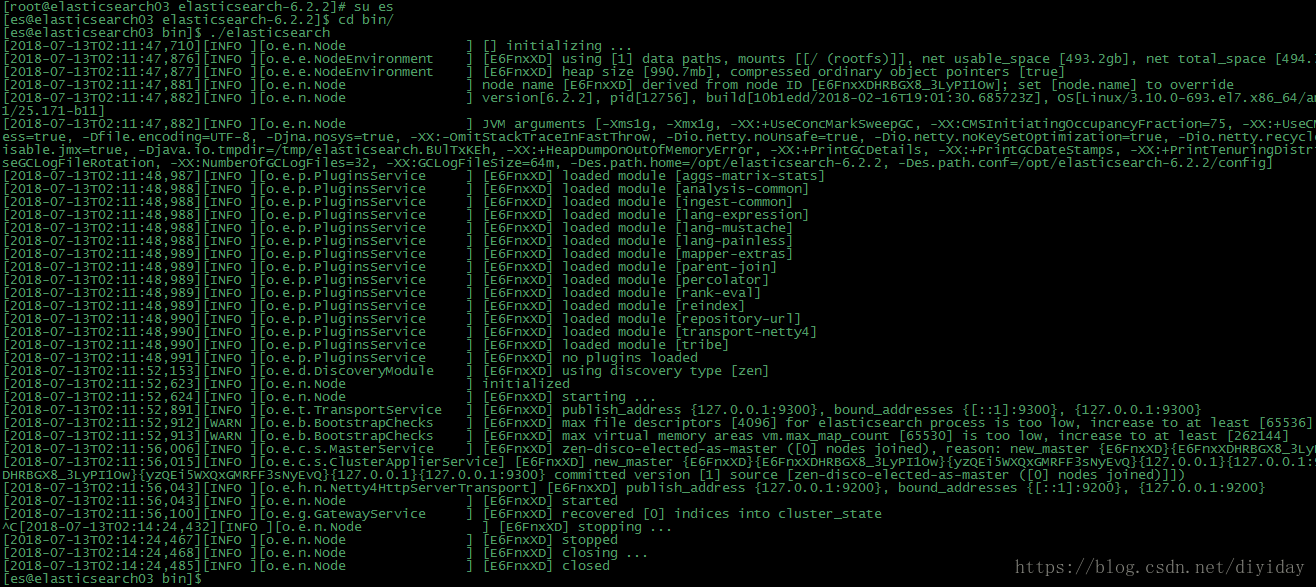
[root@elasticsearch03 bin]# su es
[es@elasticsearch03 bin]$ ./elasticsearch
Error: Could not find or load main class org.elasticsearch.tools.launchers.JavaVersionChecker
[es@elasticsearch03 bin]$ exit
exit
出现这样的情况,把elasticsearch文件夹移动到其他文件夹中,然后再次使用es用户运行,就可以正常运行了。
参考:https://stackoverflow.com/questions/48818033/elasticsearch-could-not-find-or-load-main-class-org-elasticsearch-tools-launche
我这里移动到了 /usr/share目录下
###三、elasticsearch-analysis-ik 分词的安装
elasticsearch-analysis-ik 分词的安装需要java环境
下载:(注意下载的版本,一般github上的tag会说明对于的 elasticsearch版本)
https://github.com/medcl/elasticsearch-analysis-ik
下载后解压至任意目录
sudo apt-get install maven 安装mvn
mvn package 或者mvn clean package
执行操作后会在target/releases目录下生成elasticsearch对应版本的ik插件
找到zip压缩包,之后解压至lasticsearch的plugins目录下,命令为ik文件夹,之后启动elasticsearch即可。
由于分词ik的是需要es对应的版本的,而且在相对于的版本中编译生成的,由于我的elasticsearch6.2.2编译了一次,并且也生成了对应的版本的ik分词,于是可以直接使用,而不需要再次编译
如下是下载地址:
wget http://linux-1251121573.cosgz.myqcloud.com/soft/elk/elasticsearch-analysis-ik-6.2.2.zip
下载完成之后直接放入到对应的文件夹中即可使用。
cd /usr/share/elasticsearch-6.2.2/plugins
wget http://linux-1251121573.cosgz.myqcloud.com/soft/elk/elasticsearch-analysis-ik-6.2.2.zip
unzip elasticsearch-analysis-ik-6.2.2.zip
mv elasticsearch ik
rm elasticsearch-analysis-ik-6.2.2.zip
###四、配置elasticsearch集群
如果不配置集群,实现外网访问,需要修改如下:
修改配置文件 /usr/share/elasticsearch-6.2.2/configelasticsearch.yml
network.host: 0.0.0.0
如果配置集群,需要如下修改
编辑elasticsearch配置文件:
/usr/share/elasticsearch-6.2.2/configelasticsearch.yml
分别在两台服务器中填写如下配置:
切记 cluster.name: node 这个名字两台服务器需要一样。
服务器一:
cluster.name: node
node.name: node1
network.host: 192.168.1.223
discovery.zen.ping.unicast.hosts: ["192.168.1.224:9300"]
服务器二:
cluster.name: node
node.name: node2
network.host: 192.168.1.224
discovery.zen.ping.unicast.hosts: ["192.168.1.223:9300"]
完成之后保存即可,集群配置完毕。
实现开机重启
centos7
利用/etc/rc.d/rc.loacl文件实现开机自动启动es
编写脚本
#创建脚本文件夹
touch /etc/rc.d/sh/
#创建脚本文件
vi /etc/rc.d/sh/es.sh
#编写启动命令   横杠+空格+用户名	后面加-c启动命令
su - es -c '/usr/share/elasticsearch-6.2.2/bin/elasticsearch -d'
# 编辑/etc/rc.d/rc.loacl末尾加上下面参数
vi /etc/rc.d/rc.local

/etc/rc.d/sh/es.sh
# 为rc.loacl添加可执行权限
chmod + x/etc/rc.d/rc.local
ubuntu
sudo vi /etc/rc.local


/usr/share/elasticsearch/bin/elasticsearch.sh
在 exit 0 前面添加如下内容

vi /usr/share/elasticsearch/bin/elasticsearch.sh

添加如下内容
su  - ubuntu -c '/usr/share/elasticsearch/bin/elasticsearch -d'

sudo chomod +x /etc/rc.local /usr/share/elasticsearch/bin/elasticsearch.sh
###五、安装elasticsearch-head(系统需要开放9300端口才能插件访问)
一、elasticsearch6.X版本之后,不支持命令行安装head插件,需要手动安装。
https://github.com/mobz/elasticsearch-head
或者: http://linux-1251121573.cosgz.myqcloud.com/soft/elk/elasticsearch-head-master.zip
二、安装nodejs
直接无法yum安装noodejs的,需要添加nodejs源
curl --silent --location https://rpm.nodesource.com/setup | bash -
安装
yum install -y nodejs
安装完成后,进入 elasticsearch-head插件文件夹。
执行npm install -g grunt -cli 命令安装grunt
之后npm install 进行安装pathomjs
以上即安装完所有插件
执行grunt server 命令即可启动elasticsearch-head
通过访问:ip:9100 浏览web页面。
简单安装完elasticsearch-head是无法连接elasticsearch服务器的,
需要修改 elasticsearch中/config/elasticsearch.yml配置文件,添加如下参数:
增加如下字段
# 允许插件访问
http.cors.enabled: true
http.cors.allow-origin: "*"
插件同样需要开放9100端口
firewall-cmd --zone=public --add-port=9100/tcp --permanent
firewall-cmd --reload
###docker方式安装elasticsearch-head插件
#拉取镜像
docker pull docker pull mobz/elasticsearch-head:5-apline
# 创建容器文件夹
mkdir -p /data/database/elasticsearch-6.2.2/es-head/
# 编辑配置文件
vi /data/database/elasticsearch-6.2.2/es-head/Gruntfile.js
# 添加如下内容
connect: {
        server: {
            options: {
                /* 默认监控:127.0.0.1,修改为:0.0.0.0 */
                hostname: '0.0.0.0',
                port: 9100,
                base: '.',
                keepalive: true
            }
        }

#运行docker命令创建镜像
docker run -d --restart=always --name es-head -p 9100:9100 -v /data/database/elasticsearch-6.2.2/es-head/Gruntfile.js:/usr/src/app/Gruntfile.js mobz/elasticsearch-head:5-alpine
改良版本的es-head
根据上门的镜像修改之后的es-head
wget https://linux-1251121573.cos.ap-guangzhou.myqcloud.com/docker/images/es-head.tar.gz
 docker load -i es-head.tar.gz
docker run --name es-head -p 9100:9100 -itd es-head
参考:https://blog.csdn.net/qq_36373262/article/details/80386089
es-head 查询不到数据 等常见问题
通过
curl http://192.168.1.10:9200/index_test/_search?pretty
命令能查询到es数据库内容
但是通过 es-head 无法获取数据库内容,
一直提示搜索中
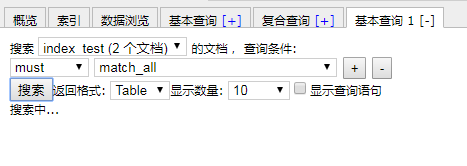
还会出现 Content-Type header [application/x-www-form-urlencoded] is not supported
这个可能是 es-head请求头的问题。
更新一下es-head 或者 更换es-head版本就可以查询出来了。

开放防火墙端口
firewall-cmd --zone=public --add-port=9100/tcp --permanent
firewall-cmd --zone=public --add-port=9200/tcp --permanent
firewall-cmd --zone=public --add-port=9300/tcp --permanent
firewall-cmd --reload
因为centos有防火墙,所以外网无法访问。必须开放防火墙端口,才可以外网访问。
常见问题问题
elasticsearch 集群无法启动出现如下提示 failed to send join request to master
[node-2] failed to send join request to master [{node-1}{WbcP0pC_T32jWpYvu5is1A}{2_LCVHx1QEaBZYZ7XQEkMg}{10.10.11.200}{10.10.11.200:9300}], reason [RemoteTransportException[[node-1][10.10.11.200:9300][internal:discovery/zen/join]]; nested: IllegalArgumentException[can't add node {node-2}{WbcP0pC_T32jWpYvu5is1A}{p-HCgFLvSFaTynjKSeqXyA}{10.10.11.200}{10.10.11.200:9301}, found existing node {node-1}{WbcP0pC_T32jWpYvu5is1A}{2_LCVHx1QEaBZYZ7XQEkMg}{10.10.11.200}{10.10.11.200:9300} with the same id but is a different node instance]; ]
原因是:是因为复制的elasticsearch文件夹下包含了data文件中示例一的节点数据,需要把示例二data文件下的文件清空。
删除es集群data数据库文件夹下所有文件即可
https://blog.csdn.net/gamer_gyt/article/details/59077189
报错二
[2018-07-13T02:44:39,316][INFO ][o.e.n.Node               ] [4dNQrAa] starting ...
[2018-07-13T02:44:39,564][INFO ][o.e.t.TransportService   ] [4dNQrAa] publish_address {127.0.0.1:9300}, bound_addresses {[::1]:9300}, {127.0.0.1:9300}
[2018-07-13T02:44:39,585][WARN ][o.e.b.BootstrapChecks    ] [4dNQrAa] max file descriptors [4096] for elasticsearch process is too low, increase to at least [65536]
[2018-07-13T02:44:39,586][WARN ][o.e.b.BootstrapChecks    ] [4dNQrAa] max virtual memory areas vm.max_map_count [65530] is too low, increase to at least [262144]

问题翻译过来就是:elasticsearch用户拥有的可创建文件描述的权限太低,至少需要65536;
解决办法:
一:
#切换到root用户修改
vi /etc/security/limits.conf
# 在最后面追加下面内容
*** hard nofile 65536
*** soft nofile 65536
***  是启动ES的用户
修改成
* hard nofile 65536
* soft nofile 65536
*的意思就是所有用户生效,也可以替换成es,这个表示让所有用户生效

之后运行ulimit -Hn 查看效果


二:
切换到root用户修改配置sysctl.conf
vi /etc/sysctl.conf
添加下面配置:
vm.max_map_count=655360
并执行命令
sysctl -p
报错三
[2019-03-08T16:21:01,276][INFO ][o.e.d.z.ZenDiscovery     ]  failed to send join request to master [{es02}{k0grUcSFQ6quhJaf_qXU7Q}{nOPIXqO6RsWlBcO8zOBrwg}{node}{192.168.1.100:9300}], reason [RemoteTransportException[[es02][192.168.1.100:9300][internal:discovery/zen/join]];
[2019-03-08T16:21:10,449][INFO ][o.e.n.Node               ] [que_es04] stopping ...
[2019-03-08T16:21:10,483][INFO ][o.e.n.Node               ] [que_es04] stopped
[2019-03-08T16:21:10,484][INFO ][o.e.n.Node               ] [que_es04] closing ...
[2019-03-08T16:21:10,500][INFO ][o.e.n.Node               ] [que_es04] closed

这个是因为,我有四台机器做成集群,安装了一台之后,然后把es文件夹复制到新机器中导致的,

解决办法,删除其他机器上面的es-data文件夹即可。
删除和会重新创建。记得删除之前备份 indicse文件夹
安装kibana
下载对应版本的kibana
wget https://artifacts.elastic.co/downloads/kibana/kibana-6.2.2-linux-x86_64.tar.gz
tar -xzf kibana-6.2.2-linux-x86_64.tar.gz
cd kibana-6.2.2-linux-x86_64/
修改kibana.yml配置文件
添加如下配置项:
server.port: 5601      #端口
server.host: 0.0.0.0    #服务ip
server.name: "knode01"  #服务名称
elasticsearch.url: "http://172.30.154.74:9200"  #es集群url
elasticsearch.username: "elastic"     #kibana用户名
elasticsearch.password: "changeme"    #kibana密码
启动验证
./bin/kibana
注意:未安装x-pack插件的kibana只具有基本功能,Monitoring、Graph等功能不能使用。
安装x-pack
在线安装:
./bin/kibana-plugin install x-pack
离线安装:
wget https://artifacts.elastic.co/downloads/packs/x-pack/x-pack-6.2.2.zip
./bin/kibana-plugin install file:///path/to/file/x-pack-6.2.2.zip
#注意路径
重新启动验证
./bin/kibana


 3113
3113


 被折叠的 条评论
为什么被折叠?
被折叠的 条评论
为什么被折叠?
 到【灌水乐园】发言


