


 Spring Boot Admin提供了一个管理界面,用于集中监控和管理多个Spring Boot应用。它结合Spring Actuator的端点,简化了对应用状态的查看,包括日志、指标和环境信息。此外,还能实现通知功能,如Slack通知,以及通过添加安全特性进行用户登录控制。
作为微服务开发的一部分,我们许多人都将Spring Boot与Spring Cloud功能一起使用。 在微服务领域,我们将有许多Spring Boot应用程序将在相同/不同的主机上运行。 如果将Spring Actuator添加到Spring Boot应用程序中,我们将获得很多现成的端点来监视和与Spring Boot应用程序交互。 列表如下。
| ID | 描述 | 敏感违约 |
|---|---|---|
actuator | 为其他端点提供基于超媒体的“发现页面”。 要求Spring HATEOAS位于类路径上。 | 真正 |
auditevents | 公开当前应用程序的审核事件信息。 | 真正 |
autoconfig | 显示自动配置报告,该报告显示所有自动配置候选者以及应用它们“被”或“未被”的原因。 | 真正 |
beans | 显示应用程序中所有Spring Bean的完整列表。 | 真正 |
configprops | 显示所有@ConfigurationProperties的整理列表。 | 真正 |
dump | 执行线程转储。 | 真正 |
env | 从Spring的ConfigurableEnvironment公开属性。 | 真正 |
flyway | 显示已应用的所有Flyway数据库迁移。 | 真正 |
health | 显示应用程序的运行状况信息(在应用程序安全的情况下,通过未经身份验证的连接访问时为简单的“状态”,而在经过身份验证时则为完整的消息详细信息)。 | 假 |
info | 显示任意应用程序信息。 | 假 |
loggers | 显示和修改应用程序中记录器的配置。 | 真正 |
liquibase | 显示已应用的所有Liquibase数据库迁移。 | 真正 |
metrics | 显示当前应用程序的“指标”信息。 | 真正 |
mappings | 显示所有@RequestMapping路径的整理列表。 | 真正 |
shutdown | 允许正常关闭应用程序(默认情况下未启用)。 | 真正 |
trace | 显示跟踪信息(默认情况下,最近的100个HTTP请求)。 | 真正 |
上面的端点提供了许多有关Spring Boot应用程序的见解。 但是,如果您有许多正在运行的应用程序,则通过命中终点并检查JSON响应来监视每个应用程序是一个繁琐的过程。 为了避免这种麻烦,Code Centric团队提出了Spring Boot Admin模块,该模块将为我们提供Admin UI Dash板来管理Spring Boot应用程序。 该模块处理来自执行器端点的数据,并提供有关单个仪表板上所有已注册应用程序的见解。 现在,我们将在以下各节中演示Spring Boot Admin功能。
第一步,创建一个Spring Boot应用程序,通过添加以下maven依赖项将其作为Spring Boot Admin服务器模块进行制作。
<dependency>
	<groupId>de.codecentric</groupId>
	<artifactId>spring-boot-admin-server</artifactId>
	<version>1.5.1</version>
</dependency>
<dependency>
	<groupId>de.codecentric</groupId>
	<artifactId>spring-boot-admin-server-ui</artifactId>
	<version>1.5.1</version>
</dependency> 通过将@EnableAdminServer添加到您的配置中来添加Spring Boot Admin Server配置。
package org.samrttechie;

import org.springframework.boot.SpringApplication;
import org.springframework.boot.autoconfigure.SpringBootApplication;
import org.springframework.context.annotation.Configuration;
import org.springframework.security.config.annotation.web.builders.HttpSecurity;
import org.springframework.security.config.annotation.web.configuration.WebSecurityConfigurerAdapter;

import de.codecentric.boot.admin.config.EnableAdminServer;

@EnableAdminServer
@Configuration
@SpringBootApplication
public class SpringBootAdminApplication {

	public static void main(String[] args) {
		SpringApplication.run(SpringBootAdminApplication.class, args);
	}

	@Configuration
	public static class SecurityConfig extends WebSecurityConfigurerAdapter {
		@Override
		protected void configure(HttpSecurity http) throws Exception {
			// Page with login form is served as /login.html and does a POST on /login
			http.formLogin().loginPage("/login.html").loginProcessingUrl("/login").permitAll
			// The UI does a POST on /logout on logout
			http.logout().logoutUrl("/logout");
			// The ui currently doesn't support csrf
			http.csrf().disable();

			// Requests for the login page and the static assets are allowed
			http.authorizeRequests()
			.antMatchers("/login.html", "/**/*.css", "/img/**", "/third-party/**")
			.permitAll();
			// ... and any other request needs to be authorized
			http.authorizeRequests().antMatchers("/**").authenticated();

			// Enable so that the clients can authenticate via HTTP basic for registering
			http.httpBasic();
		}
	}
	// end::configuration-spring-security[]

}
让我们创建更多的Spring Boot应用程序,以通过上述步骤中创建的Spring Boot Admin服务器进行监视。 现在将创建的所有Spring Boot应用程序将充当Spring Boot Admin客户端。 要将应用程序作为Admin客户端,请添加以下依赖项以及执行器依赖项。 在此演示中,我创建了三个应用程序,例如Eureka Server,客户服务和订单服务。
<dependency>
	<groupId>de.codecentric</groupId>
	<artifactId>spring-boot-admin-starter-client</artifactId>
	<version>1.5.1</version>
</dependency>
<dependency>
	<groupId>org.springframework.boot</groupId>
	<artifactId>spring-boot-starter-actuator</artifactId>
</dependency>
将以下属性添加到application.properties文件。 这个属性告诉Spring Boot Admin服务器在哪里运行。 因此,客户端将向服务器注册。
spring.boot.admin.url=http://localhost:1111 现在,如果我们启动Admin Server和其他Spring Boot应用程序,则可以在Admin Server仪表板中查看所有admin客户端信息。 在此示例中,当我们在1111端口上启动管理服务器时,我们可以在http://:// <host_name>:1111上看到仪表板。 以下是Admin Server用户界面的屏幕截图。 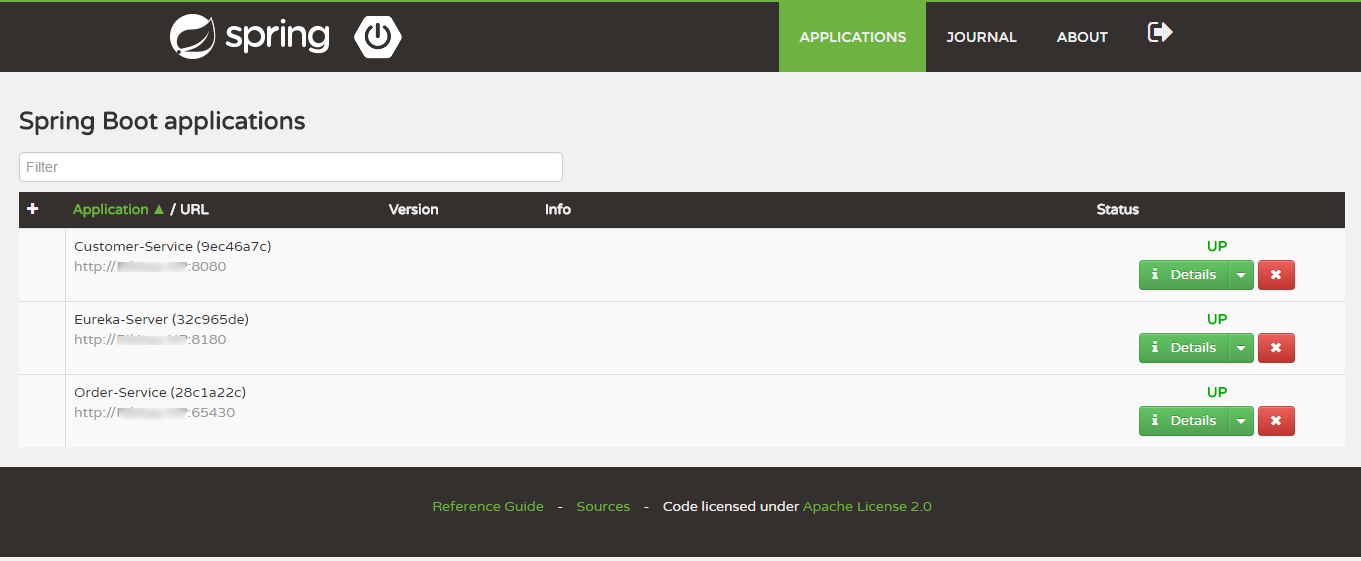
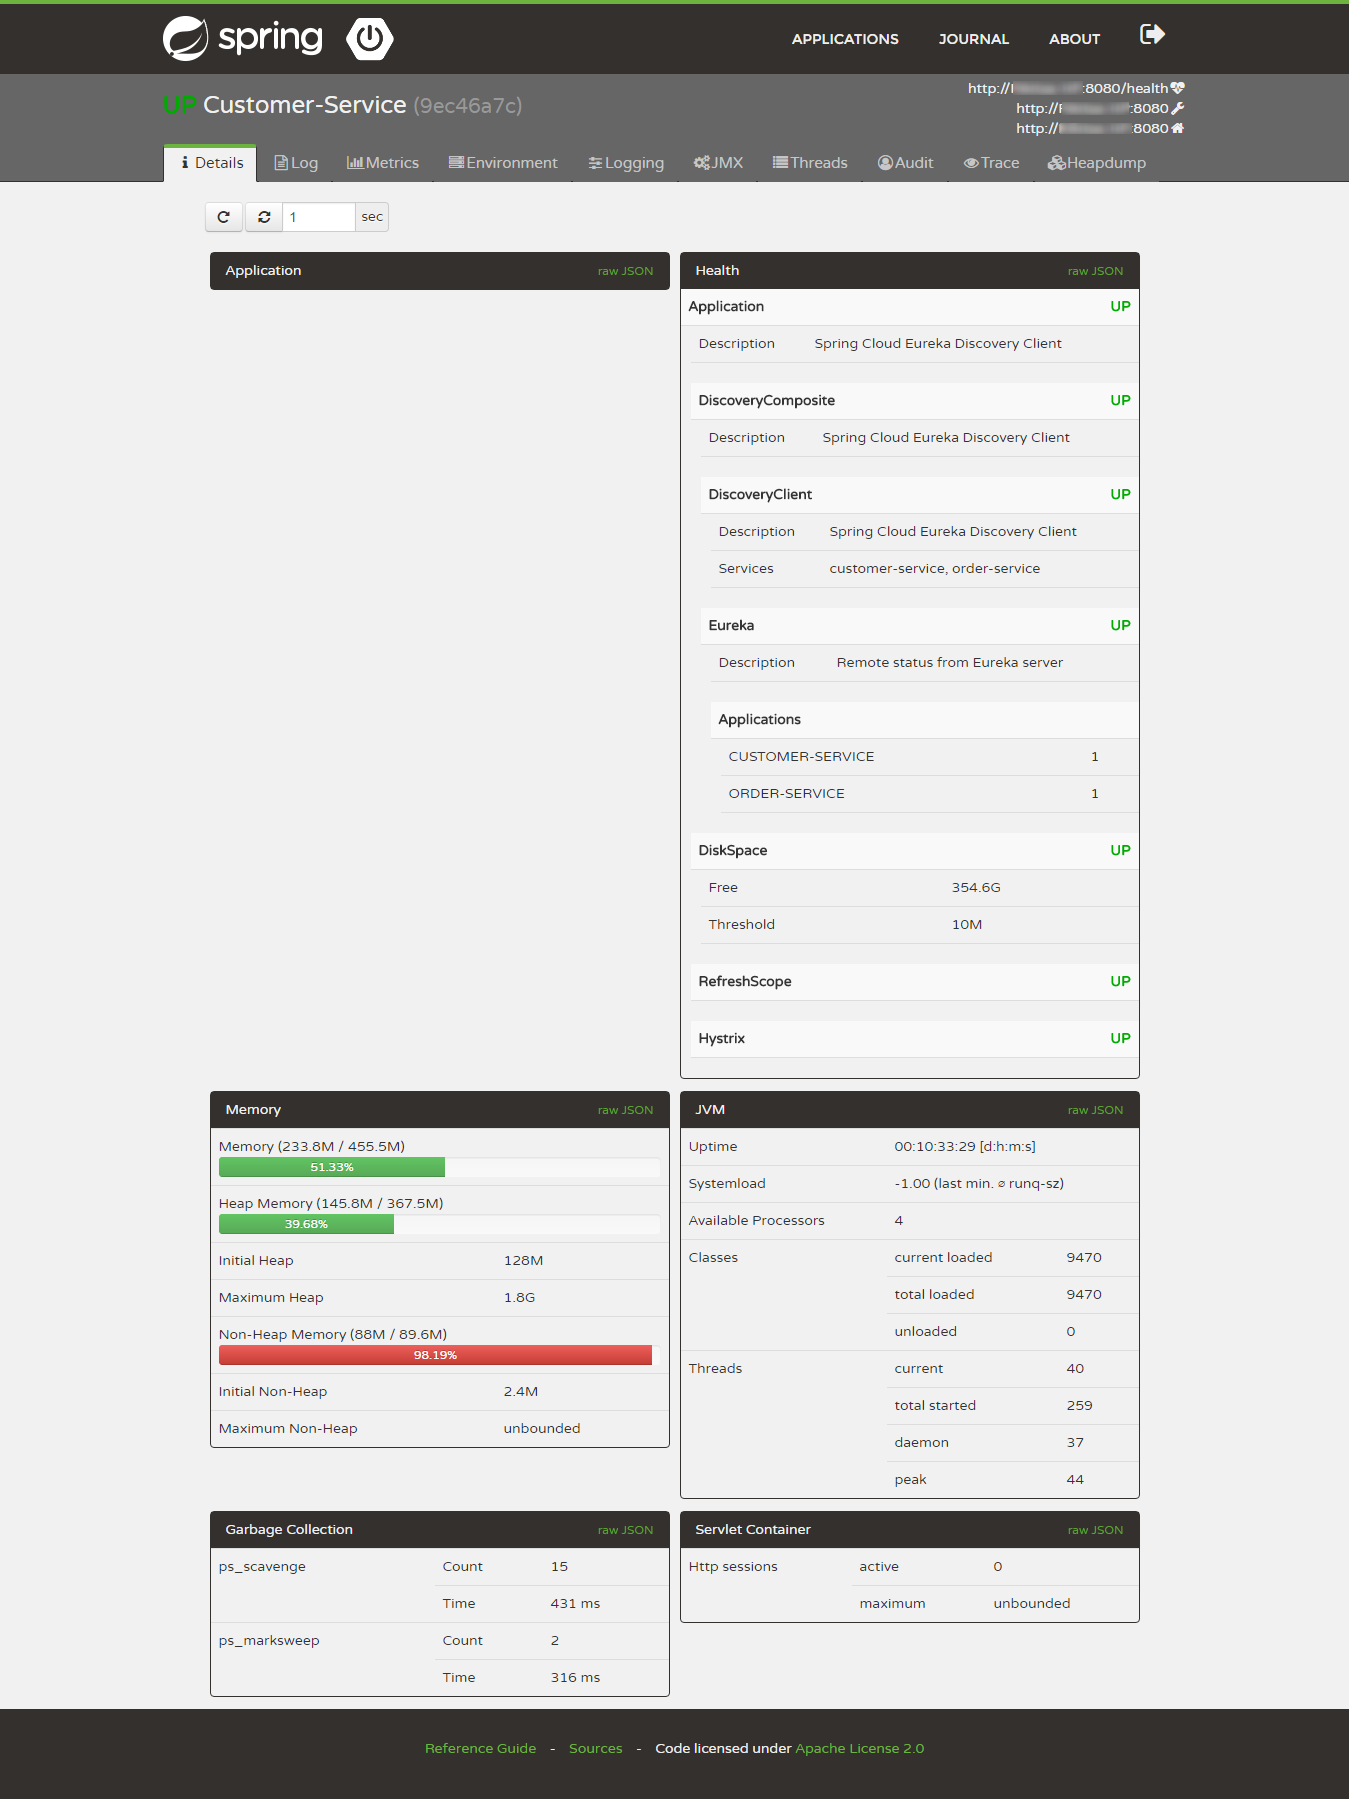
下面给出了应用程序的详细视图。 在此视图中,我们可以看到日志文件的尾部,指标,环境变量,日志配置,在这里我们可以在组件级别,根级别或程序包级别动态切换日志级别以及其他信息。
现在,我们将看到另一个名为Spring Boot Admin的通知功能。 当应用程序状态为DOWN或应用程序状态为UP时,这将通知管理员。 Spring Boot管理员支持以下渠道通知用户。
- 邮件通知
- 寻呼机通知
- Hipchat通知
- 松弛通知
- 让我们聊天通知
在本文中,我们将配置Slack通知。 将以下属性添加到Spring Boot Admin Server的application.properties文件中。
spring.boot.admin.notify.slack.webhook-url=https://hooks.slack.com/services/T8787879tttr/B5UM0989988L/0000990999VD1hVt7Go1eL //Slack Webhook URL of a channel
spring.boot.admin.notify.slack.message="*#{application.names *#{to.status}*" //Message to appear in the channel
使用Spring Boot Admin,我们可以管理所有应用程序。 因此,我们需要使用登录功能来保护Spring Boot Admin UI。 让我们启用到Spring Boot Admin服务器的登录功能。 在这里,我将进行基本身份验证。 将以下maven依赖项添加到Admin Server模块。
<dependency>
	<groupId>org.springframework.boot</groupId>
	<artifactId>spring-boot-starter-security</artifactId>
</dependency>
<dependency>
	<groupId>de.codecentric</groupId>
	<artifactId>spring-boot-admin-server-ui-login</artifactId>
	<version>1.5.1</version>
</dependency>
将以下属性添加到application.properties文件。
security.user.name=admin //user name to authenticate
security.user.password=admin123 //Password to authenticate
随着我们向Admin Server添加安全性,Admin客户端应该能够通过身份验证连接到服务器。 因此,将以下属性添加到Admin客户端的application.properties文件。
spring.boot.admin.username=admin
spring.boot.admin.password=admin123
还有一些其他UI功能,例如Hystrix,Turbine UI,我们可以在仪表板上启用它们。 您可以在此处找到更多详细信息。 Github上提供了为该演示创建的示例代码。


 5050
5050

 被折叠的 条评论
为什么被折叠?
被折叠的 条评论
为什么被折叠?
 到【灌水乐园】发言


