


gwt入门和进阶
现在我们对术语和内容已经很熟悉了,我们可以继续编写自己的GWT应用程序了。
步骤1:为Eclipse安装GWT插件
如果您已经安装了eclipse,只需进入“帮助”菜单,在“安装新软件”下,将URL设置为http://dl.google.com/eclipse/plugin/3.6 ,然后单击“下一步”和完成安装。

步骤2:创建一个新项目
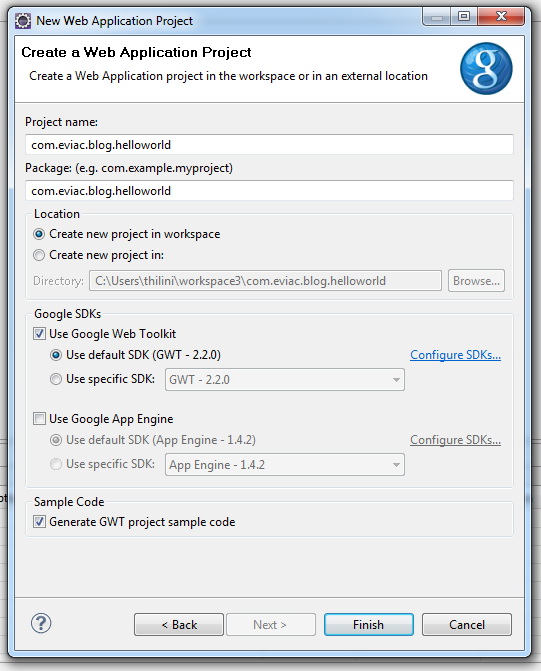
选择文件>新建> Web应用程序项目。 输入名称“ com.eviac.blog.helloworld”作为项目名称和程序包。 默认情况下,它将选择“使用Google Web Toolkit”和“使用Google App Engine”,因为我们在这里仅使用Google Web Toolkit,因此您必须取消选择Google App Engine。
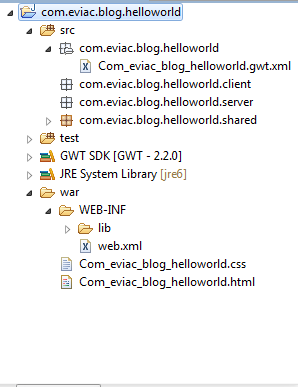
现在,eclipse将为您创建一个具有包结构的项目,如下所示。
步骤3:创建入口点
在com.eviac.blog.helloworld.client包中,创建一个名为
“ HelloWorldGwt ”
package com.eviac.blog.helloworld.client;

import com.google.gwt.core.client.EntryPoint;
import com.google.gwt.event.dom.client.ClickEvent;
import com.google.gwt.event.dom.client.ClickHandler;
import com.google.gwt.user.client.Window;
import com.google.gwt.user.client.ui.Button;
import com.google.gwt.user.client.ui.Label;
import com.google.gwt.user.client.ui.RootPanel;

public class HelloWorldGwt implements EntryPoint {

 @Override
 public void onModuleLoad() {
  final Label label = new Label("Hello World GWT !!!");
  final Button button = new Button("Click Here");
  button.addClickHandler(new ClickHandler() {
   @Override
   public void onClick(ClickEvent event) {
    label.setVisible(false);
    button.setText("welcome back again!");
    Window.alert("Welcome to GWT");
   }
  });

  RootPanel.get().add(label);
  RootPanel.get().add(button);
 }
}
在com.eviac.blog.helloworld包中,创建Com_eviac_blog_helloworld.gwt.xml文件。
Com_eviac_blog_helloworld.gwt.xml
<?xml version="1.0" encoding="UTF-8"?>
<module rename-to='com_eviac_blog_helloworld'>
  <!-- Inherits Web Toolkit utilities.                        -->
  <inherits name='com.google.gwt.user.User'/>

  <inherits name='com.google.gwt.user.theme.standard.Standard'/>

  <!-- Specify the app entry point class.                         -->
  <entry-point class='com.eviac.blog.helloworld.client.HelloWorldGwt'/>
</module>
步骤3:建立html网页
在文件夹war内,创建Com_eviac_blog_helloworld.html文件
Com_eviac_blog_helloworld.html
<!DOCTYPE HTML PUBLIC "-//W3C//DTD HTML 4.01 Transitional//EN">

<html>
  <head>
    <meta http-equiv="content-type" content="text/html; charset=UTF-8">
    <link type="text/css" rel="stylesheet" href="Com_eviac_blog_helloworld.css">
    <title>Hello World GWT</title>
    <script type="text/javascript" language="javascript" src="com_eviac_blog_helloworld/com_eviac_blog_helloworld.nocache.js"></script>
  </head>

  <body>

    <!-- optional tag: add this if needs history support -->
    <iframe src="javascript:''" id="__gwt_historyFrame" tabIndex='-1' style="position:absolute;width:0;height:0;border:0"></iframe>
    <h1><center>Hello World GWT</center></h1>

  </body>
</html>
第4步:创建web.xml文件
在文件夹war / WEB-INF内,创建一个名为web.xml的xml文件。
web.xml
<?xml version="1.0" encoding="UTF-8"?>
<!DOCTYPE web-app
    PUBLIC "-//Sun Microsystems, Inc.//DTD Web Application 2.3//EN"
    "http://java.sun.com/dtd/web-app_2_3.dtd">
<web-app>

 <!-- Default page to serve -->
 <welcome-file-list>
  <welcome-file>Com_eviac_blog_helloworld.html</welcome-file>
 </welcome-file-list>
</web-app>
步骤5:创建css文件
在打猎者内创建一个名为Com_eviac_blog_helloworld.cssCSS文件
Com_eviac_blog_helloworld.css
h1 {
  font-size: 2em;
  font-weight: bold;
  color: #6495ED;
}

.gwt-Label {
 color: #0000FF;
 font: normal 12px tahoma, arial, helvetica, sans-serif;
 height:3.5em;
 width: 10.7em;
}

.gwt-Button {
 color: #0000FF;
 height:3.5em;
 width: 10.7em;
 font-size: 12px;
 font-family: arial, sans-serif;
}
好了,我们已经完成了编码步骤,但请等待,还有一个步骤
步骤6:运行GWT应用程序
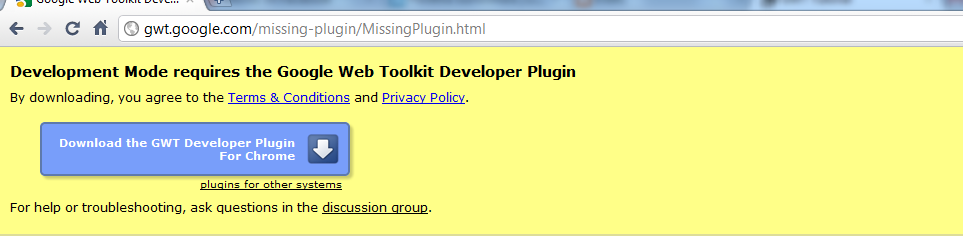
要在项目上单击鼠标右键,请选择“运行方式”->“ Web应用程序”,它将弹出一个新视图“开发模式”,复制生成的URL。

使用此链接为您的Web浏览器安装GWT插件。
现在,将URL粘贴到浏览器中,您将看到类似以下的内容,仅此而已。

现在,您知道如何构建基本的GWT应用程序,可以通过添加更多功能并使用css文件更改外观来改进它。
翻译自: https://www.javacodegeeks.com/2012/03/getting-started-with-gwt.html
gwt入门和进阶


 785
785

 被折叠的 条评论
为什么被折叠?
被折叠的 条评论
为什么被折叠?
 到【灌水乐园】发言


