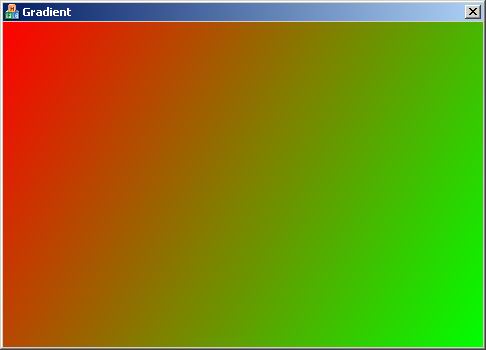
GDI+ 是GDI(Windows 早期版本提供的图形设备接口)的后续版本,是Microsoft Windows XP作系统即后续版本的图形显示技术。它已经集成到了.Net开发环境中,所以不管你的OS是什么版本,只要安装了.Net框架,就有了GDI+(注意:是.Net框架,而不是.Net开发环境,所以Win98中也可以使用GDI+)。
现在,言归正传。
下面以给一个CTestDlg的对话框绘制背景为例子,用GDI+实现角度可变的颜色渐变效果。用到的变量:
iRotation:整型,渐变色的角度
Color1、Color2、Color3:RGB颜色值
两种颜色的比较简单,直接用GDI+提供的LinearGradientBrush刷子就行了:

三种颜色比较复杂,也是用GDI+提供的LinearGradientBrush刷子,不过需要计算绘制区域的对角线长度,并按照对角线平分为三等分。

具体的看以下代码:
BOOL CTestDlg::OnEraseBkgnd(CDC
*
pDC)
{
CDialog::OnEraseBkgnd(pDC);
// 取得第一种颜色的R,G,B值
int r1 = GetRValue(Color1);
int g1 = GetGValue(Color1);
int b1 = GetBValue(Color1);
// 取得第二种颜色的R,G,B值
int r2 = GetRValue(Color2);
int g2 = GetGValue(Color2);
int b2 = GetBValue(Color2);
// 取得第三种颜色的R,G,B值
int r3 = GetRValue(Color3);
int g3 = GetGValue(Color3);
int b3 = GetBValue(Color3);
// 得到绘制区域
CRect rect;
GetClientRect( & rect);
// 计算对角线长度
int iHeight = rect.Height();
int iWidth = rect.Width();
double dwDiagonal = sqrt(( double )(iWidth * iWidth + iHeight * iHeight));
// 三块绘制区域
Rect rectDraw( 0 , 0 , (INT)dwDiagonal, (INT)dwDiagonal);
Rect rectDraw1( 0 , 0 , (INT)dwDiagonal, ((INT)dwDiagonal) / 2 );
Rect rectDraw2( 0 , ((INT)dwDiagonal) / 2 , (INT)dwDiagonal, ((INT)dwDiagonal) / 2 );
// GDI+对象
Graphics graphics(pDC -> GetSafeHdc());
Gdiplus::Bitmap bmp(rectDraw.Width, rectDraw.Height);
Graphics grTmp( & bmp);
// 用刷子填充区域
Gdiplus::LinearGradientBrush linGrBrush(rectDraw1, Color(r1, g1, b1), Color(r2, g2, b2), 90 );
grTmp.FillRectangle( & linGrBrush, rectDraw1);
Gdiplus::LinearGradientBrush linGrBrush1(rectDraw2, Color(r2, g2, b2),Color(r3, g3, b3), 90 );
grTmp.FillRectangle( & linGrBrush1, rectDraw2);
// 计算
dwDiagonal *= 0.5 ;
double dwAngle = iRotation * 3.1415926 / 180.0 ;
double dwCosAngle = cos(dwAngle);
double dwSinAngle = sin(dwAngle);
double dwBeta = atan2(( double )iHeight, ( double )iWidth);
double dwDistance = dwDiagonal * sin(fabs(dwAngle) + dwBeta);
double xc = 0.5 * iWidth - dwDistance * dwSinAngle;
double yc = 0.5 * iHeight - dwDistance * dwCosAngle;
double xc1 = 0.5 * iWidth + dwDistance * dwSinAngle;
double yc1 = 0.5 * iHeight + dwDistance * dwCosAngle;
double dx = dwDiagonal * dwCosAngle;
double dy = - dwDiagonal * dwSinAngle;
// 绘制
Point ptDestinationPoints[ 3 ];
ptDestinationPoints[ 0 ].X = (INT)(xc - dx);
ptDestinationPoints[ 0 ].Y = (INT)(yc - dy);
ptDestinationPoints[ 1 ].X = (INT)(xc + dx);
ptDestinationPoints[ 1 ].Y = (INT)(yc + dy);
ptDestinationPoints[ 2 ].X = (INT)(xc1 - dx);
ptDestinationPoints[ 2 ].Y = (INT)(yc1 - dy);
graphics.DrawImage( & bmp, ptDestinationPoints, 3 );
return TRUE;
}


 8711
8711

 被折叠的 条评论
为什么被折叠?


