


WebView和AppBarLayout嵌套滑动联动无效分析及解决办法
目录
序章
上两篇博客分析了嵌套滑动,CoordinatorLayout与Behavior,这次来结合两者分析.
如果尚未了解嵌套滑动NestedScroll的使用及CoordinatorLayout与Behavior的使用,请先移步查看
引题
在Android CoordinatorLayout和Behavior解析一篇中讲完了Behavior的依赖联动实现部分,本篇将结合实例讲解Behavior的嵌套滑动联动部分.
Materials Design中AppBarLayout嵌套滑动的基本实现.
用Android Studio可以直接新建一个Scrolling Activity
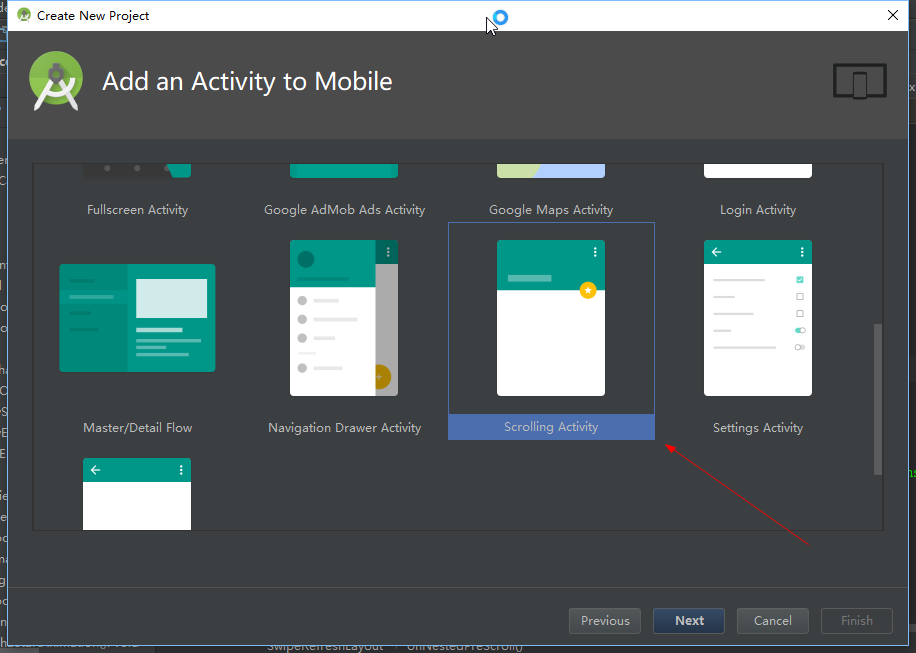
运行创建的例子
这是一个很简单的AppBarLayout嵌套滑动的例子.
查看其布局如下
activity_scrolling.xml
<?xml version="1.0" encoding="utf-8"?>
<android.support.design.widget.CoordinatorLayout xmlns:android="http://schemas.android.com/apk/res/android"
    xmlns:app="http://schemas.android.com/apk/res-auto"
    xmlns:tools="http://schemas.android.com/tools"
    android:layout_width="match_parent"
    android:layout_height="match_parent"
    android:fitsSystemWindows="true"
    tools:context=".ScrollingActivity">

    <android.support.design.widget.AppBarLayout
        android:id="@+id/app_bar"
        android:layout_width="match_parent"
        android:layout_height="@dimen/app_bar_height"
        android:fitsSystemWindows="true"
        android:theme="@style/AppTheme.AppBarOverlay">

        <android.support.design.widget.CollapsingToolbarLayout
            android:id="@+id/toolbar_layout"
            android:layout_width="match_parent"
            android:layout_height="match_parent"
            android:fitsSystemWindows="true"
            app:contentScrim="?attr/colorPrimary"
            app:layout_scrollFlags="scroll|exitUntilCollapsed"
            app:toolbarId="@+id/toolbar">

            <android.support.v7.widget.Toolbar
                android:id="@+id/toolbar"
                android:layout_width="match_parent"
                android:layout_height="?attr/actionBarSize"
                app:layout_collapseMode="pin"
                app:popupTheme="@style/AppTheme.PopupOverlay" />

        </android.support.design.widget.CollapsingToolbarLayout>
    </android.support.design.widget.AppBarLayout>

    <include layout="@layout/content_scrolling" />

    <android.support.design.widget.FloatingActionButton
        android:id="@+id/fab"
        android:layout_width="wrap_content"
        android:layout_height="wrap_content"
        android:layout_margin="@dimen/fab_margin"
        app:layout_anchor="@id/app_bar"
        app:layout_anchorGravity="bottom|end"
        app:srcCompat="@android:drawable/ic_dialog_email"
        android:elevation="50dp"
        />

</android.support.design.widget.CoordinatorLayout>在AppBarLayout的子View中添加app:layout_scrollFlags属性,这里的子View是CollapsingToolbarLayout,关于CollapsingToolbarLayout这是一个配合AppBarLayout和ToolBar实现伸缩的布局,在此不多做介绍,有兴趣请自行百度喽.
对于scrollFlags有如下属性
        /**
         * The view will be scroll in direct relation to scroll events. This flag needs to be
         * set for any of the other flags to take effect. If any sibling views
         * before this one do not have this flag, then this value has no effect.
         */
        public static final int SCROLL_FLAG_SCROLL = 0x1;

        /**
         * When exiting (scrolling off screen) the view will be scrolled until it is
         * 'collapsed'. The collapsed height is defined by the view's minimum height.
         *
         * @see ViewCompat#getMinimumHeight(View)
         * @see View#setMinimumHeight(int)
         */
        public static final int SCROLL_FLAG_EXIT_UNTIL_COLLAPSED = 0x2;

        /**
         * When entering (scrolling on screen) the view will scroll on any downwards
         * scroll event, regardless of whether the scrolling view is also scrolling. This
         * is commonly referred to as the 'quick return' pattern.
         */
        public static final int SCROLL_FLAG_ENTER_ALWAYS = 0x4;

        /**
         * An additional flag for 'enterAlways' which modifies the returning view to
         * only initially scroll back to it's collapsed height. Once the scrolling view has
         * reached the end of it's scroll range, the remainder of this view will be scrolled
         * into view. The collapsed height is defined by the view's minimum height.
         *
         * @see ViewCompat#getMinimumHeight(View)
         * @see View#setMinimumHeight(int)
         */
        public static final int SCROLL_FLAG_ENTER_ALWAYS_COLLAPSED = 0x8;

        /**
         * Upon a scroll ending, if the view is only partially visible then it will be snapped
         * and scrolled to it's closest edge. For example, if the view only has it's bottom 25%
         * displayed, it will be scrolled off screen completely. Conversely, if it's bottom 75%
         * is visible then it will be scrolled fully into view.
         */
        public static final int SCROLL_FLAG_SNAP = 0x10;
对着英文注释强行解释一波哈哈
| 源码里的Flag | xml中layout_scrollFlags对应的字段 | 说明 |
|---|---|---|
| SCROLL_FLAG_SCROLL | scroll | 滑动支持所必须得属性,如果没有这个属性则不可滑动.若在该属性所附属的View的前一个View(它的哥哥或者姐姐…)没有这个属性,则该属性所附属的View也将不支持滑动 |
| SCROLL_FLAG_EXIT_UNTIL_COLLAPSED | exitUntilCollapsed | 当主体滑动的View上滑时,该属性会让所附属的View的高度压缩到最小高度. |
| SCROLL_FLAG_ENTER_ALWAYS | enterAlways | 只要主体滑动的View有下滑操作,不管其是否有滑动到顶部,都会把当前属性所附属的View拉下来. |
| SCROLL_FLAG_ENTER_ALWAYS_COLLAPSED | enterAlwaysCollapsed | 这是enterAlways的附加属性,配合enterAlways使用,单独使用无效.作用是当有下拉操作时不会把整个View都拉下来,而是拉一个最小高度的值,当滑动的View已经触顶了,再将整个View拉下来. |
| SCROLL_FLAG_SNAP | snap | 当滑动结束的时候,根据附属View的显示高度和原本高度决定隐藏还是显示,比如显示高度只有原来的25%则隐藏,75%则显示.实测效果会带动主体滑动的View一起运动,感觉体验较差. |
layout_scrollFlags强行解释完后来看看与AppBarLayout配合嵌套滑动的layout – content_scrolling.xml,这是一个NestedScrollView.
在NestedScrollView的属性中添加了一个Behavior如下
app:layout_behavior="@string/appbar_scrolling_view_behavior"appbar_scrolling_view_behavior定义如下
<string name="appbar_scrolling_view_behavior" translatable="false">android.support.design.widget.AppBarLayout$ScrollingViewBehavior</string>问题
基本使用简单介绍完了,如果我们需要滑动的View是WebView呢?我们将这个NestedScrollView替换成WebView,查看下效果.

然而很遗憾,并没有效果.那么没有效果的原因呢?
分析
开始分析问题,根据之前篇章Android CoordinatorLayout和Behavior解析可以知道,AppBarLayout这效果肯定是Behavior实现的.
AppBarLayout有一个默认Behavior
@CoordinatorLayout.DefaultBehavior(AppBarLayout.Behavior.class)查看这个Behavior源码,发现有几重继承
AppBarLayout.Behavior –> HeaderBehavior<AppBarLayout> –> ViewOffsetBehavior<V> –> CoordinatorLayout.Behavior<V>
虽然有多重继承,但是却发现这些Behavior都没有重写CoordinatorLayout.Behavior<V>的layoutDependsOn方法,说明这些Behavior都不是依赖联动,那它们就是嵌套滑动的Behavior了.
查看AppBarLayout.Behavior的嵌套滑动相关方法
    @Override
    public boolean onStartNestedScroll(CoordinatorLayout parent, AppBarLayout child,
                                       View directTargetChild, View target, int nestedScrollAxes, int type) {
        // Return true if we're nested scrolling vertically, and we have scrollable children
        // and the scrolling view is big enough to scroll
        final boolean started = (nestedScrollAxes & ViewCompat.SCROLL_AXIS_VERTICAL) != 0
                && child.hasScrollableChildren()
                && parent.getHeight() - directTargetChild.getHeight() <= child.getHeight();

        if (started && mOffsetAnimator != null) {
            // Cancel any offset animation
            mOffsetAnimator.cancel();
        }

        // A new nested scroll has started so clear out the previous ref
        mLastNestedScrollingChildRef = null;

        return started;
    }

    @Override
    public void onNestedPreScroll(CoordinatorLayout coordinatorLayout, AppBarLayout child,
                                  View target, int dx, int dy, int[] consumed, int type) {
        if (dy != 0) {
            int min, max;
            if (dy < 0) {
                // We're scrolling down
                min = -child.getTotalScrollRange();
                max = min + child.getDownNestedPreScrollRange();
            } else {
                // We're scrolling up
                min = -child.getUpNestedPreScrollRange();
                max = 0;
            }
            if (min != max) {
                consumed[1] = scroll(coordinatorLayout, child, dy, min, max);
            }
        }
    }

    @Override
    public void onNestedScroll(CoordinatorLayout coordinatorLayout, AppBarLayout child,
                               View target, int dxConsumed, int dyConsumed, int dxUnconsumed, int dyUnconsumed,
                               int type) {
        if (dyUnconsumed < 0) {
            // If the scrolling view is scrolling down but not consuming, it's probably be at
            // the top of it's content
            scroll(coordinatorLayout, child, dyUnconsumed,
                    -child.getDownNestedScrollRange(), 0);
        }
}根据onStartNestedScroll的注释
// Return true if we're nested scrolling vertically, and we have scrollable children
// and the scrolling view is big enough to scroll可知,如果该Behavior所附属的View存在可以滑动的子View,而且正在滑动的View足够大去滑动的话,就接受嵌套滑动事件.
然后在onNestedPreScroll和onNestedScroll中也做了滑动的处理.这说明AppBarLayout的联动效果确实是依赖于嵌套滑动实现的.
查看NestedScrollView源码
public class NestedScrollView extends FrameLayout implements NestedScrollingParent,
        NestedScrollingChild2, ScrollingView {
        //..................
}发现其确实实现了嵌套滑动的NestedScrollingChild2方法.那么问题原因就很明显了,由于AppBarLayout的联动依赖于嵌套滑动,而WebView并没有实现嵌套滑动机制,那么便无法实现联动.
想要WebView实现和AppBarLayout的联动就需要重写WebView了.
在开始重写WebView之前,我们继续分析两个问题.
- 上面AndroidStudio自带例子中,
NestedScrollView的父View是和FrameLayout类似的CoordinatorLayout,但是NestedScrollView却没有覆盖掉AppBarLayout. - 在
AppBarLayout上下滑动的时候,NestedScrollView不仅位置在变化,而且高度也在变化.
这两个问题很显然应该是NestedScrollView的Behavior所实现的效果.
查看AppBarLayout.ScrollingViewBehavior的实现
    @Override
    public boolean layoutDependsOn(CoordinatorLayout parent, View child, View dependency) {
        // We depend on any AppBarLayouts
        return dependency instanceof AppBarLayout;
}说明这个Behavior会根据AppBarLayout的改变而改变.
再看onDependentViewChanged方法.
    @Override
    public boolean onDependentViewChanged(CoordinatorLayout parent, View child,
            View dependency) {
        offsetChildAsNeeded(parent, child, dependency);
        return false;
    }

    private void offsetChildAsNeeded(CoordinatorLayout parent, View child, View dependency) {
        final CoordinatorLayout.Behavior behavior =
                ((CoordinatorLayout.LayoutParams) dependency.getLayoutParams()).getBehavior();
        if (behavior instanceof Behavior) {
            // Offset the child, pinning it to the bottom the header-dependency, maintaining
            // any vertical gap and overlap
            final Behavior ablBehavior = (Behavior) behavior;
            ViewCompat.offsetTopAndBottom(child, (dependency.getBottom() - child.getTop())
                    + ablBehavior.mOffsetDelta
                    + getVerticalLayoutGap()
                    - getOverlapPixelsForOffset(dependency));
        }
}这段代码就是根据AppBarLayout的改变来改变滑动View的位置和高度了.
接着查看AppBarLayout.ScrollingViewBehavior的父类HeaderScrollingViewBehavior的onLayoutChild代码
    @Override
    protected void layoutChild(final CoordinatorLayout parent, final View child,
            final int layoutDirection) {
        final List<View> dependencies = parent.getDependencies(child);
        final View header = findFirstDependency(dependencies);

        if (header != null) {
            final CoordinatorLayout.LayoutParams lp =
                    (CoordinatorLayout.LayoutParams) child.getLayoutParams();
            final Rect available = mTempRect1;
            available.set(parent.getPaddingLeft() + lp.leftMargin,
                    header.getBottom() + lp.topMargin,
                    parent.getWidth() - parent.getPaddingRight() - lp.rightMargin,
                    parent.getHeight() + header.getBottom()
                            - parent.getPaddingBottom() - lp.bottomMargin);

            final WindowInsetsCompat parentInsets = parent.getLastWindowInsets();
            if (parentInsets != null && ViewCompat.getFitsSystemWindows(parent)
                    && !ViewCompat.getFitsSystemWindows(child)) {
                // If we're set to handle insets but this child isn't, then it has been measured as
                // if there are no insets. We need to lay it out to match horizontally.
                // Top and bottom and already handled in the logic above
                available.left += parentInsets.getSystemWindowInsetLeft();
                available.right -= parentInsets.getSystemWindowInsetRight();
            }

            final Rect out = mTempRect2;
            GravityCompat.apply(resolveGravity(lp.gravity), child.getMeasuredWidth(),
                    child.getMeasuredHeight(), available, out, layoutDirection);

            final int overlap = getOverlapPixelsForOffset(header);

            child.layout(out.left, out.top - overlap, out.right, out.bottom - overlap);
            mVerticalLayoutGap = out.top - header.getBottom();
        } else {
            // If we don't have a dependency, let super handle it
            super.layoutChild(parent, child, layoutDirection);
            mVerticalLayoutGap = 0;
        }
}这段代码也很明显有根据依赖来设置Behavior所附属的View的位置.那么上面两个疑问就明了了.
解决
接下来就是如何重写WebView了.
嵌套滑动接口实现
先实现NestedScrollingChild2的嵌套滑动接口吧.
package com.yxf.nestedscrollwebview;

import android.content.Context;
import android.support.v4.view.NestedScrollingChild2;
import android.support.v4.view.NestedScrollingChildHelper;
import android.util.AttributeSet;
import android.webkit.WebView;

public class NestedScrollWebView extends WebView implements NestedScrollingChild2 {

    private final NestedScrollingChildHelper mChildHelper;

    public NestedScrollWebView(Context context) {
        this(context, null);
    }

    public NestedScrollWebView(Context context, AttributeSet attrs) {
        this(context, attrs, 0);
    }

    public NestedScrollWebView(Context context, AttributeSet attrs, int defStyleAttr) {
        super(context, attrs, defStyleAttr);
        mChildHelper = new NestedScrollingChildHelper(this);
        setNestedScrollingEnabled(true);
    }

    // NestedScrollingChild

    @Override
    public void setNestedScrollingEnabled(boolean enabled) {
        mChildHelper.setNestedScrollingEnabled(enabled);
    }

    @Override
    public boolean isNestedScrollingEnabled() {
        return mChildHelper.isNestedScrollingEnabled();
    }

    @Override
    public boolean startNestedScroll(int axes) {
        return mChildHelper.startNestedScroll(axes);
    }

    @Override
    public boolean startNestedScroll(int axes, int type) {
        return mChildHelper.startNestedScroll(axes, type);
    }

    @Override
    public void stopNestedScroll() {
        mChildHelper.stopNestedScroll();
    }

    @Override
    public void stopNestedScroll(int type) {
        mChildHelper.stopNestedScroll(type);
    }

    @Override
    public boolean hasNestedScrollingParent() {
        return mChildHelper.hasNestedScrollingParent();
    }

    @Override
    public boolean hasNestedScrollingParent(int type) {
        return mChildHelper.hasNestedScrollingParent(type);
    }

    @Override
    public boolean dispatchNestedScroll(int dxConsumed, int dyConsumed, int dxUnconsumed,
                                        int dyUnconsumed, int[] offsetInWindow) {
        return mChildHelper.dispatchNestedScroll(dxConsumed, dyConsumed, dxUnconsumed, dyUnconsumed,
                offsetInWindow);
    }

    @Override
    public boolean dispatchNestedScroll(int dxConsumed, int dyConsumed, int dxUnconsumed,
                                        int dyUnconsumed, int[] offsetInWindow, int type) {
        return mChildHelper.dispatchNestedScroll(dxConsumed, dyConsumed, dxUnconsumed, dyUnconsumed,
                offsetInWindow, type);
    }

    @Override
    public boolean dispatchNestedPreScroll(int dx, int dy, int[] consumed, int[] offsetInWindow) {
        return mChildHelper.dispatchNestedPreScroll(dx, dy, consumed, offsetInWindow);
    }

    @Override
    public boolean dispatchNestedPreScroll(int dx, int dy, int[] consumed, int[] offsetInWindow,
                                           int type) {
        return mChildHelper.dispatchNestedPreScroll(dx, dy, consumed, offsetInWindow, type);
    }

    @Override
    public boolean dispatchNestedFling(float velocityX, float velocityY, boolean consumed) {
        return mChildHelper.dispatchNestedFling(velocityX, velocityY, consumed);
    }

    @Override
    public boolean dispatchNestedPreFling(float velocityX, float velocityY) {
        return mChildHelper.dispatchNestedPreFling(velocityX, velocityY);
    }
}
以上实现若不理解请参见Android NestedScroll嵌套滑动机制解析,在此不再赘述了.
重写onTouchEvent
然后需要重写的一个关键方法是onTouchEvent.在重写这个方法之前,其实我们需要考虑一个问题,就是由于AppBarLayout.ScrollingViewBehavior会改变WebView的高度,那么这种改变导致的差异需要在重写的onTouchEvent中计算触摸坐标的增减吗?
这么装逼的问题,我本来想好好写下这方面的解释的,奈何…很尴尬,LZ没有很好的工具来做原理分析图,尝试了几次都画不出来 (如果各位有好的原理图制作工具跪求告知)
所以,锻炼下大家的思维,自己分析吧,我就不解释了
在这里直接说答案吧,AppBarLayout.ScrollingViewBehavior的效果实际上不会对一般嵌套滑动的触摸处理产生影响.
开始重写onTouchEvent
添加成员变量
    private final int[] mScrollConsumed = new int[2];
    private final int[] mScrollOffset = new int[2];

private int mLastMotionY;重写onTouchEvent
    @Override
    public boolean onTouchEvent(MotionEvent event) {
        MotionEvent vtev = MotionEvent.obtain(event);

        final int actionMasked = event.getAction();

        switch (actionMasked) {
            case MotionEvent.ACTION_DOWN:
                mLastMotionY = (int) event.getRawY();
                startNestedScroll(ViewCompat.SCROLL_AXIS_VERTICAL);
                break;
            case MotionEvent.ACTION_UP:
            case MotionEvent.ACTION_CANCEL:
                stopNestedScroll();
                break;
            case MotionEvent.ACTION_MOVE:
                final int y = (int) event.getRawY();
                int deltaY = mLastMotionY - y;
                if (dispatchNestedPreScroll(0, deltaY, mScrollConsumed, mScrollOffset)) {
                    Log.d(TAG, "onTouchEvent: deltaY : " + deltaY + " , mScrollConsumedY : " + mScrollConsumed[1] + " , mScrollOffset : " + mScrollOffset[1]);
                    vtev.offsetLocation(0, mScrollConsumed[1]);
                }
                mLastMotionY = y;

                int scrollY = getScrollY();

                int dyUnconsumed = 0;
                if (scrollY == 0) {
                    dyUnconsumed = deltaY;
                } else if (scrollY + deltaY < 0) {
                    dyUnconsumed = deltaY + scrollY;
                    vtev.offsetLocation(0, -dyUnconsumed);
                }
                boolean result = super.onTouchEvent(vtev);
                if (dispatchNestedScroll(0, deltaY - dyUnconsumed, 0, dyUnconsumed, mScrollOffset)) {

                }
                return result;
            default:

                break;
        }
        return super.onTouchEvent(vtev);
}这里的差值距离计算没有采用Android NestedScroll嵌套滑动机制解析中的方式,其方式较为麻烦.
这里只作为一个简单的示例为避免逻辑过于复杂,也没有做多点触控的处理.相比event.getY(),使用event.getRawY()的差值也更加直接明了,毕竟是屏幕中的坐标,不会受View位置的影响.
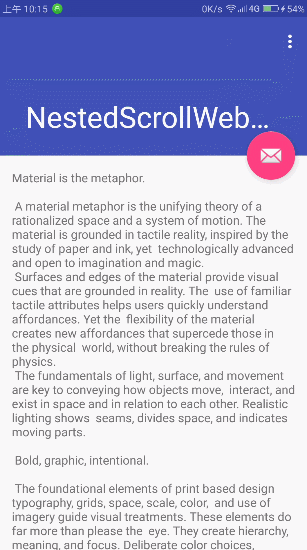
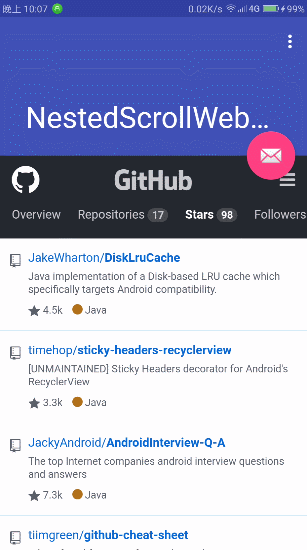
运行程序
解决惯性滑动时的嵌套滑动
看似很完美了,实际上还有一个可以逼死强逼症的缺陷 – 在WebView的惯性滑动下,滑动到顶也无法将AppBarLayout拉下来,触顶后必须再下滑一次才能将AppBarLayout拉下来.

那么如何解决这个问题呢?
这种问题,呵,能难倒我吗?
先说下思路:
大部分的可滑动的View都有一个惯性滑动的机制,这个机制基本是类似的,就是添加一个速度追踪器(VelocityTracker)记录滑动速度,然后在ACTION_UP触摸事件出现时,获得这个速度,在ViewConfiguration中获得最大的滑动速度,然后再调用OverScroller来计算惯性滑动的距离,并且调用View的刷新从而实现调用computeScroll方法,然后在computeScroll方法中根据OverScroller计算的应该滑动的距离滑动到指定位置.
我本想查看下WebView的滑动是否也是如此,但是SDK中并没有WebView的源码
只能赌它机制是一样的了,如果不一样就得完全重写computeScroll方法,不过运气不错,实践发现这套机制是一样的,避免了要重写computeScroll.
接下来是一如既往的贴代码时间.
实现代码如下
添加成员变量.
    private VelocityTracker mVelocityTracker;
    private int mMinimumVelocity;
    private int mMaximumVelocity;
    private OverScroller mScroller;
    private int mLastScrollerY;
在有三个参数的构造方法中添加如下代码
    mScroller = new OverScroller(getContext());

    final ViewConfiguration configuration = ViewConfiguration.get(getContext());
    mMinimumVelocity = configuration.getScaledMinimumFlingVelocity();
    mMaximumVelocity = configuration.getScaledMaximumFlingVelocity();
然后添加下列方法
    private void initVelocityTrackerIfNotExists() {
        if (mVelocityTracker == null) {
            mVelocityTracker = VelocityTracker.obtain();
        }
    }

    private void recycleVelocityTracker() {
        if (mVelocityTracker != null) {
            mVelocityTracker.recycle();
            mVelocityTracker = null;
        }
    }

    public void fling(int velocityY) {
        startNestedScroll(ViewCompat.SCROLL_AXIS_VERTICAL, ViewCompat.TYPE_NON_TOUCH);
        mScroller.fling(getScrollX(), getScrollY(), // start
                0, velocityY, // velocities
                0, 0, // x
                Integer.MIN_VALUE, Integer.MAX_VALUE, // y
                0, 0); // overscroll
        mLastScrollerY = getScrollY();
        ViewCompat.postInvalidateOnAnimation(this);
    }

    @Override
    public void computeScroll() {
        super.computeScroll();
        if (mScroller.computeScrollOffset()) {
            final int x = mScroller.getCurrX();
            final int y = mScroller.getCurrY();
            Log.d(TAG, "computeScroll: y : " + y);
            int dy = y - mLastScrollerY;
            if (dy != 0) {
                int scrollY = getScrollY();
                int dyUnConsumed = 0;
                int consumedY = dy;
                if (scrollY == 0) {
                    dyUnConsumed = dy;
                    consumedY = 0;
                } else if (scrollY + dy < 0) {
                    dyUnConsumed = dy + scrollY;
                    consumedY = -scrollY;
                }

                if (!dispatchNestedScroll(0, consumedY, 0, dyUnConsumed, null,
                        ViewCompat.TYPE_NON_TOUCH)) {

                }
            }

            // Finally update the scroll positions and post an invalidation
            mLastScrollerY = y;
            ViewCompat.postInvalidateOnAnimation(this);
        } else {
            // We can't scroll any more, so stop any indirect scrolling
            if (hasNestedScrollingParent(ViewCompat.TYPE_NON_TOUCH)) {
                stopNestedScroll(ViewCompat.TYPE_NON_TOUCH);
            }
            // and reset the scroller y
            mLastScrollerY = 0;
        }
}修改onTouchEvent
    @Override
    public boolean onTouchEvent(MotionEvent event) {
        initVelocityTrackerIfNotExists();

        MotionEvent vtev = MotionEvent.obtain(event);

        final int actionMasked = event.getAction();

        switch (actionMasked) {
            case MotionEvent.ACTION_DOWN:
                mLastMotionY = (int) event.getRawY();
                startNestedScroll(ViewCompat.SCROLL_AXIS_VERTICAL);
                mVelocityTracker.addMovement(vtev);
                mScroller.computeScrollOffset();
                if (!mScroller.isFinished()) {
                    mScroller.abortAnimation();
                }
                break;
            case MotionEvent.ACTION_UP:
                final VelocityTracker velocityTracker = mVelocityTracker;
                velocityTracker.computeCurrentVelocity(1000, mMaximumVelocity);
                int initialVelocity = (int) velocityTracker.getYVelocity();
                if (Math.abs(initialVelocity) > mMinimumVelocity) {
                    fling(-initialVelocity);
                }
            case MotionEvent.ACTION_CANCEL:
                stopNestedScroll();
                recycleVelocityTracker();
                break;
            case MotionEvent.ACTION_MOVE:
                final int y = (int) event.getRawY();
                int deltaY = mLastMotionY - y;
                if (dispatchNestedPreScroll(0, deltaY, mScrollConsumed, mScrollOffset)) {
                    Log.d(TAG, "onTouchEvent: deltaY : " + deltaY + " , mScrollConsumedY : " + mScrollConsumed[1] + " , mScrollOffset : " + mScrollOffset[1]);
                    vtev.offsetLocation(0, mScrollConsumed[1]);
                }
                mLastMotionY = y;

                int scrollY = getScrollY();

                int dyUnconsumed = 0;
                if (scrollY == 0) {
                    dyUnconsumed = deltaY;
                } else if (scrollY + deltaY < 0) {
                    dyUnconsumed = deltaY + scrollY;
                    vtev.offsetLocation(0, -dyUnconsumed);
                }
                mVelocityTracker.addMovement(vtev);
                boolean result = super.onTouchEvent(vtev);
                if (dispatchNestedScroll(0, deltaY - dyUnconsumed, 0, dyUnconsumed, mScrollOffset)) {

                }
                return result;
            default:

                break;
        }
        return super.onTouchEvent(vtev);
    }
已经说过思路了,这里就不对这些操作做太多解释了,自己慢慢理解吧.
重点说下重写的computeScroll方法,由于使用了super.computeScroll(),这里的computeScroll,在WebView滑动时没有做什么操作,只有当其滑动到顶时才会将嵌套滑动事件通过dispatchNestedScroll分发出去.
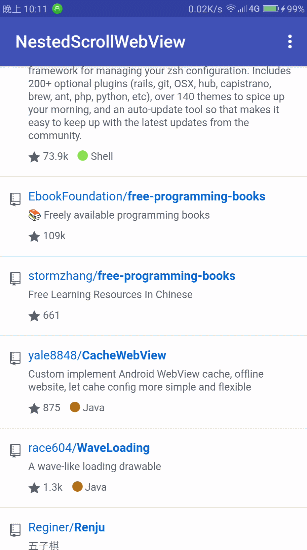
来看看实际效果吧

滑动如丝般顺滑,那么到此为止,问题完美解决了.
终章
当你看到这里时,说明我已经成功的浪费了你很多的时间.实际上WebView的嵌套滑动并不需要做那么多事情,Android官方的例子中用NestedScrollView可以实现嵌套滑动,那么直接将WebView作为NestedScrollView直接子View即可实现WebView的嵌套滑动,2333333333333333.
看了那么长一段是不是有被耍了的感觉?
实际上,并没有!
这篇也算是一篇能够说明Behavior与NestedScroll使用原理及实例的文章.
然后呢,自己重写WebView实现嵌套滑动也有好处,第一,减少了布局层数;第二,如果使用NestedScrollView嵌套WebView那么多点触控的一些手势和事件将不能分发WebView中,比如WebView所支持的放大和缩小手势,将完全失效.
当然,也有缺点.我写的WebView示例只是非常简单的,很多东西未考虑进去,其中必定有很多隐藏的bug,同样,在实际项目中这样重写,如果你功力不够,那么你将成为bug制造者.
扯淡完毕!
示例源码
按习惯,附上一个示例源码.


 1396
1396


 被折叠的 条评论
为什么被折叠?
被折叠的 条评论
为什么被折叠?
 到【灌水乐园】发言


