


Jenkins is one open source tool to perform continuous integration and build automation. A developer can easily build and test software using continuous integration through jenkins in a project life cycle. It allows continuous delivery of software by building pipelines and integrating with a large number of testing and deployment technologies. In this tutorial, we will configure jenkins2 in ubuntu 16.04 along with NGINX reverse proxy inside a docker.
To setup jenkins in a docker , you can do it by simply pulling the image from official jenkins docker image and then run it using docker command to setup the container. But with this approach you will be unable to configure data volumes, port configuration, reverse proxy etc. exactly you like to do it. Therefore, to understand in details, we will configure it in a step by step/modular approach. So we will start by creating jenkins user and home.
Create Jenkins user and home
This is important in the sense that, jenkins uses user/group id of 1000 and if the same user id and group id is allocated to another user then there will be error in running the container. Use the following command to find out if user id 1000 is available or not. Another option is to change the uid/gid of the user who owns it leaving uid/gid 1000 free. When the docker-compose builds the jenkins it will create uid/gid 1000 of jenkins along with the default home location which is /var/jenkins_home
# useradd -u 1000 -g 1000 jenkins
# awk -F: '//home/ {printf "%s:%s\n",3}' /etc/passwd

If the uid/gid (1000) is already allocated to another user then swap the uid/gid of that user with jenkins using usermod/groupmod command. Also make sure you have already installed docker and docker-compose in the host system. Find their version with the following commands.
# docker -v
Docker version 1.12.1, build 23cf638
# docker-compose -v
docker-compose version 1.9.0, build 2585387
Folder setup
Let us create the directory structure for jenkins. Create three folders inside your docker project directory for jenkins data, jenkins master and nginx.
- Create a root directory by the name DockerJenkins ( Jenkins project directory ) and a single file docker-compose.yml inside it.
- Create three directories- jenkins-data , jenkins-master and nginx inside jenkins project directory which is DockerJenkins.
- Create Dockerfile inside all of the above three folders.
- Create four directories by the name conf.d, ssl, htpass and logs inside nginx directory.
- Create nginx default configuration file default.conf inside nginx and jenkins.conf inside conf.d The log files for NGINX will be inside logs directory.
- We will create key/certificate for NGINX inside ssl directory and http basic user inside htpass directory at later stages.
# cd ~
# mkdir DockerJenkins
# cd DockerJenkins/
~/DockerJenkins# mkdir jenkins-data
~/DockerJenkins# mkdir jenkins-master
~/DockerJenkins# mkdir nginx
~/DockerJenkins# touch docker-compose.yml
~/DockerJenkins# cd jenkins-data/
~/DockerJenkins/jenkins-data# touch Dockerfile
~/DockerJenkins/jenkins-data# cd ../jenkins-master
~/DockerJenkins/jenkins-master# touch Dockerfile
~/DockerJenkins/jenkins-master# cd ../nginx/
~/DockerJenkins/nginx# mkdir conf.d
~/DockerJenkins/nginx# mkdir ssl
~/DockerJenkins/nginx# mkdir logs
~/DockerJenkins/nginx# touch default.conf
~/DockerJenkins/nginx# cd conf.d/
~/DockerJenkins/nginx/conf.d# touch jenkins.conf
~/DockerJenkins/nginx/conf.d# cd ../logs
~/DockerJenkins/nginx/logs# touch access.log
~/DockerJenkins/nginx/logs# touch error.log
The current directory structure of our docker project (DockerJenkins) looks like this-
DockerJenkins/
├── docker-compose.yml
├── jenkins-data
│ └── Dockerfile
├── jenkins-master
│ └── Dockerfile
└── nginx
├── conf.d
│ └── jenkins.conf
├── default.conf
├── Dockerfile
├── logs
│ ├── access.log
│ └── error.log
└── ssl
├── demohost.crt
└── demohost.key
Setup / Build Jenkins data
Now that directory structure for our docker project has been created, we will start by creating docker file for jenkins-data.
# cd ~/DockerJenkins/jenkins-data
~/DockerJenkins/jenkins-data# vi DockerfileFROM ubuntu:16.04
RUN useradd -d "/var/jenkins_home" -u 1000 -m -s /bin/bash jenkins
RUN mkdir -p /var/log/jenkins
RUN chown -R jenkins:jenkins /var/log/jenkins
VOLUME ["/var/log/jenkins", "/var/jenkins_home"] USER jenkins
CMD ["echo", "Data container for Jenkins"]
The above docker file adds 'jenkins' user with id 1000 and defaults its home to /var/jenkins_home. We have also declared two volumes directory, one is for log another is for jenkins data. The image will mount volumes for the Jenkins master so that even if you delete the Jenkins master, there will be no loss of data. The command VOLUME ["/var/log/jenkins", "/var/jenkins_home"] in the above docker file declares the mount points in the docker host. Any changes made in this directory can be accessed from host machine even if you have exited the container. However if you run a new container with a new name the host location it mounts will change and the data will not be visible the next time you start the container from same image. The solution is simple. We will add volumes_from command in the docker-compose to attach the container name permanently. This is commonly referred to as persistent data storage in containers.
jenkins-master:
image: jenkins
volumes_from:
- jenkins-data
.....................
.....................
Next we move to configure docker file for jenkins master but before that let us build jenkins data.
~/DockerJenkins/jenkins-data# docker build .
Setup/Build Jenkins master
Once jenkins data built completed successfully we will create a docker file for jenkins master which is easy to understand and self-explanatory.
# cd ~/DockerJenkins/jenkins-master
~/DockerJenkins/jenkins-master# vi DockerfileFROM jenkins
USER root
RUN mkdir /var/log/jenkins
RUN mkdir /var/cache/jenkins
RUN chown -R jenkins:jenkins /var/log/jenkins
RUN chown -R jenkins:jenkins /var/cache/jenkins
USER jenkinsENV JAVA_OPTS="-Xmx8192m"
ENV JENKINS_OPTS="--handlerCountStartup=100 --handlerCountMax=300 --logfile=/var/log/jenkins/jenkins.log --webroot=/var/cache/jenkins/war"
The above docker file pulls jenkins image and as a root user creates log and cache directory and changes the ownership to jenkins to setup the environments.
Build the jenkins master
~/DockerJenkins/jenkins-master# docker build .
Setup/Build NGINX
First create the dockerfile for NGINX
# cd ~/DockerJenkins/nginx
~/DockerJenkins/nginx# vi DockerfileFROM nginx
RUN rm /etc/nginx/conf.d/default.conf
EXPOSE 80
EXPOSE 443
Jenkins runs in the port no 8080, so to access it behind a proxy we will install NGINX and configure it to access Jenkins service through SSL with HTTP Basic Auth. Let’s install apache2-utils package, which contains htpasswd utility.
# sudo apt-get -y install apache2-utils
# cd ~/DockerJenkins/nginx/
~/DockerJenkins/nginx# mkdir htpass
~/DockerJenkins/nginx# cd htpass/
~/DockerJenkins/nginx/htpass# htpasswd -c jenkins.password linoxide
New password:
Re-type new password:
Adding password for user linoxide
Next we will create SSL key and certificates for the jenkins site.
# cd ~/DockerJenkins/nginx/ssl
root@demohost:~/DockerJenkins/nginx/ssl# sudo openssl req -x509 -nodes -days 365 -newkey rsa:2048 -keyout demohost.key -out demohost.crt
Generating a 2048 bit RSA private key
..........................+++
..............+++
writing new private key to 'demohost.key'
-----
Edit the default.conf for NGINX which we have created during folder setup.
# cd ~/DockerJenkins/nginx/
~/DockerJenkins/nginx# vi default.conf
daemon off;
user www-data;
pid /var/run/nginx.pid;
worker_processes 1;
events {
worker_connections 1024;
}
http {
# Basic Settings
sendfile on;
tcp_nopush on;
tcp_nodelay on;
keepalive_timeout 33;
types_hash_max_size 2048;server_tokens off;
server_names_hash_bucket_size 64;include /etc/nginx/mime.types;
default_type application/octet-stream;# Logging Settings
access_log /var/log/nginx/access.log;
error_log /var/log/nginx/error.log;# Gzip Settings
gzip on;
gzip_vary on;
gzip_proxied any;
gzip_comp_level 3;
gzip_buffers 16 8k;
gzip_http_version 1.1;
gzip_types text/plain text/xml text/css application/x-javascript application/json;
gzip_disable "MSIE [1-6].(?!.*SV1)";# Virtual Host Configs
include /etc/nginx/sites-enabled/*;# Error Page Config
#error_page 403 404 500 502 /srv/Splash;
}
Edit jenkins.conf inside conf.d directory
~/Dockerjenkins/nginx# vi conf.d/jenkins.conf
server {
listen 80;
listen 443 ssl http2;
server_name "demohost.com";ssl_certificate /etc/nginx/ssl/demohost.crt;
ssl_certificate_key /etc/nginx/ssl/demohost.key;
ssl_session_timeout 1d;ssl_session_cache shared:SSL:50m;
ssl_session_tickets off;ssl_protocols TLSv1 TLSv1.1 TLSv1.2;
ssl_ciphers 'ECDHE-ECDSA-CHACHA20-POLY1305:ECDHE-RSA-CHACHA20-POLY1305:ECDHE-ECDSA-AES128-GCM-SHA256:ECDHE-RSA-AES128-GCM-SHA256:ECDHE-ECDSA-AES256-GCM-SHA384:
ECDHE-RSA-AES256-GCM-SHA384:DHE-RSA-AES128-GCM-SHA256:DHE-RSA-AES256-
GCM-SHA384:ECDHE-ECDSA-AES128-SHA256:ECDHE-RSA-AES128-SHA256:ECDHE-ECDSA-
AES128-SHAECDHE-RSA-AES256-SHA384:ECDHE-RSA-AES128-SHA:ECDHE-ECDSA-AES256-
SHA384:ECDHE-ECDSA-AES256-SHA:ECDHE-RSA-AES256-SHA:DHE-RSA-AES128-SHA256:DHE-
RSA-AES128-SHA:DHE-RSA-AES256-SHA256:DHE-RSA-AES256-SHA:ECDHE-ECDSA-DES-CBC3-
SHA:ECDHE-RSA-DES-CBC3-SHA:EDH-RSA-DES-CBC3-SHA:AES128-GCM-SHA256:AES256-
GCM-SHA384:AES128-SHA256:AES256-SHA256:AES128-SHA:AES256-SHA:DES-CBC3-SHA:!DSS';
ssl_prefer_server_ciphers on;
access_log on;location / {
auth_basic "Restricted";
auth_basic_user_file /etc/nginx/htpass/jenkins.password;proxy_pass http://jenkins-master:8080;
proxy_set_header Host remote_addr;
proxy_set_header X-Forwarded-For $proxy_add_x_forwarded_for;
proxy_set_header X-Forwarded-Proto http;
proxy_max_temp_file_size 0;proxy_connect_timeout 150;
proxy_send_timeout 100;
proxy_read_timeout 100;proxy_buffer_size 8k;
proxy_buffers 4 32k;
proxy_busy_buffers_size 64k;
proxy_temp_file_write_size 64k;
}
}
Build the NGINX container
# cd ~/DockerJenkins/nginx/
~/DockerJenkins/nginx# docker build .
Create/run docker-compose
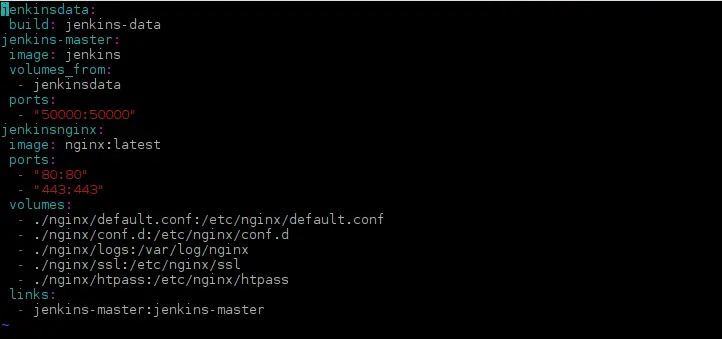
Now that we have almost completed the setup/build of jenkins data, jenkins and NGINX, let us edit docker-compose.yml inside docker project directory which is DockerJenkins so that they can run in an isolated environment.
~/DockerJenkins# vi docker-compose.yml
Now to create the containers, use docker-compose.
~/DockerJenkins# docker-compose up -d
-d flag instructs the docker compose to run as daemon. To check, list the containers.
# docker ps -a
One last piece of puzzle is how you will access the jenkins site, in our case it is demohost.com which is configured in NGINX conf directory (jenkins.conf) . For that you need to find the IP address of NGINX container. Use docker inspect command to find it.
root@demohost:~/DockerJenkins# docker inspect <Container_Name_Or_ID_Of_NGINX> | grep IPAddress
Edit the /etc/hosts file of host system and add an entry for demohost.com and restart networking
# vi /etc/hosts
.......................................
172.17.0.2 demohost.com
.......................................# service networking restart
Open your favorite browser and point it to http://<Server_Name_Of_jenkins_Or_IP_Address>, in our case it is http://demohost.com. You will be asked to unlock jenkins.
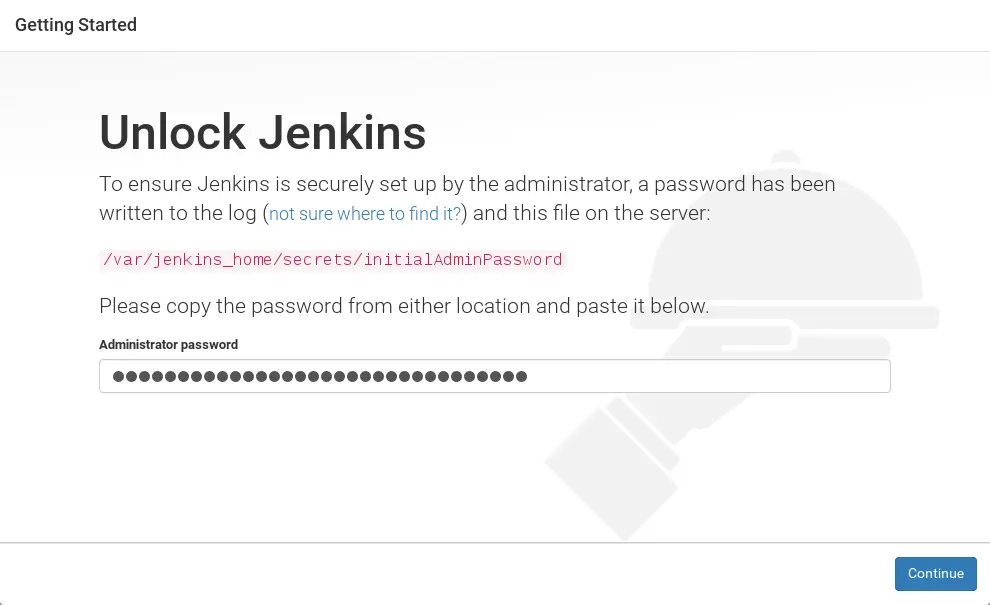
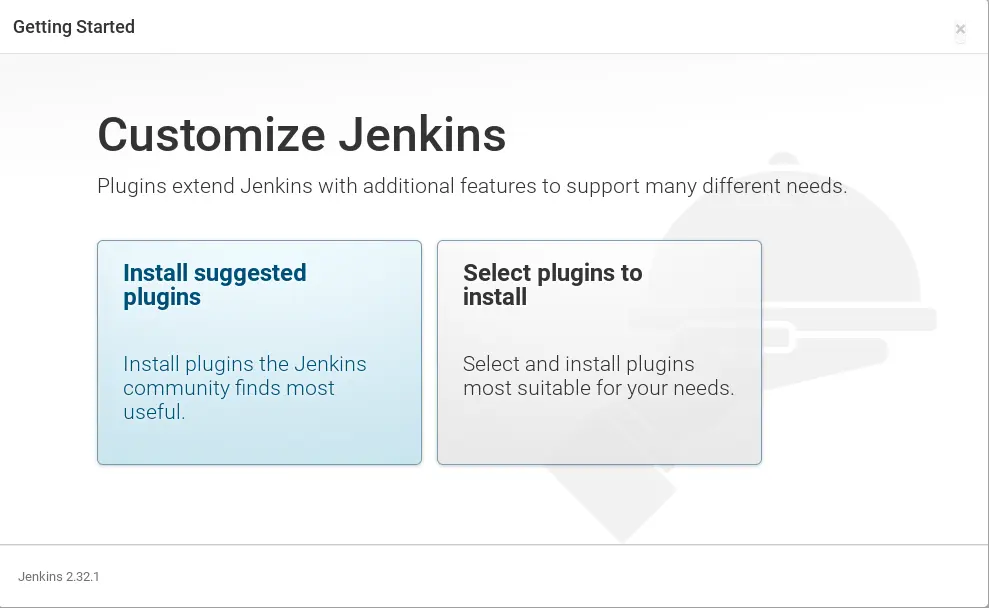
Enter the password and then customize jenkins according to your requirements.
Conclusion
In this tutorial we have discussed how to setup jenkins in a docker and found it easy and simple. Next you can add more functionality like taking backup of jenkins in docker environment or include/exclude more plugins using docker file etc. Thank you for reading this article.


 866
866

 被折叠的 条评论
为什么被折叠?
被折叠的 条评论
为什么被折叠?
 到【灌水乐园】发言


