


Day49-Nginx-Web服务深入实践
1. 调整yum源优先级
Nginx的安装包在epel中也有,但是比较旧,已经把Nginx的源加入/etc/yum.repos.d/nginx.repo,但是yum安装的时候,会选择epel里的Nginx软件包,而不是是选择Nginx源里的。
解决方法:使用yum的yum-plugin-priorities插件。
#yum install yum-plugin-priorities
确认配置文件内容
cat /etc/yum/pluginconf.d/priorities.conf
[main]
enabled = 1
在 /etc/yum.repos.d/nginx.repo 中的每个节点加入
priority=1 #priority越小表示优先级越高
2. Nginx master和worker进程
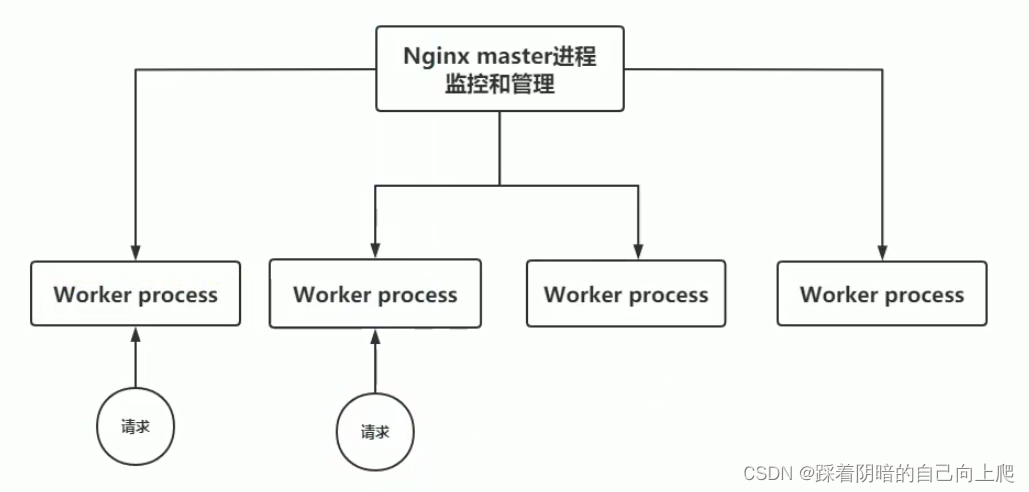
1、master进程:老大,不干活,管理、监控小弟。
2、多个worker_processes
worker_processes负责干活的,接收请求并处理。占用内存资源。数量CPU核数相当。
[root@web01 yum.repos.d]# cat /etc/nginx/nginx.conf
user  nginx;
worker_processes  8;   #worker_processes auto,进程数自动获取,跟随系统CPU个数,可自己设定
......

[root@web01 ~]# nginx -s reload
[root@web01 ~]# ps -ef|grep nginx
root       1341      1  0 14:59 ?        00:00:00 nginx: master process /usr/sbin/nginx -c /etc/nginx/nginx.conf
nginx      1426   1341  0 15:10 ?        00:00:00 nginx: worker process
nginx      1427   1341  0 15:10 ?        00:00:00 nginx: worker process
nginx      1428   1341  0 15:10 ?        00:00:00 nginx: worker process
nginx      1429   1341  0 15:10 ?        00:00:00 nginx: worker process
nginx      1430   1341  0 15:10 ?        00:00:00 nginx: worker process
nginx      1431   1341  0 15:10 ?        00:00:00 nginx: worker process
nginx      1432   1341  0 15:10 ?        00:00:00 nginx: worker process
nginx      1433   1341  0 15:10 ?        00:00:00 nginx: worker process
root       1436   1195  0 15:10 pts/0    00:00:00 grep --color=auto nginx
3. Nginx目录结构
[root@web01 ~]# rpm -ql nginx
/etc/logrotate.d/nginx              # nginx日志切割配置
/etc/nginx						  # nginx配置文件目录
/etc/nginx/nginx.conf			   # nginx主配置文件(重要)*****
/etc/nginx/conf.d			       # nginx主配置文件包含的目录*****,扩展名是xx.conf
/etc/nginx/conf.d/default.conf      # 默认的虚拟主机,包含一个或多个站点

/etc/nginx/mime.types               # nginx所支持的文件类型
/usr/lib64/nginx
/usr/lib64/nginx/modules            # 指向/usr/lib64/nginx/modules/,模块路径。
/etc/nginx/modules

#和动态程序交互的进程配置
/etc/nginx/fastcgi_params           # fastcgi参数,配合和PHP-fcgi联系配置。
/etc/nginx/scgi_params
/etc/nginx/uwsgi_params             # uwsgi参数,配合动态服务Python配置。

/usr/lib/systemd/system/nginx-debug.service # systemd nginx debug方式命令启动文件
/usr/lib/systemd/system/nginx.service       # systemd nginx启动文件

/usr/sbin/nginx                      # nginx可执行文件,二进制命令。
                                     # 在任意地点,编译好带有【第三方模块】的命令,拷贝这里用。
/usr/sbin/nginx-debug                # nginx-debug可执行文件,二进制命令。

/usr/share/nginx
/usr/share/nginx/html                        # 默认站点目录
/usr/share/nginx/html/50x.html               # 报错5xx,重定向的页面。
/usr/share/nginx/html/index.html             # 默认的首页
/var/cache/nginx                             # 缓存目录
/var/log/nginx                               # 日志目录
[root@web02 application]# tree nginx
nginx
├── client_body_temp
├── conf                              # 这是nginx的所有的配置文件的目录,极其重要
│   ├── fastcgi.conf                  # fastcgi相关参数的配置文件
│   ├── fastcgi.conf.default          # fastcgi.conf的原始备份
│   ├── fastcgi_params                # fastcgi的参数文件
│   ├── fastcgi_params.default        # fastcgi的参数文件备份
│   ├── koi-utf
│   ├── koi-win
│   ├── mime.types                    # mime.types媒体类型文件
│   ├── mime.types.default            # mime.types媒体类型文件备份
│   ├── nginx.conf                    # 这是nginx默认的主配置文件
│   ├── nginx.conf.default            # 这是nginx默认的主配置文件备份
│   ├── scgi_params                   # scgi相关参数文件
│   ├── scgi_params.default           # scgi相关参数文件备份
│   ├── uwsgi_params                  # uwsgi相关参数文件,配置Python环境可能会用到
│   ├── uwsgi_params.default          # uwsgi相关参数文件备份
│   └── win-utf
├── fastcgi_temp                      # fastcgi临时数据目录
├── html   # 这是编译安装时nginx的默认站点目录,前面已说明,类似apache的默认站点htdocs目录。
│   ├── 50x.html   # 错误页面优雅替代显示文件,例如:出现502错误时会调用此页面。
│   └── index.html  # 默认的首页文件,在实际环境中,大家习惯用(注意字眼不是必须)index.html、index.php、index.jsp来做网站的首页文件。首页文件名字是在nginx.conf中事先定义好的。
├── logs     # 这是nginx默认的日志路径,包括错误日志及访问日志。
│   ├── access.log  # 这是 ginx的默认访问日志文件,使用tail -f access.log 可以时时观看网站用户访问情况信息。
│   ├── error.log # 这是nginx的错误日志文件,如果nginx出现启动故障等问题,一定要看看这个错误日志。
│   └── nginx.pid # nginx的pid文件,nginx进程启动后,会把所有进程的ID号写到此文件。
├── proxy_temp   # 临时目录
├── sbin    # 这是nginx命令的目录,如nginx的启动命令nginx
│   └── nginx  # nginx的启动命令
├── scgi_temp  # 临时目录
└── uwsgi_temp  # 临时目录

9 directories, 21 files
Web服务403错误原因。
- 没有首页文件,index.html,index.php(没有开目录浏览功能)。
- 没有站点目录以及首页文件权限。
作业:模拟出403错误
nginx日志切割解决方案:访问日志要一天一个。
nginx日志切割配置:由logrotate,rsyslog工具负责切割的。
[root@web01 ~]# cat /etc/logrotate.d/nginx
/var/log/nginx/*.log {
        daily
        missingok
        rotate 52
        compress
        delaycompress
        notifempty
        create 640 nginx adm
        sharedscripts
        postrotate
                if [ -f /var/run/nginx.pid ]; then
                        kill -USR1 `cat /var/run/nginx.pid`
                fi
        endscript
}
作业:使用logrotate工具实现nginx日志切割
4. Nginx软件功能模块
作业:整理10个第三方常用模块
| Nginx http 功能模块 | 模块说明 |
|---|---|
| ngx_http_core_module | 包括一些核心的http参数配置,对应Nginx的配置为http区块部分 |
| ngx_http_access_module | 访问控制模块,用来控制网站用户对Nginx的访问 |
| ngx_http_gzip | 压缩模块,对 Nginx 返回的数据压缩,属于性能优化模块 |
| ngx_http_fastcgi_module | fastcgi 模块,和动态应用相关的模块,例如 PHP |
| ngx_http_proxymodule | proxy 代理模块 |
| ngx_http_upstream_module | 负载均衡模块,可以实现网站的负载均衡功能及节点的健康检查 |
| ngx_http_rewrite_module | URL 地址重写模块 |
| ngx_http_limit_conn_module | 限制用户并发连接数及请求数模块 |
| ngx_http_limit_reg_module | 根据定义的 key 限制 Nginx 请求过程的速率 |
| ngx_http_log_module | 访问日志模块,以指定的格式记录 Nginx客户访问日志等信息 |
| ngx_http_auth_basic_module | Web 认证模块,设置 Web 用户通过账号密码访间 Nginx |
| ngx_http_ssl_module | ssl 模块,用于加密的 http 连接,如https |
| ngx_http_stub_status_module | 记录 Nginx 基本访问状态信息等的模块 |
5. Nginx主配置文件
[root@web01 html]# cat /etc/nginx/nginx.conf -n
1	# nginx 核心模块(Core functionality)
2	user  nginx;					# 进程使用用户。
3	worker_processes  1;			 # worker进程数量,和CPU核数相当。
4
5	error_log  /var/log/nginx/error.log notice; # 错误日志的路径及记录日志级别,最低warn, error级别。
	                                            # debug, info, notice, warn, error, crit, alert, or emerg.
6	pid        /var/run/nginx.pid;   # 进程运行后的进程号所在文件。用来管理进程。
	                                 # 来自日志轮询配置
7	                                 # if [ -f /var/run/nginx.pid ]; then
                                     # kill -USR1 `cat /var/run/nginx.pid`
                                     # fi
    # 事件模块
9	events {
10	    worker_connections  1024;    # 单个worker可以接受的并发连接数。
	    # Nginx并发连接总量=worker_connections *  worker_processes
		use epoll;  # 使用epoll模型。
11	}
12
13	# http核心模块 ngx_http_core_module
14	http {
    include       /etc/nginx/mime.types;
    # 加载所有静态资源类型,nginx所支持的类型
    default_type  application/octet-stream;
    # 默认的类型(如果出现mime.types 没有的类型,则使用这个默认类型,自动下载)

17	    log_format  oldgirl  '$remote_addr';
18	    log_format  oldboy  '$remote_addr - $remote_user [$time_local] "$request" '
19	                        '$status $body_bytes_sent "$http_referer" '
20	                        '"$http_user_agent" "$http_x_forwarded_for"';  # 按此格式记录日志
#apache日志样例
# 59.33.26.105 - - [08/Dec/2010:15:43:55 +0800] "GET //back/upload/course/2010-10-25-23-48-59-048-18.jpg HTTP/1.1" 200 44286 "http://oldboy.blog.51cto.com/static/web/column/17/index.shtml?courseId=43" "Mozilla/4.0 (compatible; MSIE 6.0; Windows NT 5.1; SV1; .NET CLR 2.0.50727; .NET CLR 3.0.4506.2152; .NET CLR 3.5.30729)"
21
22	    access_log  /var/log/nginx/access.log  oldgirl; # 访问日志
23
24	    sendfile        on;          # <==开启高效传输模式。
25	    #tcp_nopush     on;
26
27	    keepalive_timeout  65;       # 长链接超时时间
28
29	    #gzip  on;                   # 压缩功能。
30
31	    include /etc/nginx/conf.d/*.conf;  #包含的配置文件目录
        # 包含/etc/nginx/conf.d/所有以.conf结尾的文件
32	}
#默认虚拟主机配置文件,虚拟主机是一个网站站点(www.oldboyedu.com),blog.oldboyedu.com
[root@web01 ~]# cat /etc/nginx/conf.d/default.conf    # 虚拟主机模板
# apache虚拟主机包含在<VirtualHost></VirtualHost>内,
# 而Nginx软件则使用一个server{}标签来标示一个虚拟主机。

server {						# 定义站点
    listen       80;			 # 监听80端口,所有网卡。listen   10.0.0.7:80;
    server_name  localhost;		  # 配置一个域名www.oldboyedu.com。
	                              # 用户发起http请求时携带的Host字段与server_name匹配
							    # Host:www.oldboyedu.com
    location / {
	     # location用来匹配用户请求的路径,用户请求的是 / 匹配成功
        root   /usr/share/nginx/html;
		# root定义站点所在的路径,返回/usr/share/nginx/html资源
        index  index.jsp index.php index.html index.htm; # 从前向后一个个找。
		# index定义返回的默认页面,返回index.html,如果该文件没有,则返回403错误。
    }
	    # 最终返回 /usr/share/nginx/html/index.html 发给浏览器,加载、渲染获得最终结果
}
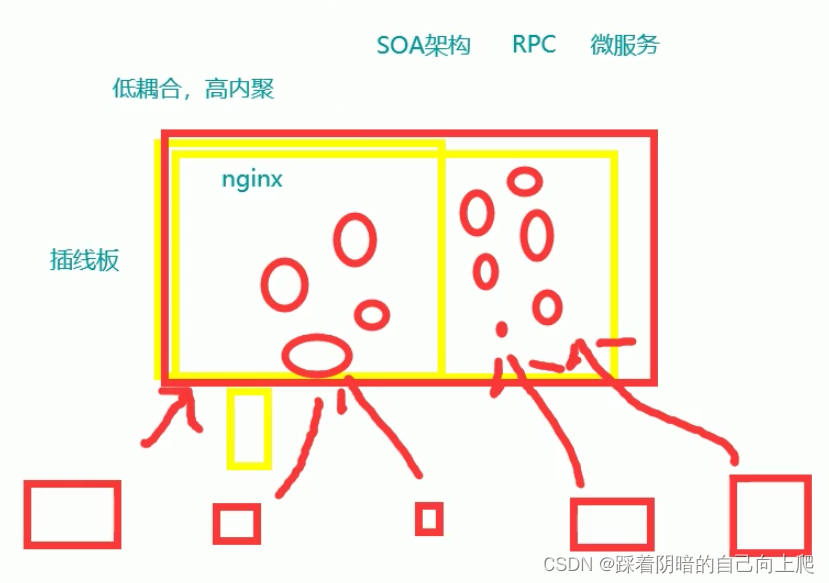
作业:了解SOA和微服务架构(2-3句话说清楚是什么)
链接: https://blog.csdn.net/zpoison/article/details/80729052
演示:基于域名的虚拟主机配置实践。
6. diy配置一个nginx站点,熟练配置步骤是关键
- 备份并清理defalut.conf文件
[root@web01 html]# cd /etc/nginx/conf.d/
[root@web01 conf.d]# egrep -v "#|^$" default.conf >01_test.etiantian.org.conf
[root@web01 conf.d]# gzip default.conf
[root@web01 conf.d]# ls
01_test.etiantian.org.conf  default.conf.gz
- 编写Nginx配置文件,定义端口、域名、站点路径、默认返回首页
[root@web01 conf.d]# cat 01_test.etiantian.org.conf
	server {
		listen       80;
		server_name  test.etiantian.org;
		location / {
			root   /usr/share/nginx/html/test;
			index  index.html index.htm;
		}
	}
- 创建对应网站的站点目录,存放对应的代码。
测试没有首页index.html文件的提示
[root@web01 conf.d]# mkdir -p /usr/share/nginx/html/test
[root@web01 html]# cd /usr/share/nginx/html/test
[root@web01 test]# echo "oldboy edu Linux-77,best class.no.1" >index.html
[root@web01 test]# cat index.html
oldboy edu Linux-77,best class.no.1
- 检查语法,重载服务。
[root@web01 test]# nginx -t
nginx: the configuration file /etc/nginx/nginx.conf syntax is ok
nginx: configuration file /etc/nginx/nginx.conf test is successful
[root@web01 test]# systemctl reload nginx
- 要通过域名访问,配置Hosts局域网域名解析。
1)linux客户端访问
[root@web01 conf.d]# curl 10.0.0.7  #找第一个虚拟主机
oldboy edu Linux-77,best class.no.1

# 当有多虚拟主机的时候,可以通过 -H 给个主机头字段
[root@web01 conf.d]# curl -H test.etiantian.org 10.0.0.7
oldboy edu Linux-77,best class.no.1

#配置/etc/hosts解析
[root@web01 conf.d]# tail -1 /etc/hosts
10.0.0.7  test.etiantian.org
[root@web01 conf.d]# ping test.etiantian.org
PING test.etiantian.org (10.0.0.7) 56(84) bytes of data.

[root@web01 conf.d]# curl test.etiantian.org
oldboy edu Linux-77,best class.no.1
在windows下通过浏览器使用域名访问,配置Hosts局域网域名解析。
Windows7:
	C:\Windows\System32\drivers\etc\hosts

Windows10:###以管理员身份打开(有必要可以这么做)
	创建文件不带后缀hosts ,填写对应的解析信息,然后覆盖 C:\Windows\System32\drivers\etc\hosts

hosts文件里的内容:
10.0.0.7 test.etiantian.org
注意:中文乱码处理
[root@web01 conf.d]# cat 01_test.etiantian.org.conf
server {
    listen       80;
    server_name  test.etiantian.org;
    charset        utf-8;  ###中文乱码处理
    location / {
        root   /usr/share/nginx/html/test;
        index  index.html index.htm;
    }
}
[root@web01 conf.d]# echo "老男孩Linux运维77期,历史最牛班级" >>/usr/share/nginx/html/test/index.html
[root@web01 conf.d]# curl test.etiantian.org
oldboy edu Linux-77,best class.no.1
老男孩Linux运维77期,历史最牛班级
7. 部署一个游戏站点,你可以明晃晃打游戏了
- 编写Nginx配置文件,定义端口,定义域名,定义返回的路径,以及默认的页面
[root@web01 conf.d]# cat 02_game.etiantian.org.conf
	server {
		listen       80;
		server_name  game.etiantian.org;
		charset        utf-8;
		location / {
			root   /usr/share/nginx/html/game;
			index  index.html index.htm;
		}
	}
- 创建对应网站的站点目录,存放对应的代码。
[root@web01 conf.d]# mkdir -p /usr/share/nginx/html/game
[root@web01 conf.d]# cd /usr/share/nginx/html/game
[root@web01 game]# rz #找到Day48-老男孩Linux77期html小游戏项目.zip并上传。
[root@web01 game]# ls
Day48-老男孩Linux77期html小游戏项目.zip  ###手机版,不支持电脑版
[root@web01 game]# unzip Day48-老男孩Linux77期html小游戏项目.zip
[root@web01 game]# ls
Day48-老男孩Linux77期html小游戏项目.zip  html5
[root@web01 game]# mv Day48-老男孩Linux77期html小游戏项目.zip /server/tools/
[root@web01 game]# mv html5/* .
- 检查语法,重载服务。
[root@web01 ~]# nginx -t
[root@web01 ~]# systemctl reload nginx

做一个其他测试:两个虚拟主机,用IP访问看访问的是哪个。
[root@web01 game]# curl 10.0.0.7
oldboy edu Linux-77,best class.no.1
老男孩Linux运维77期,历史最牛班级
[root@web01 conf.d]# mv 01_test.etiantian.org.conf 03_test.etiantian.org.conf
[root@web01 conf.d]#
[root@web01 conf.d]# ls -l
总用量 8
-rw-r--r-- 1 root root 198 7月  13 18:05 02_game.etiantian.org.conf
-rw-r--r-- 1 root root 198 7月  13 17:57 03_test.etiantian.org.conf
[root@web01 conf.d]# nginx -t
nginx: the configuration file /etc/nginx/nginx.conf syntax is ok
nginx: configuration file /etc/nginx/nginx.conf test is successful
[root@web01 conf.d]# systemctl reload nginx
[root@web01 conf.d]# curl 10.0.0.7 #可以看见,出来的结果为游戏网站

<!DOCTYPE html>
<!-- saved from url=(0029)http://www.9miao.com/ -->
<html><head><meta http-equiv="Content-Type" content="text/html; charset=UTF-8">
<meta charset="utf-8">
<meta http-equiv="pragma" content="no-cache">
<meta http-equiv="Cache-Control" content="no-store, must-revalidate">
<meta http-equiv="expires" content="0">
<title>微信html5游戏平台——9miao.com国内最大微信开发者社区</title>

###还原回去
[root@web01 conf.d]# mv 03_test.etiantian.org.conf 01_test.etiantian.org.conf
[root@web01 conf.d]# nginx -t
nginx: the configuration file /etc/nginx/nginx.conf syntax is ok
nginx: configuration file /etc/nginx/nginx.conf test is successful
[root@web01 conf.d]# systemctl reload nginx
- 配置Hosts局域网域名解析。
C:\Windows\System32\drivers\etc\hosts

hosts文件里的内容:
10.0.0.7 game.etiantian.org
浏览器输入game.etiantian.org
游戏是手机版,谷歌f12,左下角部分找到手机图标,点击就是手机版。
讲完了基于域名的虚拟主机


 3万+
3万+


 被折叠的 条评论
为什么被折叠?
被折叠的 条评论
为什么被折叠?
 到【灌水乐园】发言


