


提示:文章写完后,目录可以自动生成,如何生成可参考右边的帮助文档
前言
提示:这里可以添加本文要记录的大概内容:
一、前期准备
1.在首页创建好自己的订阅号
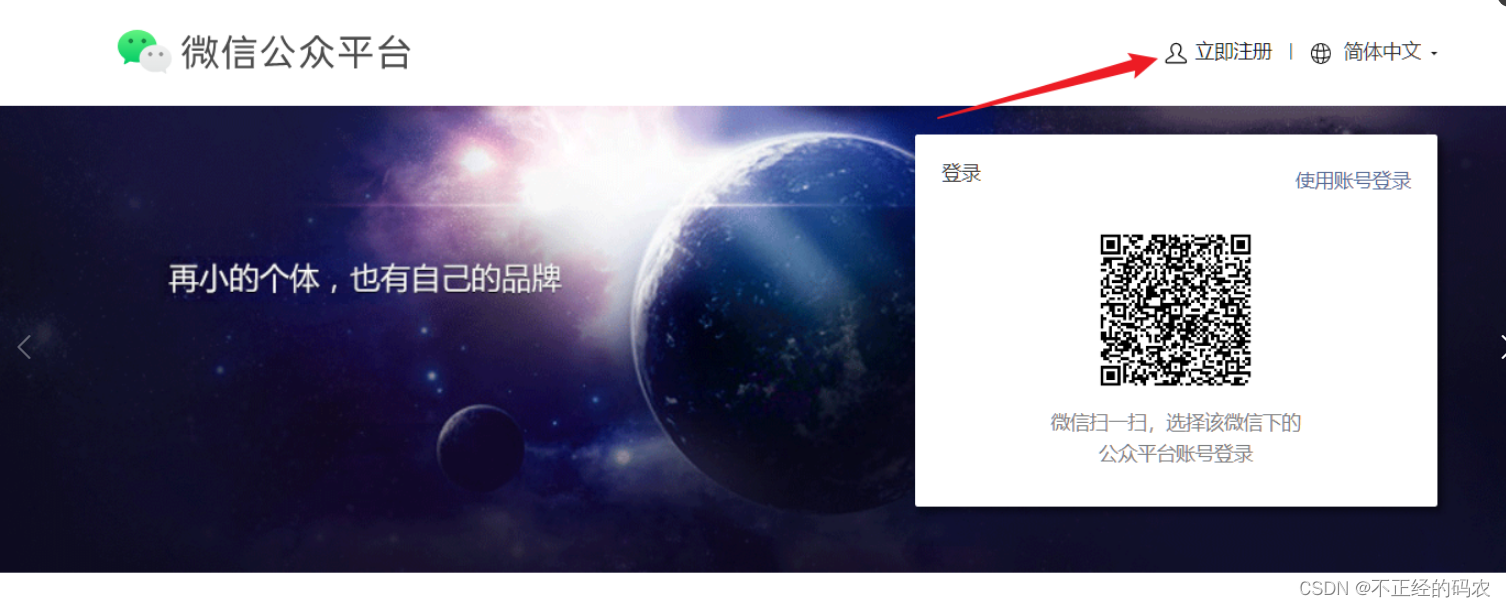
网站:https://mp.weixin.qq.com/
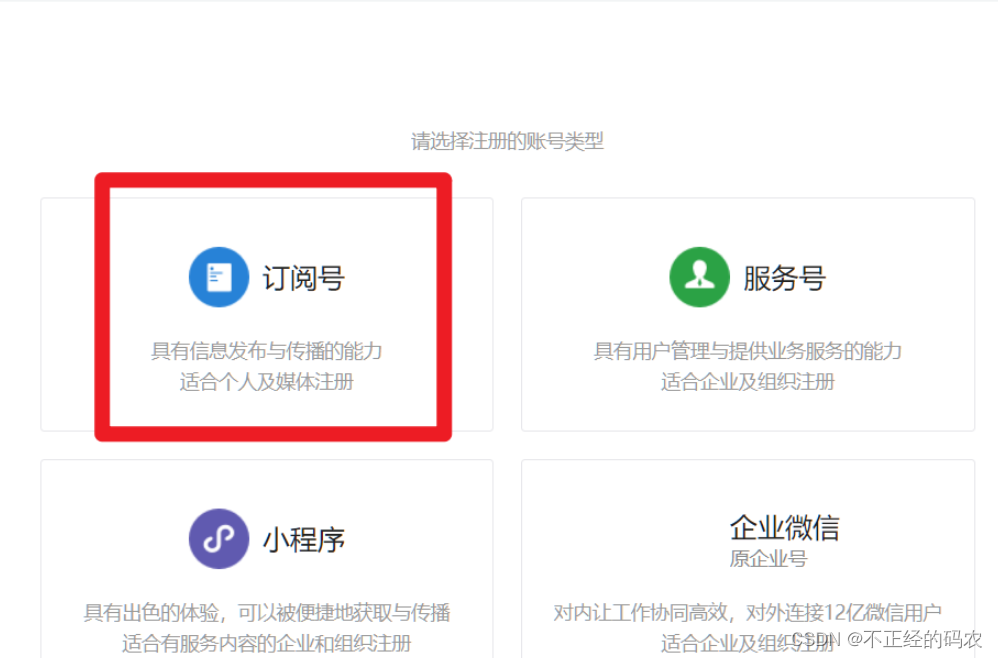
2、点击立即注册,在选择订阅号(个人创建使用,公司应该是使用认证过的服务号)
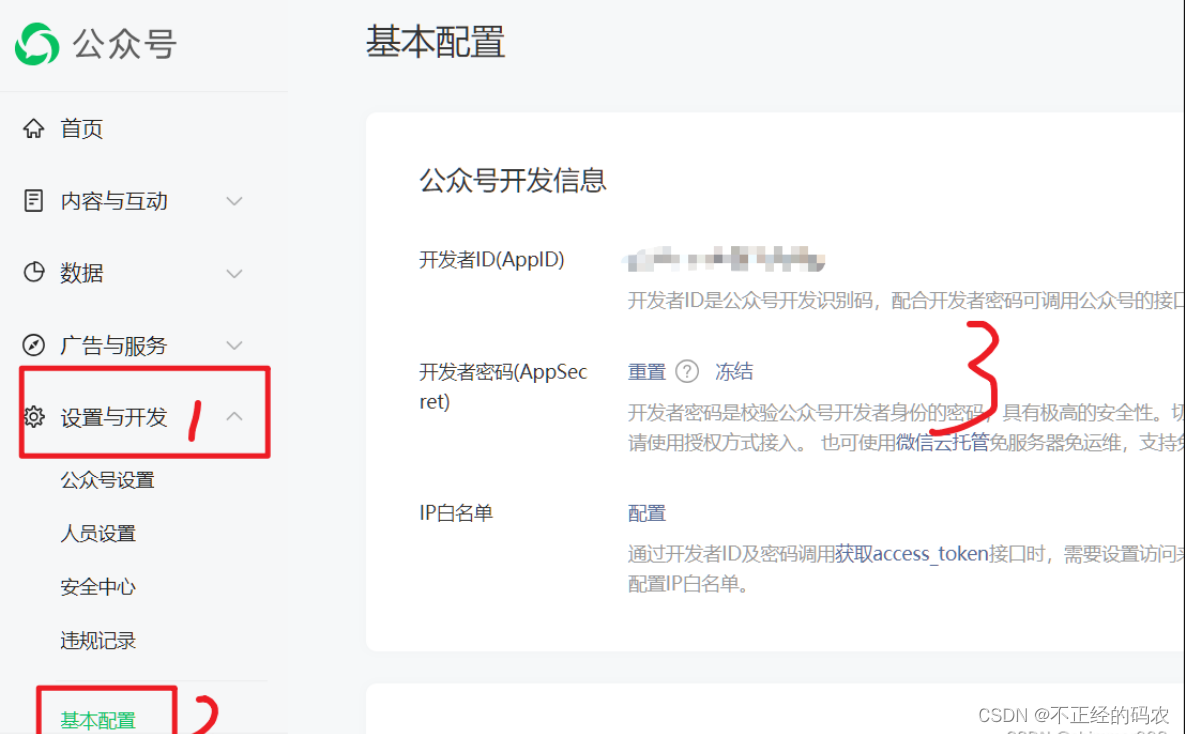
3、之后按流程填写后,点击设置与开发-------->基本配置,这里可以通过点击成为开发人员 (自己本地调试不用配置这个)
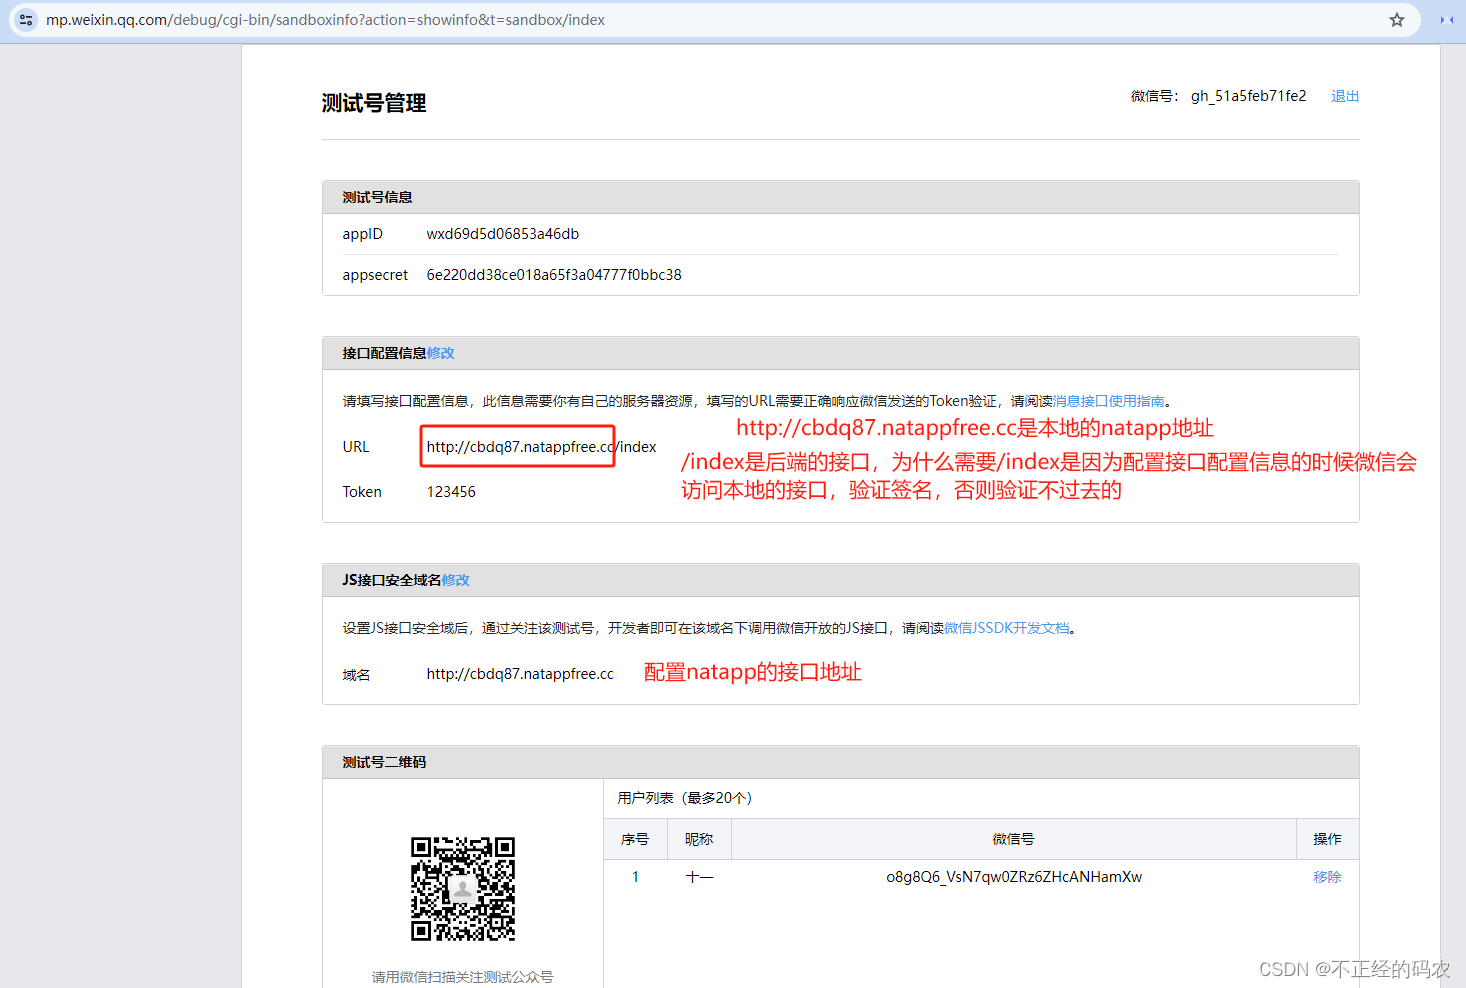
4、之后会出现开发者工具,点击后出现该页面,选择公众平台测试账号

5、准备一个内网穿透工具,把本地地址映射到外网(便由于本地调试),因为微信要授权后,需要跳转到本地,如果是内网,微信无法访问,我这里采用natapp开辟了一条免费隧道。
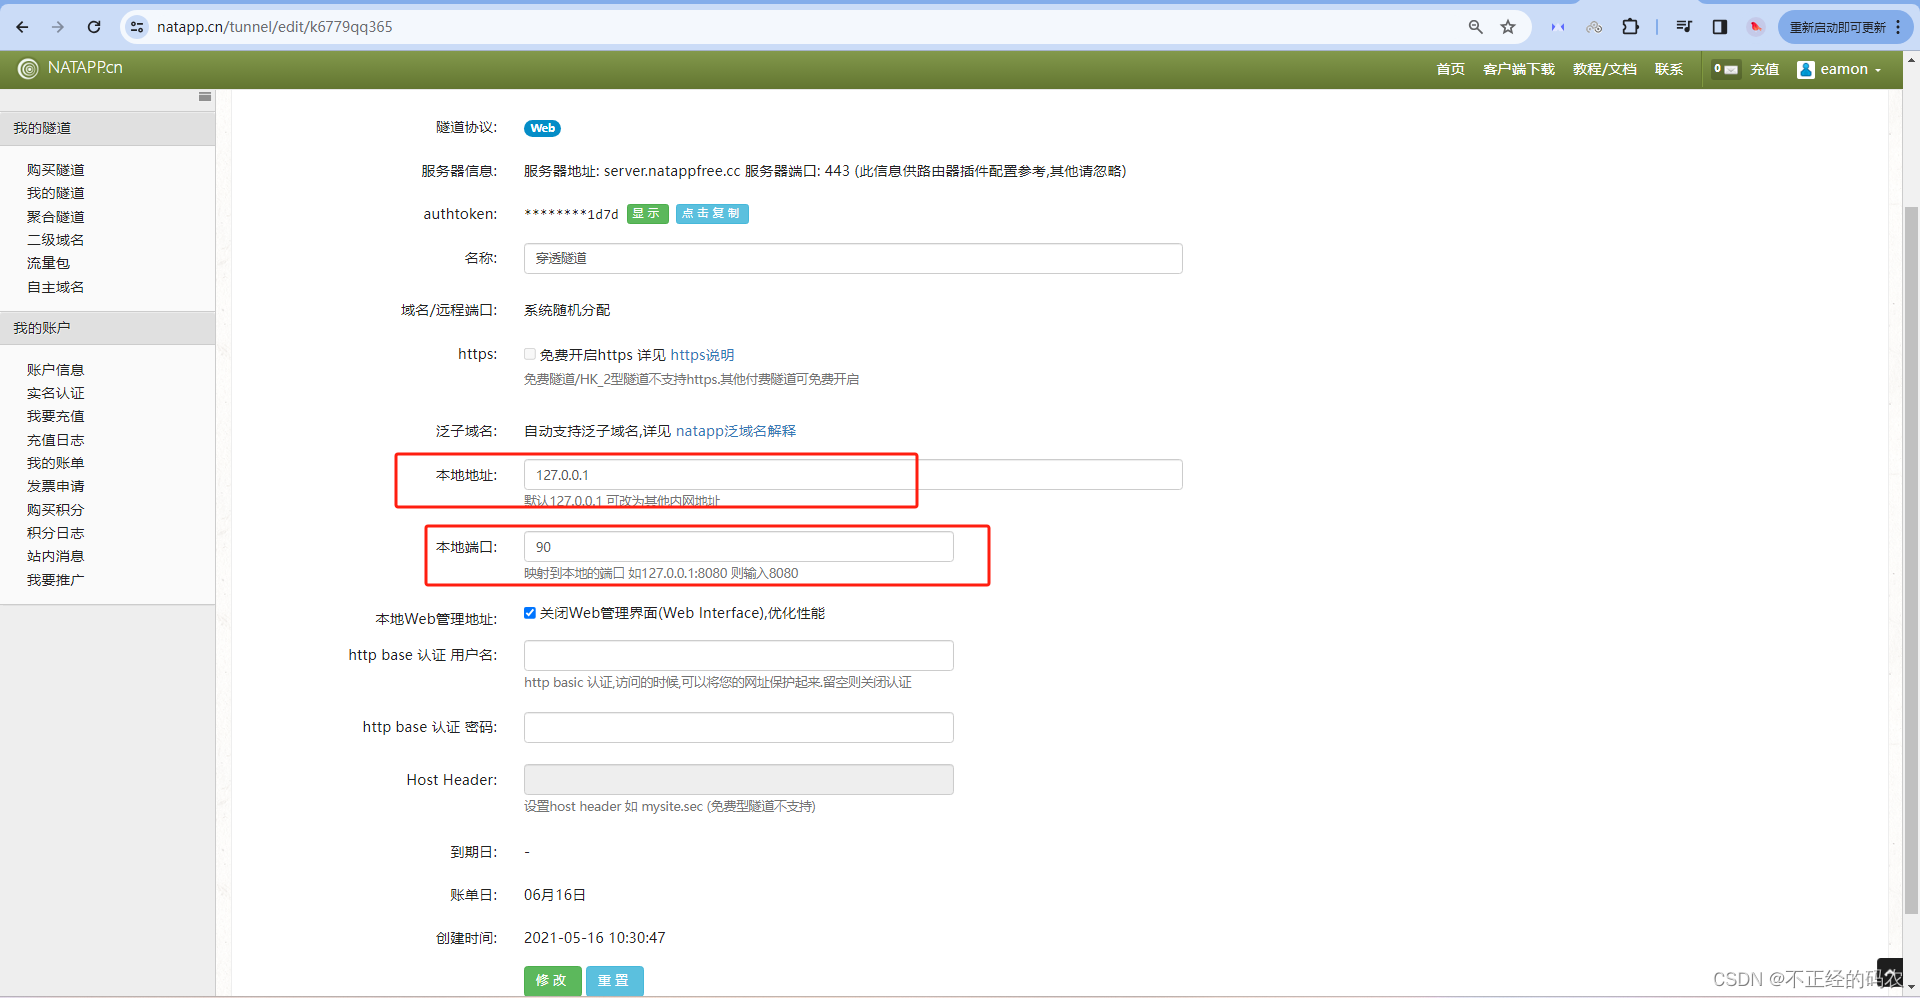
6、本地下载natapp的程序包,然后启动,根据在网站后台配置的隧道信息进行映射,本地映射是本地回环地址的90端口
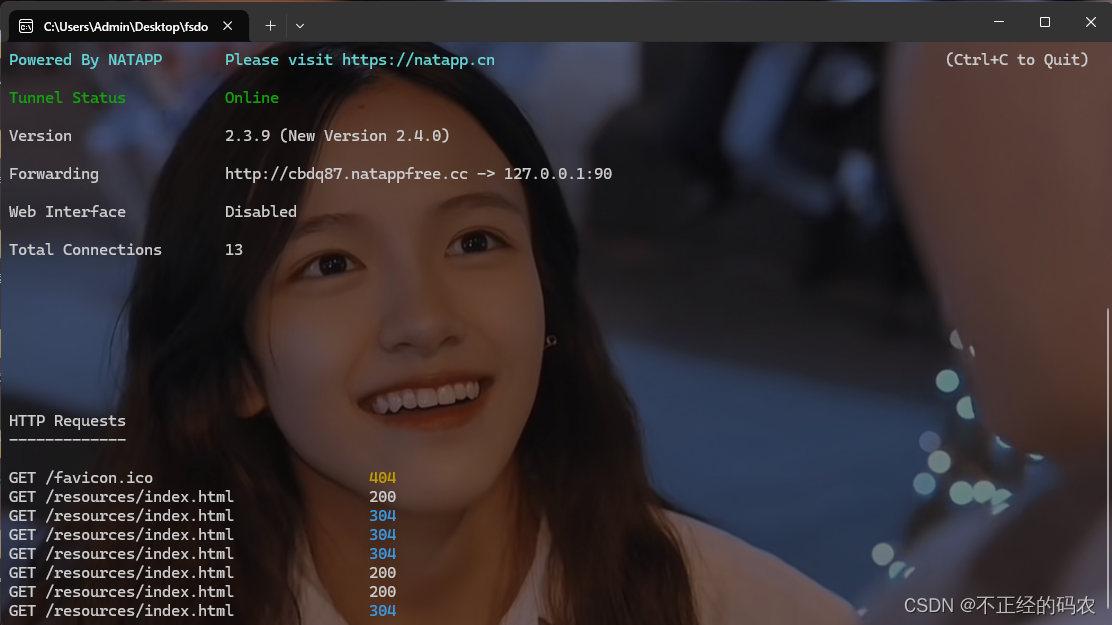
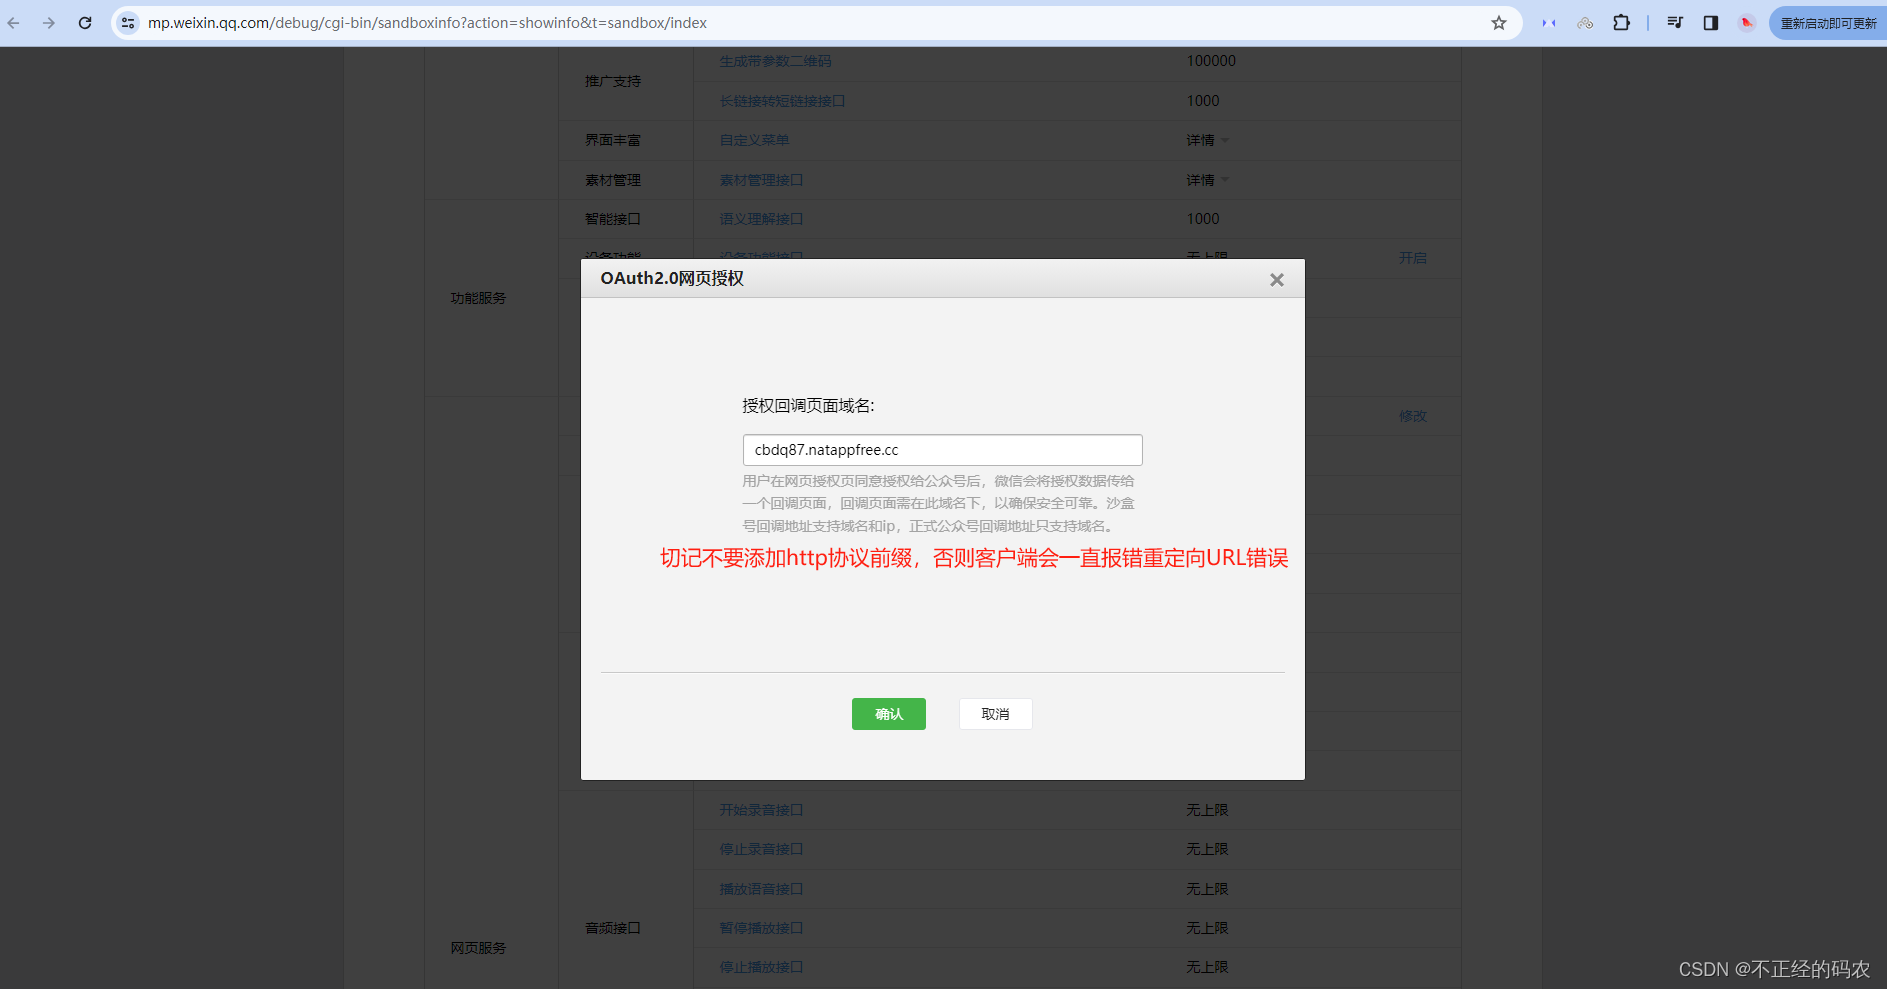
7、在公众平台里填写上刚刚本地启动的内网映射地址
二、代码示例
经过以上准备,已经有一个测试号了,且也有了一个网络映射地址,各种信息也配置完了,接下来写写代码。
2.1、前端代码:
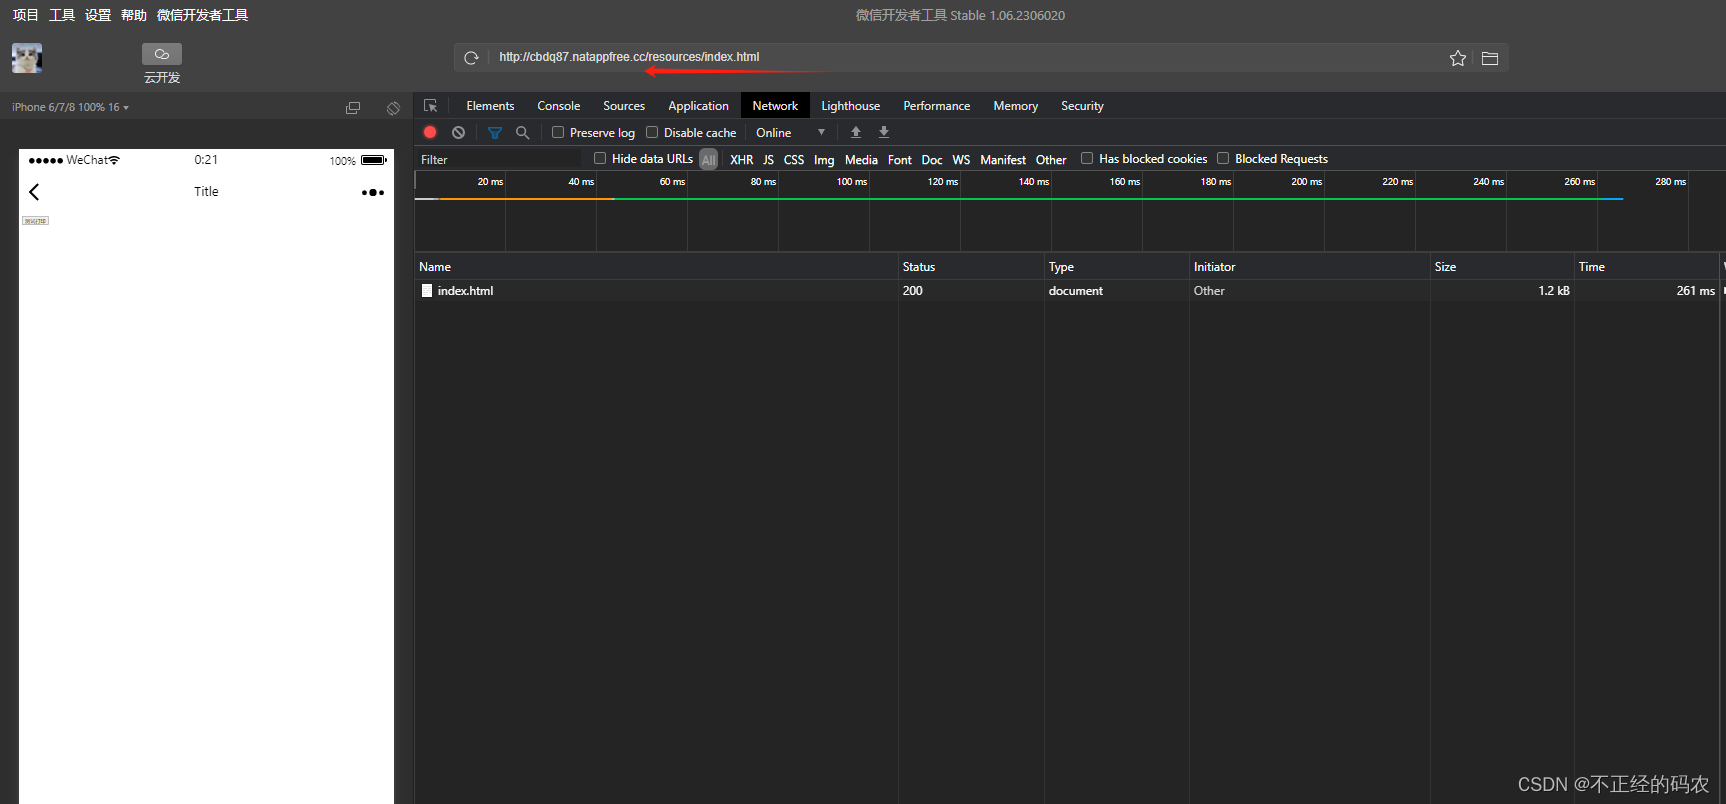
index.html
<!DOCTYPE html>
<html lang="en">
<head>
<meta charset="UTF-8">
<title>Title</title>
</head>
<body>
<button onclick="login()">测试打印</button>
</body>
<script>
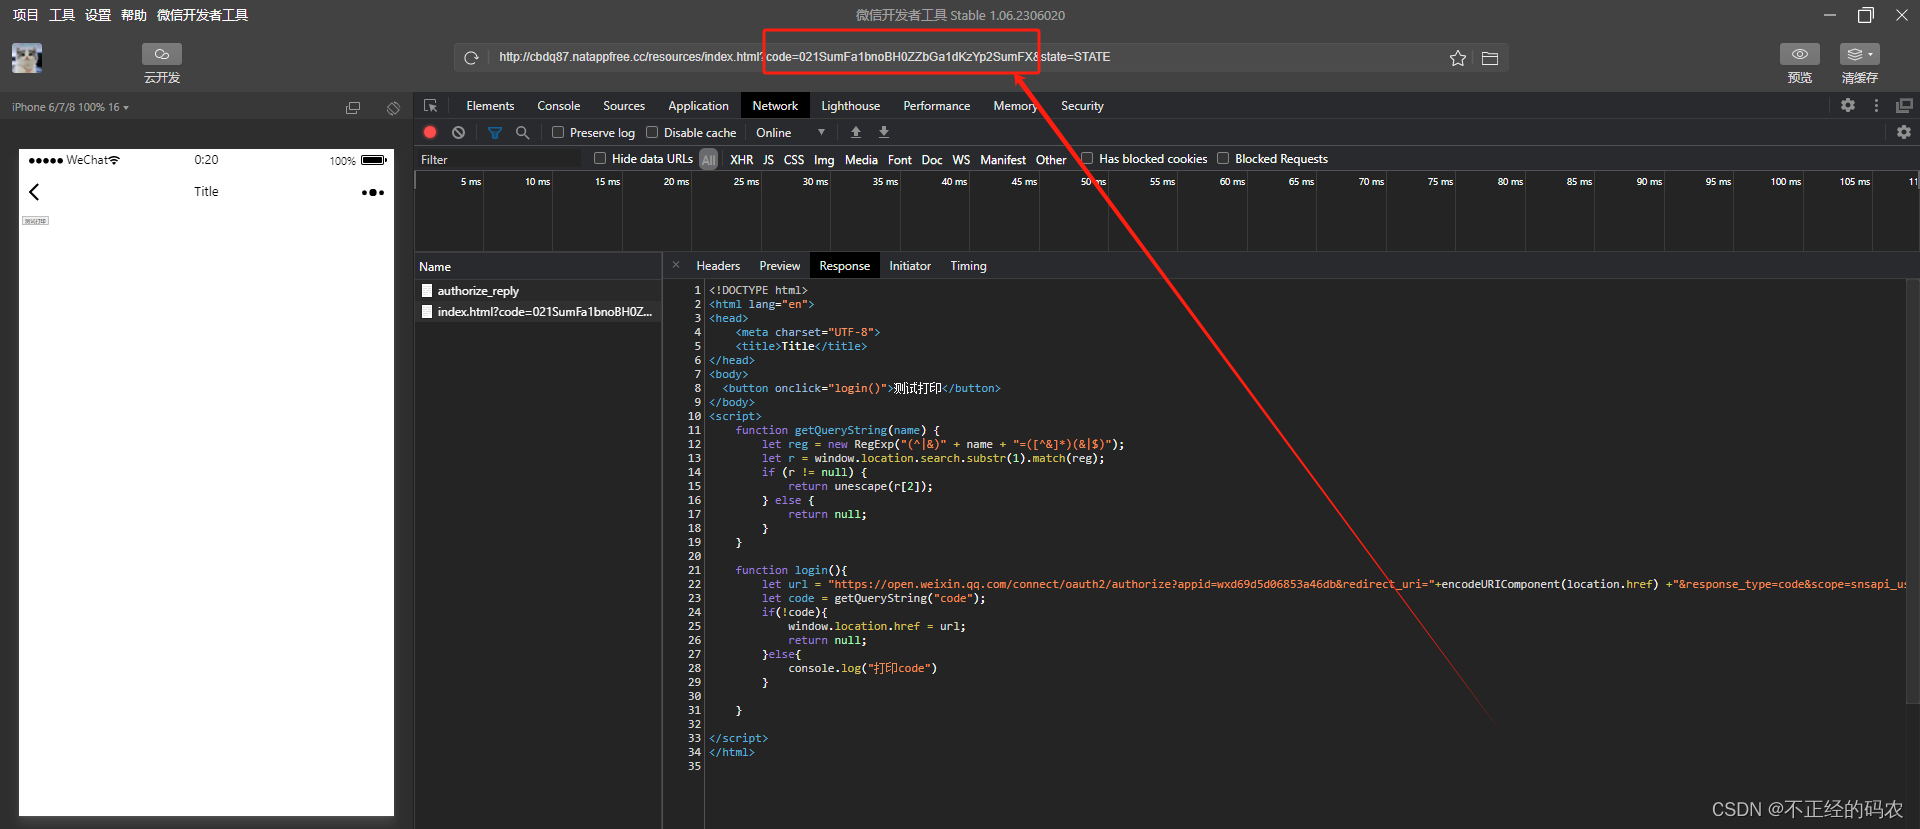
function getQueryString(name) {
let reg = new RegExp("(^|&)" + name + "=([^&]*)(&|$)");
let r = window.location.search.substr(1).match(reg);
if (r != null) {
return unescape(r[2]);
} else { return null; }
}
function login(){
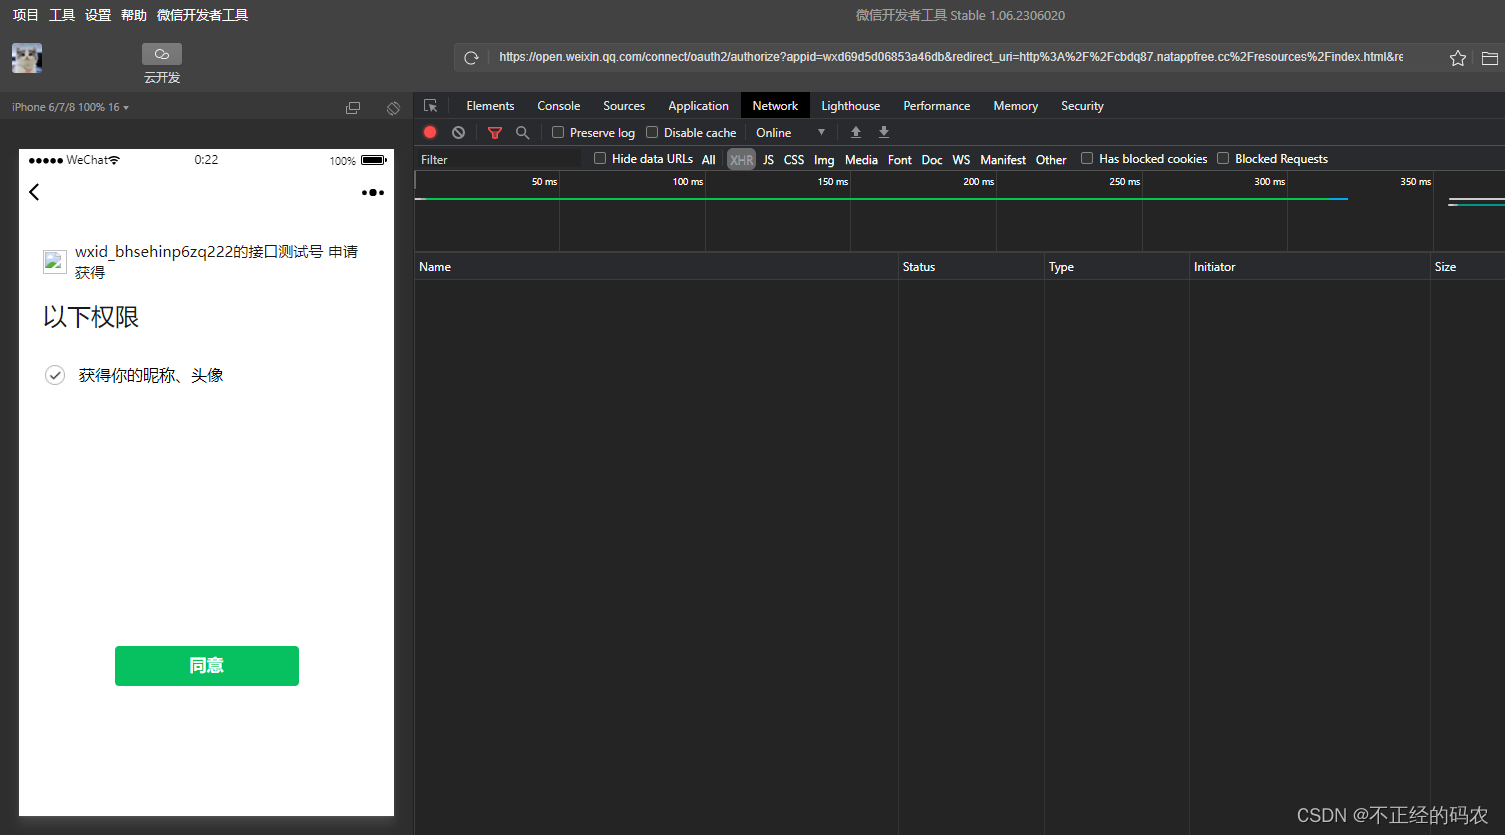
let url = "https://open.weixin.qq.com/connect/oauth2/authorize?appid=wxd69d5d06853a46db&redirect_uri="+encodeURIComponent(window.location.href)+"&response_type=code&scope=snsapi_userinfo&state=STATE#wechat_redirect"
let code = getQueryString("code");
if(!code){
window.location.href = url;
return null;
}else{
console.log("打印code")
}
}
</script>
</html>
携带额外的链接参数 ,需要将state的属性值设为需要携带的参数
// 假设需要传递的额外参数为 userId 和 source
var userId = '123456';
var source = 'wechat';
var redirectUri = encodeURIComponent('https://yourwebsite.com/callback');

// 生成登录链接
var loginUrl = 'https://open.weixin.qq.com/connect/oauth2/authorize' +
    '?appid=YOUR_APPID' +
    '&redirect_uri=' + redirectUri +
    '&response_type=code' +
    '&scope=snsapi_userinfo' +
    '&state=' + encodeURIComponent('userId=' + userId + '&source=' + source) +
    '#wechat_redirect';

2.2、后端代码:
WechatIndexController
import jakarta.servlet.http.HttpServletRequest;
import jakarta.servlet.http.HttpServletResponse;
import org.slf4j.Logger;
import org.slf4j.LoggerFactory;
import org.springframework.web.bind.annotation.RequestMapping;
import org.springframework.web.bind.annotation.RequestMethod;
import org.springframework.web.bind.annotation.RestController;
import java.io.IOException;
import java.io.PrintWriter;
@RestController
@RequestMapping("/index")
public class WechatIndexController {
    private static final Logger LOGGER = LoggerFactory.getLogger(WechatIndexController.class);
    @RequestMapping(method = RequestMethod.GET)
    public void get(HttpServletRequest request, HttpServletResponse response) {
        String signature = request.getParameter("signature");
        String timestamp = request.getParameter("timestamp");
        String nonce = request.getParameter("nonce");
        String echostr = request.getParameter("echostr");
        PrintWriter out = null;
        try {
            out = response.getWriter();
            if (Utils.checkSignature(signature, timestamp, nonce)) {
                out.print(echostr);
            }
        } catch (IOException e) {
            e.printStackTrace();
            LOGGER.error(e.getMessage());
        } finally {
            out.close();
            out = null;
        }
    }
}
WxController
import cn.hutool.core.text.StrFormatter;
import com.eamon.admin.base.Result;
import com.eamon.admin.base.Results;
import com.eamon.admin.entity.AccessTokenInfo;
import com.eamon.admin.entity.WeiXinUserInfo;
import com.eamon.admin.utils.HttpUtil;
import com.eamon.admin.utils.JSONUtil;
import io.swagger.v3.oas.annotations.tags.Tag;
import org.springframework.web.bind.annotation.*;
@RestController
@RequestMapping("/api/weixin")
@Tag(name = "微信", description = "微信相关接口")
public class WxController {
private String appId = "wxd69d5d06853a46db"; //替换成自己的测试appId
private String secret = "6e220dd38ce018a65f3a04777f0bbc38"; //替换成自己的测试secret
/**
* @description 根据code获取用户信息
* @param code 前端通过授权后会跳转的页面中携带的参数
* @return
*/
@GetMapping("/getAccessToken")
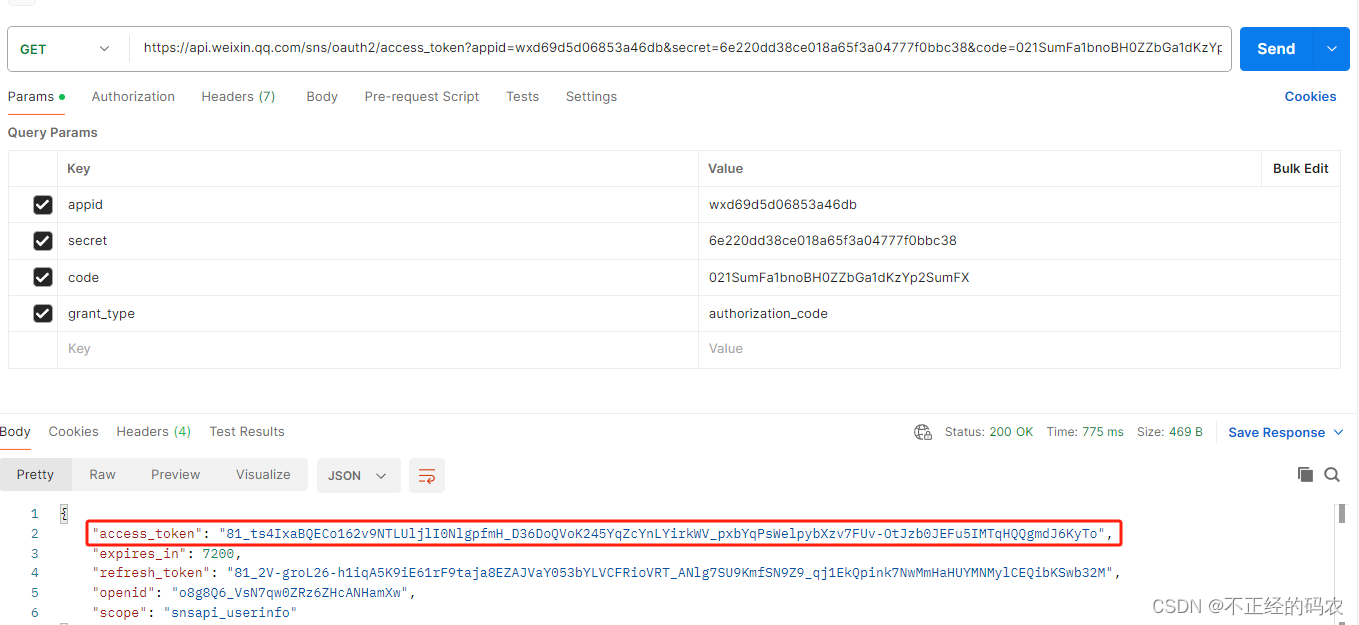
public WeiXinUserInfo getAccessToken(String code) {
String url = StrFormatter.format("https://api.weixin.qq.com/sns/oauth2/access_token?appid={}&secret={}&code={}&grant_type=authorization_code", appId, secret, code);
//请求返回的内容,一个json对象
String body = HttpUtil.get(url);
//将接收的json对象转换为对象
AccessTokenInfo accessTokenInfo = JSONUtil.jsonToObject(body, AccessTokenInfo.class);
//获取用户信息
url = StrFormatter.format("https://api.weixin.qq.com/sns/userinfo?access_token={}&openid={}&lang=zh_CN",accessTokenInfo.getAccess_token(),accessTokenInfo.getOpenid());
//请求返回的内容,一个json对象
body = HttpUtil.get(url);
WeiXinUserInfo weiXinUserInfo = JSONUtil.jsonToObject(body, WeiXinUserInfo.class);
System.out.println("用户信息: " + weiXinUserInfo.toString());
//返回用户信息给前端
return weiXinUserInfo;
}
}
Utils
    /**
     * 将字节数组转换为16进制字符串
     * @param byteArrays 字节数组
     * @return 16进制字符串
     */
    private static String bytesToHexString(byte[] byteArrays) {
        final char[] HEX_ARRAY = "0123456789ABCDEF".toCharArray(); // 十六进制表示字符
        char[] hexChars = new char[byteArrays.length * 2]; // 一个字节对应两个十六进制字符
        for (int i = 0; i < byteArrays.length; i++) {
            int v = byteArrays[i] & 0xFF; // 将字节转为0-255的无符号整数
            hexChars[i * 2] = HEX_ARRAY[v >>> 4]; // 高4位
            hexChars[i * 2 + 1] = HEX_ARRAY[v & 0x0F]; // 低4位
        }
        return new String(hexChars);
    }
    /**
     * 校验签名
     * @param signature 签名
     * @param timestamp 时间戳
     * @param nonce 随机数
     * @return 布尔值
     */
    public static boolean checkSignature(String signature,String timestamp,String nonce){
        String checktext = null;
        String token = "123456";  // 测试后台配置的token, 我这配置的是123456
        if (null != signature) {
            String[] paramArr = new String[]{token,timestamp,nonce};
            Arrays.sort(paramArr);
            String content = paramArr[0].concat(paramArr[1]).concat(paramArr[2]);
            try {
                MessageDigest md = MessageDigest.getInstance("SHA-1");
                byte[] digest = md.digest(content.toString().getBytes());
                checktext = bytesToHexString(digest);
            } catch (NoSuchAlgorithmException e){
                e.printStackTrace();
            }
        }
        System.out.println("计算WX签名:"+ checktext);
        //将加密后的字符串与signature进行对比
        return checktext !=null ? checktext.equals(signature.toUpperCase()) : false;
    }
application.properties
server.port=90   // 要和自己配置的隧道和测试公众号上配置的信一致, 我这里统一是127的90端口
server.address=127.0.0.1
 // (我是把测试index.html放到Java文件包的静态目录下了,所以需要配置下静态资源访)
spring.mvc.static-path-pattern=/resources/**
spring.web.resources.static-locations=classpath:/static/,classpath:/resources/,classpath:/public/
JSONUtil
import com.alibaba.fastjson.JSON;
public class JSONUtil {
    public static <T> T jsonToObject(String json, Class<T> clazz) {
        return JSON.parseObject(json, clazz);
    }
    public static String objectToJson(Object obj) {
        return JSON.toJSONString(obj);
    }
}
HttpUtil
import java.net.HttpURLConnection;
import java.net.URL;
import java.io.BufferedReader;
import java.io.InputStreamReader;
public class HttpUtil {
    public static String get(String url) {
        StringBuilder response = new StringBuilder();
        try {
            URL obj = new URL(url);
            HttpURLConnection con = (HttpURLConnection) obj.openConnection();
            con.setRequestMethod("GET");
            BufferedReader in = new BufferedReader(new InputStreamReader(con.getInputStream()));
            String inputLine;

            while ((inputLine = in.readLine()) != null) {
                response.append(inputLine);
            }
            in.close();
        } catch (Exception e) {
            e.printStackTrace();
        }
        return response.toString();
    }
}
AccessTokenInfo
import lombok.Data;
@Data
public class AccessTokenInfo {
    String access_token;
    int expires_in;
    String refresh_token;
    String openid;
    String scope;
    String unionid;
    int is_snapshotuser;
}
WeiXinUserInfo
import lombok.Data;
@Data
public class WeiXinUserInfo {
    String openid;
    String nickname;
    int sex;
    String province;
    String city;
    String country;
    String headimgurl;
    String privilege;
    String unionid;
}
pom.xml
        <!--  HTTP请求框架  -->
        <dependency>
            <groupId>com.squareup.okhttp3</groupId>
            <artifactId>okhttp</artifactId>
            <version>3.9.1</version>
        </dependency>

        <!--  JSON方法  -->
        <dependency>
            <groupId>com.alibaba</groupId>
            <artifactId>fastjson</artifactId>
            <version>1.2.83</version>
        </dependency>

        <dependency>
            <groupId>org.projectlombok</groupId>
            <artifactId>lombok</artifactId>
            <optional>true</optional>
        </dependency>
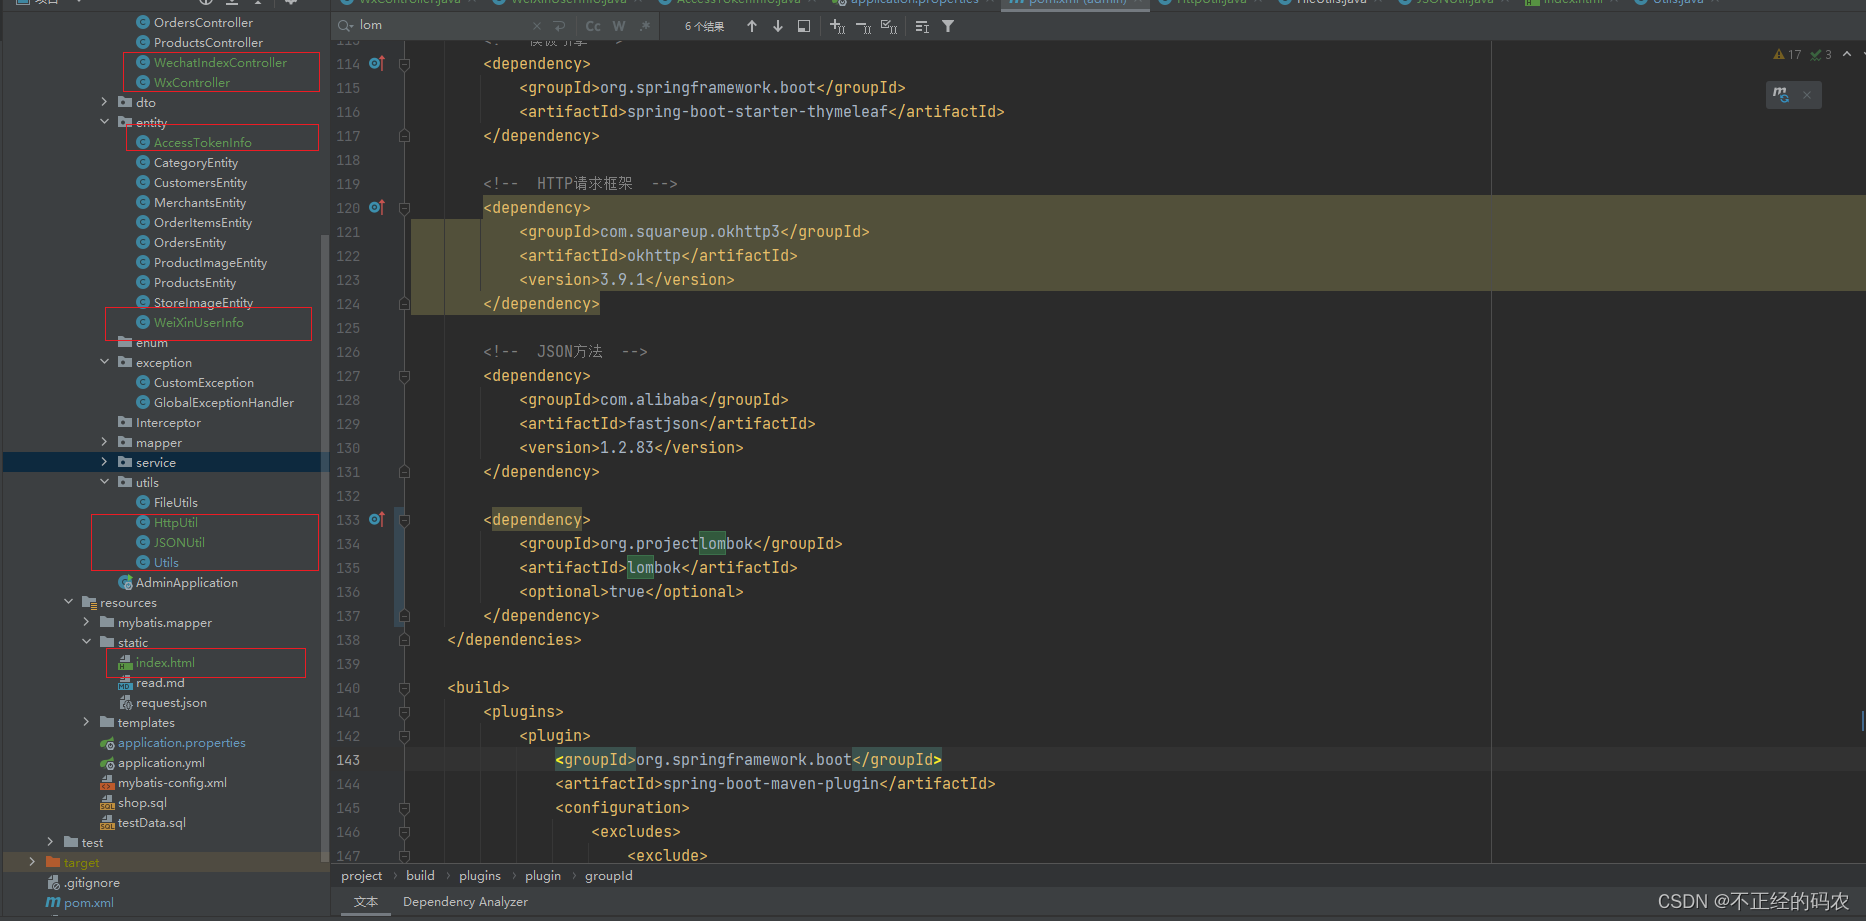
文件目录示例
三、测试
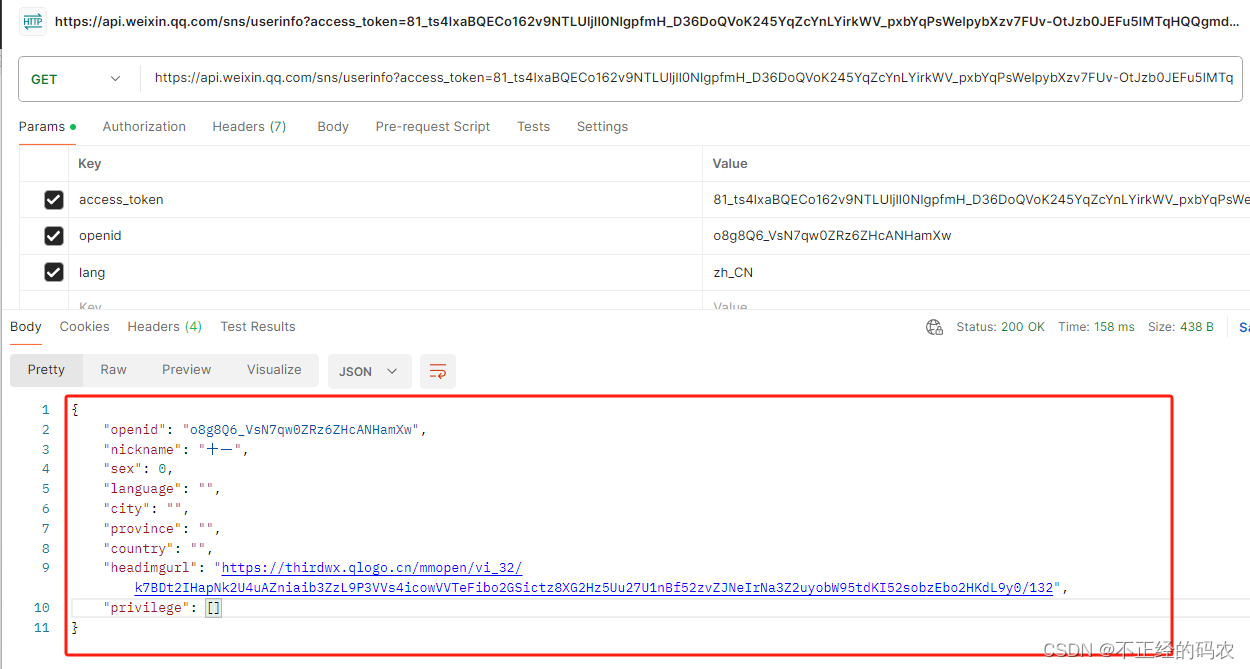
拿到code以后, 就自然可以获取AccessToken,userInfo了, 不再累述,完结!


 被折叠的 条评论
为什么被折叠?
被折叠的 条评论
为什么被折叠?
 到【灌水乐园】发言


