


一、目的
实验目的:
了解消息中间件的原理及应用场景;
了解AMQP协议体系架构,掌握SpringBoot整合RabbitMQ,掌握RabbitMQ编程模型,并能识别在实际项目中的应用
实验要求:
独立完成实验操作,并撰写实验报告
实验内容:
- RabbitMQ安装与使用
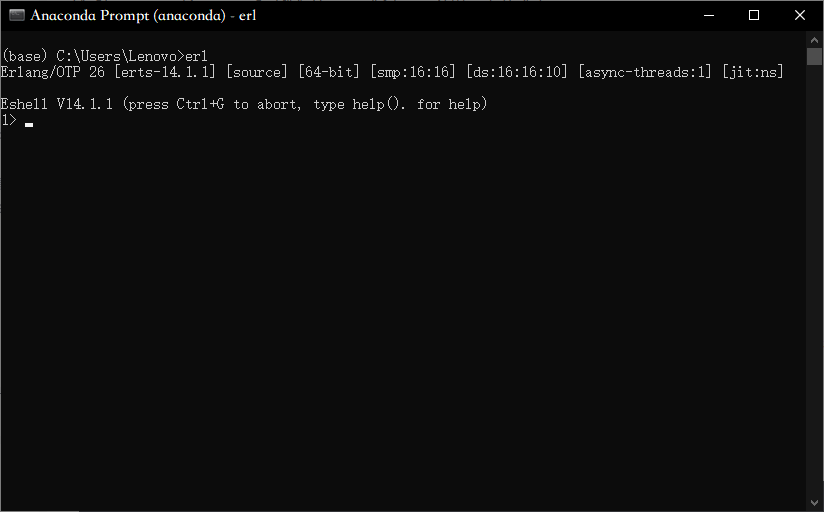
(1)安装Erlang、RabbitMQ;
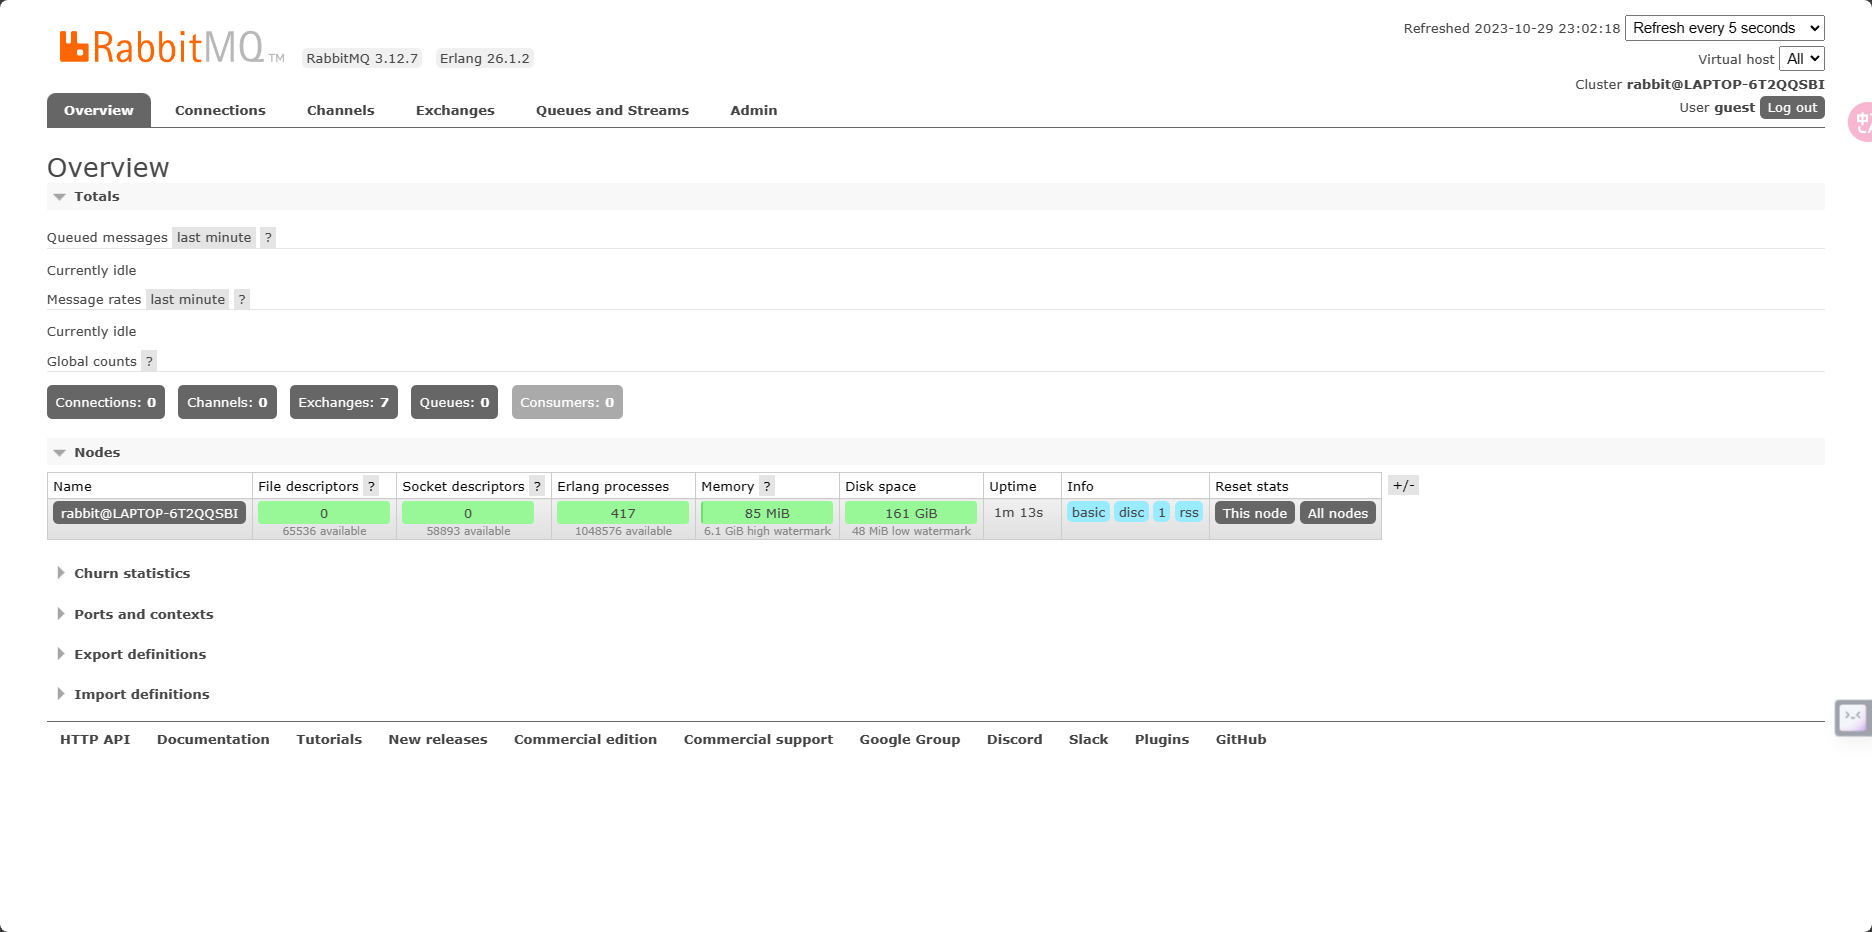
(2)添加RabbitMQ管理模块,启动服务,并在http://localhost:15672测试服务是否正常启动。
(3)熟悉常用的RabbitMQ管理控制台命令,如查询状态、列表所有帐户等。
注:也可以使用其他类型的消息中间件,如RocketMQ、ActiveMQ,后续题目也相应改为所选MQ。
- SpringBoot中整合RabbitMQ
在微服务工程基础上,完成如下操作:
(1)在pom.xml中添加amqp支持;
(2)添加配置RabbitConfig,完成相应Bean的添加;
(3)分别编写程序完成对四种Exchange类型的测试:Direct、Fanout、Topic、Headers(至少选择两种类型)。测试时,注意序列化组件的选择,综合测试字符串、对象等消息的传输。
- 日志模块
为实验2的秒杀程序添加一个异步日志模块。
(1)日志模块独立创建一个SpringBoot工程(可以用微服务框架,也可以不用);
(2)解藕秒杀程序中的日志记录部分,使用RabbitMQ实现:由抢单程序发送日志消息到队列,再由日志模块处理消息队列,并记录日志(可以写入文件、数据库,或者只是控制台输出)。
(3)合理设计消息队列及Exchange,使得满足如下需求:对于抢单成功的日志消息,需要控制台输出,并写入数据库(需要另建一个表,表结构自定);而对于抢单失败的日志消息,则只要输出控制台即可(提示:可以选取合适类型的Exchange,创建两个队列,监听时分别按控制台输出、写入数据库两种方法绑定相应的队列)。
(4)有条件的话,秒杀程序与日志模块分别部署在不同机器中;
(5)使用jmeter并发测试抢单操作,并观察日志模块的结果。
二、实验内容与设计思想
2.1 设计思路
- RabbitMQ安装与使用
(1)安装Erlang、RabbitMQ;
(2)添加RabbitMQ管理模块,启动服务,并在http://localhost:15672测试服务是否正常启动。
(3)熟悉常用的RabbitMQ管理控制台命令,如查询状态、列表所有帐户等。
注:也可以使用其他类型的消息中间件,如RocketMQ、ActiveMQ,后续题目也相应改为所选MQ。
- SpringBoot中整合RabbitMQ
在微服务工程基础上,完成如下操作:
(1)在pom.xml中添加amqp支持;
(2)添加配置RabbitConfig,完成相应Bean的添加;
(3)分别编写程序完成对三种Exchange类型的测试:Direct、Fanout、Topic,并测试字符串、对象等消息的传输。
- 日志模块
为实验2的秒杀程序添加一个异步日志模块。
解藕秒杀程序中的日志记录部分:
如果秒杀成功,
则通过成功绑定键发送记录(用户id,货物id,抢单时间)到交换器;
如果秒杀失败,则通过失败绑定键记录到交换器。
成功队列则对记录进行控制台输出;
失败队列则对记录进行控制台输出,并执行写入数据库操作;
使用jmeter并发测试抢单操作,并观察日志模块的结果。
三、实验使用环境
平台:win10
软件:idea
四、实验步骤和调试过程
4.1 实验步骤
1. RabbitMQ安装与使用
(1)安装Erlang、RabbitMQ;
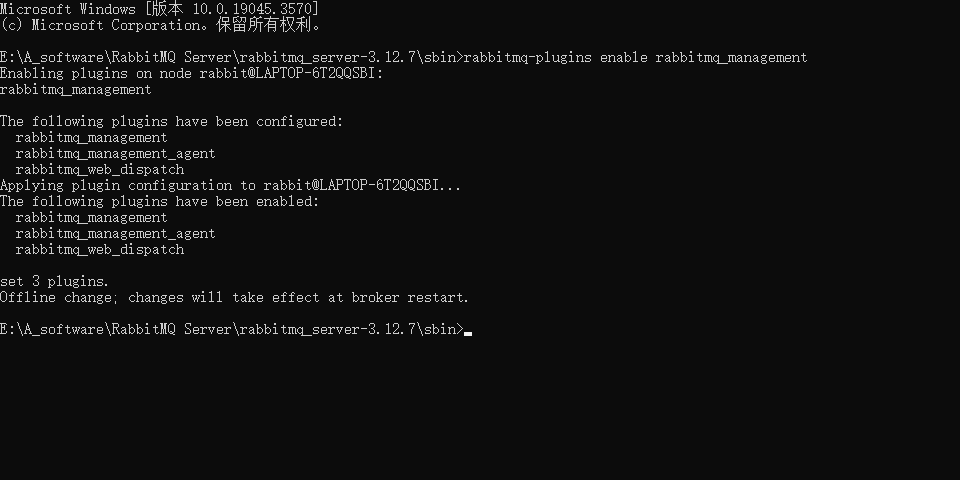
(2)添加RabbitMQ管理模块,启动服务,并在http://localhost:15672测试服务是否正常启动。
2. SpringBoot中整合RabbitMQ
在微服务工程基础上,完成如下操作:
(1) 在pom.xml中添加amqp支持;
<dependency>
    <groupId>org.springframework.boot</groupId>
    <artifactId>spring-boot-starter-amqp</artifactId>
</dependency>
(2) 添加配置RabbitConfig,完成相应Bean的添加;
@Configuration
public class RabbitMQConfig
{
    private static final Logger log = LoggerFactory.getLogger(RabbitMQConfig.class);
    @Autowired(required = false)
    private CachingConnectionFactory cachingConnectionFactory; //MQ连接
    @Autowired(required = false)
    private SimpleRabbitListenerContainerFactoryConfigurer factoryConfigurer; //监听器配置

    /**
     * 单一消费者
     */
    @Bean(name = "singleListenerContainer")
    public SimpleRabbitListenerContainerFactory listenerContainer()
    { //客户端连接监听器(Connection, Channel....)
        SimpleRabbitListenerContainerFactory factory = new SimpleRabbitListenerContainerFactory();
        factory.setConnectionFactory(cachingConnectionFactory);
        factory.setMessageConverter(new Jackson2JsonMessageConverter()); //TODO: JSON
        factory.setConcurrentConsumers(1);
        factory.setMaxConcurrentConsumers(1);
        factory.setPrefetchCount(1);
        return factory;
    }

    /**
     * RabbitMQ发送消息的操作组件实例
     */
    @Bean
    public RabbitTemplate rabbitTemplate()
    {
        cachingConnectionFactory.setPublisherConfirms(true);
        cachingConnectionFactory.setPublisherConfirmType(CachingConnectionFactory.ConfirmType.SIMPLE);
        cachingConnectionFactory.setPublisherReturns(true);
        RabbitTemplate rabbitTemplate = new RabbitTemplate(cachingConnectionFactory);
        rabbitTemplate.setMandatory(true);
        rabbitTemplate.setConfirmCallback((correlationData, ack, cause) -> log.info("消息发送成功:correlationData({}),ack({}),cause({})", correlationData, ack, cause));
        rabbitTemplate.setReturnsCallback(returnedMessage -> log.info("消息丢失:{}", returnedMessage));
        return rabbitTemplate;
    }

}
(3) 分别编写程序完成对四种Exchange类型的测试:Direct、Fanout、Topic、Headers(至少选择两种类型)。测试时,注意序列化组件的选择,综合测试字符串、对象等消息的传输。
@Configuration
public class DirectMq
{
    public static final String QUEUE_A_NAME = "DirectQueueA";
    public static final String QUEUE_B_NAME = "DirectQueueB";
    public static final String QUEUE_C_NAME = "DirectQueueC";
    public static final String EXCHANGE_NAME = "DirectExchange";
    public static final String ROUTING_KEY_A = "routingKeyA";
    public static final String ROUTING_KEY_B = "routingKeyB";
    public static final String ROUTING_KEY_C = "routingKeyC";

    @Bean
    public Queue DirectQueueA() {
        return new Queue(QUEUE_A_NAME, true, false, false, null);
    }

    @Bean
    public Queue DirectQueueB() {
        return new Queue(QUEUE_B_NAME, true, false, false, null);
    }

    @Bean
    public Queue DirectQueueC() {
        return new Queue(QUEUE_C_NAME, true, false, false, null);
    }

    @Bean
    public DirectExchange DirectExchange() {
        return new DirectExchange(EXCHANGE_NAME, true, false);
    }

    @Bean
    public Binding DirectBindingA() {
        return BindingBuilder.bind(DirectQueueA()).to(DirectExchange()).with(ROUTING_KEY_A);
    }

    @Bean
    public Binding DirectBindingB() {
        return BindingBuilder.bind(DirectQueueB()).to(DirectExchange()).with(ROUTING_KEY_B);
    }

    @Bean
    public Binding DirectBindingC() {
        return BindingBuilder.bind(DirectQueueC()).to(DirectExchange()).with(ROUTING_KEY_C);
    }
}
@Configuration
public class FanoutMq
{
    public static final String QUEUE_A_NAME = "FanoutQueueA";
    public static final String QUEUE_B_NAME = "FanoutQueueB";
    public static final String QUEUE_C_NAME = "FanoutQueueC";
    public static final String EXCHANGE_A_NAME = "FanoutExchangeA";
    public static final String EXCHANGE_B_NAME = "FanoutExchangeB";
    public static final String EXCHANGE_C_NAME = "FanoutExchangeC";

    @Bean
    public Queue FanoutQueueA() {
        return new Queue(QUEUE_A_NAME, true);
    }

    @Bean
    public Queue FanoutQueueB() {
        return new Queue(QUEUE_B_NAME, true);
    }

    @Bean
    public Queue FanoutQueueC() {
        return new Queue(QUEUE_C_NAME, true);
    }

    @Bean
    public FanoutExchange FanoutExchangeA() {
        return new FanoutExchange(EXCHANGE_A_NAME);
    }

    @Bean
    public FanoutExchange FanoutExchangeB() {
        return new FanoutExchange(EXCHANGE_B_NAME);
    }

    @Bean
    public FanoutExchange FanoutExchangeC() {
        return new FanoutExchange(EXCHANGE_C_NAME);
    }

    @Bean
    public Binding FanoutBindingA() {
        return BindingBuilder.bind(FanoutQueueA()).to(FanoutExchangeA());
    }

    @Bean
    public Binding FanoutBindingB() {
        return BindingBuilder.bind(FanoutQueueB()).to(FanoutExchangeA());
    }

    @Bean
    public Binding FanoutBindingC() {
        return BindingBuilder.bind(FanoutQueueC()).to(FanoutExchangeA());
    }

    @Bean
    public Binding FanoutBindingAB() {
        return BindingBuilder.bind(FanoutQueueA()).to(FanoutExchangeB());
    }

    @Bean
    public Binding FanoutBindingCB() {
        return BindingBuilder.bind(FanoutQueueC()).to(FanoutExchangeB());
    }
}
@Configuration
public class TopicMq {
    public static final String QUEUE_A_NAME = "TopicQueueA";
    public static final String QUEUE_B_NAME = "TopicQueueB";
    public static final String QUEUE_C_NAME = "TopicQueueC";
    public static final String EXCHANGE_NAME = "TopicExchange";
    public static final String ROUTING_KEY_A = "topic.routingKey.routingKeyA";
    public static final String ROUTING_KEY_B = "topic.routingKey.routingKeyB";
    public static final String ROUTING_KEY_C = "topic.routingKey.#";

    @Bean
    public Queue TopicQueueA() {
        return new Queue(QUEUE_A_NAME, true);
    }

    @Bean
    public Queue TopicQueueB() {
        return new Queue(QUEUE_B_NAME, true);
    }

    @Bean
    public Queue TopicQueueC() {
        return new Queue(QUEUE_C_NAME, true);
    }

    @Bean
    public TopicExchange TopicExchange() {
        return new TopicExchange(EXCHANGE_NAME, true, false);
    }

    @Bean
    public Binding TopicBindingA() {
        return BindingBuilder.bind(TopicQueueA()).to(TopicExchange()).with(ROUTING_KEY_A);
    }

    @Bean
    public Binding TopicBindingB() {
        return BindingBuilder.bind(TopicQueueB()).to(TopicExchange()).with(ROUTING_KEY_B);
    }

    @Bean
    public Binding TopicBindingC() {
        return BindingBuilder.bind(TopicQueueC()).to(TopicExchange()).with(ROUTING_KEY_C);
    }
}
@Component
public class DirectReceiver
{
    @RabbitListener(queues = "DirectQueueA")
    public void receiveMessageA(@Payload String context)
    {
        System.out.println("【DirectQueueA】接收到消息:" + context);
    }

    @RabbitListener(queues = "DirectQueueB")
    public void receiveMessageB(@Payload String context)
    {
        System.out.println("【DirectQueueB】接收到消息:" + context);
    }

    @RabbitListener(queues = "DirectQueueC")
    public void receiveMessageC(@Payload String context)
    {
        System.out.println("【DirectQueueC】接收到消息:" + context);
    }

}
@RestController
@RequestMapping("/direct")
public class DirectSender
{
    @Autowired
    private RabbitMqService rabbitMqService;

    @GetMapping("/send/{routingKey}/{exchangeName}/{context}")
    public void sendDirectMessage(@PathVariable("routingKey") String routingKey,
                                 @PathVariable("exchangeName") String exchangeName,
                                 @PathVariable("context") String context)
    {
        //http://localhost:8080/direct/send/routingKeyA/DirectExchange/测试用routingKeyA向队列发送消息
        this.rabbitMqService.SendMessage(exchangeName,routingKey,context);
    }

    @GetMapping("/sendObject/{routingKey}/{exchangeName}")
    public void sendDirectMessageObject(@PathVariable("routingKey") String routingKey,
                                        @PathVariable("exchangeName") String exchangeName,
                                       @RequestBody Message context) throws JsonProcessingException
    {
        //http://localhost:8080/direct/sendObject/routingKeyA/DirectExchange
        this.rabbitMqService.SendMessageObject(exchangeName,routingKey,context);
    }
}
@Component
public class FanoutReceiver
{
    @RabbitListener(queues = "FanoutQueueA")
    public void receiveMessageA(@Payload String context)
    {
        System.out.println("【FanoutQueueA】接收到消息:" + context);
    }

    @RabbitListener(queues = "FanoutQueueB")
    public void receiveMessageB(@Payload String context)
    {
        System.out.println("【FanoutQueueB】接收到消息:" + context);
    }

    @RabbitListener(queues = "FanoutQueueC")
    public void receiveMessageC(@Payload String context)
    {
        System.out.println("【FanoutQueueC】接收到消息:" + context);
    }
}
@RestController
@RequestMapping("/fanout")
public class FanoutSender
{
    @Autowired
    private RabbitMqService rabbitMqService;

    @GetMapping("/send/{queueName}/{exchangeName}/{context}")
    public void sendFanoutMessage(@PathVariable("queueName") String queueName,
                                 @PathVariable("exchangeName") String exchangeName,
                                 @PathVariable("context") String context)
    {
        //http://localhost:8080/fanout/send/routingKeyA/FanoutExchangeA/testContext
        this.rabbitMqService.SendMessage(exchangeName,queueName,context);
    }

    @GetMapping("/sendObject/{routingKey}/{exchangeName}")
    public void sendFanoutMessageObject(@PathVariable("routingKey") String routingKey,
                                        @PathVariable("exchangeName") String exchangeName,
                                        @RequestBody Message context) throws JsonProcessingException
    {
        //http://localhost:8080/direct/sendObject/routingKeyA/DirectExchange
        this.rabbitMqService.SendMessageObject(exchangeName,routingKey,context);
    }
}
@Component
public class TopicReceiver
{
    @RabbitListener(queues = "TopicQueueA")
    public void receiveMessageA(@Payload String context)
    {
        System.out.println("【TopicQueueA】接收到消息:" + context);
    }

    @RabbitListener(queues = "TopicQueueB")
    public void receiveMessageB(@Payload String context)
    {
        System.out.println("【TopicQueueB】接收到消息:" + context);
    }

    @RabbitListener(queues = "TopicQueueC")
    public void receiveMessageC(@Payload String context)
    {
        System.out.println("【TopicQueueC】接收到消息:" + context);
    }
}
@RestController
@RequestMapping("/topic")
public class TopicSender
{
    @Autowired
    private RabbitMqService rabbitMqService;

    @GetMapping("/send/{routingKey}/{exchangeName}/{context}")
    public void sendTopicMessage(@PathVariable("routingKey") String routingKey,
                                 @PathVariable("exchangeName") String exchangeName,
                                 @PathVariable("context") String context)
    {
        //http://localhost:8080/topic/send/topic.routingKey.routingKeyA/TopicExchange/testContext
        this.rabbitMqService.SendMessage(exchangeName,routingKey,context);
    }

    @GetMapping("/sendObject/{routingKey}/{exchangeName}")
    public void sendTopicMessageObject(@PathVariable("routingKey") String routingKey,
                                        @PathVariable("exchangeName") String exchangeName,
                                        @RequestBody Message context) throws JsonProcessingException
    {
        //http://localhost:8080/direct/sendObject/routingKeyA/DirectExchange
        this.rabbitMqService.SendMessageObject(exchangeName,routingKey,context);
    }
}
日志模块
定义2个队列,成功队列和失败队列,分别通过两个绑定键与交换器进行绑定:
@Configuration
public class DirectMq
{
    public static final String SUCCESS_QUEUE_NAME = "successQueue";
    public static final String FAIL_QUEUE_NAME = "failQueue";
    public static final String EXCHANGE_NAME = "DirectExchange";
    public static final String ROUTING_KEY_SUCCESS = "routingKeySuccess";
    public static final String ROUTING_KEY_FAIL = "routingKeyFail";

    @Bean
    public Queue DirectQueueA() {
        return new Queue(SUCCESS_QUEUE_NAME, true, false, false, null);
    }

    @Bean
    public Queue DirectQueueB() {
        return new Queue(FAIL_QUEUE_NAME, true, false, false, null);
    }

    @Bean
    public DirectExchange DirectExchange() {
        return new DirectExchange(EXCHANGE_NAME, true, false);
    }

    @Bean
    public Binding DirectBindingA() {
        return BindingBuilder.bind(DirectQueueA()).to(DirectExchange()).with(ROUTING_KEY_SUCCESS);
    }

    @Bean
    public Binding DirectBindingB() {
        return BindingBuilder.bind(DirectQueueB()).to(DirectExchange()).with(ROUTING_KEY_FAIL);
    }
}
解耦日志模块:
如果秒杀成功,
则通过成功绑定键发送记录(用户id,货物id,抢单时间)到交换器;
如果秒杀失败,则通过失败绑定键记录到交换器。
@Service("seckillService")
public class SeckillServiceImpl implements SeckillService
{
    @Autowired
    private RabbitMqService rabbitMqService;

    @Resource
    private RedisService redisService;

    @Resource
    private RecordService recordService;

    @Resource
    private GoodsService goodsService;

    @Override
    public R init()
    {
        //清空redis
        redisService.deleteValue();
        // 加载已有记录到redis
        List<Record> records = (List<Record>) recordService.queryAll(null).getData();
        for (Record record : records)
            redisService.addValue(record.getGoodsId() + ":" + record.getCustomId(), 1);
        // 加载货物剩余数量到redis
        List<Goods> goodss = (List<Goods>) goodsService.queryAll(null).getData();
        for (Goods goods : goodss)
            redisService.addValue(goods.getGoodsId() + ":total", goods.getInventory());
        return R.ok().setData(redisService.getAllValue());
    }

    @Override
    public void seckill(int goodsId, int customId) throws JsonProcessingException
    {
        Record record = new Record(goodsId, new Date(System.currentTimeMillis()), customId);

        String robId = goodsId + ":" + customId; //记录是否已经抢到货物
        String goodsTotal = goodsId + ":total";
        //1. 查询是否已经抢到货物,若已经抢到,则返回-1
        Object obj = redisService.getValue(robId).getData();
        if (obj != null && !"".equals("" + obj))
        {
            rabbitMqService.SendMessageObject(DirectMq.EXCHANGE_NAME, DirectMq.ROUTING_KEY_FAIL,record);
            return;
        }
        //2. 加锁
        Boolean lock = (Boolean) redisService.reidsLock(robId + "-lock", "lock").getData();
        if (lock)
        {
            while (!(Boolean) redisService.reidsLock(goodsId + "-lock", "lock").getData()) ;

            //2. 若剩余货物列表为空,则返回-1。
            int total = (int) redisService.getValue(goodsTotal).getData();
            if (total <= 0)
            {
                rabbitMqService.SendMessageObject(DirectMq.EXCHANGE_NAME, DirectMq.ROUTING_KEY_FAIL,record);
                return;
            }
            //3. 否则,取一个货物,并返回1。
            //update total
            redisService.decrement(goodsTotal);
            //取消锁
            redisService.reidsUnlock(goodsId + "-lock");
            //update robId
            redisService.addValue(robId, 1);
            //update mysql
            rabbitMqService.SendMessageObject(DirectMq.EXCHANGE_NAME, DirectMq.ROUTING_KEY_SUCCESS,record);
        }
        else
        {
            rabbitMqService.SendMessageObject(DirectMq.EXCHANGE_NAME, DirectMq.ROUTING_KEY_FAIL,record);
        }
    }
}
定义成功队列和失败队列接收到消息后:
成功队列对记录进行控制台输出;
失败队列对记录进行控制台输出,并执行写入数据库操作;
@Component
public class DirectReceiver
{
    @Resource
    private RecordService recordService;

    @Resource
    private GoodsService goodsService;

    @RabbitListener(queues = "successQueue",containerFactory = "singleListenerContainer")
    public void receiveMessageA(@Payload Record record)
    {
        System.out.println("【抢购成功】" + record);
        recordService.insert(record);
        goodsService.updateLow(record.getGoodsId());
    }

    @RabbitListener(queues = "failQueue",containerFactory = "singleListenerContainer")
    public void receiveMessageB(@Payload Record record)
    {
        System.out.println("【抢购失败】"  + record);
    }

}
4.2 测试数据设计
4.2.1 SpringBoot中整合RabbitMQ
Direct类型设计了:
-
三个队列(DirectQueueA,DirectQueueB,DirectQueueC)
-
一个交换器(DirectExchange)
-
三个绑定键(routingKeyA,routingKeyB,routingKeyC)
-
队列A通过绑定键A与交换器连接;
-
队列B通过绑定键B与交换器连接;
-
队列C通过绑定键C与交换器连接;
通过DirectExchange交换器分别向绑定键A,B,C发送不同的消息,测试接受情况。
Fanout类型设计了:
-
三个队列(FanoutQueueA,FanoutQueueB,FanoutQueueC)
-
三个交换机(FanoutExchangeA,FanoutExchangeB,FanoutExchangeC)
-
将队列FanoutQueueA、FanoutQueueB、FanoutQueueC分别与FanoutExchangeA进行绑定
-
将队列FanoutQueueA与FanoutExchangeB进行绑定
-
不为FanoutExchangeC添加绑定关系
分别向所有交换器发送不同的消息,测试接收情况
Topic类型设计了:
-
三个队列(TopicQueueA,TopicQueueB,TopicQueueC)
-
一个Topic交换机(TopicExchange)
-
将队列A与交换器进行绑定,使用绑定键topic.routingKey.routingKeyA
-
将队列B与交换器进行绑定,使用绑定键topic.routingKey.routingKeyB
-
将队列C与交换器进行绑定,使用绑定键topic.routingKey.#
分别用不同绑定键向交换器发送不同的消息,测试接收情况
4.2.2 日志模块
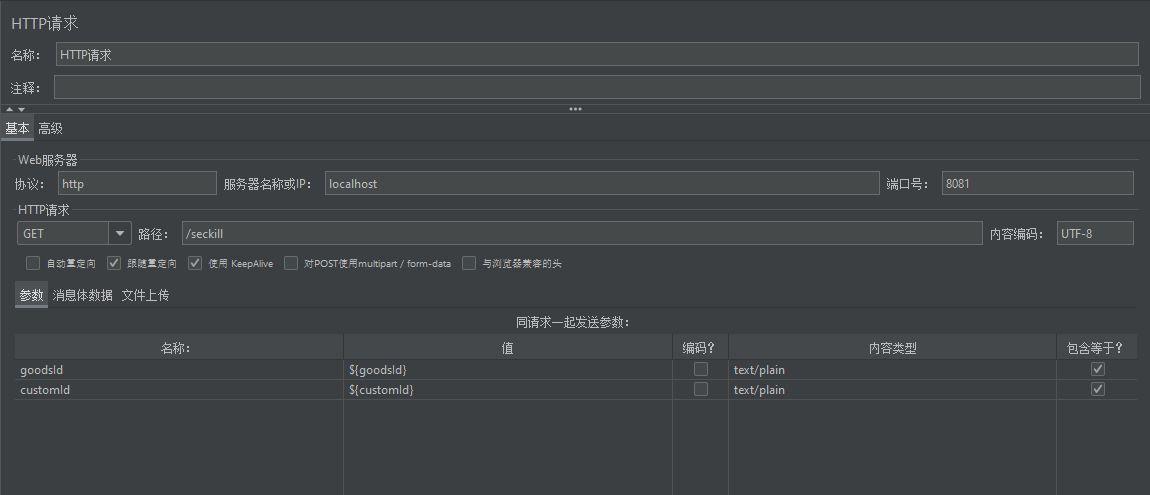
测试1秒钟1000次请求,通过多用户对多货物进行抢购。
4.3 测试结果分析
4.2.1 SpringBoot中整合RabbitMQ
Direct类型测试:
http://localhost:8080/direct/send/routingKeyA/DirectExchange/测试用routingKeyA向队列发送消息

localhost:8080/direct/send/routingKeyB/DirectExchange/测试用routingKeyB向队列发送消息

localhost:8080/direct/send/routingKeyC/DirectExchange/测试用routingKeyC向队列发送消息

http://localhost:8080/direct/sendObject/routingKeyA/DirectExchange
{
“userId”:1,
“context”:“hello world”
}

Fanout类型测试:
http://localhost:8080/fanout/send/routingKeyA/FanoutExchangeA/testContext

http://localhost:8080/fanout/send/routingKeyB/FanoutExchangeB/testContext

http://localhost:8080/fanout/send/routingKeyC/FanoutExchangeC/testContext

http://localhost:8080/fanout/sendObject/routingKeyA/exchange
{
“userId”:1,
“context”:“hello world”
}

Topic类型测试:
http://localhost:8080/topic/send/topic.routingKey.routingKeyA/TopicExchange/testContext

http://localhost:8080/topic/send/topic.routingKey.routingKeyA/TopicExchange/testContext

http://localhost:8080/topic/send/topic.routingKey.%23/TopicExchange/testContext

http://localhost:8080/topic/sendObject/routingKeyA/exchange
{
“userId”:1,
“context”:“hello world”
}

4.2.2 日志模块
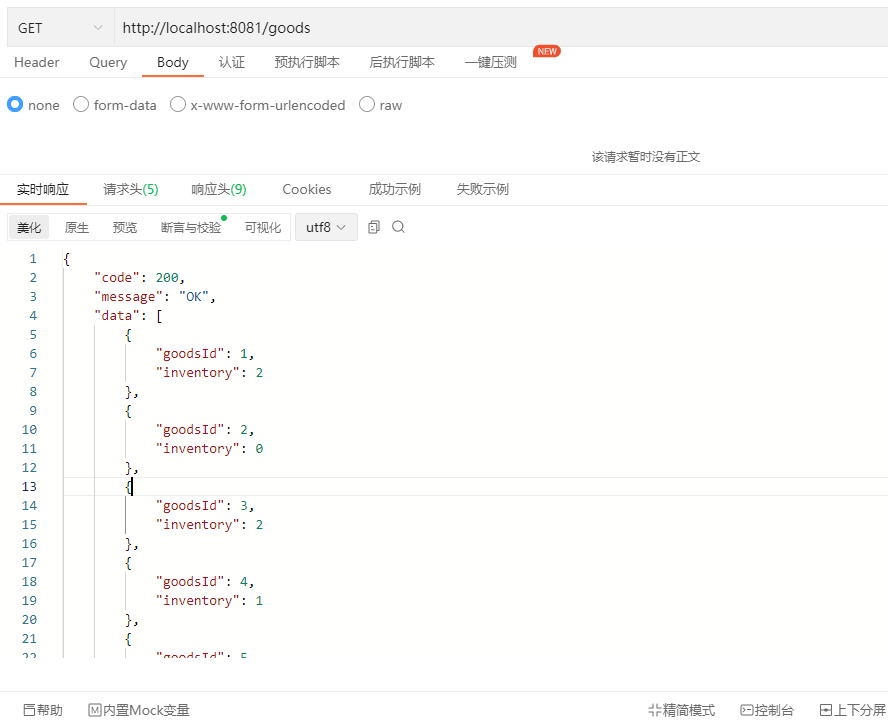
首先进行初始化,将redis中键值清空,将用户秒杀记录和货物剩余库存信息载入到redis中:
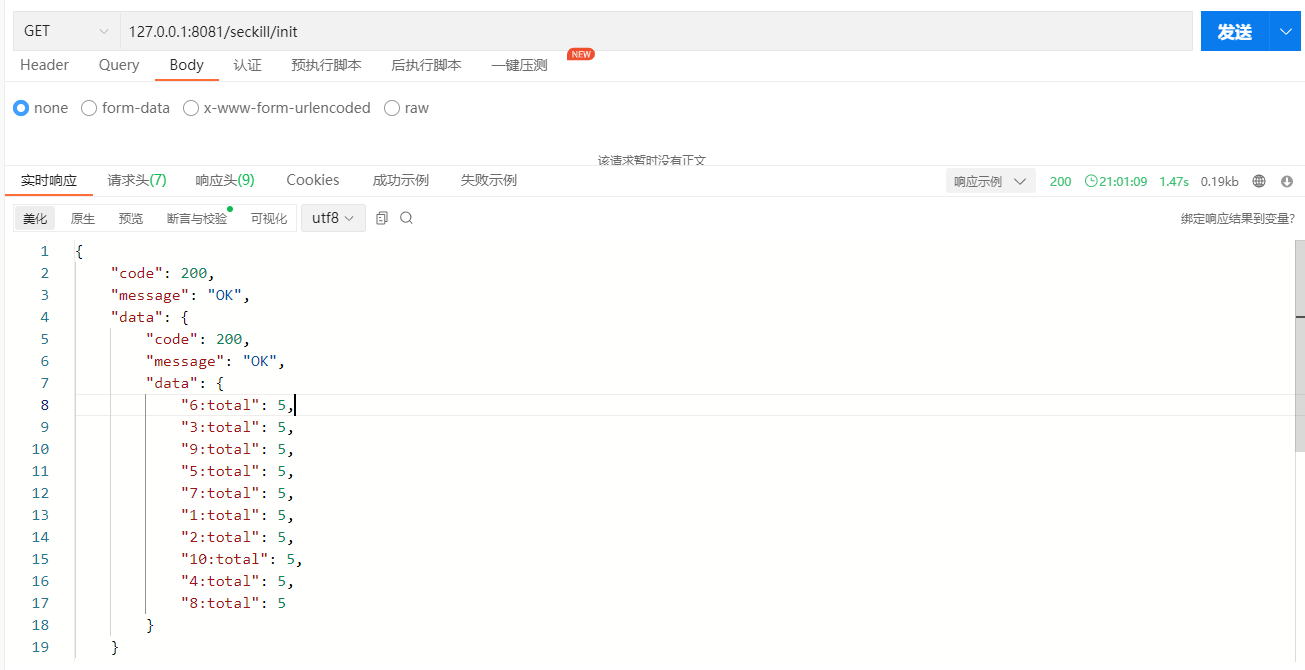
结果如上:总共有1~10的10件货物,每件货物余量为5。且暂无用户抢购记录。
- 测试多用户对多商品的超数量抢购
添加商品csv文件
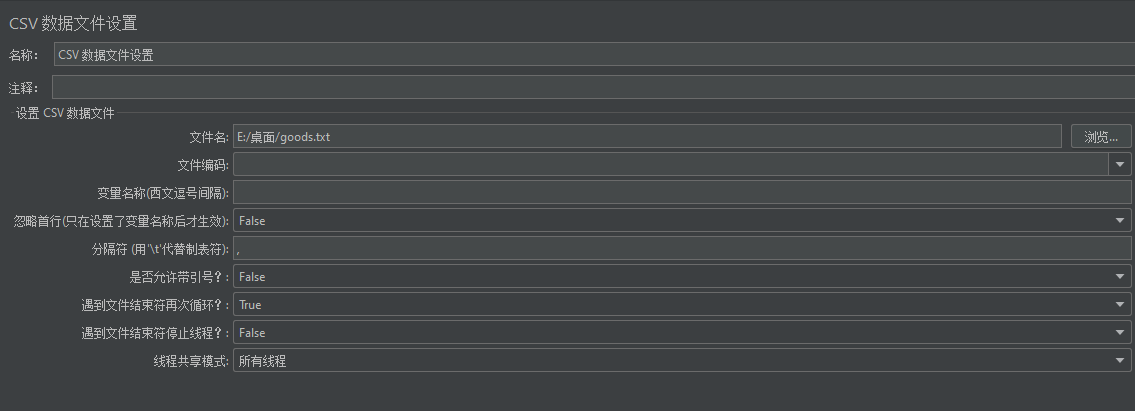
将商品和顾客的值改成 g o o d s I d 和 {goodsId}和 goodsId和{customId}
-
测试结果:
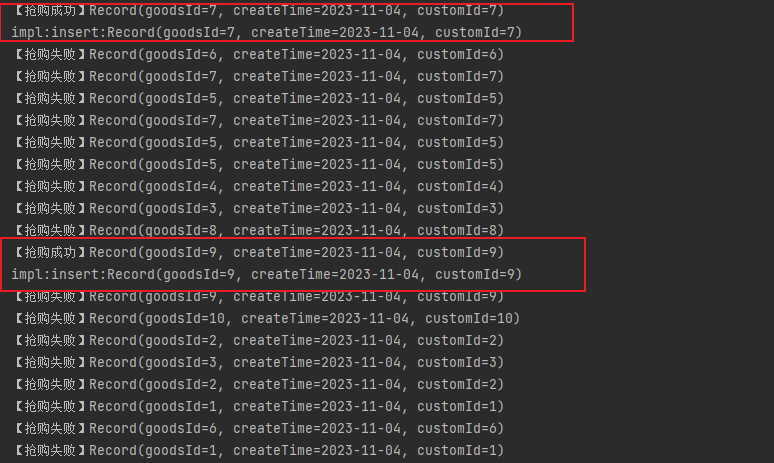
发出了1000条请求,可以看出抢购成功的记录会在控制台打印出"【抢购成功】“信息,并且将数据写入数据库;抢购失败的记录会在控制台打印出”【抢购失败】"信息。
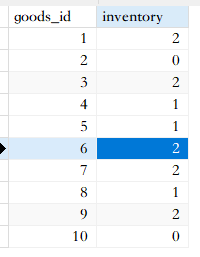
对数据库内的货物与抢购记录进行检查,可以看出10个货物,每个货物原本有5件。
经过秒杀后,还剩余13件。
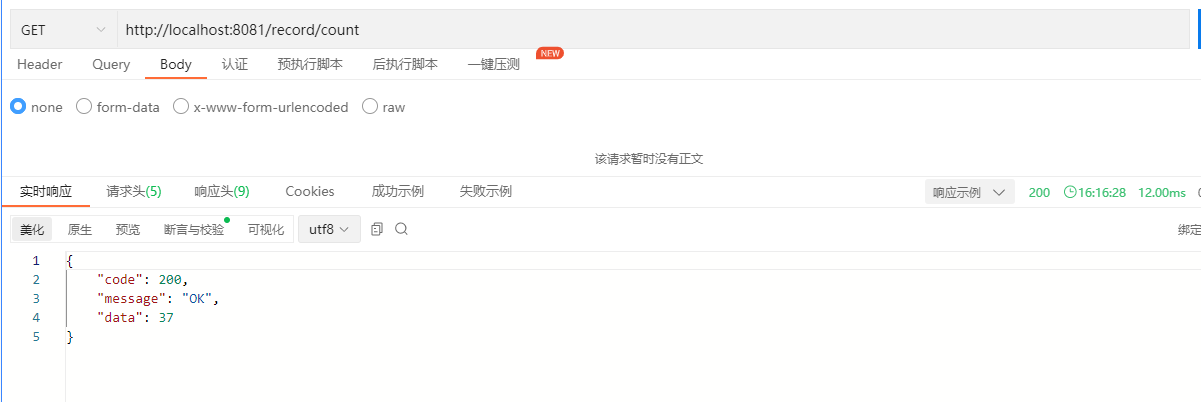
查询用户抢购记录,共有37条。与上面的结果印证正确。
五、实验小结
- 实验中遇到的问题及解决过程
无 - 实验中产生的错误及原因分析
无 - 实验体会和收获。
无


 2302
2302


 被折叠的 条评论
为什么被折叠?
被折叠的 条评论
为什么被折叠?
 到【灌水乐园】发言


